Envira Gallery Blog
Digital Photography Tips, Tutorials and Resources
Digital Photography Tips, Tutorials and Resources

Last updated on Nov 27, 2016 by Waseem Abbas
Do you want to test which featured image performs better with your post? You can run a split test on two different featured images to see which one engages more visitors with your post. In this tutorial, we will share how to A/B test featured images in WordPress.
Your featured image is the main image for your article, and it’s often the first thing that a visitor sees before clicking through to your blog post. Whether or not that image makes a good first impression will play a big role in whether the visitor chooses to read the post or not.
A/B testing helps you to find out which featured image will work better to engage more people with your site, and reduce your bounce rate (the percentage of people who leave your site without engaging). WordPress doesn’t give you the ability to A/B test featured images by default, but you can do it with a simple plugin and by following the steps outlined in this tutorial.
To A/B test featured images in WordPress, you’ll need to follow these 4 steps:
Ready to get started? Let’s go!
First thing you need to do is install and activate Featured Image Optimizer plugin. To install the plugin, simply go to Plugins » Add New from your WordPress backend and type Featured Image Optimizer in the search bar.
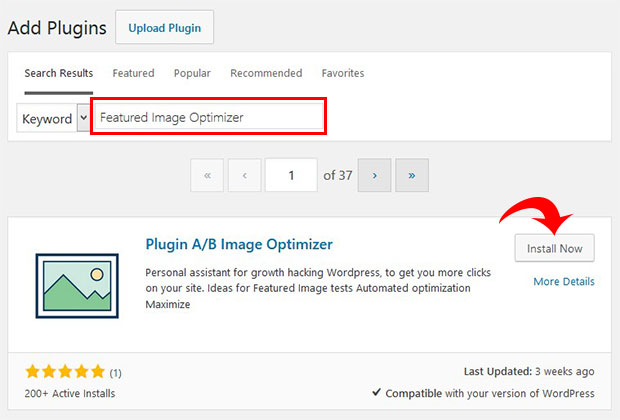
Once you click on the Install Now button, it’ll change into a blue Activate button. Click on it to activate the plugin.
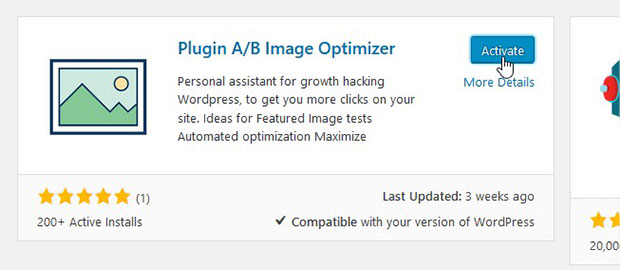
You will be redirected to the Plugins page on your WordPress admin.
If you face any issues in the installation, then check out this guide on how to install a WordPress plugin.
Upon activating the plugin, you should go to Posts » Add New or edit an existing post to add your featured images.
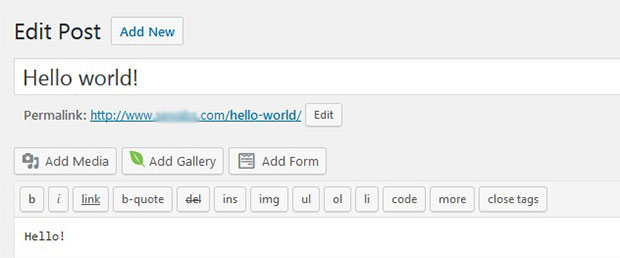
By default, you can only add one featured image in the Featured Image widget on your post. However, this plugin will show you two different widgets: Featured Image and A/B Test Featured Image.
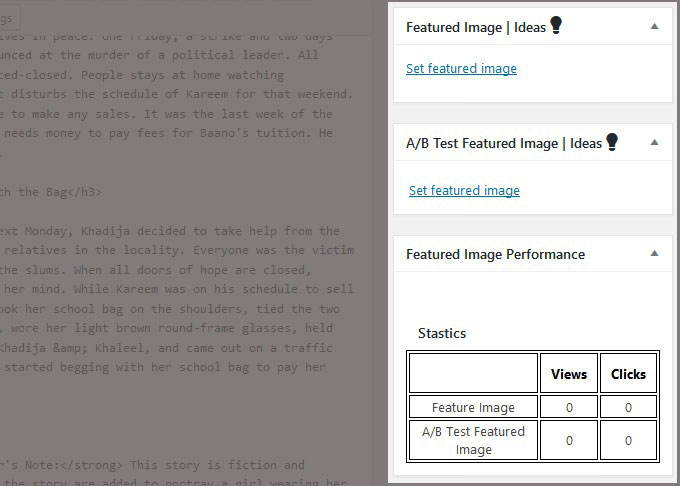
Add two different featured images in the respective widgets and update your post. This plugin works to display one of the two featured images to your visitors at random.
Now you can see your featured image performance at Settings » A/B Settings Page.
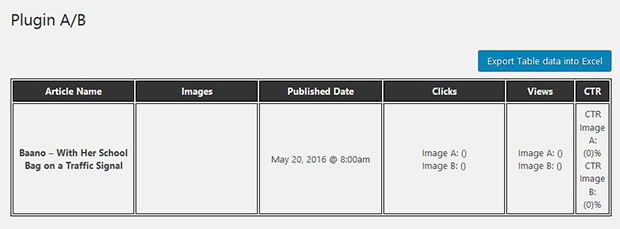
You can also monitor the results of the A/B test on the post. Go ahead and edit your post in WordPress. You will see the Featured Image Performance widget on the right side of the screen.
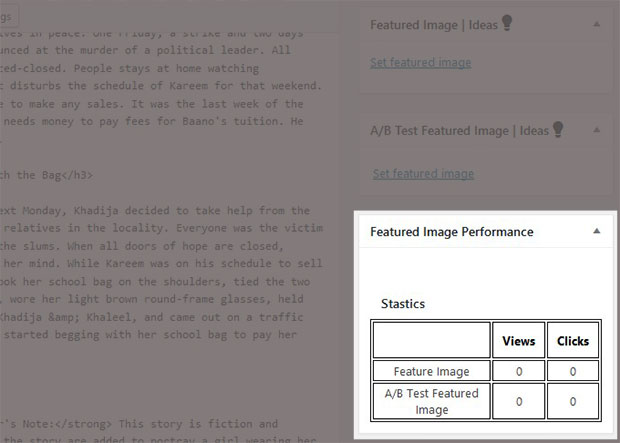
Once you have collected enough data and you have decided on a winner, simply use this featured image in your post and remove the one from A/B Test Featured Image widget.
We hope this tutorial has helped you to learn how to A/B test featured images in WordPress. You may also want to check out our guide on how to set a default featured image in WordPress.
If you like this tutorial, then please follow us on Facebook and Twitter for more free WordPress tutorials.
Envira Gallery helps photographers create beautiful photo and video galleries in just a few clicks so that they can showcase and sell their work.
