Envira Gallery Blog
Digital Photography Tips, Tutorials and Resources
Digital Photography Tips, Tutorials and Resources
Last updated on Dec 21, 2018 by Waseem Abbas
Are you looking to add a dramatic portrait effect to your photos? Adding a dramatic effect can really help your photos stand out. In this article, we will show you how to add dramatic portrait effect to your images in Photoshop.
If you don’t have it yet, you can get Photoshop from Adobe’s site here.
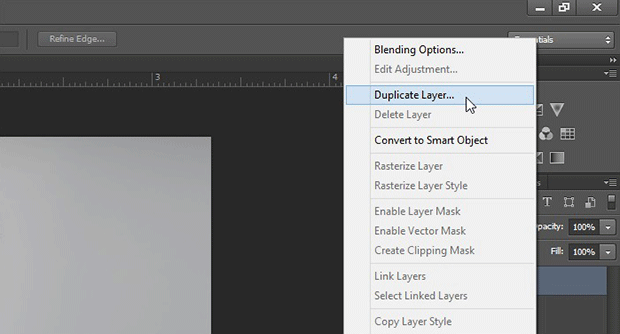
First thing you need to do is open your photo in Photoshop.
Next, you need to create a duplicate layer, so your original image will be safe.
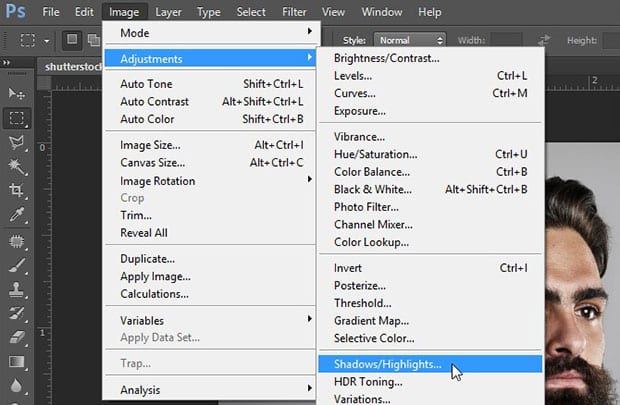
After creating the duplicate layer, you can simply go to the Image » Adjustments » Shadows / Highlights to light up the dark areas of your portrait.
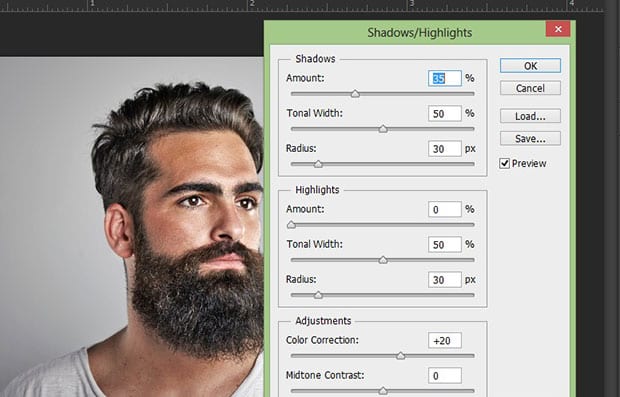
A new window will popup with the settings for Shadows and Highlights. You can go ahead and click on Show More Options.
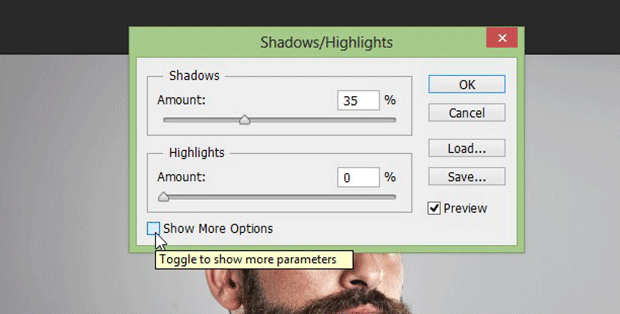
It will display more settings for you. We recommend you leave everything as-is and only adjust the Shadow setting.
Next, you need to go to the Filter » Sharpen » Unsharp Mask to add sharpness in your image.
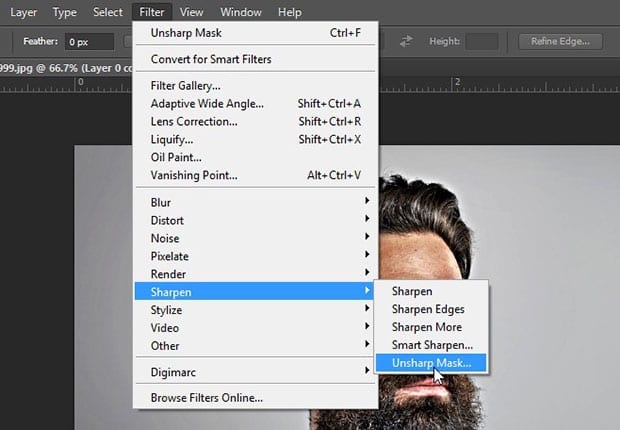
You can view the effect of Unsharp Mask on the image as you adjust the Amount of sharpness.
The other two settings that includes Radius and Threshold can be adjusted as shown in the image below.

Check out this guide to learn in detail about how to sharpen your images using Photoshop.
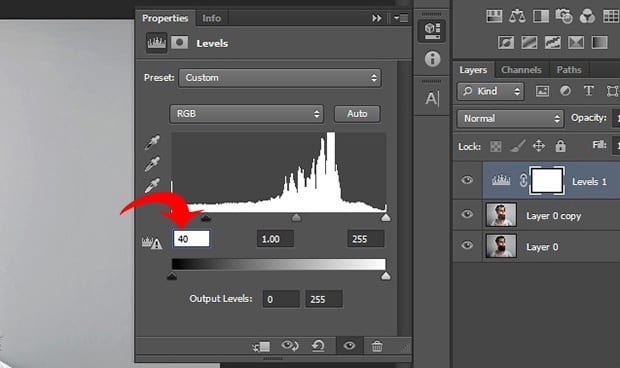
Now you can simply add an adjustment layer for Levels from the bottom right corner of your Photoshop screen.
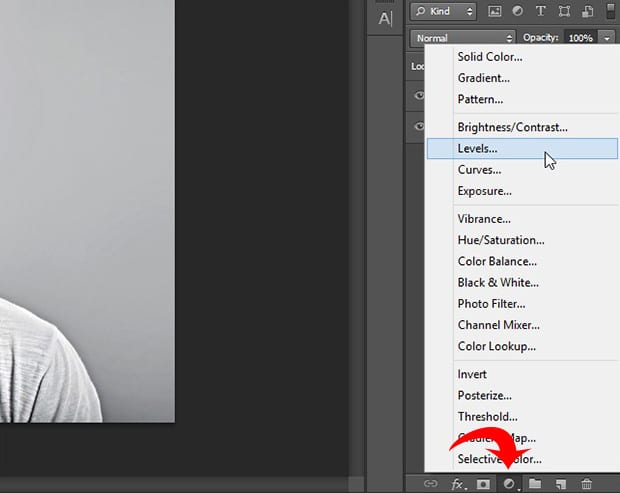
In this step, you need to adjust a number for the Levels, so your portrait looks stunning.
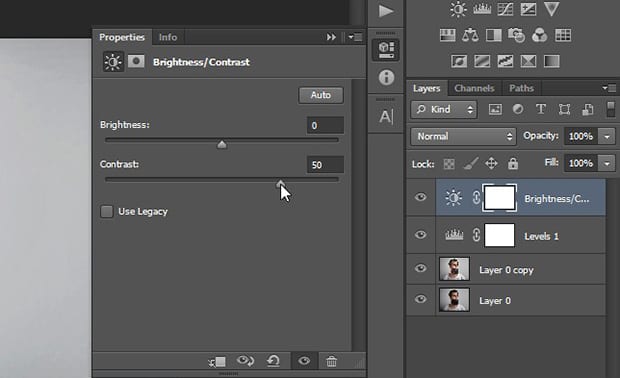
After the Levels, you can go ahead and adjust the Brightness / Contrast by adding another adjustment layer.

I recommend leaving the Brightness as-is and lift up the Contrast for best results.
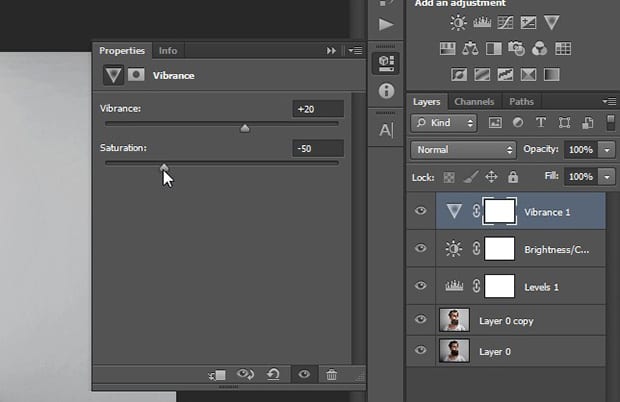
Now, the last thing you need to do is adjust the Vibrance and Saturation on your portrait.
You can do this by adding another adjustment layer for Vibrance.
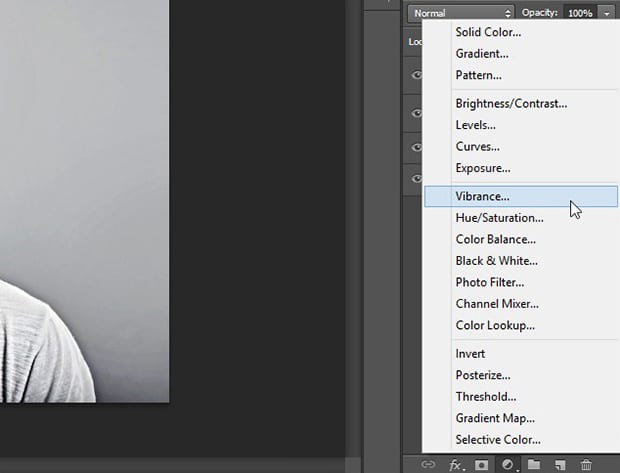
Simply increase the Vibrance by a little bit, and reduce the Saturation.
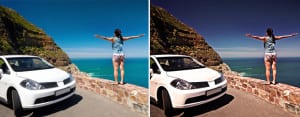
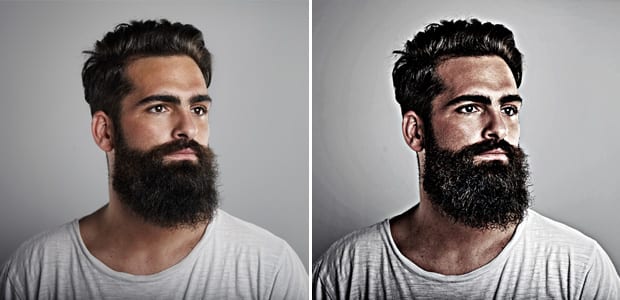
That’s all. You can see the before and after image below.
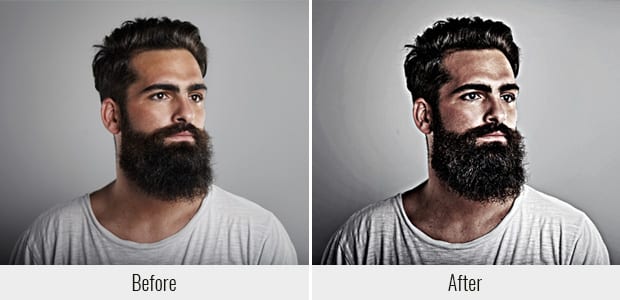
Like always, the settings to achieve the best dramatic portrait effect may vary from portrait to portrait. So play around with the numbers until you see what you like.
We hope this article has helped you to learn how to add dramatic portrait effect to your images in Photoshop. You may also want to check out our guide on how to add an old film effect to your images in Photoshop.
If you like this article, then please follow us on Facebook and Twitter for more free photo editing tutorials.
Envira Gallery helps photographers create beautiful photo and video galleries in just a few clicks so that they can showcase and sell their work.