Envira Gallery Blog
Digital Photography Tips, Tutorials and Resources
Digital Photography Tips, Tutorials and Resources

by Waseem Abbas on Sep 14, 2017
Do you want to create Facebook ads to promote your wedding photography business? A lot of photographers use paid marketing to expand their business reach, and it’s a good investment with return. In this guide, we will share how to create wedding photography Facebook ads to win more clients.
Creating the photography Facebook ads for the right audience will get you a variety of new customers from different sources. These ads need to be decent, readable, and visual effective to attract the users.
To create wedding photography Facebook ads, you’ll need to follow these 7 steps:
Ready to get started? Let’s go!
To create the wedding photography Facebook ads, simply login to your Facebook account. Go to the menu from the top right corner and click on the Create Adverts option. (Note: Depending on your location and language settings, this may say Create Ads instead.)
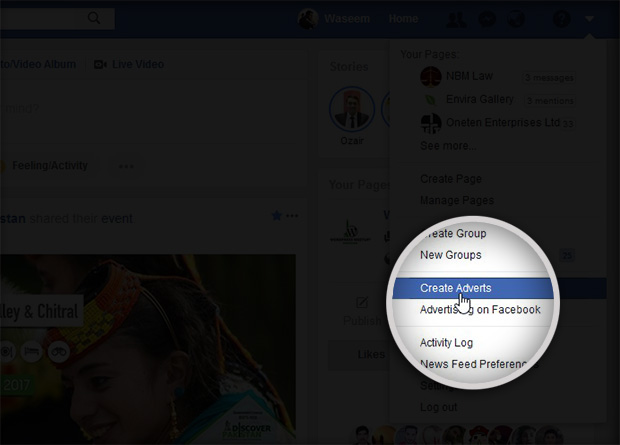
It will take you to a new page where you will start creating the ad.
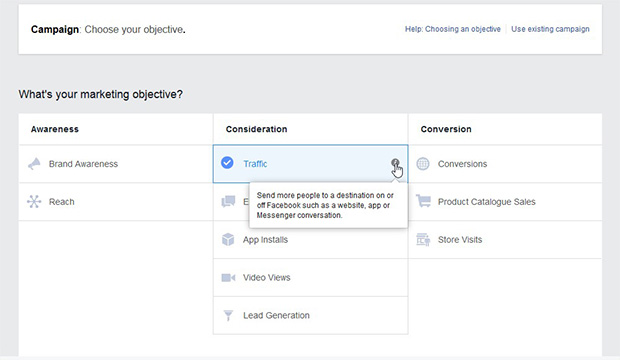
On this new page, you need to set the objective for this ad. Since you want to bring users to your website, you should select Traffic.
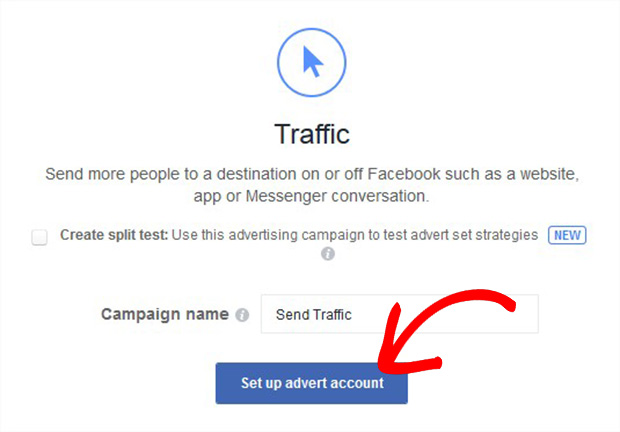
Now scroll a little and click on the Set Up Advert Account button.
Add the basic details like country, currency and timezone.
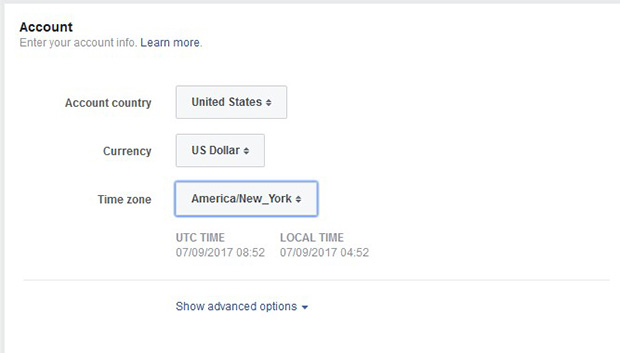
Hit the Continue button.
Next you need to select your target audience. In the Locations dropdown, you should select Everyone in this location.
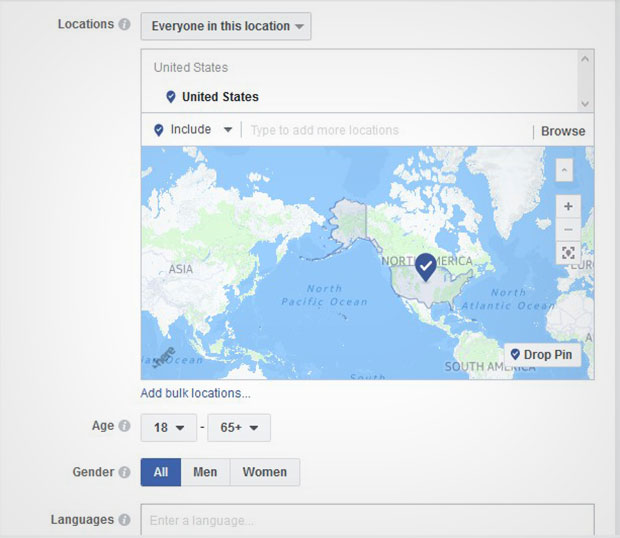
In Age and Gender section, you can select your choices. Narrow down your target audience to those that fit the profile of your typical customer.
You should click on Detailed Targeting field, and go to Demographics » Life Events » Newly Engaged, so the ad will target the couples who recently set their relationship status to engaged.
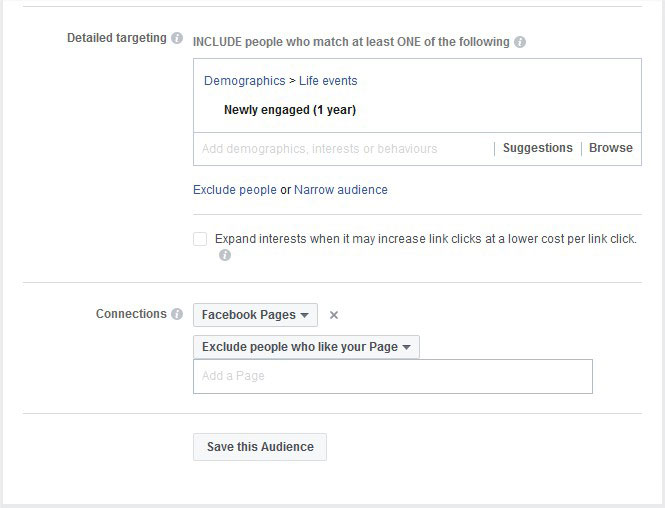
In the Connections option, you can select Facebook Pages and choose Exclude people who like your page option in order to target people who never visited your page.
Go ahead and scroll down to Budget and Schedule section. You can set the budget and schedule the ad from here.
Facebook requires a minimum budget of $1 a day if your ad is based on impressions, and $5 a day if it’s based on clicks, Likes, video views, or post engagement. You can read more about Facebook ad minimum budgets on their site.
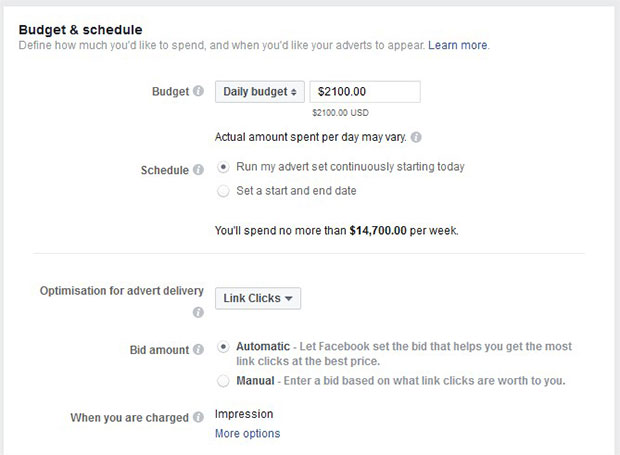
In the advanced settings, you can manage the bid amount, when you should be charged, and more.
When you’re done choosing your settings, hit the Continue button.
You will see a new page where you need to select the format of the ad. There are multiple formats available like carousel, single image, single video, slideshow and more.
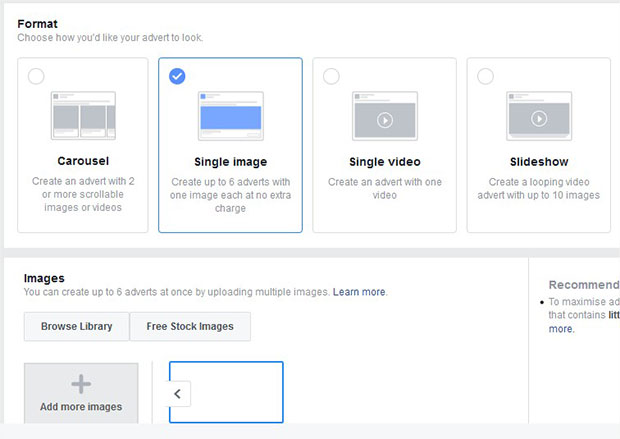
After choosing the format, you should select the image or video according to your selected format for the ad.
Now you should scroll down to links and preview section. You need to add the URL of your site where you want to get the traffic from your ads.
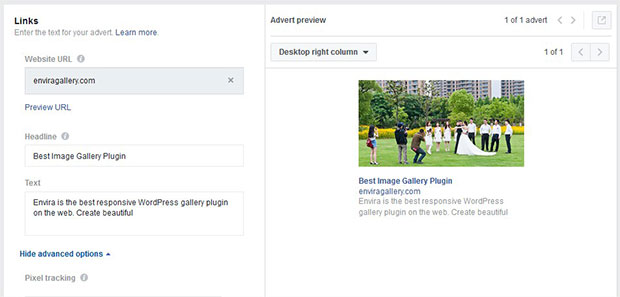
You should also add the headline and text for the ad. The ad will appear on the right side of the screen, so you can preview it and make changes as you need.
Once you are satisfied from your wedding photography Facebook ads, scroll down and click on the Confirm button. Facebook will ask for the payments, and then your ads will be reviewed and published.
Here are the few examples of the wedding photography Facebook ads that will help you to create your ad:
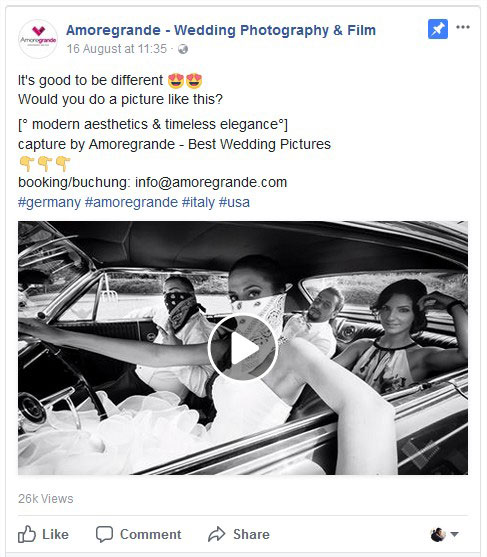
A wedding video that shows uniqueness may leave an impression on many visitors. Above the video, you can see the details for booking this wedding photographer with a small caption that question the viewers for what they need.
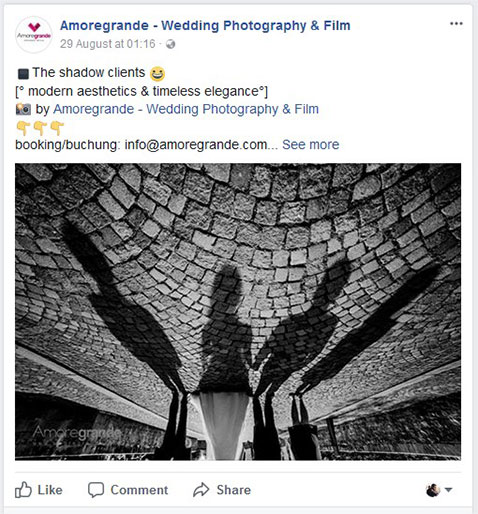
This ad from Amoregrande Wedding Photographers shows a different angle that attracts the visitor in the first look. Like the first ad, booking details are given and the website address is mentioned in the bio.
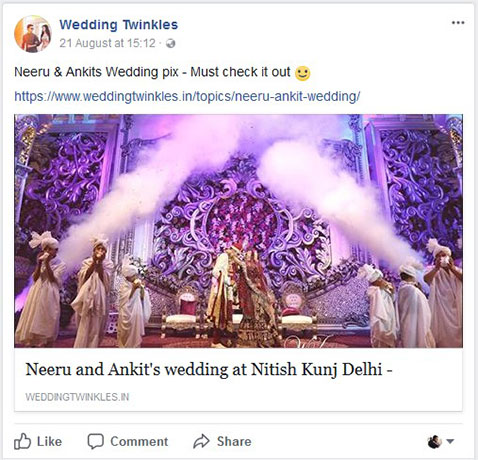
Many couples look for the case studies of the photographers, so they can view the photos and story line. In this ad, the photographer post a link to the landing page of a case study which will take the users to the website and show them the wedding photos.
We hope this guide has helped you to learn how to create wedding photography Facebook ads to win more clients. You may also want to check out our guide on how to get wedding photography clients from Twitter. In case, your wedding photography site is not ranking on search engines, then check this ultimage WordPress SEO guide for beginners.
If you like this guide, then please follow us on Facebook and Twitter for more free wedding photography tips and resources.
Envira Gallery helps photographers create beautiful photo and video galleries in just a few clicks so that they can showcase and sell their work.

I was reading through some of your blog posts on this website and I think this internet site is rattling informative! Continue putting up.
your blog is very nice and informative
An excellent post, congratulations !!