Envira Gallery Blog
Digital Photography Tips, Tutorials and Resources
Digital Photography Tips, Tutorials and Resources

Last updated on Dec 21, 2018 by Waseem Abbas
Do you want to photoshop a tattoo on your body? Sometimes it’s fun to add fake tattoos to your photos. In this article, we will show you how to Photoshop a tattoo on yourself or someone else.
First thing you need to do is open your image in Photoshop. If you don’t have it yet, you can get Photoshop here from Adobe’s site.
Make sure the body area is visible where you want to Photoshop a tattoo.
Simply select the area of the body where you want to add the fake tattoo. I used the Quick Selection tool from the toolbar to make the selection.
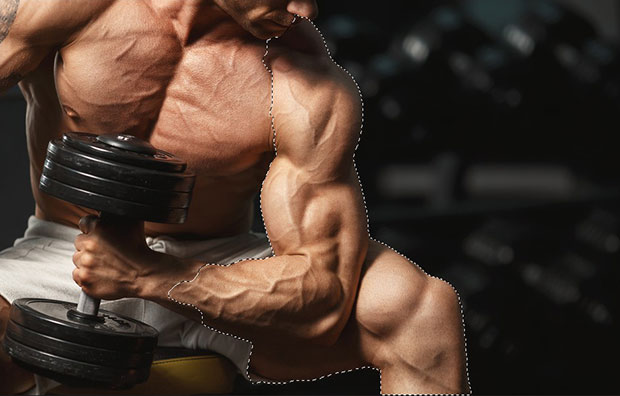
I’m going to draw the tattoo on the arm of this subject, so the selection needs to fully cover the arm.
Next, you should go to Select » Save Selection to save this selected area. Press OK to save your selection.
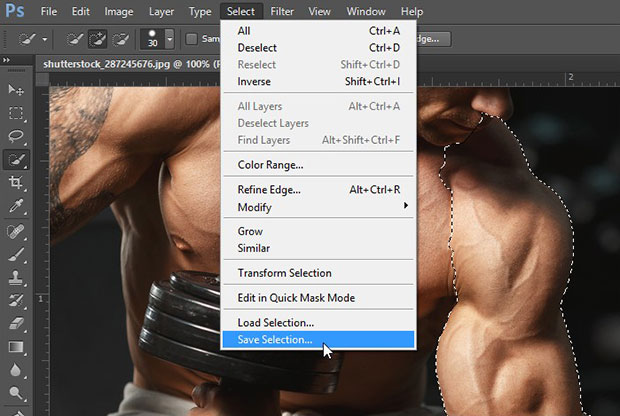
After saving the selection, you can press Ctrl + D to remove it.
Now, press Ctrl + J to make a copy of the original image layer. This copy layer will be used as the Displacement Map.
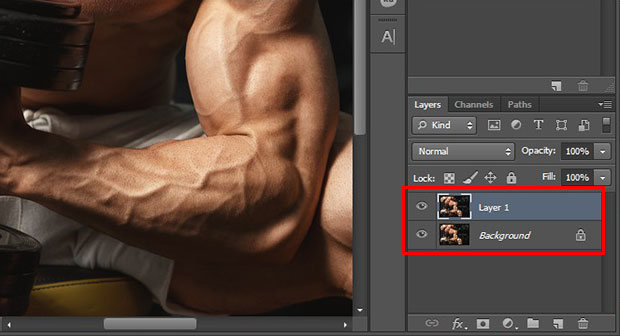
The Displacement Map makes sure that the tattoo realistically wraps around the corners of the arm, and it adjusts the shadows, midtones and highlights of the body with the tattoo.
Now, go ahead to Filter » Blur » Gaussian Blur and set the Radius to 3 pixels.
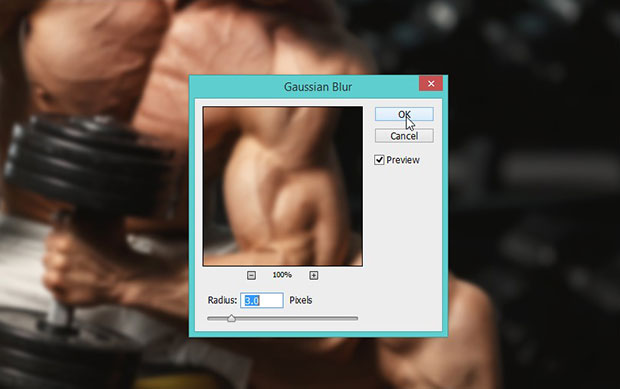
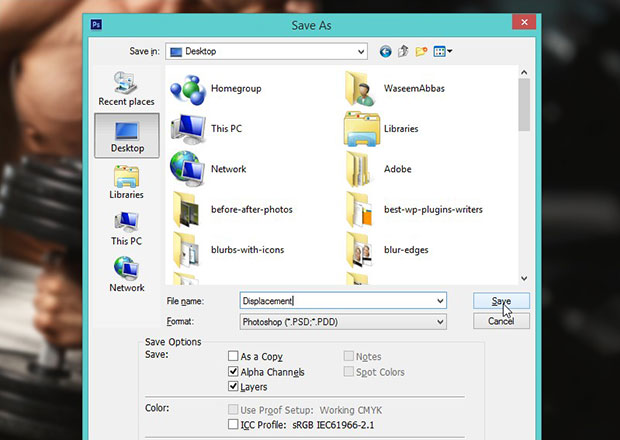
Next, you should go to File » Save As and save the document in PSD format. Name it as Displacement.
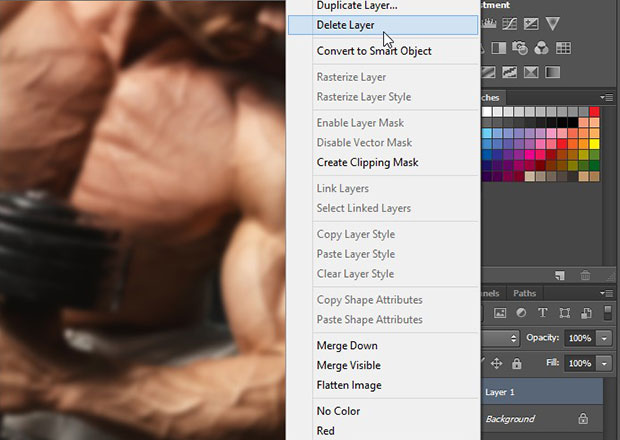
After saving the Displacement Map, simply delete the copy layer before going to the next step. To delete the layer, right click on it in the Layers panel and select Delete Layer.
Now you need to open your tattoo file in Photoshop.
In the toolbar at the left side of your Photoshop screen, select the Magic Wand tool to create a selection of the tattoo.
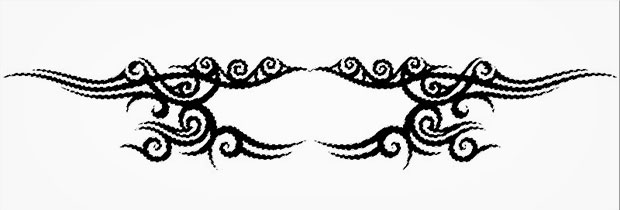
Simply press Ctrl + J to separate the tattoo from its background and then drag it to move it to the original image file.
Press Ctrl + T to transform the tattoo and adjust its size according to the arm of the subject.
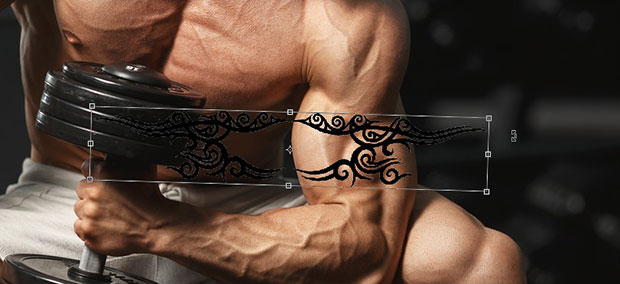
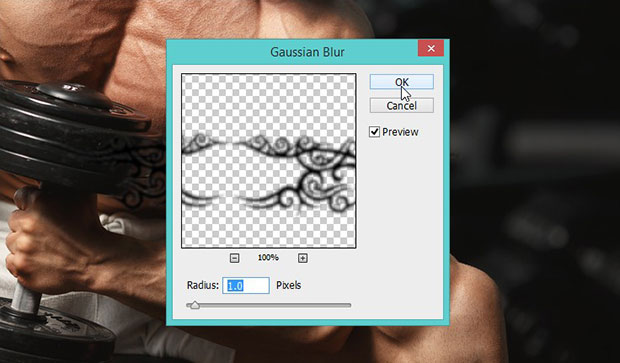
Next, you can go to Filter » Blur » Gaussian Blur and set the Radius to 1 pixel.
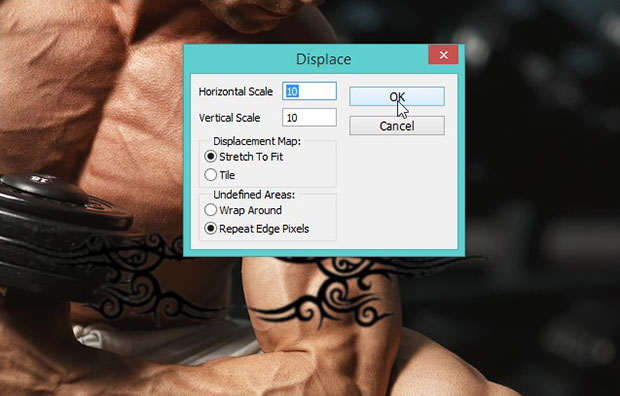
Go ahead to Filter » Distort » Displace. Set the Horizontal Scale and Vertical Scale to 10. In the Displacement Map, select Stretch to Fit and in the Undefined Areas, select Repeat Edge Pixels.
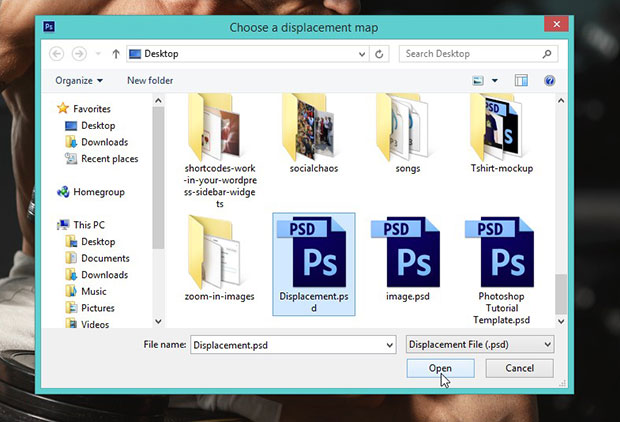
In the next window, you’ll need to select the Displacement file that you saved in the early steps of this guide.
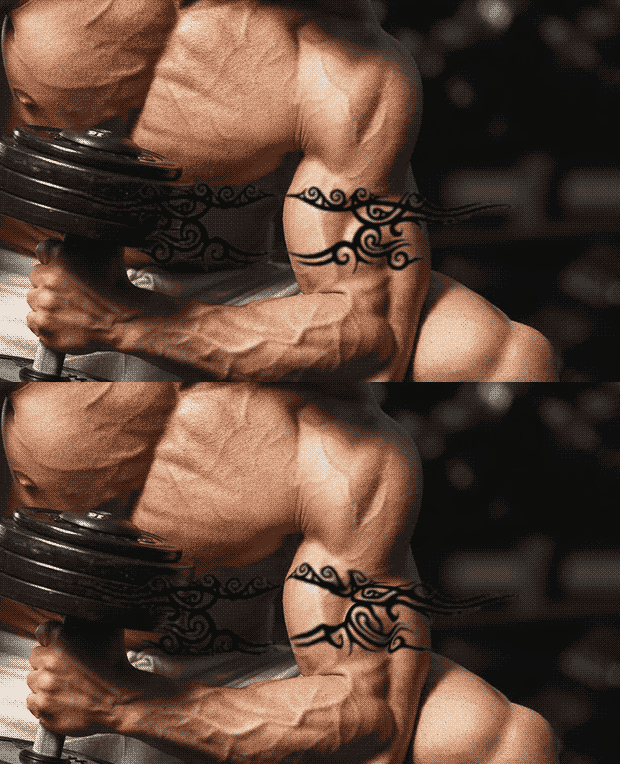
You will notice that the Displacement Map adjusts the corner of the tattoo with the shape of the arm.
If the tattoo is too big for the arm, you’ll need to remove the excess. In the Layers panel, simply Ctrl + Click on the thumbnail of the tattoo layer to create the selection on the tattoo.
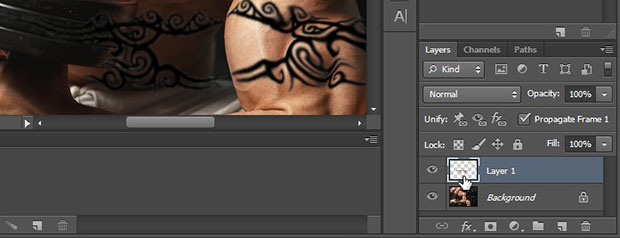
Then go to the Channels panel and press Ctrl + Shift + Alt + Click on the thumbnail of Alpha 1.
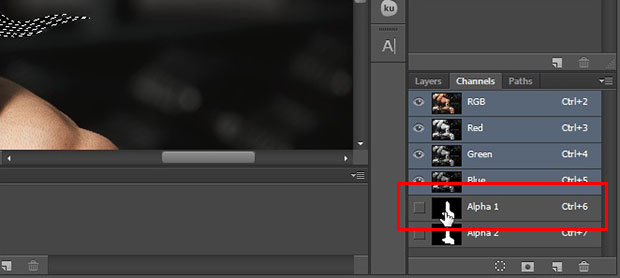
It will remove the selection from the tattoo that is outside the arm of the subject.
Now go back to the Layers panel and click on the layer mask icon from the bottom of the layers panel to add the layer mask to the tattoo layer.
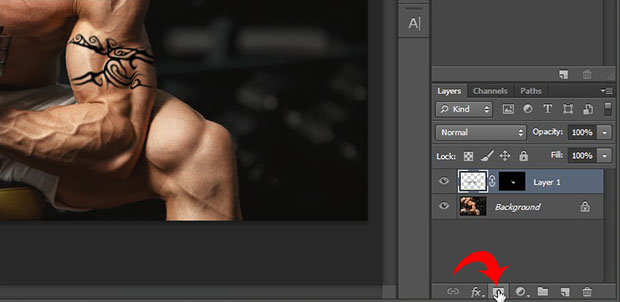
This layer mask hides the extra tattoo outside the arm to beautifully Photoshop a tattoo to the subject’s body.
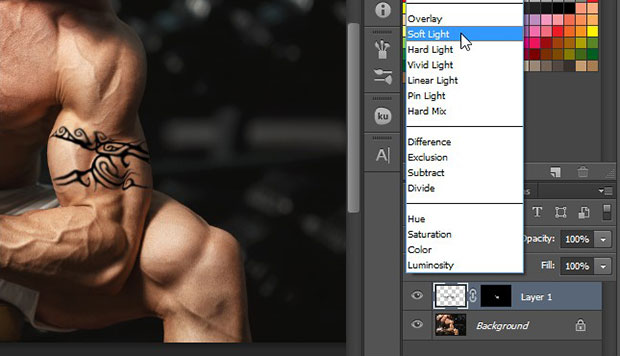
Next you should change the blending mode of the tattoo layer to Soft Light.
You need to press Ctrl + Shift + Alt + E to create a composite copy of the image, and then press Ctrl + J to create a copy of the composite copy layer.
Your Layers panel will look like as shown in the image below:
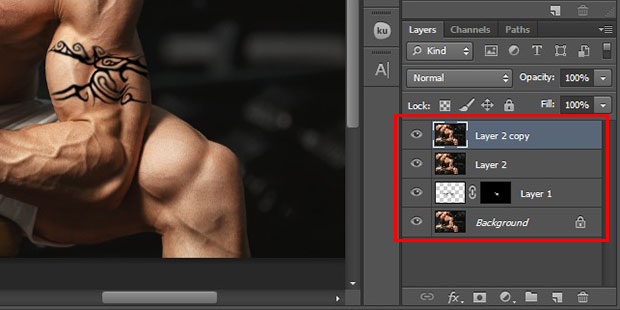
Simply Alt + Click on the layer mask of the tattoo layer and drag it to the top layer. Then click on the thumbnail of the top layer to make it active.
You can see the Layers panel again the image below:
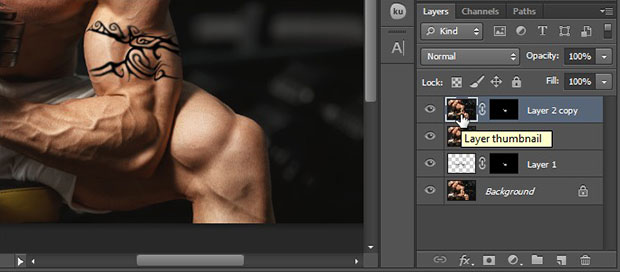
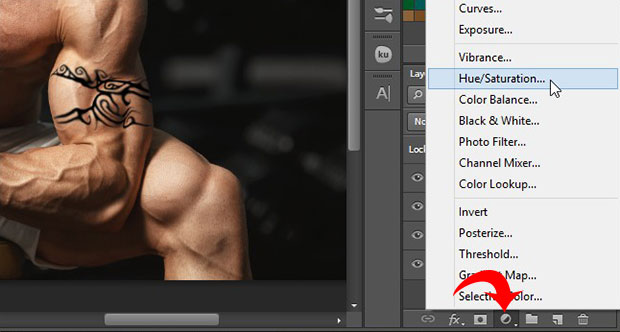
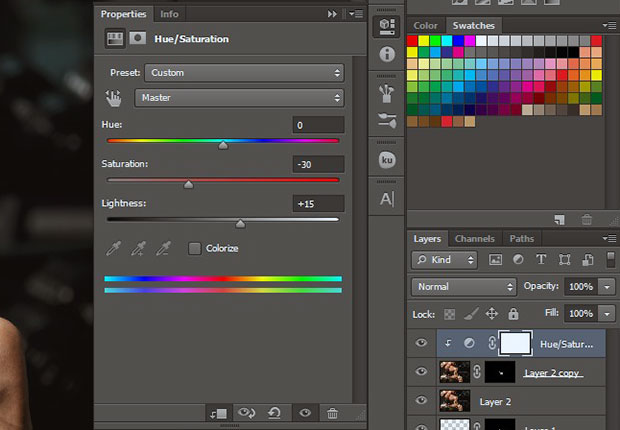
Now you should click on the Adjustment Layer icon (half filled circle) at the bottom right corner of your Photoshop screen and select Hue/Saturation.
In the Hue/Saturation settings, you should click on the icon to clip to layer, so the adjustment affects all layers below it.
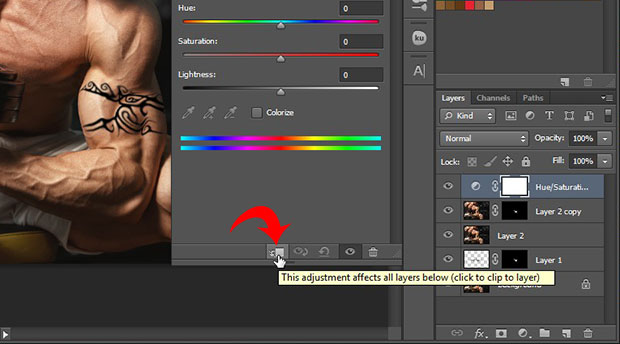
Lastly, set the Saturation to -30 and Lightness to +15. Leave the Hue slider as-is.
That’s all. You can see the before and after image below.
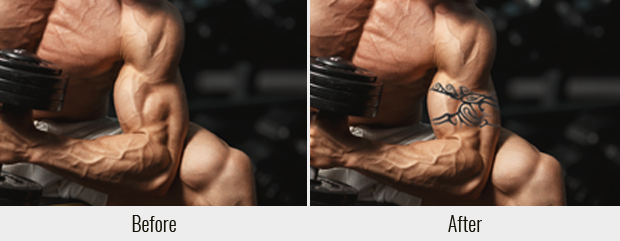
We recommend trying different settings for the Hue/Saturation sliders to match your unique skin tone.
We hope this article has helped you to learn how to Photoshop a tattoo on someone. You may also want to check out our guide on how to Photoshop a hat on someone.
If you like this article, then please follow us on Facebook and Twitter for more free photo editing tutorials.
Envira Gallery helps photographers create beautiful photo and video galleries in just a few clicks so that they can showcase and sell their work.

Perfect use of Photoshop. We will definitely try to sketch tattoo using Photoshop. Thank you for sharing!
Smashing work with photoshop, perfect!
Can you add a photo of a tattoo to a person on a video?
low-key I’m I the only one like damn he big
what’s his phone number, call . e at JKKJKKKKKK