Do you want to create a cinemagraph? Cinemagraphs are still photographs where one small, looped movement occurs, as if a bit of life has been breathed into the photo. In this article, we will show you how to create a cinemagraph in Photoshop.
If you don’t have it yet, you can get Photoshop from Adobe’s site here.
Create a Cinemagraph from Your Video
We should first note that not all videos are suitable for a cinemagraph. For a cinemagraph to work, your video needs to contain both still and moving objects.
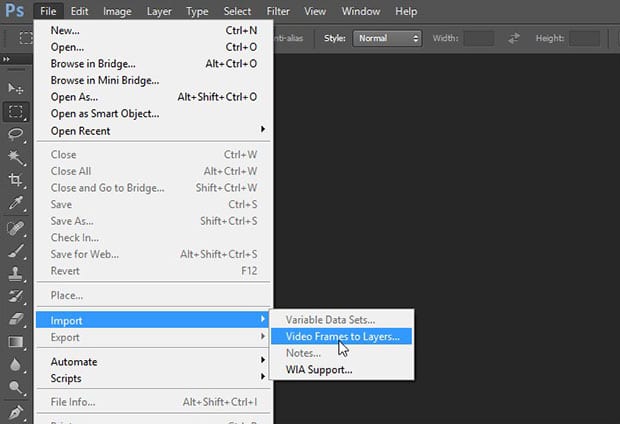
First thing you need to do is import your video into Photoshop. To import video, you can go to File » Import » Video Frames to Layers.
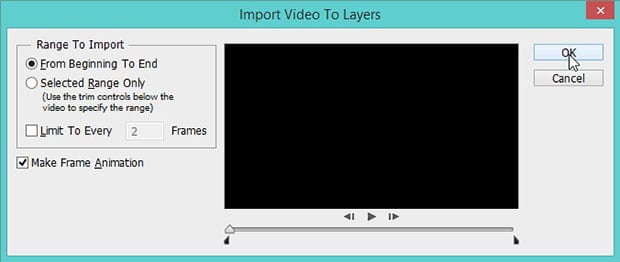
Once you select your video file, a window will popup with the import options. You can leave all the settings as-is, and import the video file.
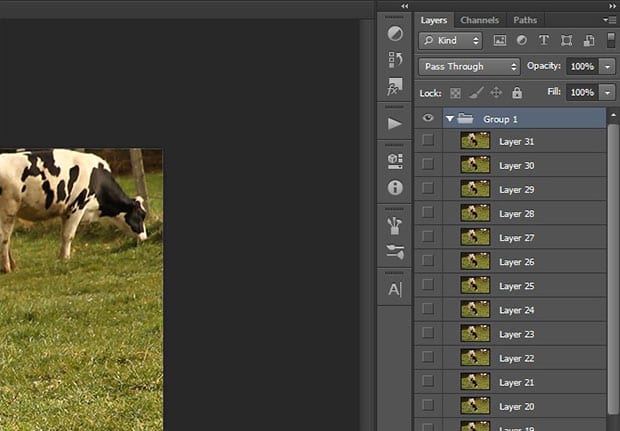
Sometimes it takes a few seconds to open the video. You should now see that all the frames of your video have been imported as layers in the Layers panel on the right-hand side of your Photoshop Screen.
Next, select all the layers except for Layer 1 and create a group of them (go to Layer » New » Group From Layers). Make sure that Layer 1 stays out of the group.
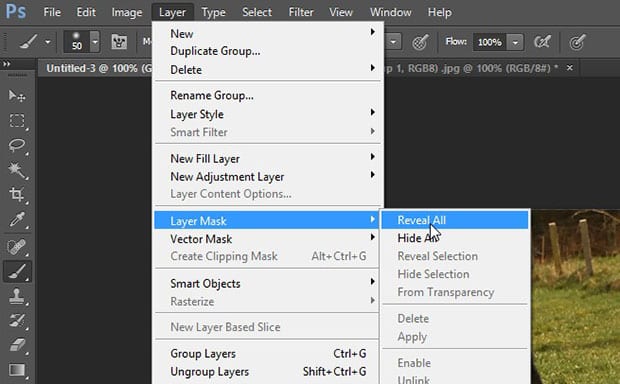
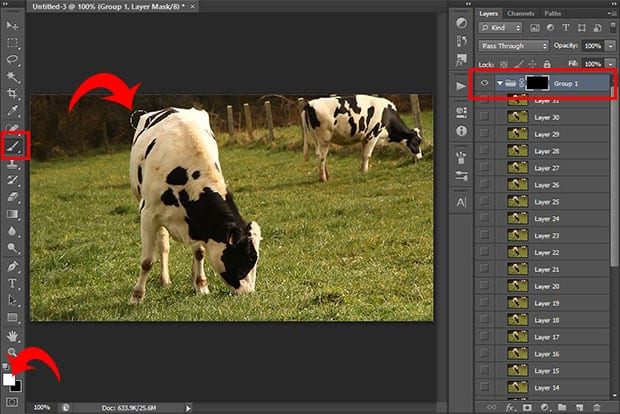
After creating the group, select it, and go ahead to Layer » Layer Mask » Reveal All to add a mask to the group.
Next, press Ctrl + I to invert the color of the mask and set the foreground color to white.
Now select the Brush Tool from the toolbar (at the left-hand side of your screen) and brush the area that you want to loop in the cinemagraph.
Now go to Window » Timeline to open all your layers in animation format at the bottom of the Photoshop screen.
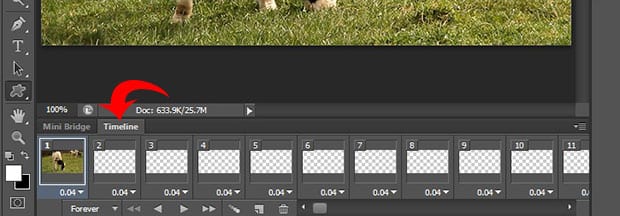
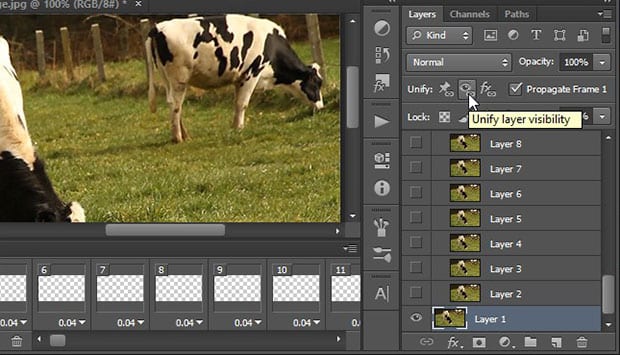
Since you can see all the frames are transparent in the Timeline except for the first frame, you can go to the Layers panel and select the bottom layer (Layer 1).
Now, you’ll need to click on the Unfiy Layer Visibility icon and press the Match button.
Next, click on the toggle icon of the Timeline and select all the frames. Click again to choose Copy Frames.
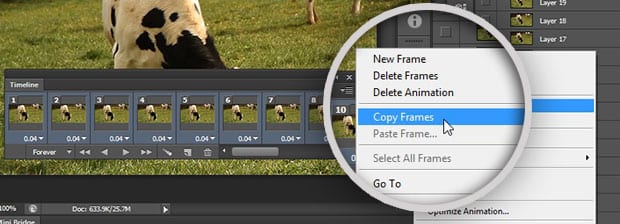
Once the frames are copied, simply click on the toggle icon of the Timeline again and select the Paste Frames option.
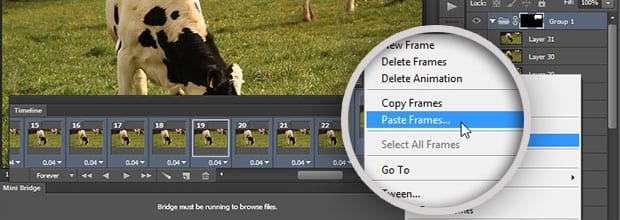
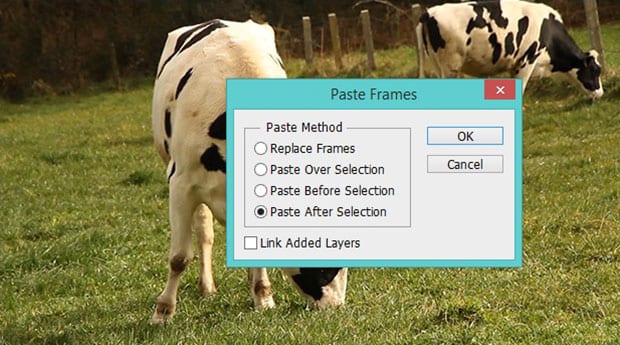
Leave the Paste After Selection option selected, and press the OK button.
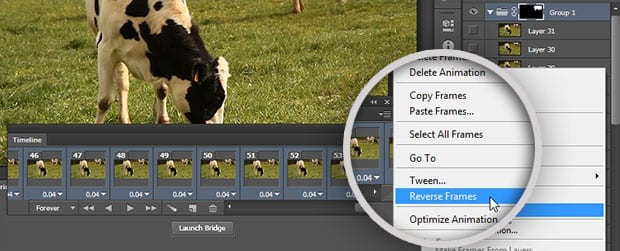
Keeping the newly pasted layers selected, click on the Timeline toggle icon and select the Reverse Frames option.
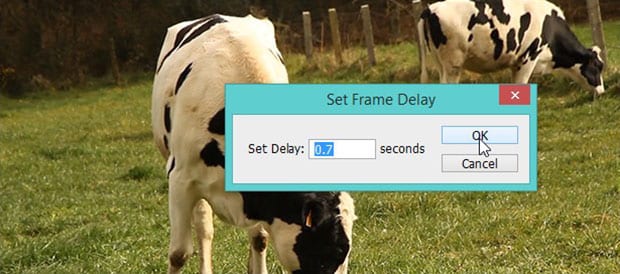
You can adjust the Set Frame Delay where you feel a shift in the moving frames.
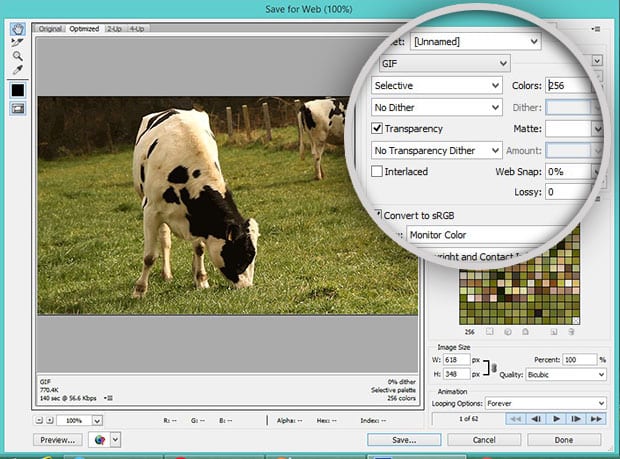
Lastly, go to File » Save For Web and choose GIF format to save your video. You can change any Dither settings to adjust the file size of your GIF image.
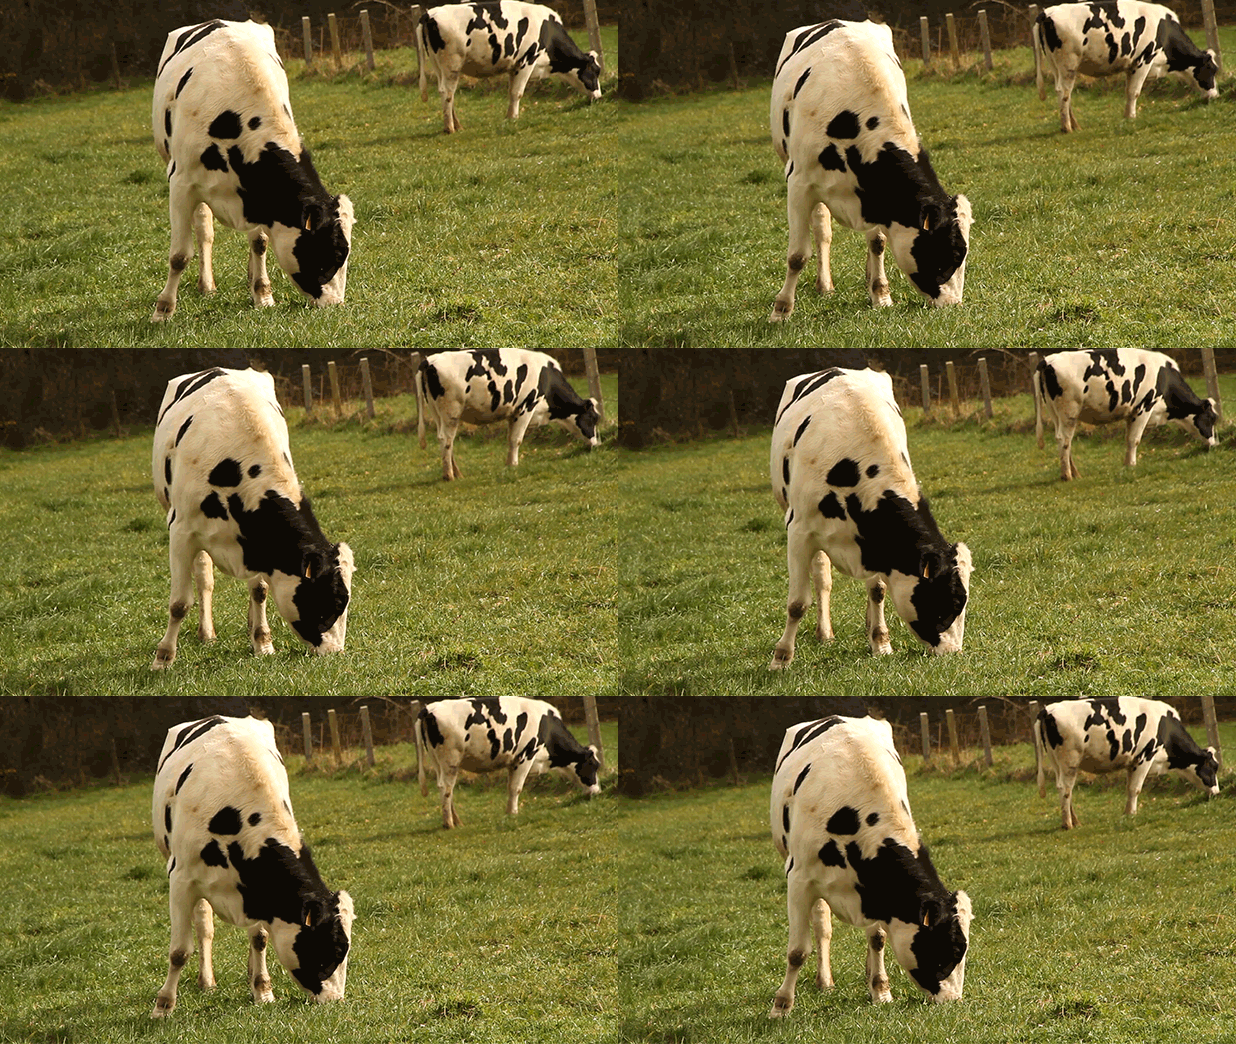
That’s all. You can see the cinemagraph (with our cow moving on the right) below.
We hope this article has helped you to learn how to create a cinemagraph in Photoshop. You may also want to check out our guide on how to add a HDR effect to your images in Photoshop.
If you like this article, then please follow us on Facebook and Twitter for more free photo editing tutorials.


