





Sending your client a Google Drive link full of proof shots might technically work — but it doesn’t exactly look polished. And emailing high-res files back and forth? That’s a recipe for missed attachments and frustrated clients.
A password-protected image gallery is a cleaner way to work. You share one link, set a password, and only the right people can see your photos. No file size limits. No sign-up required for your client. No chaos in your inbox.
In this guide, you’ll learn how to set up password-protected galleries in WordPress — no code, no complicated settings. The whole setup takes less than five minutes, and we’ll walk you through every step.
In This Article
- Why You Might Want to Password Protect Your WordPress Galleries
- What You'll Need to Password Protect a WordPress Gallery
- How to Add a Password Protected Image Gallery in WordPress
- How to Share Your Password-Protected Gallery with Clients
- Take It Further: Client Proofing with Envira Gallery
- FAQs: Password Protected Image Galleries in WordPress
Why You Might Want to Password Protect Your WordPress Galleries
Password-protected galleries aren’t just for photographers. Here are the most common reasons people set them up:
- Client proofing. Share a private gallery of unedited or lightly edited shots with a client before final delivery. They get to browse everything — no one else does.
- Private event galleries. Wedding photos, family sessions, corporate events — let guests access the gallery with a password instead of making it fully public.
- Members-only content. Selling access to photography courses, lookbooks, or exclusive image collections? A password keeps it gated without needing a full membership plugin.
- Internal team use. Real estate teams, marketing departments, and agencies often need to share image assets internally without exposing them to the public.
Whatever your use case, the setup process is the same — and it takes just a few minutes.
What You’ll Need to Password Protect a WordPress Gallery
For this tutorial, we’ll be using Envira Gallery — a WordPress gallery plugin trusted by 150,000+ websites with 2.5 million downloads and a 4.7-star rating. It’s built for photographers and content creators who want beautiful, fast galleries without wrestling with code.
Here’s what Envira Gallery brings to the table for protected galleries:
- Password-protected galleries — lock any gallery with a unique password, visible only to the people you choose.
- Private share links — generate a direct URL that grants access without a password prompt, for a frictionless client experience.
- Email/username verification — optionally require a matching email alongside the password for an extra layer of security.
- Customizable password prompt — replace the generic access screen with your own branded message.
- Responsive gallery layouts — your protected gallery looks sharp on every device, automatically.
- Lightbox and slideshow viewer — clients browse full-resolution photos in a polished, immersive experience.
Password protection is available on the Envira Gallery Plus plan ($69.50/year, up to 3 sites) and higher — it’s not included in the free Lite version. You can compare all plans on the Envira Gallery pricing page.
How to Add a Password Protected Image Gallery in WordPress
Step 1: Install and Activate the Password Protection Addon
In your WordPress dashboard, go to Envira Gallery → Addons. Find the Password Protection Addon in the list — it will show its current status on the card.
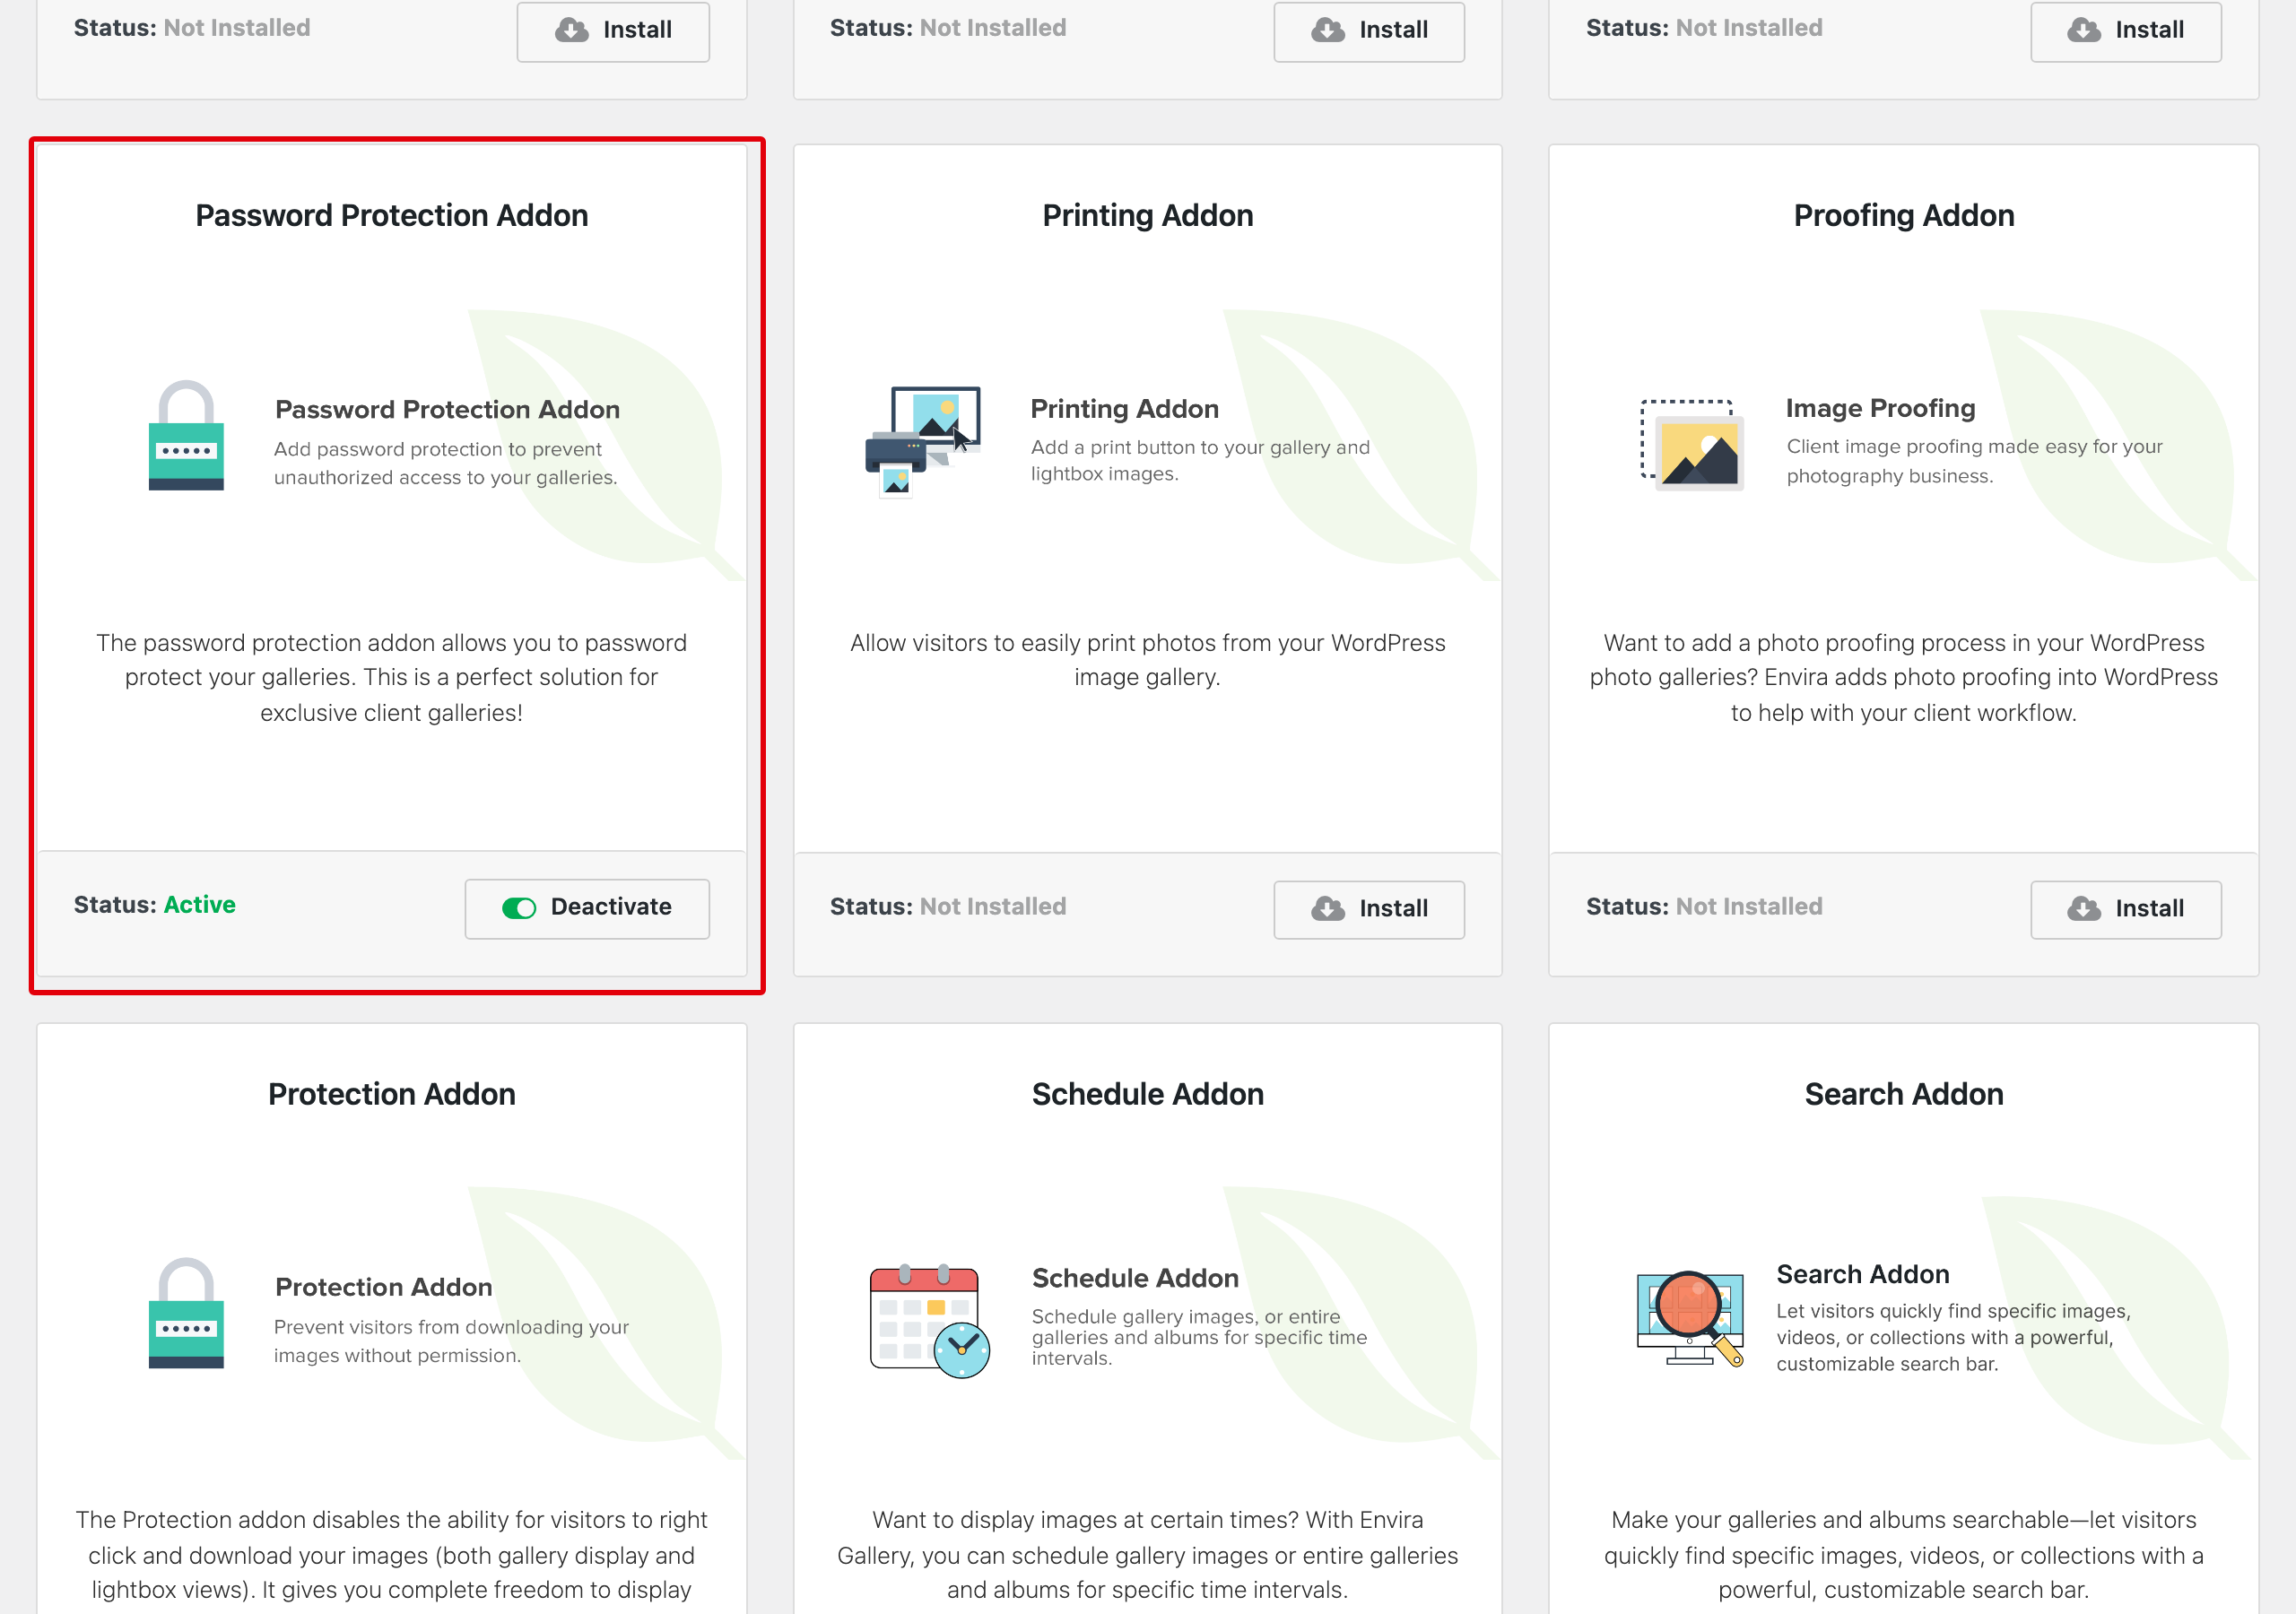
If it shows Install, click to install it first. Then click Activate. Once the status reads Active, you’re ready to move on.
Step 2: Create Your Gallery
Go to Envira Gallery → Add New in your WordPress dashboard and give your gallery a name.
Clear, descriptive names make a real difference when you’re managing multiple client galleries — something like “Johnson Family Session — May 2026” is far easier to find later than “Gallery 1.”
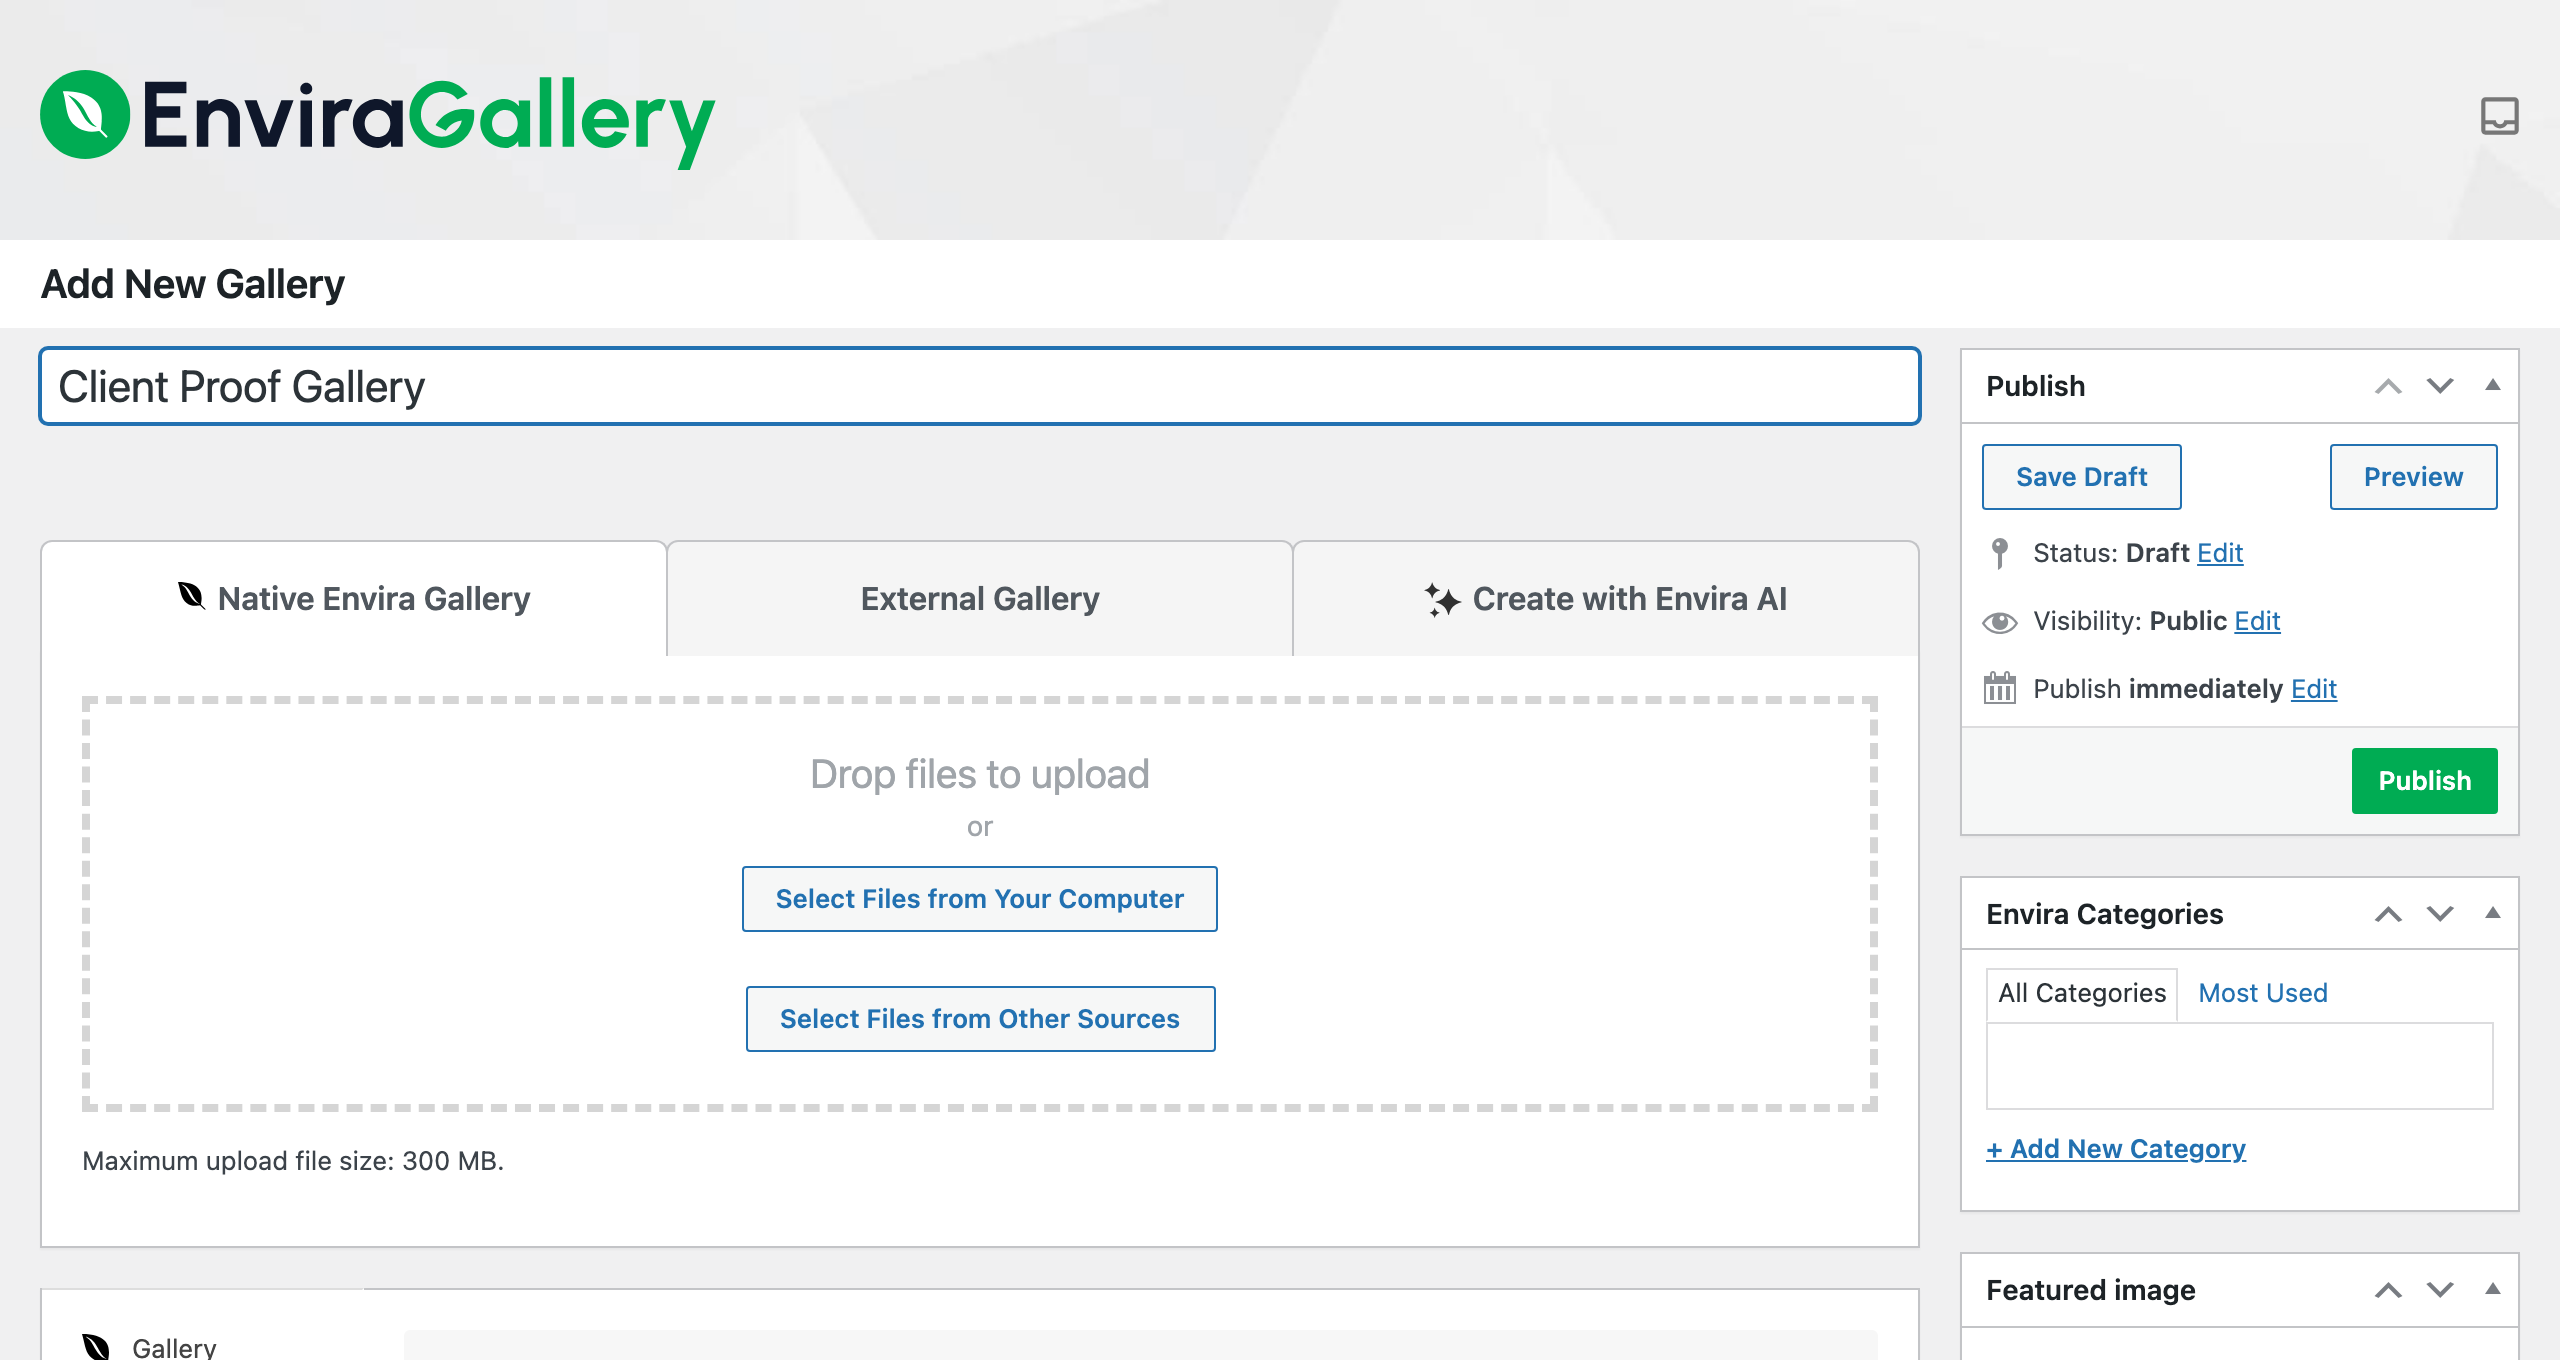
Each gallery in Envira is its own post, so you can organize them with categories, set individual publish settings, and control who sees what — all from the same editor.
Click Select Files from Other Sources to open your media library and choose your photos. Select the images you want to include and click Insert into Gallery.
Your thumbnails appear in the gallery editor once they’re loaded in. You can drag them to reorder, click any thumbnail to update the image title or alt text, and add more photos at any time.
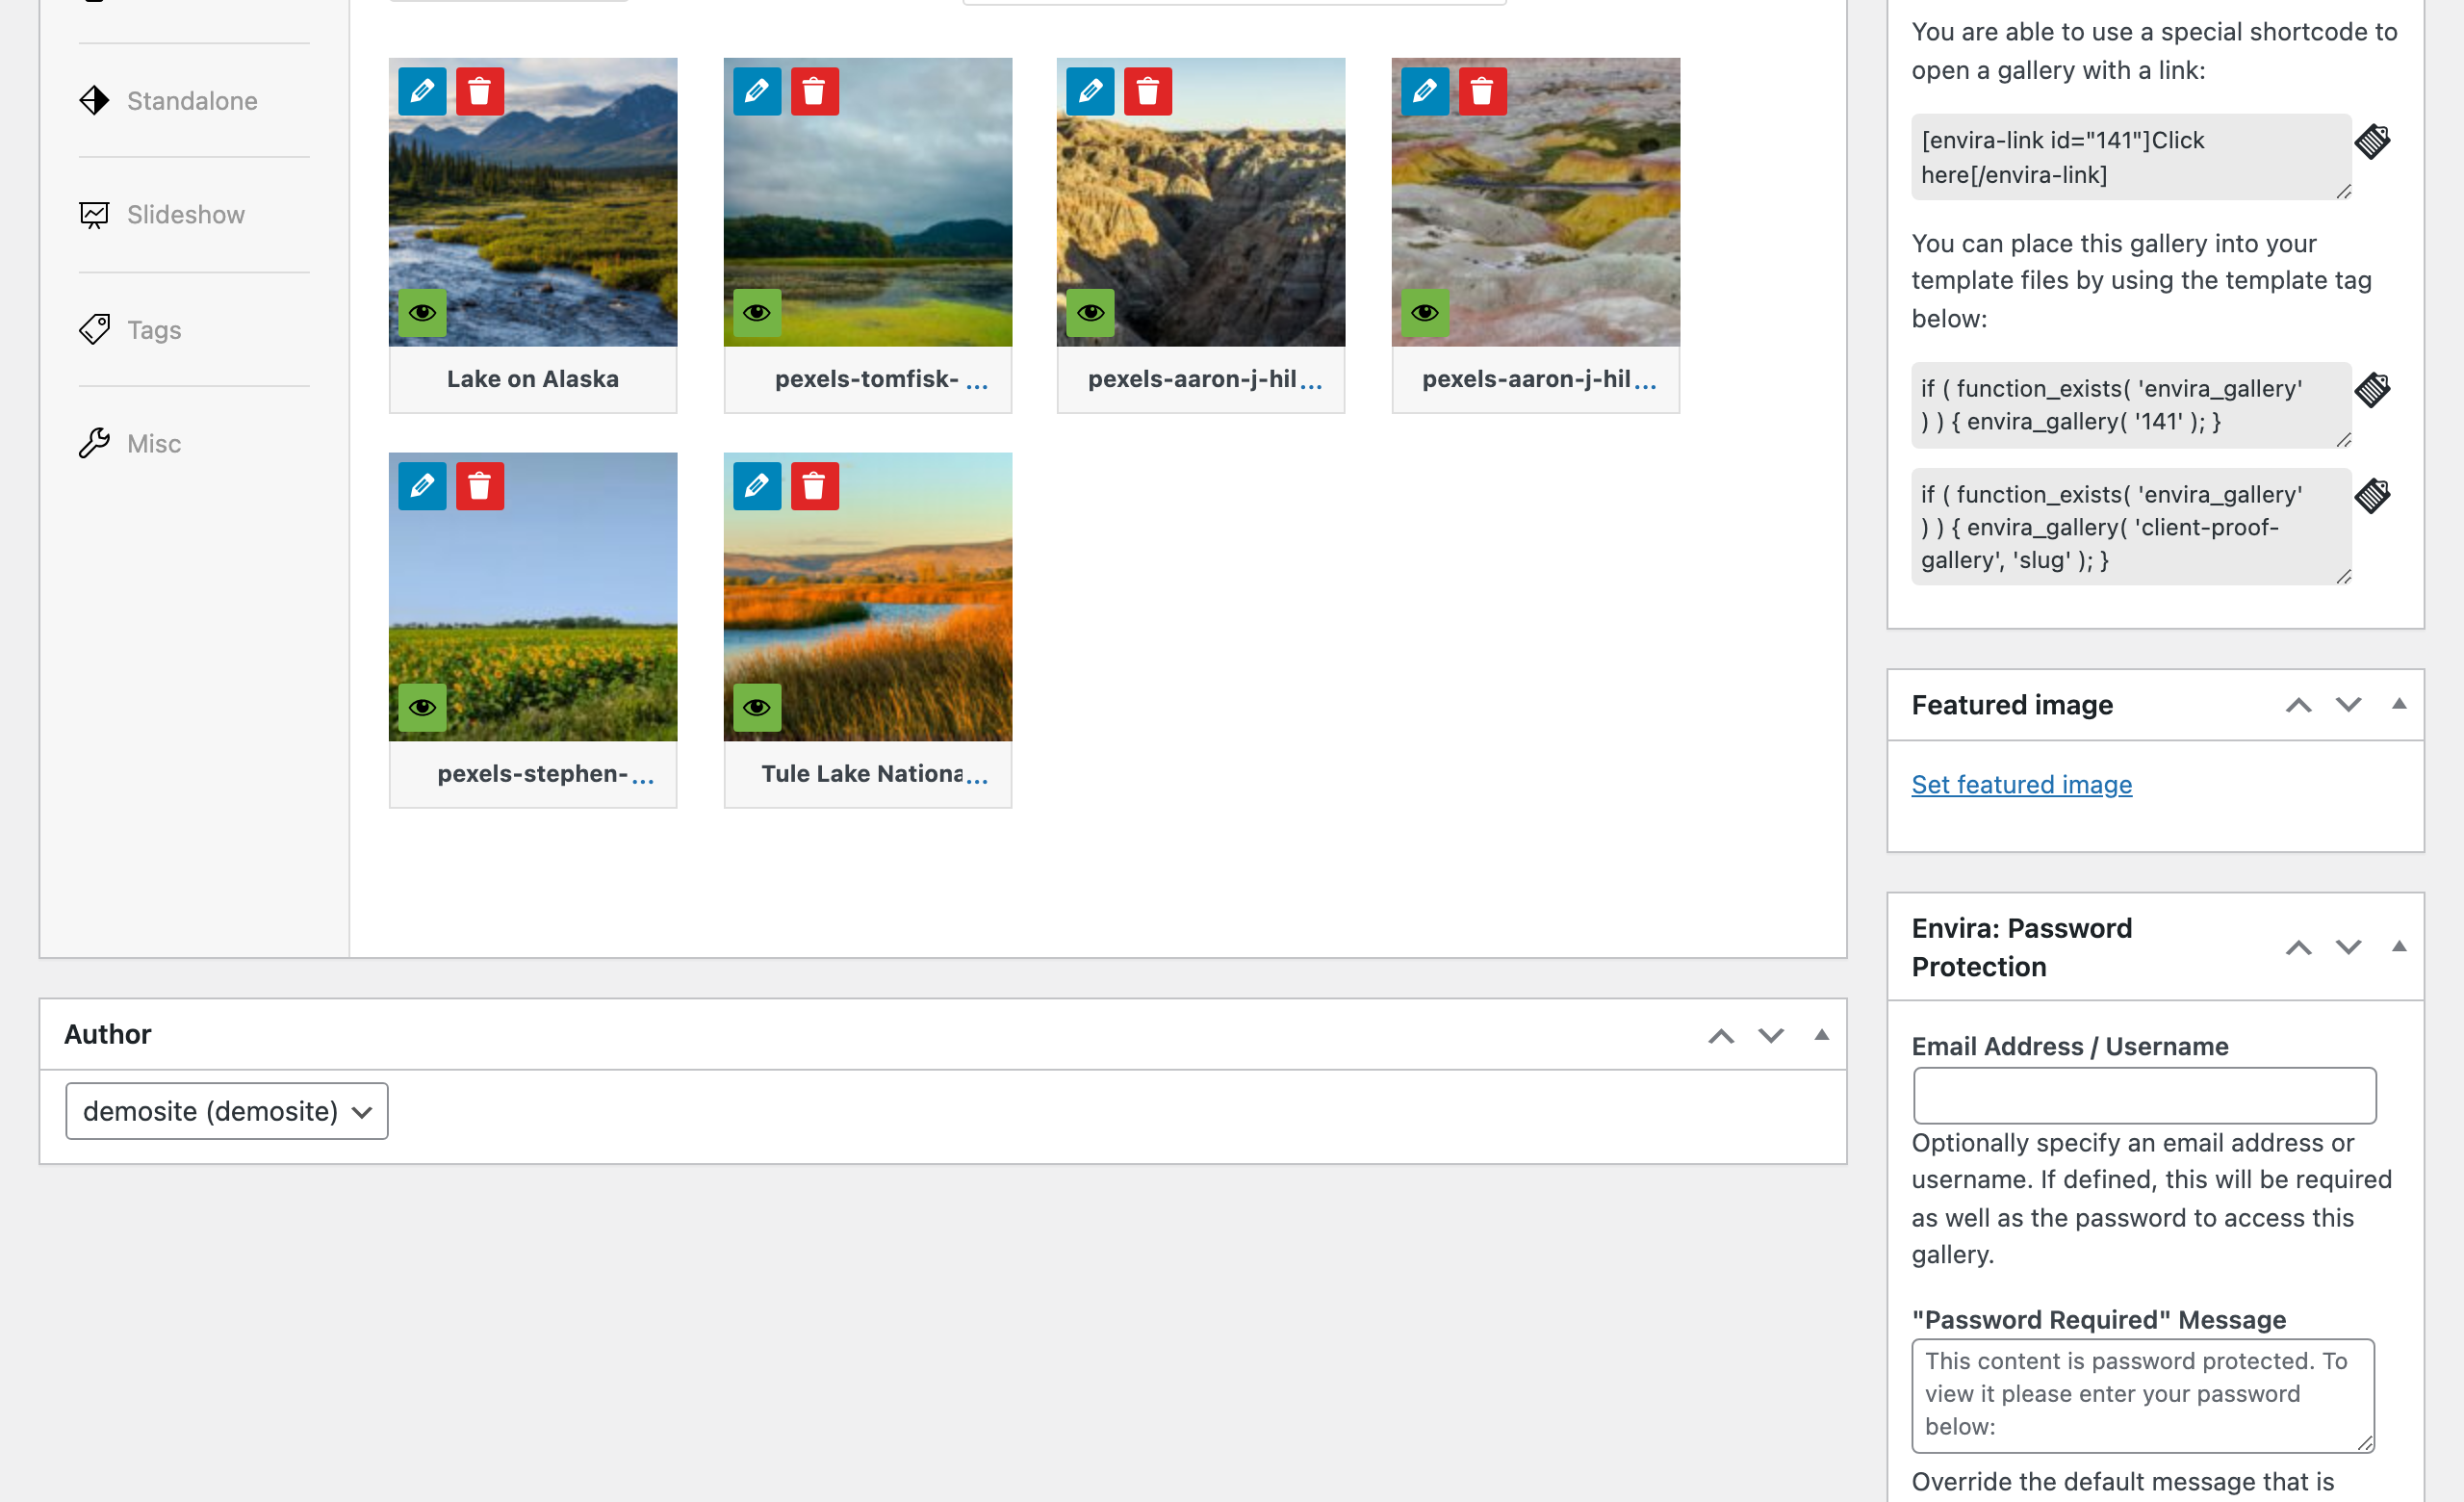
If you already have a gallery set up, open it from Envira Gallery → All Galleries and skip to Step 3.
For a complete walkthrough of building a gallery from scratch, see our guide on how to add a photo gallery to WordPress.
Step 3: Set Visibility to Password Protected
In the Publish panel on the right side of the gallery editor, find the Visibility row.
By default it’s set to Public — meaning anyone with your gallery URL can see it. Click the Edit link next to it to change this.
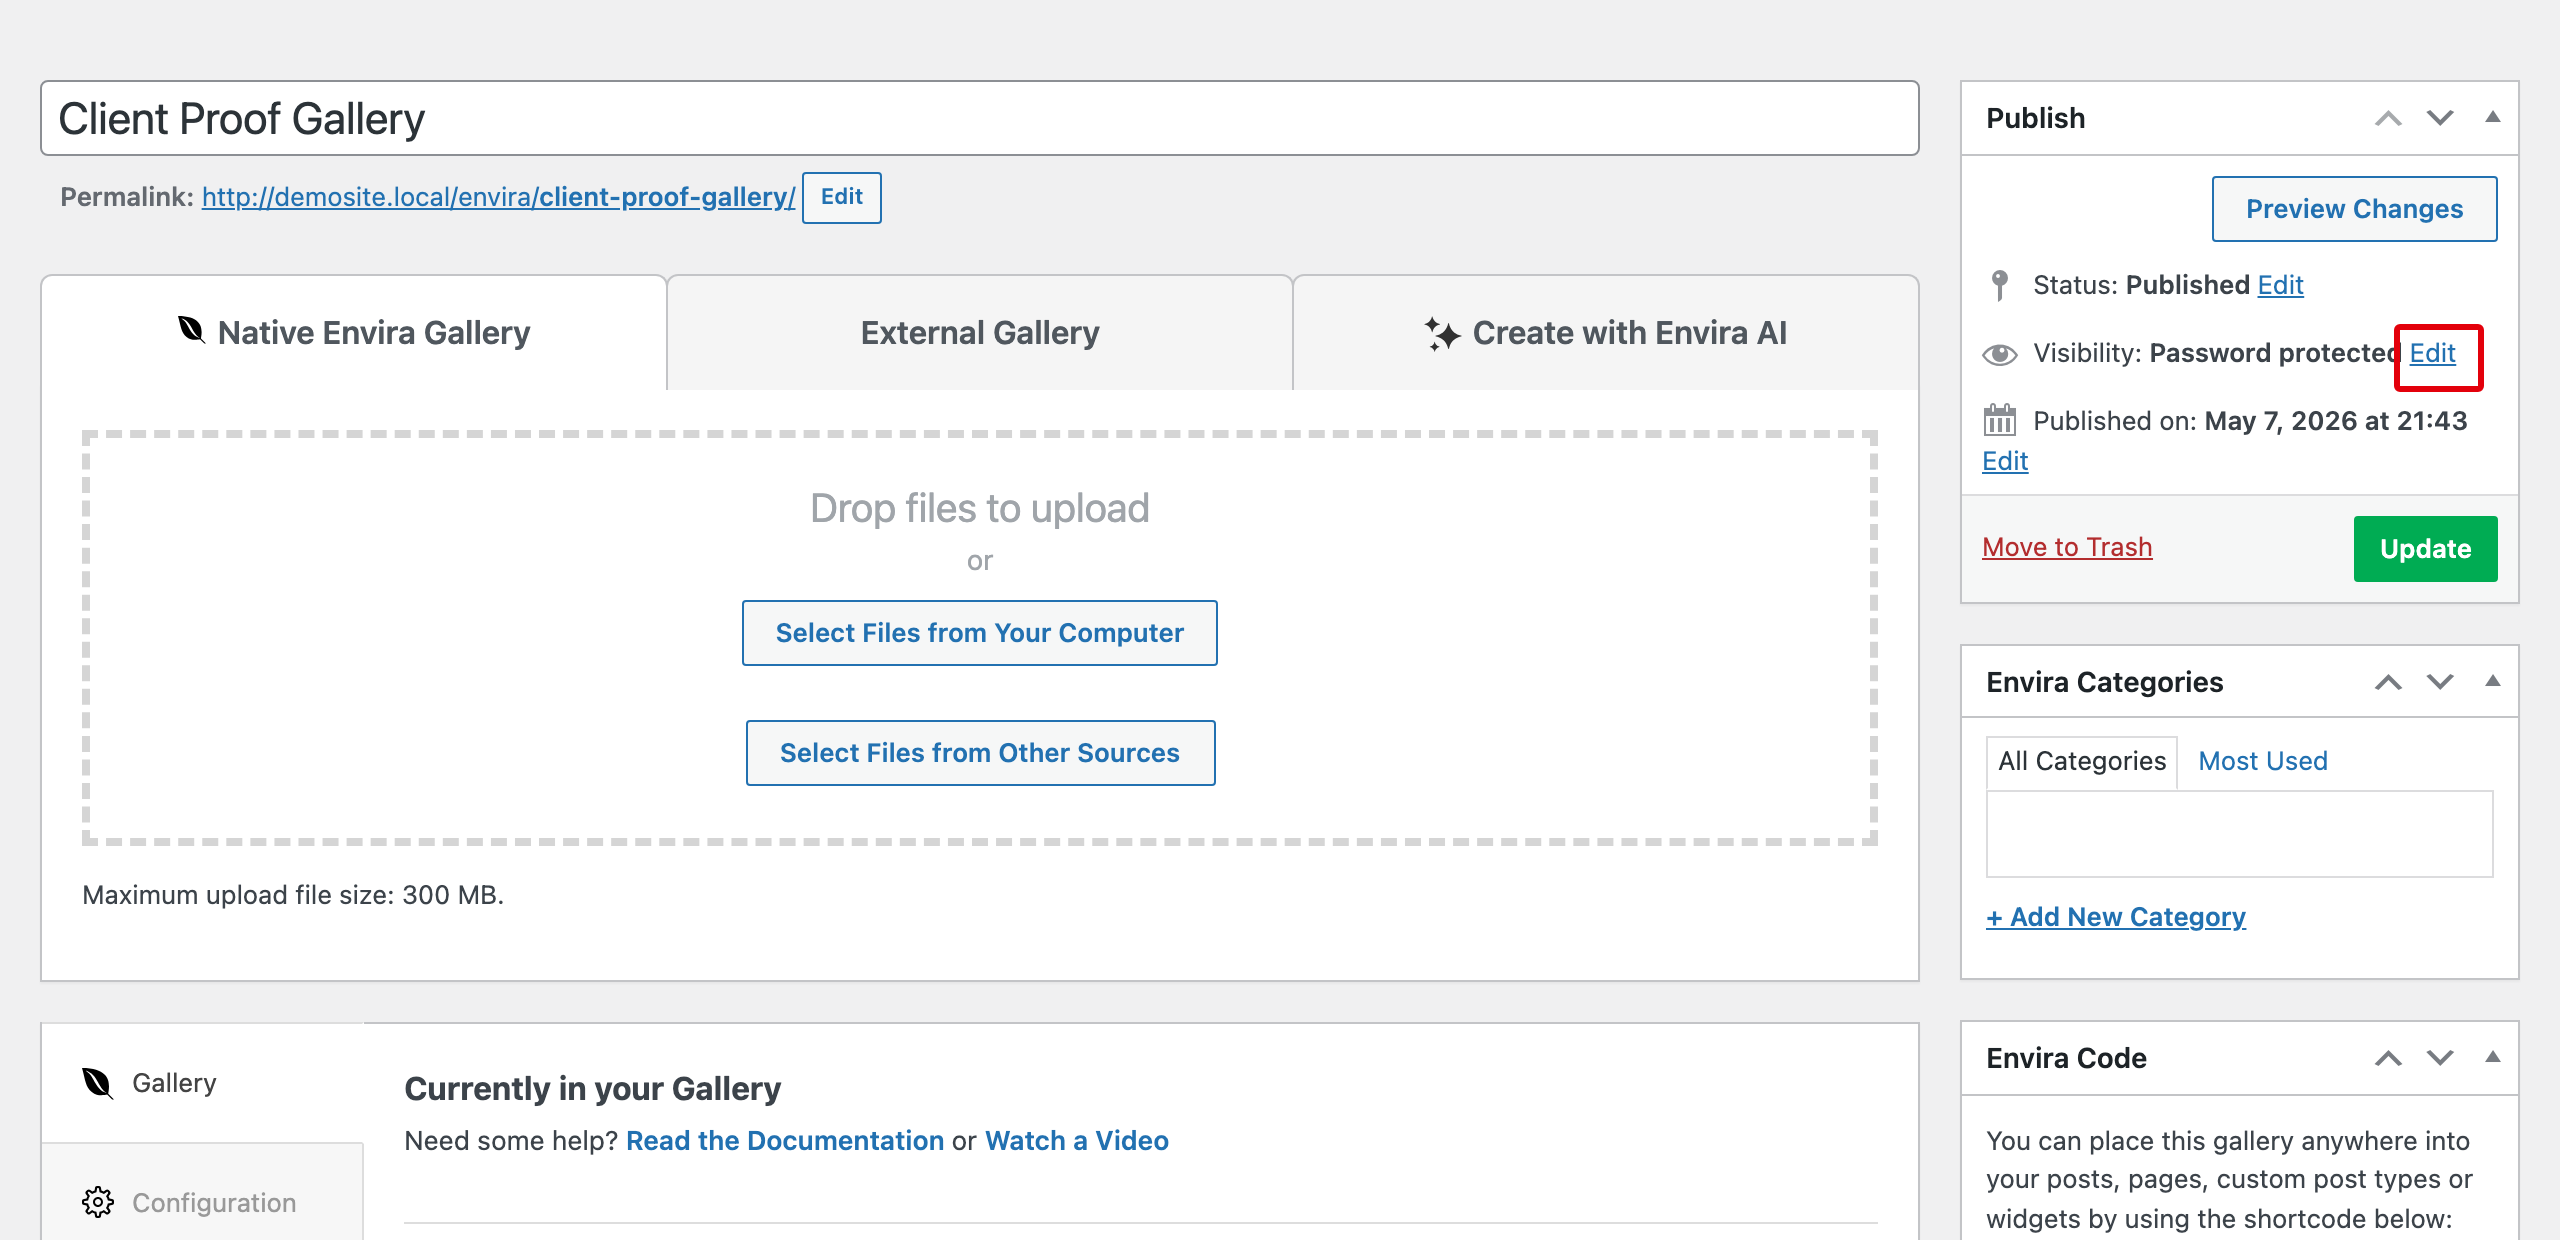
The Publish panel is in the upper-right sidebar of the editor. If you don’t see it, scroll up — it’s usually the first metabox on the right side of the screen.
Once you click edit, a small panel expands with three options: Public, Password protected, and Private. Select Password protected.
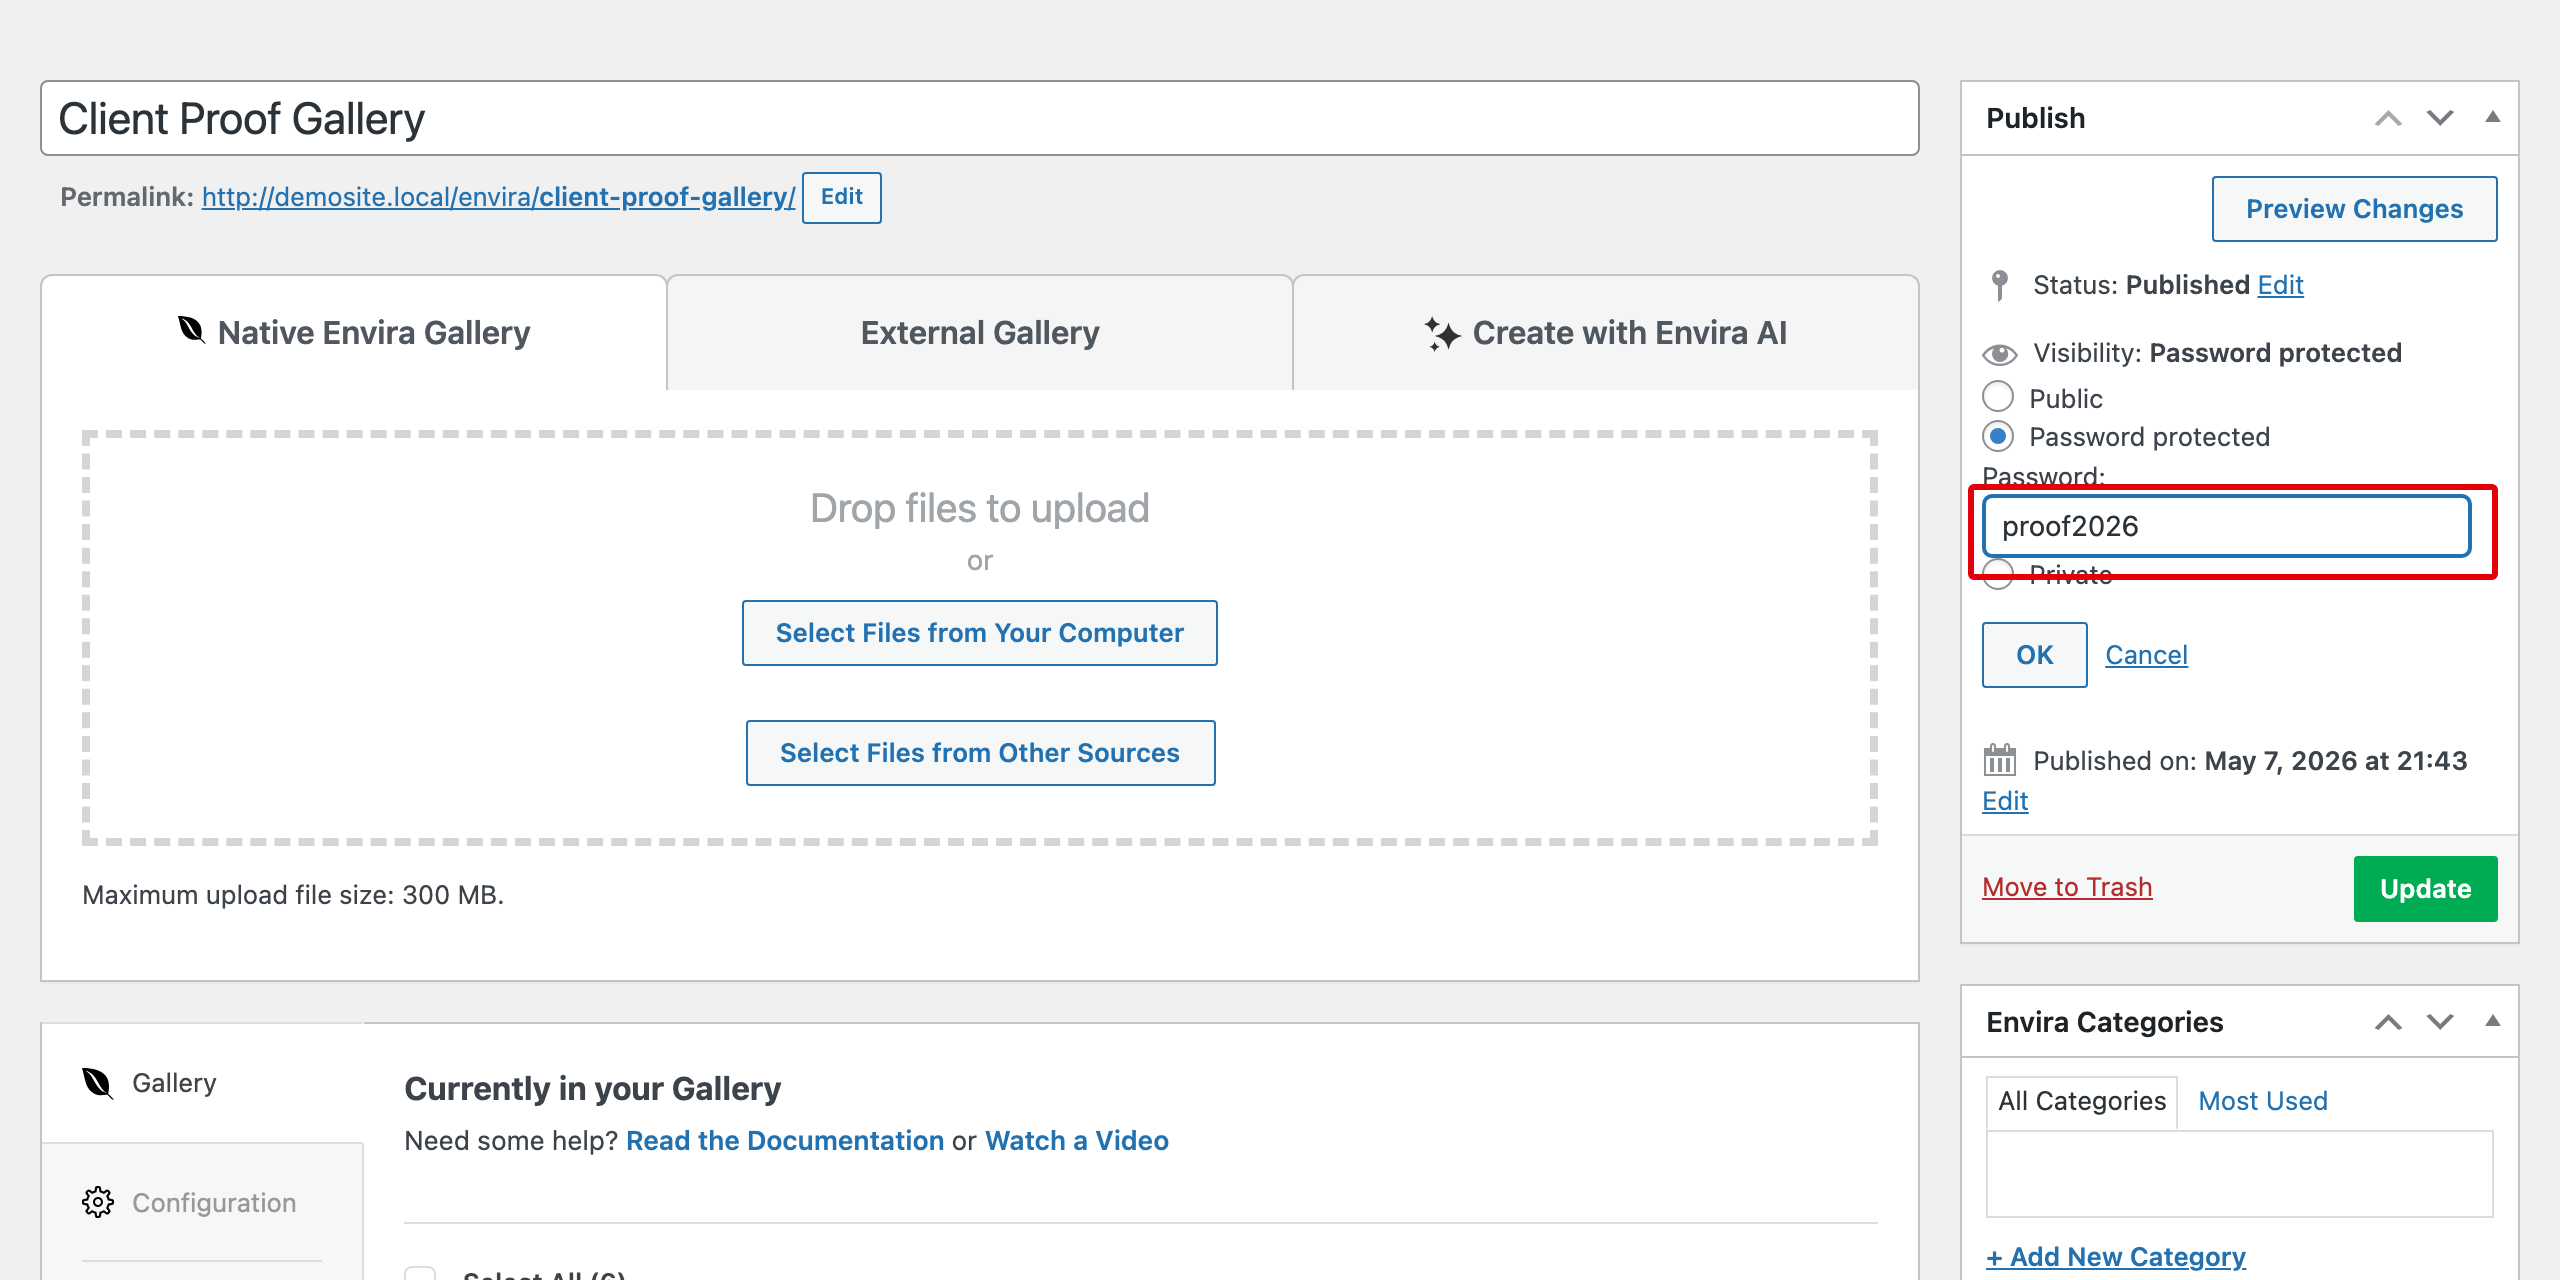
A password field appears below the radio buttons. Type the password you want to use — keep it specific to this client rather than something generic. Click OK to confirm your selection.
Step 4: Configure Optional Password Protection Settings
Now, scroll down in the right sidebar and you’ll find the Envira: Password Protection metabox. This section is optional — if all you need is a basic password gate, you can skip it.
But if you’re delivering galleries to paying clients, these settings are worth taking a minute to configure. They add an extra layer of security and let you customize what clients see when they arrive at your gallery page.
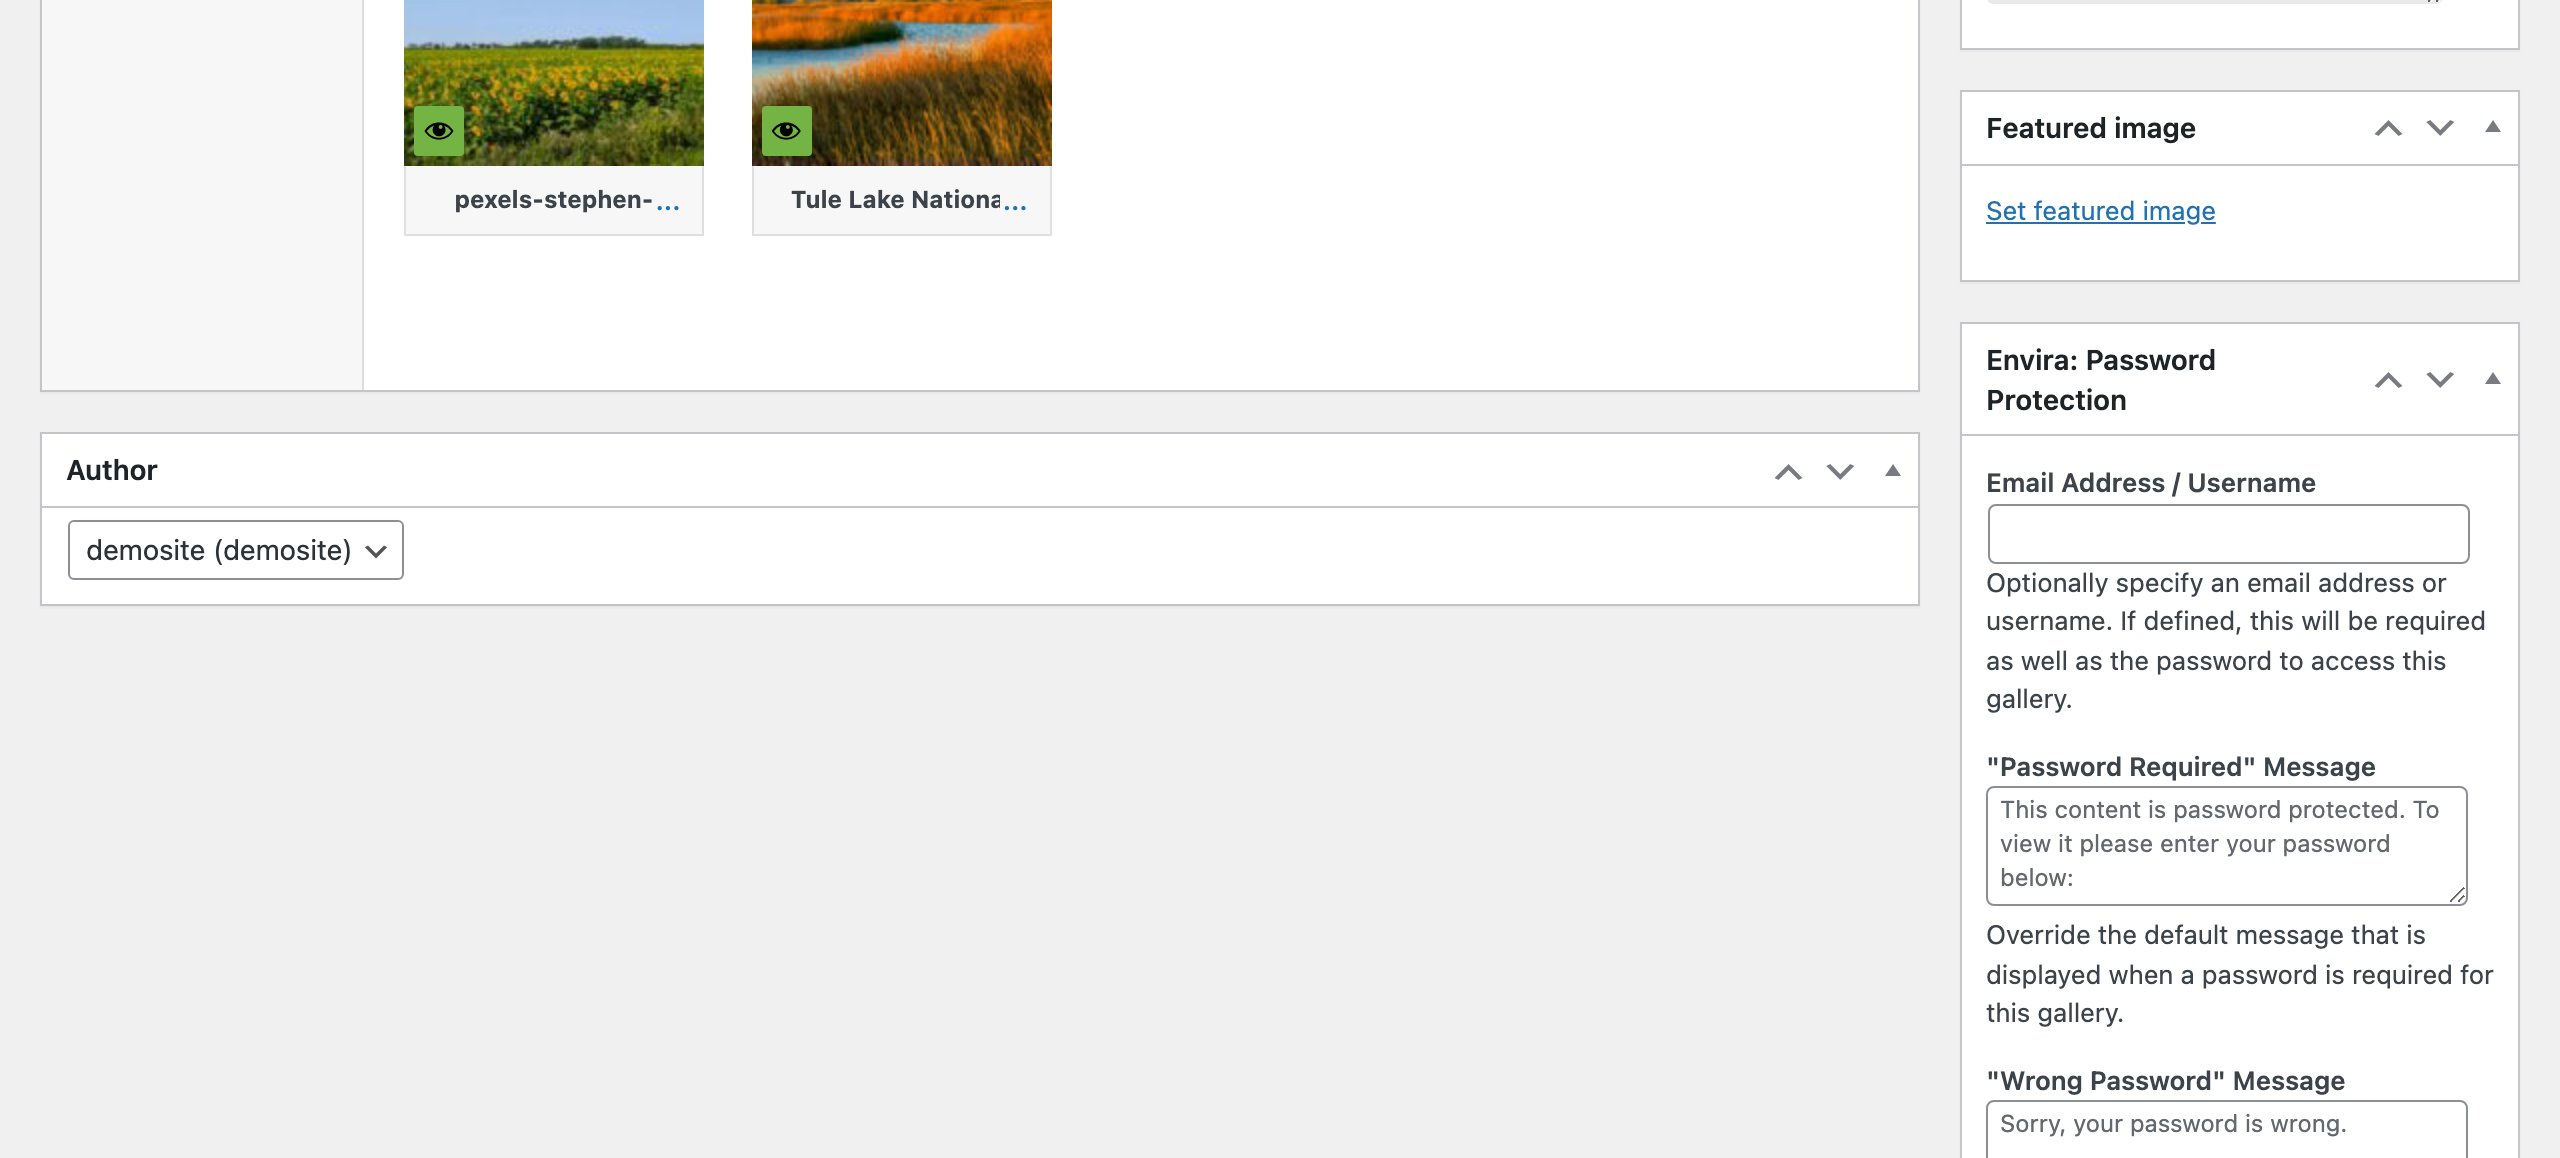
Here’s what each setting does:
- Email Address / Username. If you enter a value here, visitors will need to provide both a matching email address (or username) and the password to gain access. Useful for client proofing when you want to confirm only the right person is viewing the gallery.
- “Password Required” Message. The text shown on the gallery page before someone enters their password. The default is generic — replace it with something that fits your brand and tells the client what to expect.
- “Wrong Password” Message. The message displayed when someone enters an incorrect password. A clear, friendly message goes a long way.
All three settings are optional. If you leave them blank, the gallery falls back to WordPress’s default password behavior, which works fine for most use cases.
 Expert Tip
Replace the default “Password Required” message with something that feels personal. For a client proofing gallery, try: “Hi [Client Name]! Your proof gallery is ready. Enter the password we shared with you to view your photos.” A small touch like this makes the whole experience feel intentional.
Step 5: Click Update
Once you’ve set your password and configured any optional settings, click the Update button in the Publish panel. Your gallery is now live and password protected.
Anyone who visits the gallery URL will see a password prompt instead of your photos. Only someone with the correct password — and a matching email or username, if you set one — can get through.
How to Share Your Password-Protected Gallery with Clients
Once your gallery is protected, sharing it is simple. Copy the gallery URL from the Permalink field at the top of the gallery editor, then send it to your client — that’s their private photo gallery link.
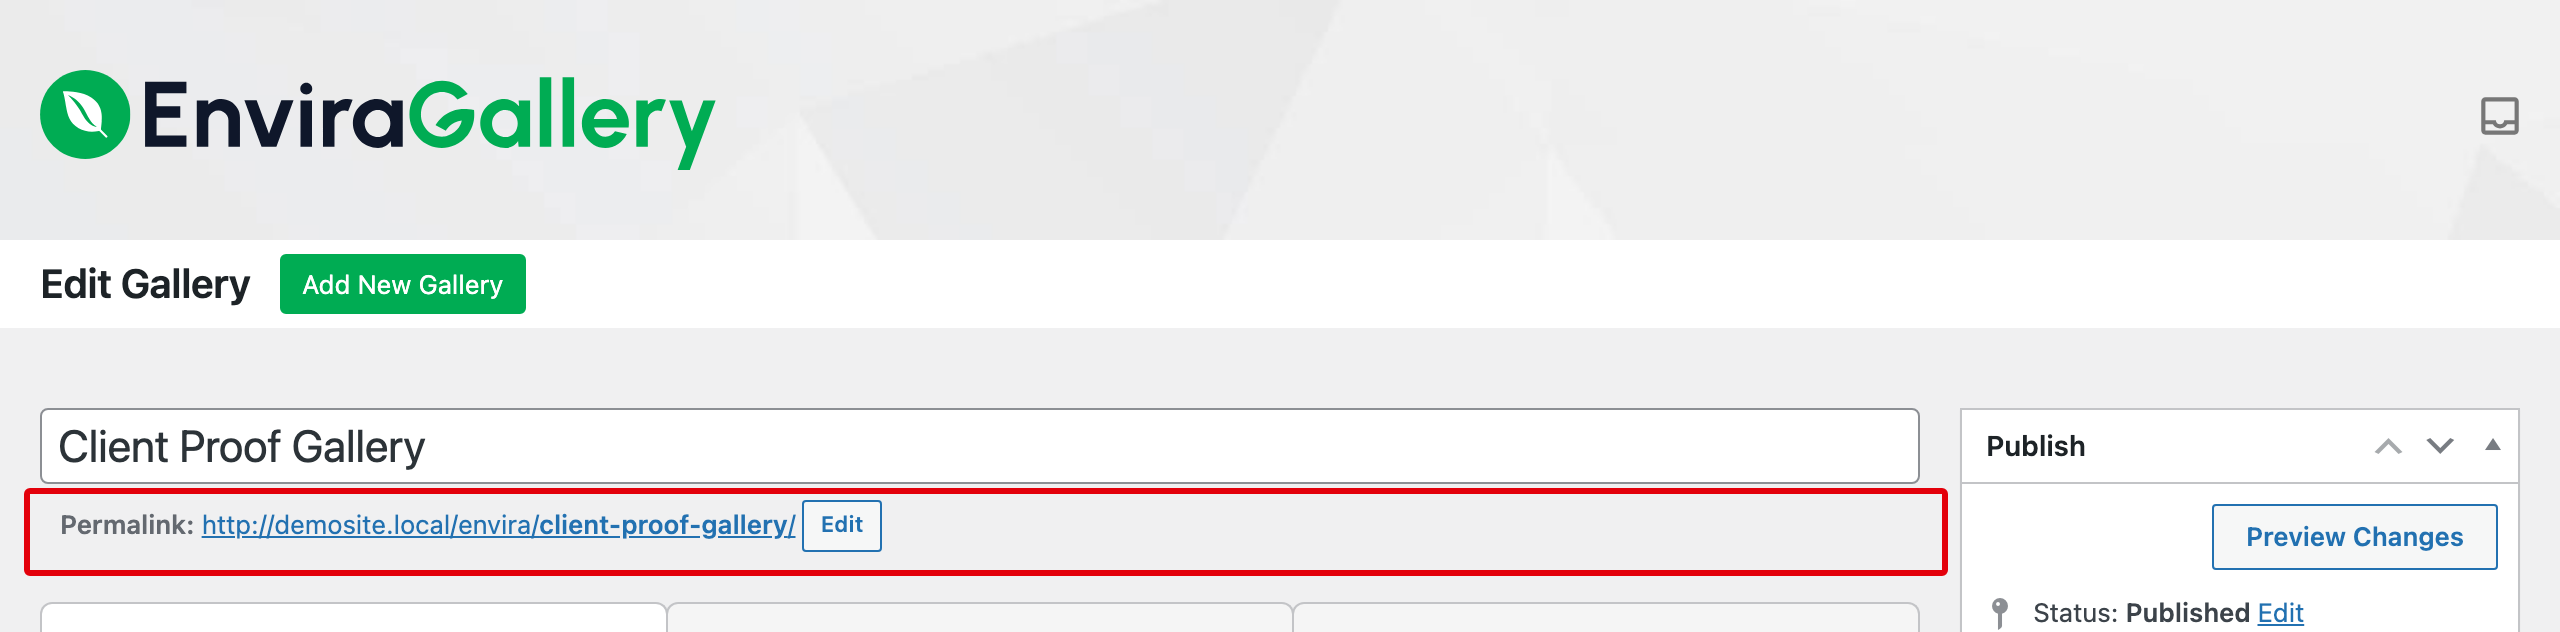
Share the password separately — in a different message — for an extra layer of security.
Your client doesn’t need a WordPress account or any special software.
They just visit the link, enter the password, and the gallery opens right up for them.
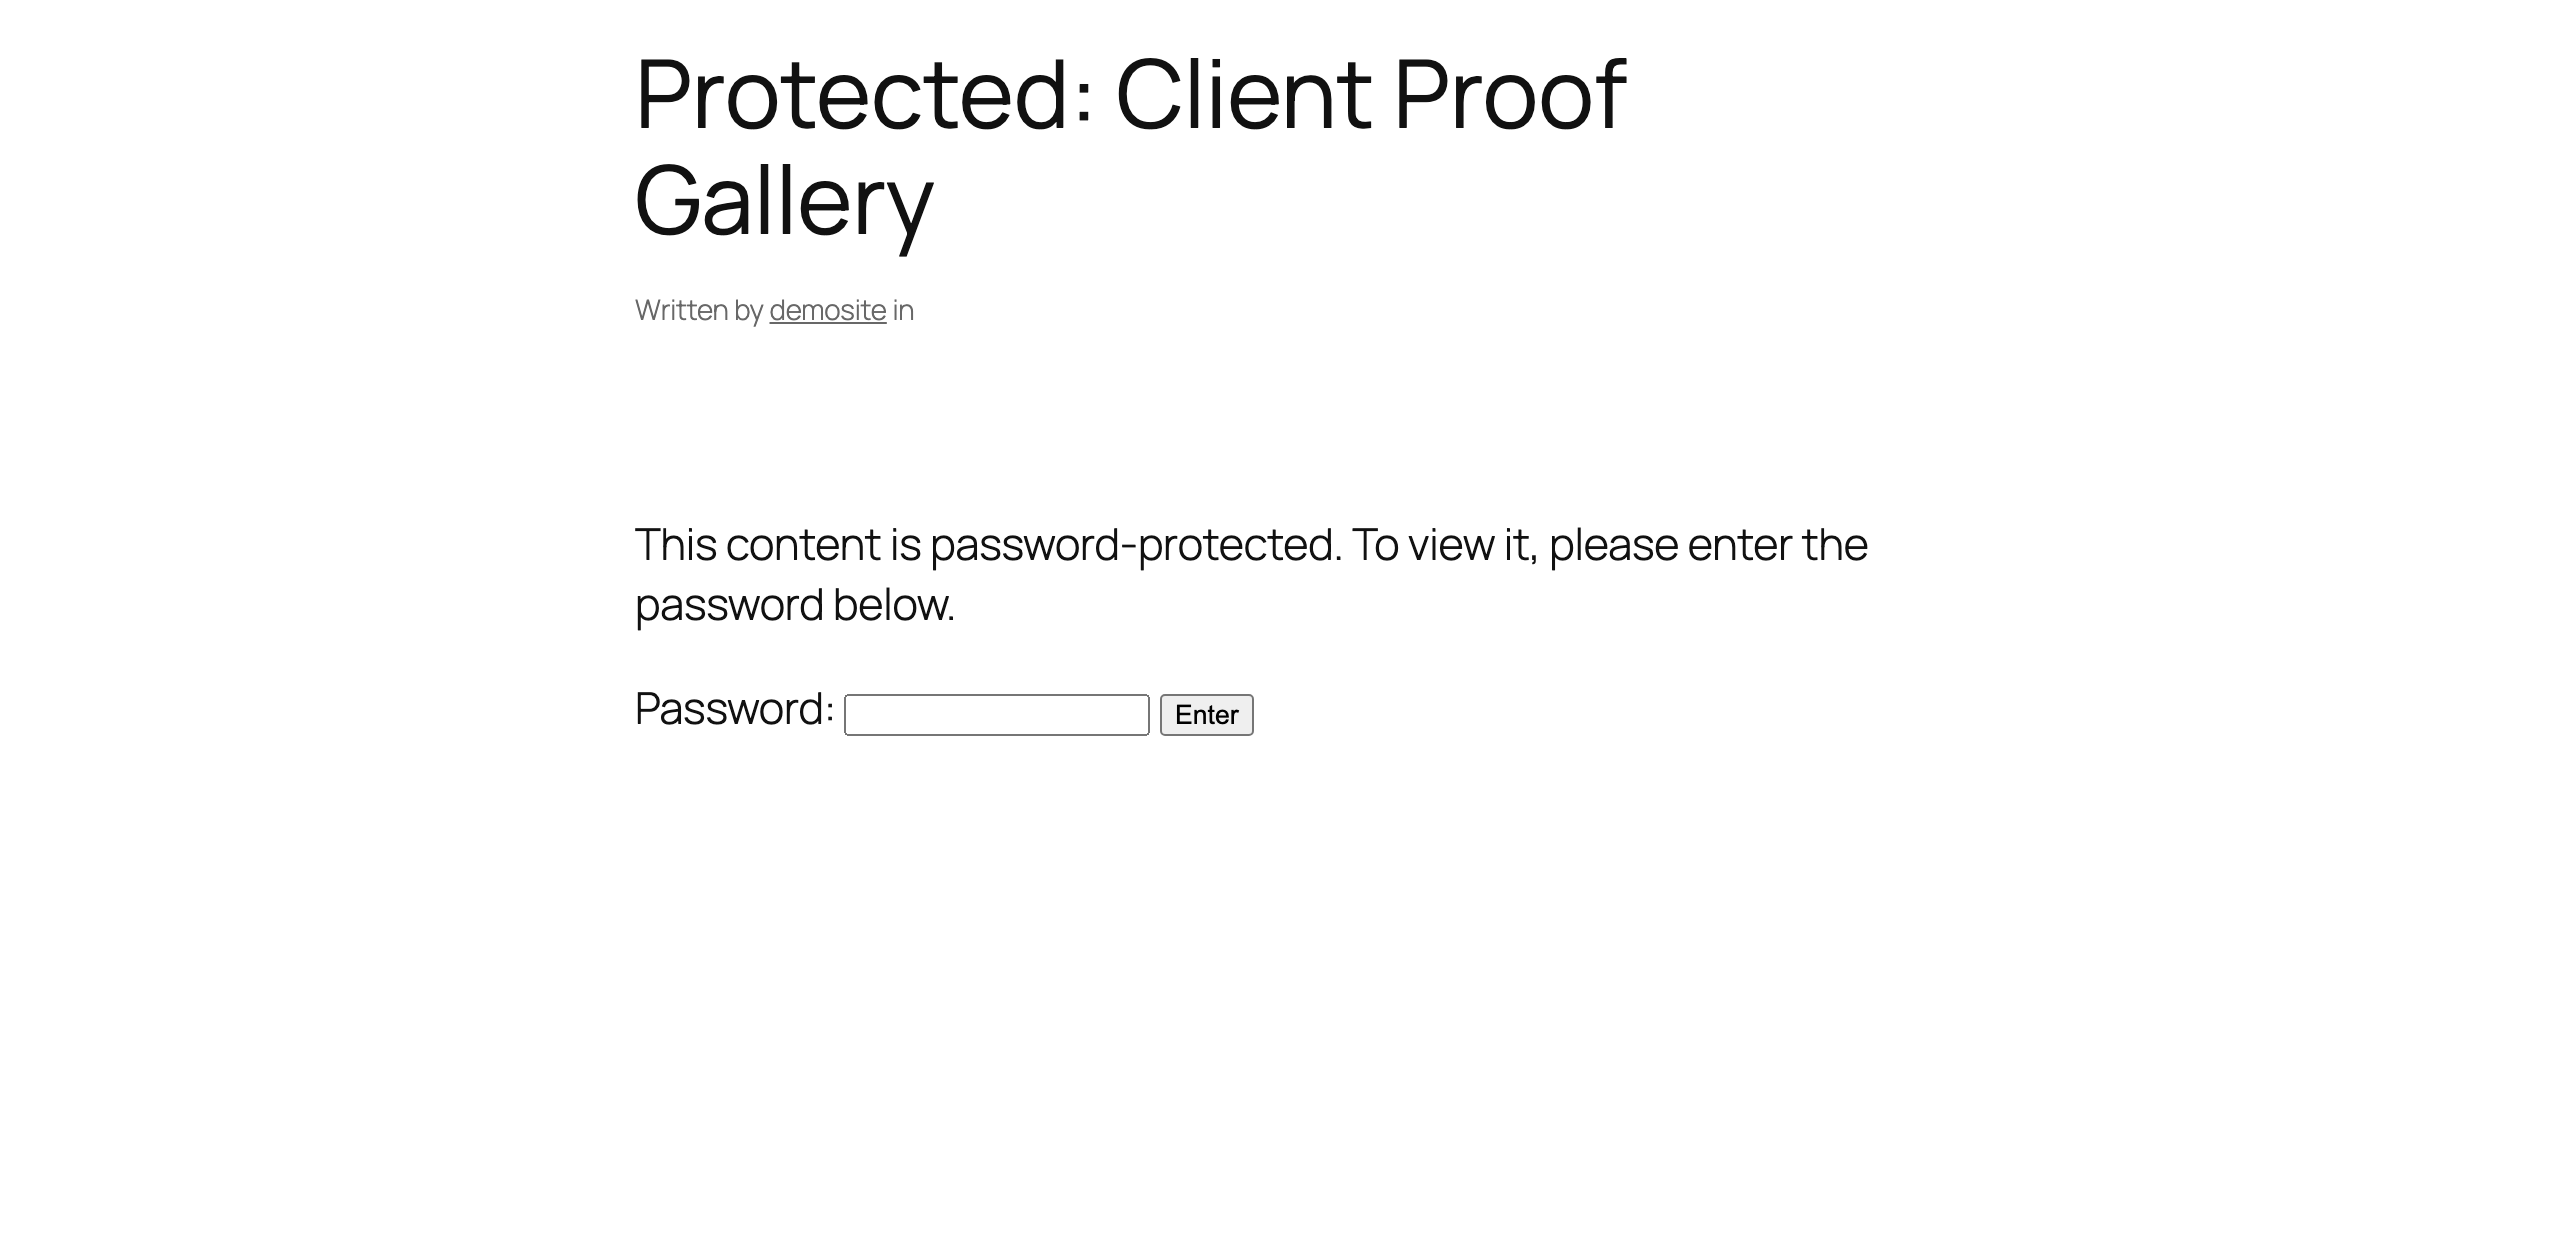
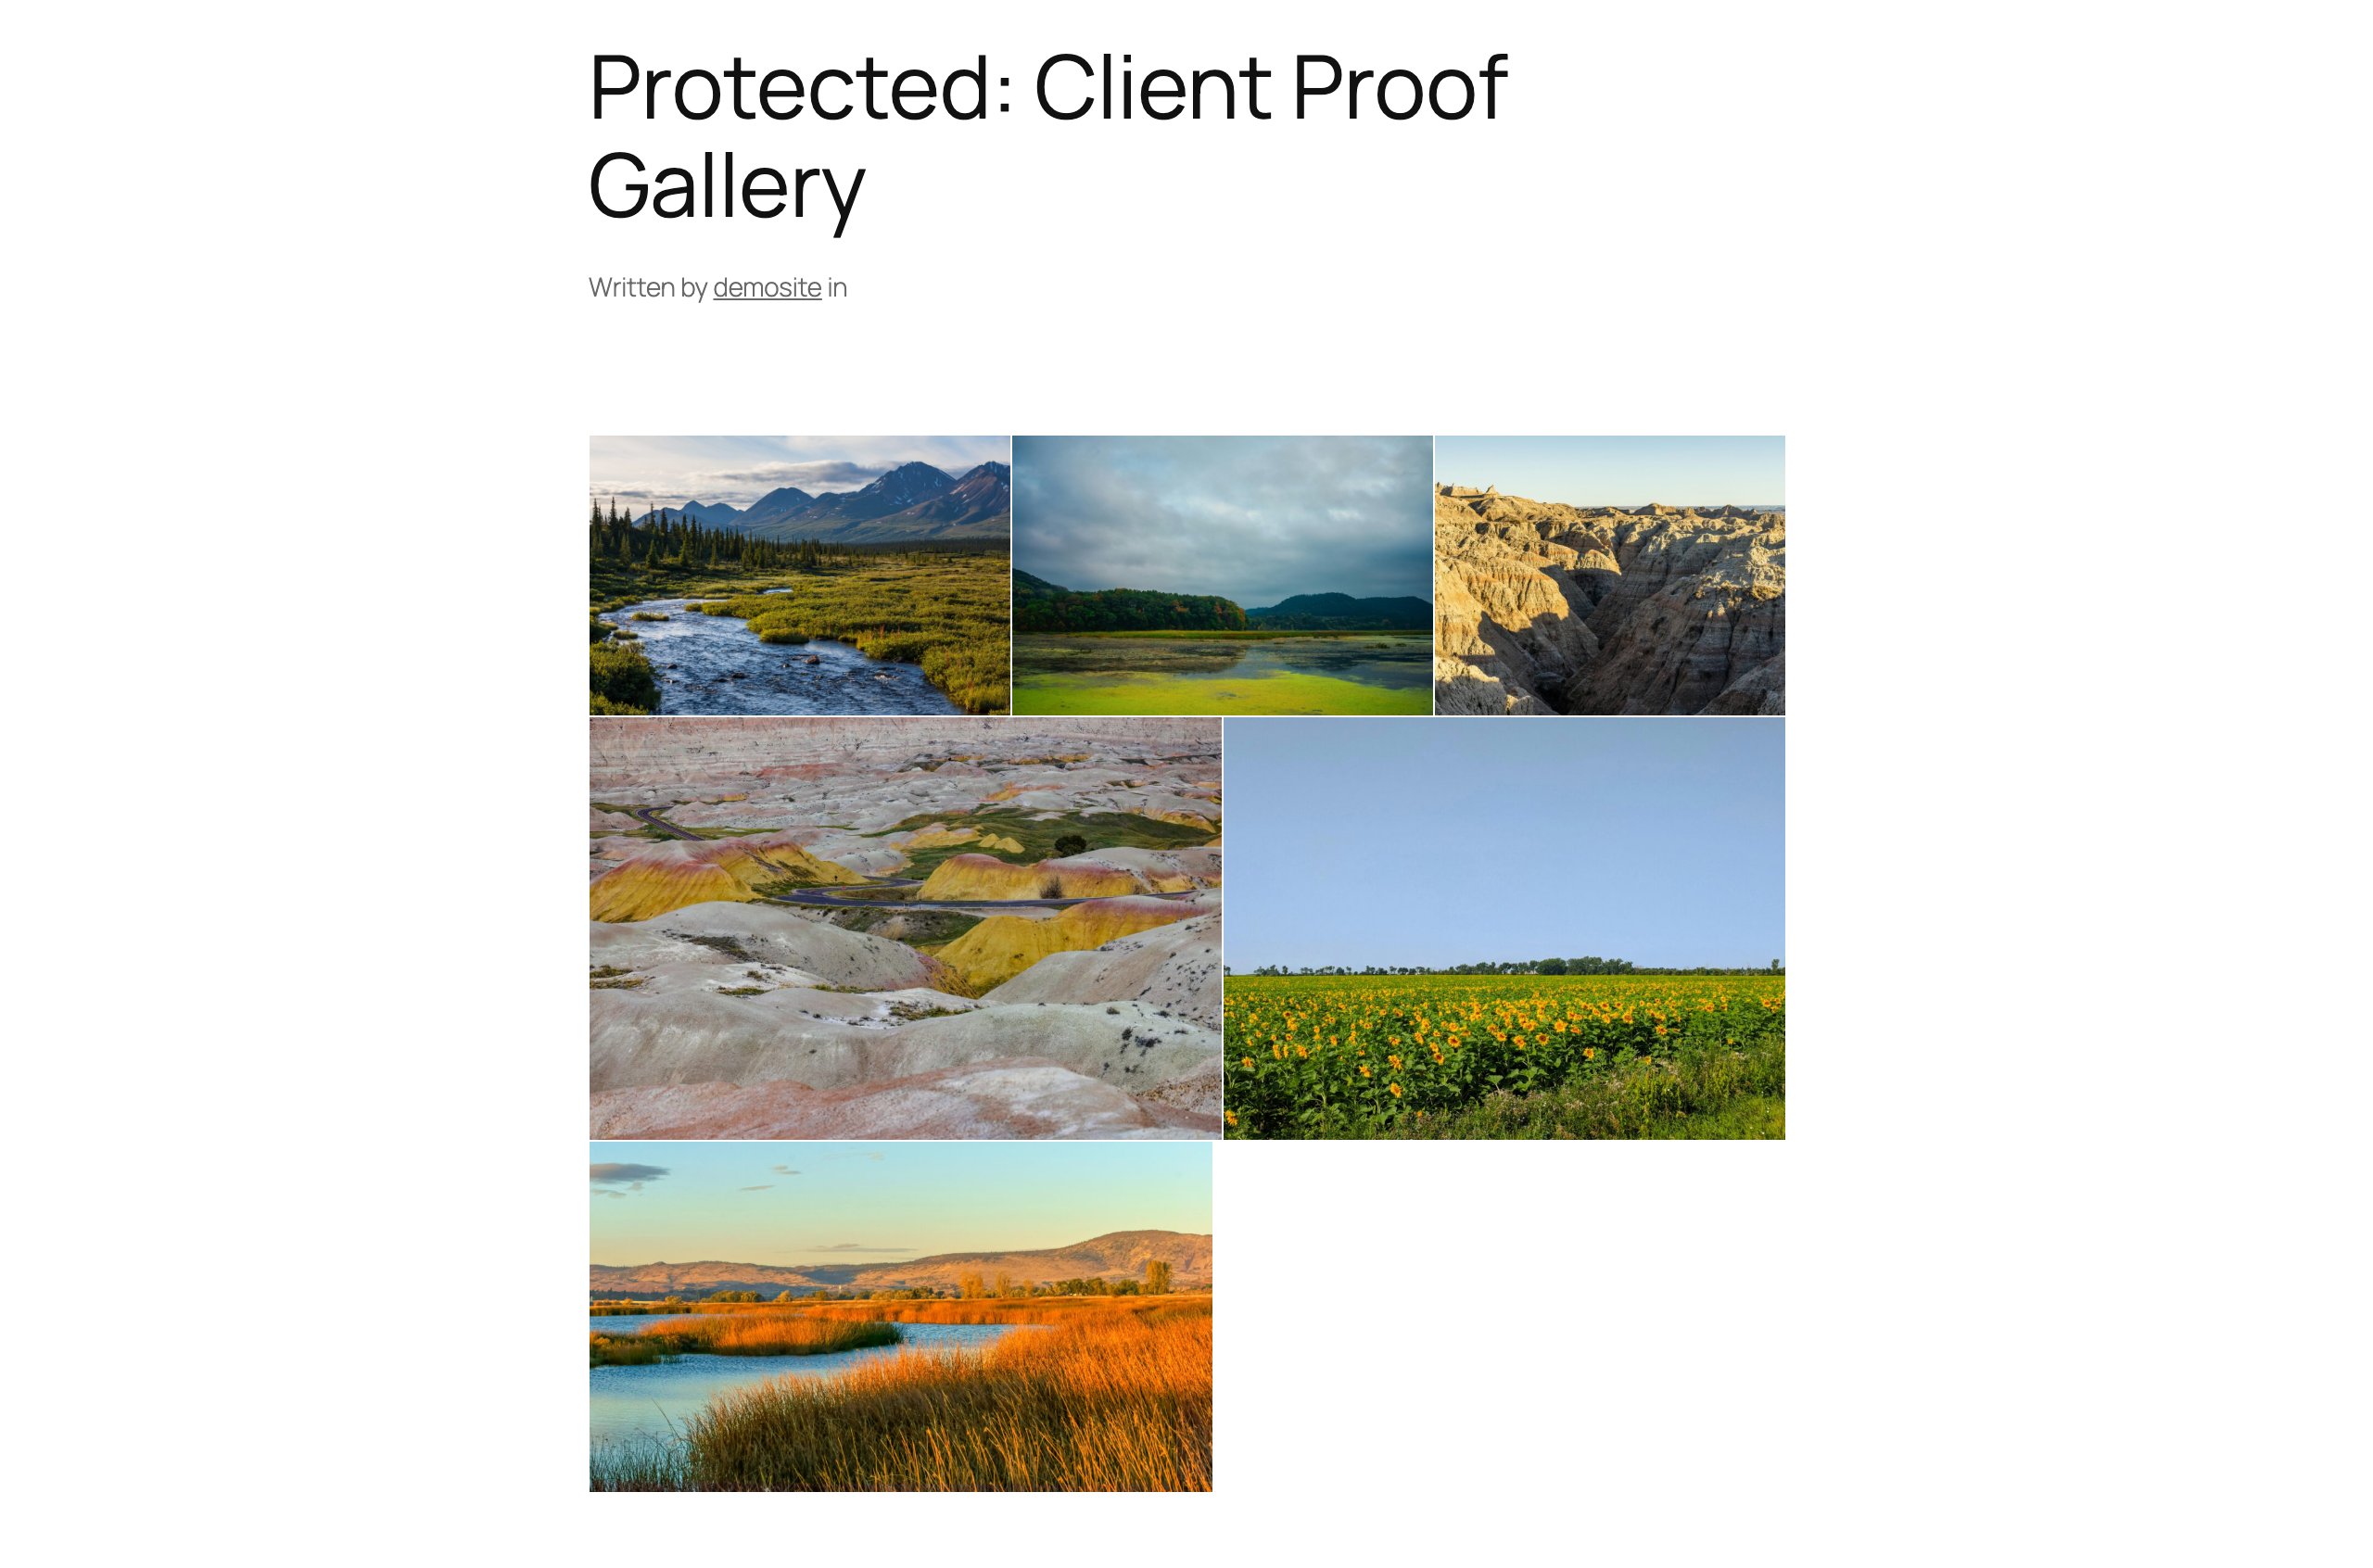
Once they enter the correct password, the gallery loads instantly — no redirect, no reload.
The gallery opens in whatever layout you’ve configured in the editor — mosaic, grid, slideshow, or any of Envira’s other display styles. Here’s what your client sees when the gallery opens:
Using a Private Share Link Instead
Prefer not to deal with passwords at all? The Password Protection addon also supports private share links — unique URLs that grant access without requiring a password entry. You generate the link, share it directly with your client, and anyone without that specific URL simply can’t access the gallery.
Private share links are a great option when you want a frictionless, one-click experience for clients who aren’t tech-savvy. No passwords to forget, no support emails to answer.
⚠️ Heads Up: Albums + Lightbox
If you add a password-protected gallery to an album that has Lightbox enabled, the images in that gallery can become visible without triggering the password prompt. To keep your content protected, either password-protect the entire album as well, or disable Lightbox for that specific gallery.
With password protection set up correctly, your clients get a clean, private experience every time they visit the gallery link.
If you’re building a simple client proof gallery or locking down a private portfolio, the steps above are everything you need to get started.
Protect Your Galleries — Starting at $69.50/yr
Password protection is available on Envira Gallery’s Plus plan and higher. Get started and keep your best work in the right hands.
Take It Further: Client Proofing with Envira Gallery
Password protection gives your clients private access to a gallery. But if you want them to be able to mark their favorite photos, leave feedback, and submit their final selections, the Proofing addon takes it a step further.
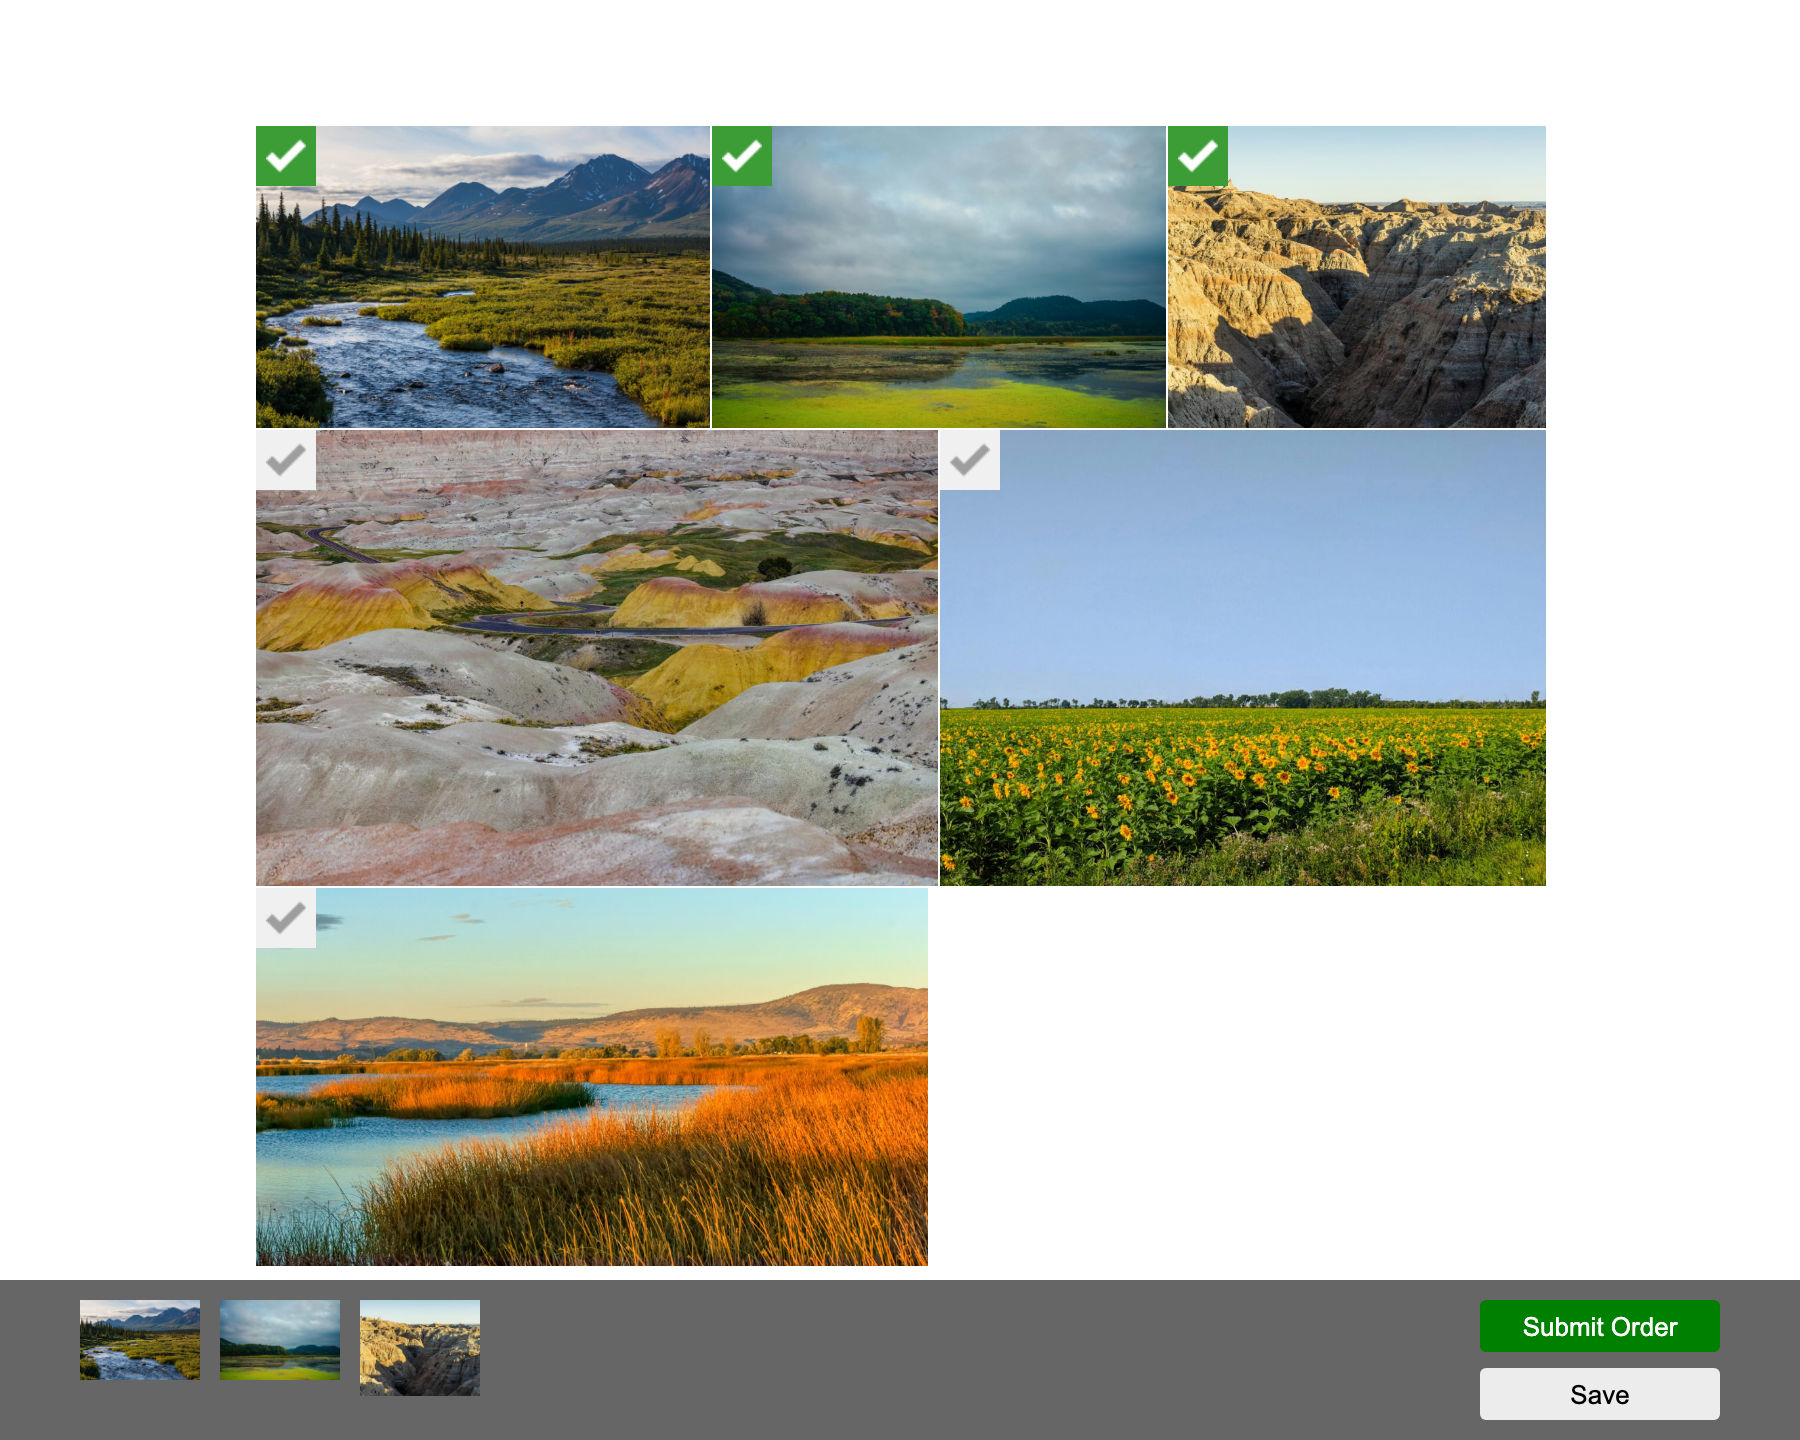
Available on the Pro plan and higher, Client Proofing turns a simple gallery into a full approval workflow.
Your client can flag their picks, you get notified, and you both stay organized without a single email thread. Explore the Proofing addon to see how it fits into a professional delivery workflow.
FAQs: Password Protected Image Galleries in WordPress
What Envira Gallery plan includes password protection?
Password protection is available on the Envira Gallery Plus plan ($69.50/year) and all higher tiers. It is not available on the free Lite plan. You can review all plans on the Envira Gallery pricing page.
Can I set different passwords for different galleries?
Yes. Each gallery has its own visibility settings, so you can set a unique password for each one. This makes it easy to share different galleries with different clients without any overlap.
Do my clients need a WordPress account to view a protected gallery?
No. Clients just need the gallery URL and the password you set. They visit the link, enter the password, and the gallery opens — no account, no plugin, no hassle on their end.
What’s the difference between password protection and client proofing?
Password protection restricts who can view a gallery — it’s all about access control. Client Proofing goes a step further by giving clients tools to mark their favorite images, add notes, and submit a selection list back to you. Password protection is included in the Plus plan; Client Proofing requires the Pro plan.
Can I password protect an entire album in Envira Gallery?
Yes. The Password Protection addon works with both individual galleries and Envira Albums. Setting a password on an album protects the entire collection, including all galleries inside it. This is the recommended approach if you’re adding password-protected galleries to an album with Lightbox enabled — protecting the album ensures nothing slips through.
That’s it! I hope this article helped you set up a password-protected gallery on your WordPress site. If you liked this article, check out the following resources:
- How to Create a Client Gallery & Proof Images Online
- Polished and Protected: How to Watermark WordPress Images
- How to Protect Your Website from Image Theft
- NEW Gallery Permissions: Secure Content, Streamlined Collaboration
- How to Hide Password Protected Galleries from the WordPress Loop
Don’t forget to check out our blog and follow us on X (Twitter) for the best photography tips, resources, and WordPress tutorials.










Does it password protect individual images too? Say if I have the URL of the photo file itself? Coz right now other plugins and WordPress password privacy setting don’t seem to safeguard that
Hi, it will protect the Envira Gallery individual images, so we recommend you to add all images on your site using Envira.