Want to learn how to verify Pinterest in WordPress? Verifying your website for Pinterest allows you to see what people are saving from your domain. In this article, we will share how to verify Pinterest in WordPress (step by step).
When you verify your website on Pinterest, you’ll be able to see all the stats for images pinned from your site– not just the Pins that you save to your own profile. This way, you can monitor what other people are saving from your website.
To verify Pinterest on your WordPress website, you’ll need to follow these 3 steps:
- Step 1. Generate verification code from your Pinterest account
- Step 2. Install and activate Insert Headers and Footers plugin
- Step 3. Add the Pinterest verification code to your site
Ready to get started? Let’s go!
Step 1: Generate Verification Code from Your Pinterest Account
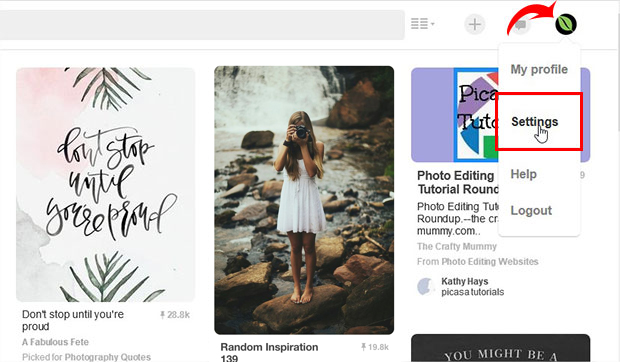
First thing you need to do is to generate the verification code. Simply login to your Pinterest account and hover on your account’s icon in the top right corner. Then click on Settings.
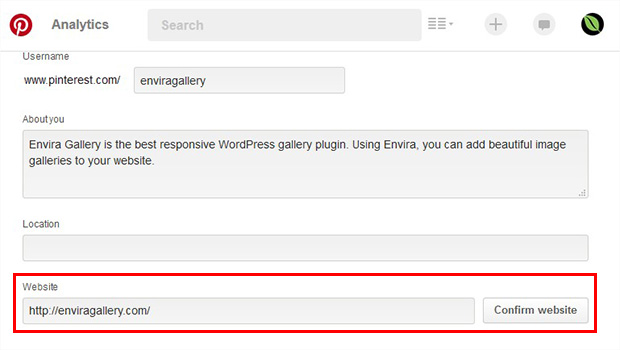
Now scroll down to the Website field and add your site’s URL. Hit the Confirm website button.
A dialog box will popup with some code to add to your website. Go ahead and copy this code to your clipboard (we’ll use it in step 3).
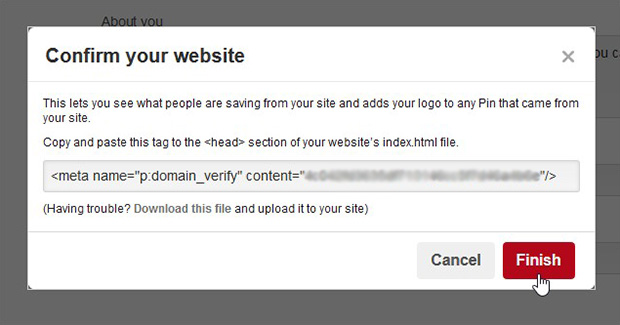
Don’t click on the Finish button yet– just leave this window open for now.
Step 2: Install and Activate Insert Headers and Footers Plugin
Next, open up a new browser tab and go to Plugins » Add New from your WordPress admin backend. In the search tab, type “Insert Headers and Footers”.
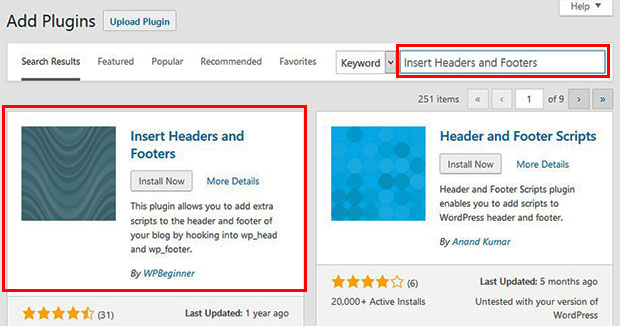
Click on the Install Now button for the Insert Headers and Footers plugin, then click on the Activate button.
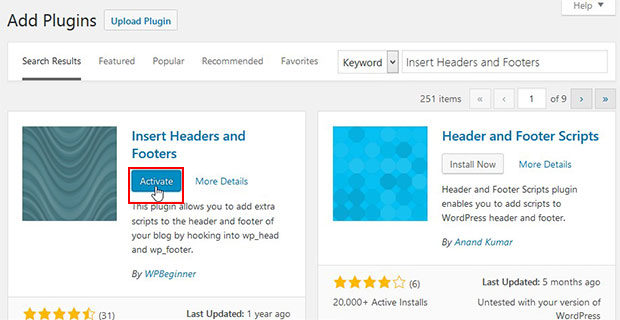
Now you are ready to add your Pinterest verification code!
Step 3: Add the Pinterest Verification Code to Your Site
Go ahead to Settings » Insert Headers & Footers and paste the verification code you copied earlier into the Scripts in Header section.
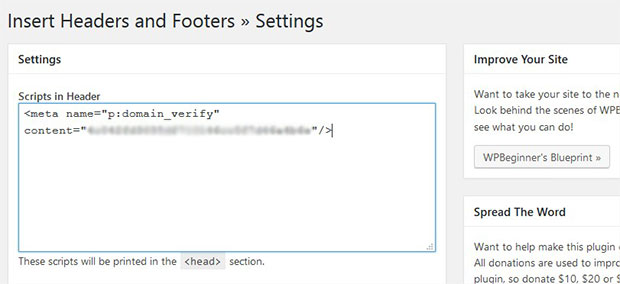
Hit the Save button on the page.
Now, go back to your Pinterest screen and click on the Finish button to complete the process.
That’s all. We hope this article has helped you to learn how to verify Pinterest in WordPress. You may also want to check out our guide on how to add a Pinterest button to image galleries in WordPress.
If you like this article, then please follow us on Facebook and Twitter for more free WordPress tutorials.


Hey, thanks for this tip. Sadly I don’t have the business plan, only premium, is there anyway to claim my site with just the Premium? I would totally upgrade but in order to do that it will cost me over $300 and I just don’t have that
What if i lost the code? how can i retrieve it?