Envira Gallery is a responsive gallery plugin that helps you showcase and share your professional portfolio. It also provides tons of customization options through its configuration and settings panels.
If you haven’t already, read our article on how to showcase your products, portfolio, or services with Envira Gallery’s Albums Addon
To make the most out of Envira Gallery, it’s worth familiarizing yourself with its general settings. Licensing, gallery image settings, loading color customization, standalone option, and gallery/album slugs.
Let’s dig deeper into each of them and discover what purposes they serve.
Envira License Key
When you active the Envira Galley plugin, you get the free Lite version. Several paid plans differ in features, support, integration options, and more.
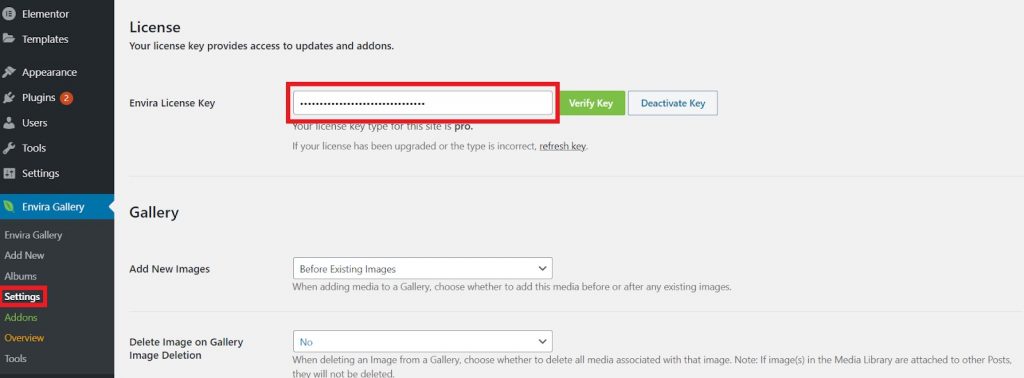
When you opt for a Basic plan or higher, you get a license key and added features. To activate them, copy the license key from your Envira Gallery account and paste it in the Envira License Key box under the Envira Gallery Settings menu. Click on Verify Key, and you’re all set!

To remove your current license, click on Deactivate Key. If you upgraded your license for more functionalities, you need to click on the Refresh Key to set Envira Gallery to your current tier and make use of all the added features.
Add New Images
When you add new images to a gallery, they either show up before the gallery’s existing images or after.
By default, Envira Gallery displays new images before the existing images. To change it, you can use the drop-down menu beside Add New Images and select After Existing Images.

Let’s see how both of these options affect a gallery visually. As an example, we’re adding a new ‘Sample’ image to an existing wedding photography portfolio gallery.


Note that these are just default settings. You always have the option to visit your gallery and manually reorder the images as you like.
Delete Image on Gallery Image Deletion
When you add an image to a gallery, it’s saved in your WordPress Media Library. The ‘Delete Image on Gallery Image Deletion’ option allows you to specify whether you still want an image in your Media Library after you delete it.

Delete Images on Gallery Deletion
Delete Images on Gallery Deletion serves a similar purpose, except that it specifies the condition when you delete a gallery rather than an image. Again, using the drop-down options, you can choose to keep or delete the images associated with that gallery.
By default, both image deletion options are set to ‘No.’ This means your images will not be deleted from the Media Library when you delete them. Keeping the images is useful when you intend to use them again on your website.
Customize Loading Graphic Color
When you open a webpage with Envira Gallery, you might see a loading animation on your screen before the gallery appears. You can customize the color of the animation using a color selection tool or a hex code.
The default loading graphic color is black (#000000), but we’ll change it to red for this demo.


Standalone
When the standalone option is enabled, each gallery has a dedicated page that can be accessed through a unique URL.
The Gallery and Album slugs allow you to set specific prefixes to all your galleries and albums.


