Do you want to learn how to create a photo album in WordPress?
You might already be familiar with creating a WordPress image gallery, but what happens when you have multiple galleries that you want to showcase? That’s where a WordPress photo album comes in!
In this article, we’ll show you how to create a photo album in WordPress the easy way.
Can You Create Photo Albums in WordPress?
You can create a simple WordPress gallery without a plugin, but WordPress doesn’t have album functionality for image galleries by default. However, WordPress plugins make it easy to create albums. You can use photo albums in WordPress to better organize your images and display multiple galleries in a cohesive layout. We’ll show you step-by-step how to make the best photo album in WordPress.
The Best WordPress Photo Album Plugin
Envira Gallery is the best WordPress image gallery and lightbox plugin available, allowing you to create a beautiful, responsive image or video gallery using an easy drag-and-drop builder. Then, you can add your galleries to an album, choose your cover photos, and embed your brand new photo album in WordPress.
You can choose from a variety of gallery templates including slideshow, fullscreen, masonry, grid, carousel, and more. Check out more of our most popular features:
- Filterable galleries and albums using tags.
- Lightroom integration and built-in image compression.
- Client proofing features and eCommerce integration to display and sell photos.
- Dynamic galleries to display content from other sources like blog posts, testimonials, Instagram posts, and more.
- Social sharing buttons on images, galleries, and albums.
- Watermarking, image protection, and password-protected galleries.
- And lots more…
Ready to learn how to add an album to WordPress using Envira Gallery? Let’s get started!
How to Create an Album Gallery in WordPress
In only a few steps, you’ll be able to add a photo album gallery to your website and captivate visitors.
Step 1: Install Envira Gallery
To add a photo album to WordPress, the first thing you need to do is install and activate the plugin. Head to the Envira Gallery pricing page and grab a Pro license or above to access the WordPress photo albums addon.
Next, download the plugin’s ZIP file and install and activate it on your WordPress website. If you need help with this step, check out this tutorial.
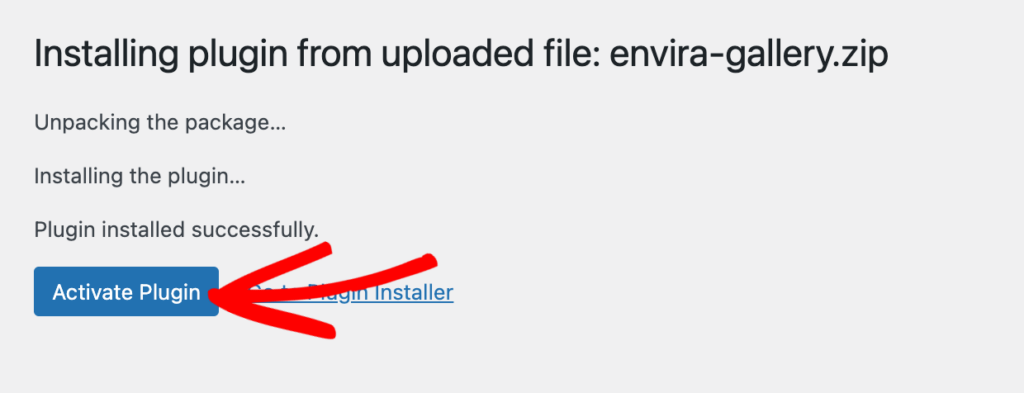
After the plugin is installed and activated, you need to verify your license key. Go to Envira Gallery » Settings from your WordPress dashboard. Paste your license key and click Verify Key.
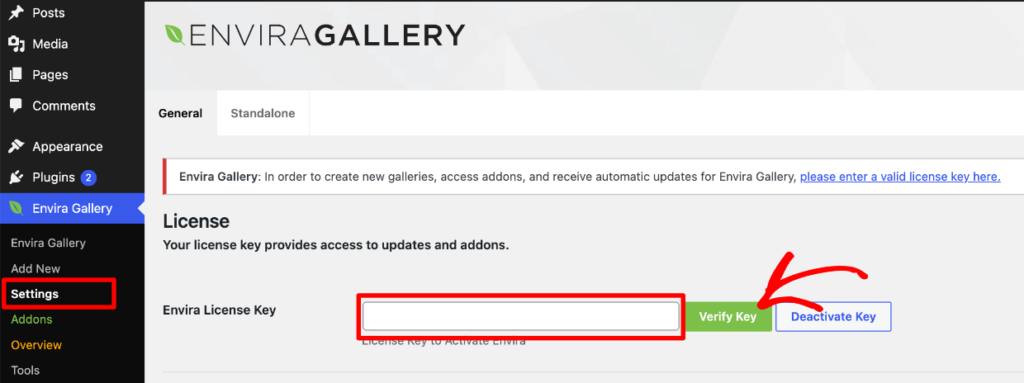
After that, it’s time to install the Albums addon and make a WordPress photo album.
Step 2: Activate Albums and Standalone Galleries
Head to Envira Gallery » Addons. Find the addon called Albums and click the Install button.
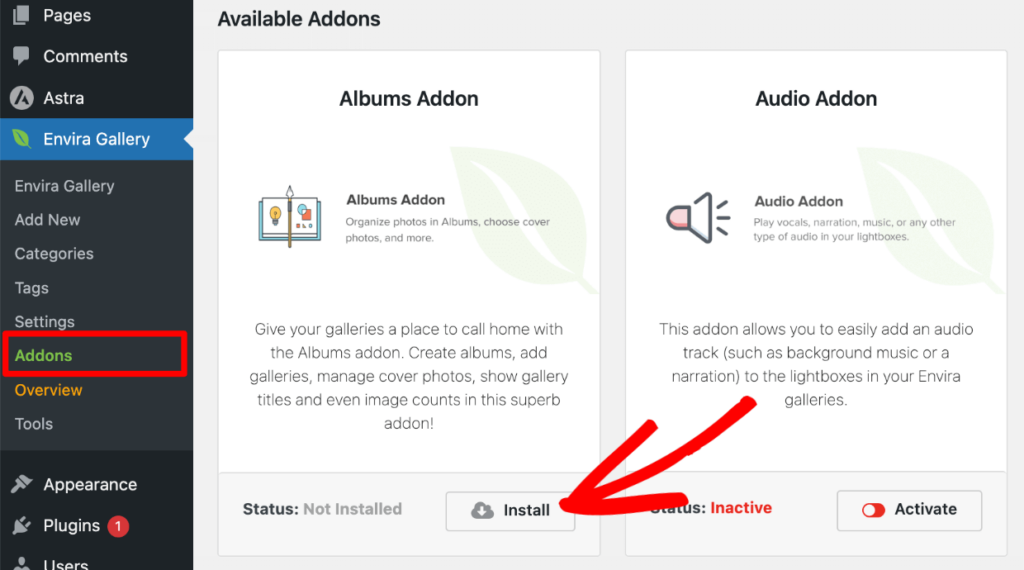
Once it finishes installing, the button will say Activate. Click it and wait for the status to turn green.
You will also need to enable the Standalone feature to use the Albums Addon. To activate it, go to Envira Gallery » Settings. From there, click the Standalone tab, check the box to Enable Standalone, and press Save.
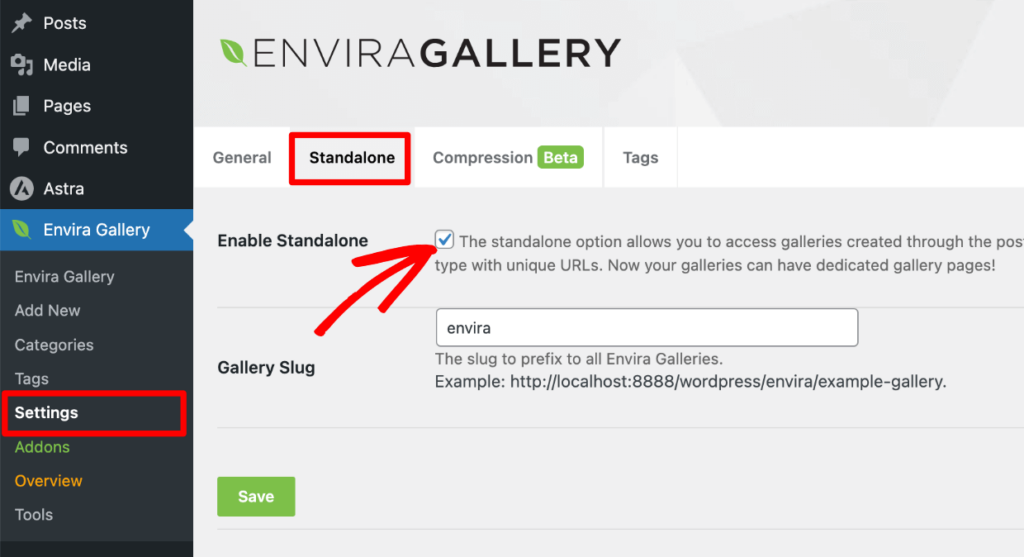
Now that the Albums addon and Standalone feature are active, you’re ready to learn how to use photo albums in WordPress.
Step 3: Add a Photo Album in WordPress
The next thing you need to do is create a few galleries. If you haven’t created a WordPress image gallery with Envira before, you can read more about it in How to Create a WordPress Photo Gallery.
Once you’ve created multiple galleries that you want to add to an album, go to Envira Gallery » Albums. Click on the Add New button to create a new photo album in WordPress.
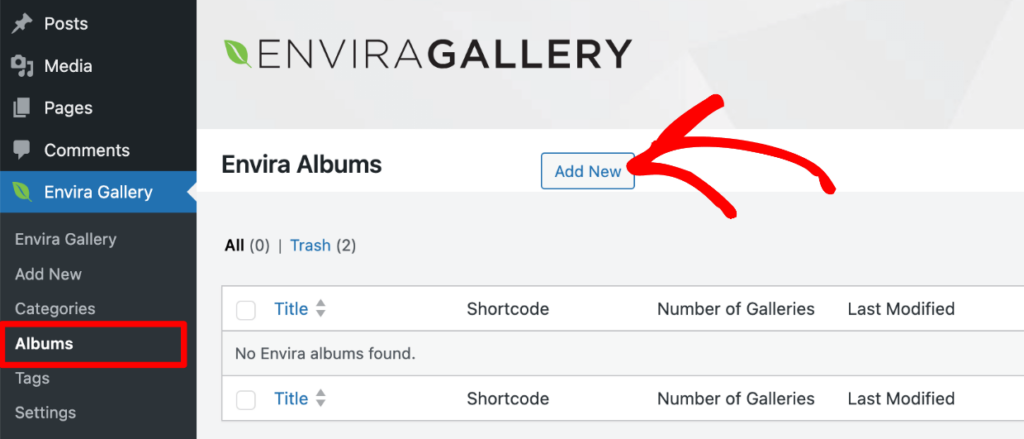
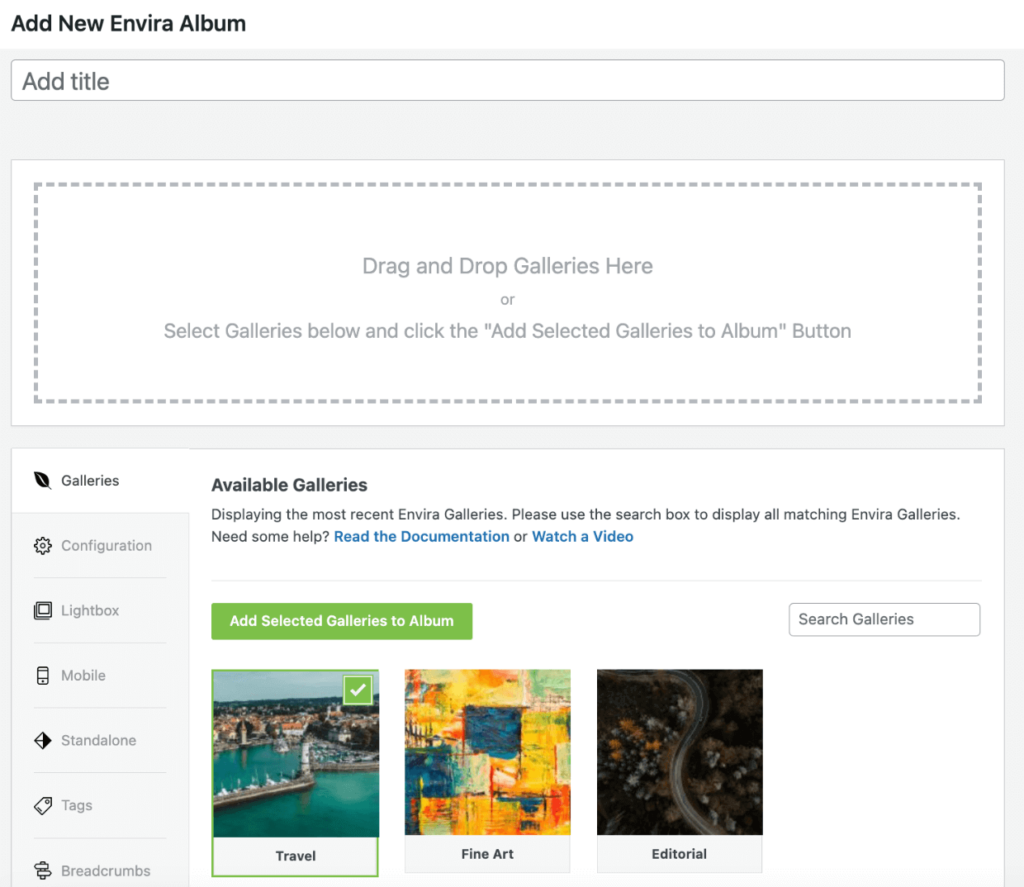
A new window will open where you’ll be asked to add a title at the top.
Then, add your image galleries to the photo album by dragging or selecting them from the Available Galleries section below. The process is similar to creating a gallery.
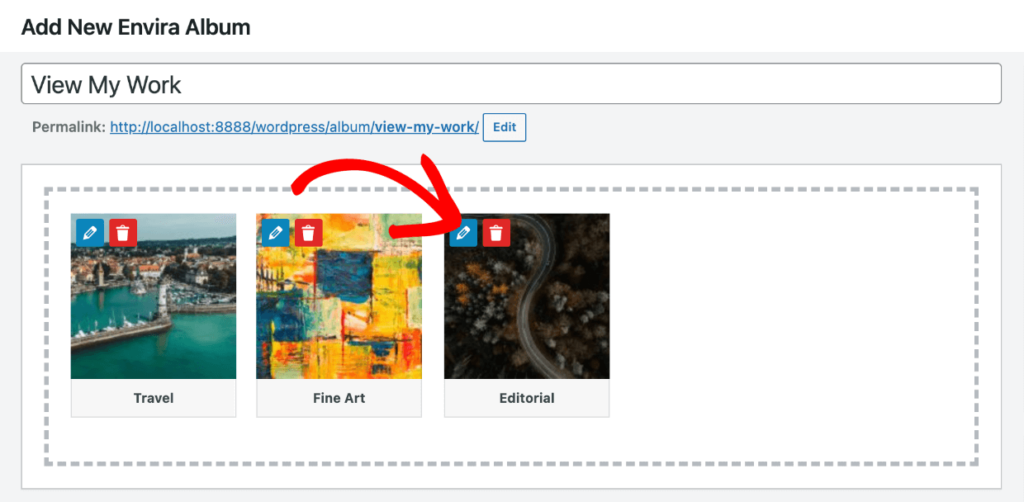
After adding galleries to your WordPress photo album, we recommend adding meta data for each gallery. You can do this by clicking the blue Pencil Icon on each one.
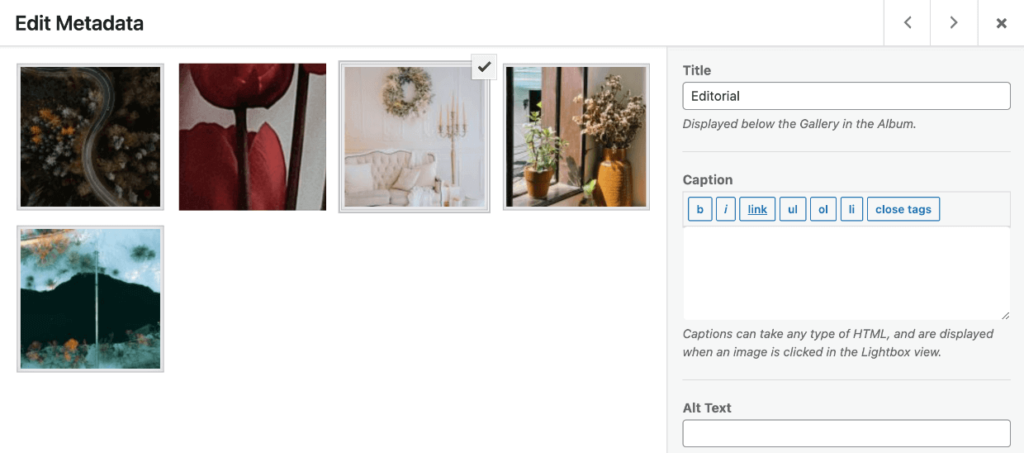
In the Edit Metadata window that opens, click to select which photo you want to use as the gallery’s cover photo (or upload your own). Then, add a caption and alt text to the gallery.
Next up, let’s see how to customize your WordPress photo album.
Step 4: Customize Your WordPress Photo Album
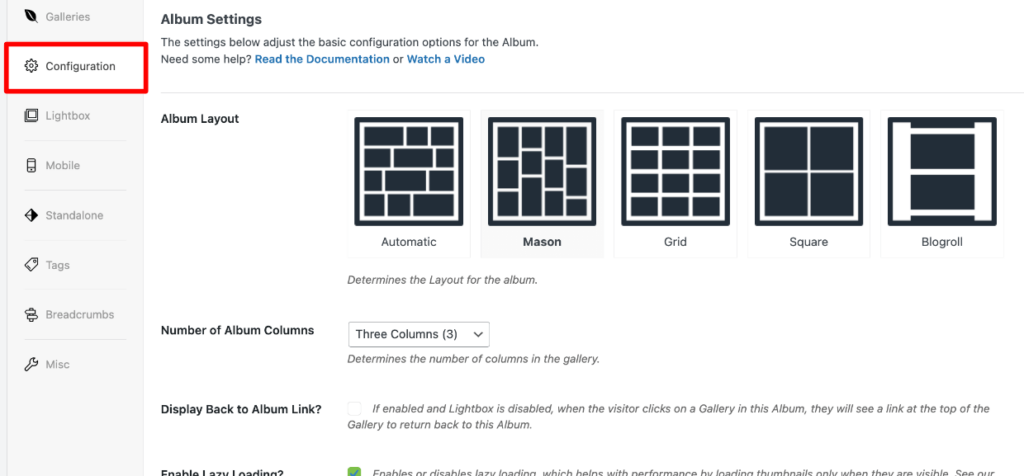
After saving the meta data for each gallery in your album, click the Configuration tab.
Here, you can pick a layout, edit the number of columns, add an album description to display, select an album theme (if you’ve activated the Gallery Themes addon), enable a “Back to Album” link for each gallery, and adjust other settings.
By default your album will show the chosen cover photo for each gallery, which will link to that gallery page. However, you can choose to have the cover photo open a lightbox that displays the gallery’s images instead.
To select this option, click the Lightbox tab and enable it. Then, adjust the lightbox settings such as thumbnails, transitions, etc. to your preferences.
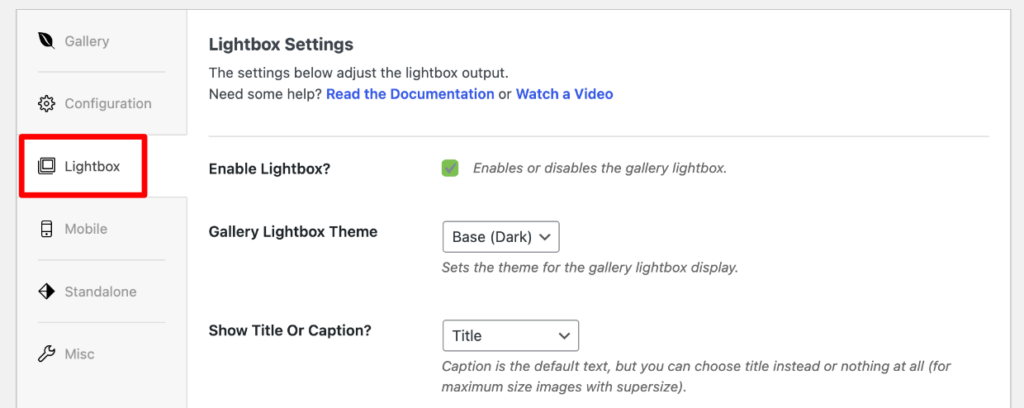
There are a lot of other settings you can play with depending on which addons you have installed, but for the sake of this tutorial, let’s move on to publishing your WordPress photo album.
Step 5: Embed Your Photo Album in WordPress
Once you’re satisfied with all the settings for your photo album gallery, click the Publish button.
Your album is now ready to add to your site! You can go back to Envira Gallery » Albums, and copy the Shortcode for your album.

Now, you can either create a new page or post, insert your photo album gallery in an existing one, or even place your WordPress album in a widget area, like the sidebar.
When you’re in the WordPress editor for a page or post, click the + sign to add a new block. Select the Shortcode block.

Now, just paste the album shortcode into the block to embed your album. Be sure to click the Publish / Update button at the top to save your changes!
After that, go ahead and visit your website to see how your photo album looks in WordPress.
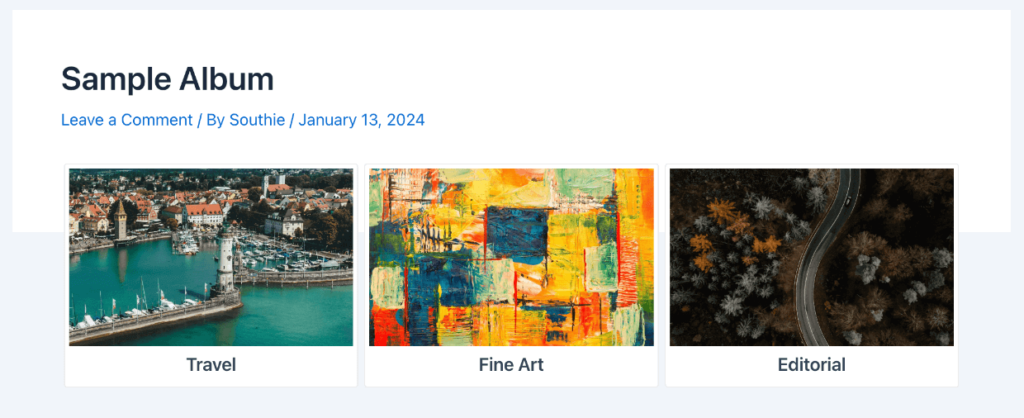
Click any of the galleries in your album to see the images it contains (either in a lightbox or on a page, depending on the settings you’ve chosen).
That’s it, you learned how to use a photo album in WordPress with Envira Gallery!
We hope you enjoyed making a WordPress photo album. Next up, want to learn how to make a WordPress searchable image gallery? Check out How to Tag Images in WordPress & Add Category Filters to a Gallery.
Not using Envira Gallery? Get started today!
Don’t forget to follow us on Facebook and X (Twitter) for the best photography tips, resources, and WordPress tutorials.

