Need help setting up Envira’s Social Addon? Look no further! In this guide, we’ll walk you through the steps necessary to create and add your Facebook Application ID to the Social Addon’s settings. This is a requirement by Facebook so you can share your Envira gallery and album images.
Requirements
Setup
Step 1 – Social Addon Settings Tab
First you will need to install and activate Envira’s Social Addon.
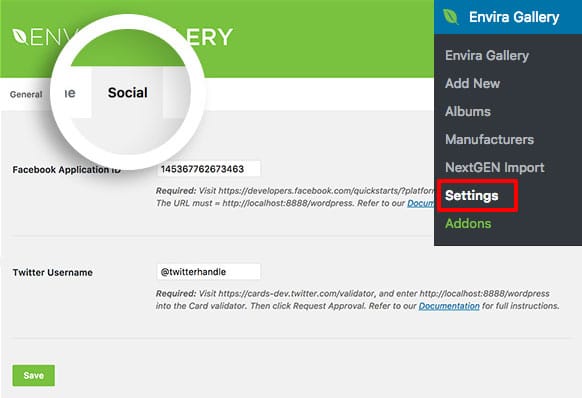
Next, navigate to the Envira Gallery » Settings and select the Social tab. Here you’ll find the Facebook Application ID field.
Step 2 – Create a Facebook Application
Visit https://developers.facebook.comquickstarts/?platform=web to create a Facebook App ID.
Facebook requires to you to have a Facebook developer account before you can create your App ID. Click the Register button to complete this process.

Once you’re logged in as a developer to Facebook, click the Add A New App link from the menu under your name in the top right corner of the screen.

A window will open asking you to enter a Display Name for your App. Enter your name and click click the Create App ID button. Facebook will ask you to complete a security check next and then redirect you to another page.

The name you give your App is displayed in the Facebook share window. You’ll need to keep that in mind as your name your App.
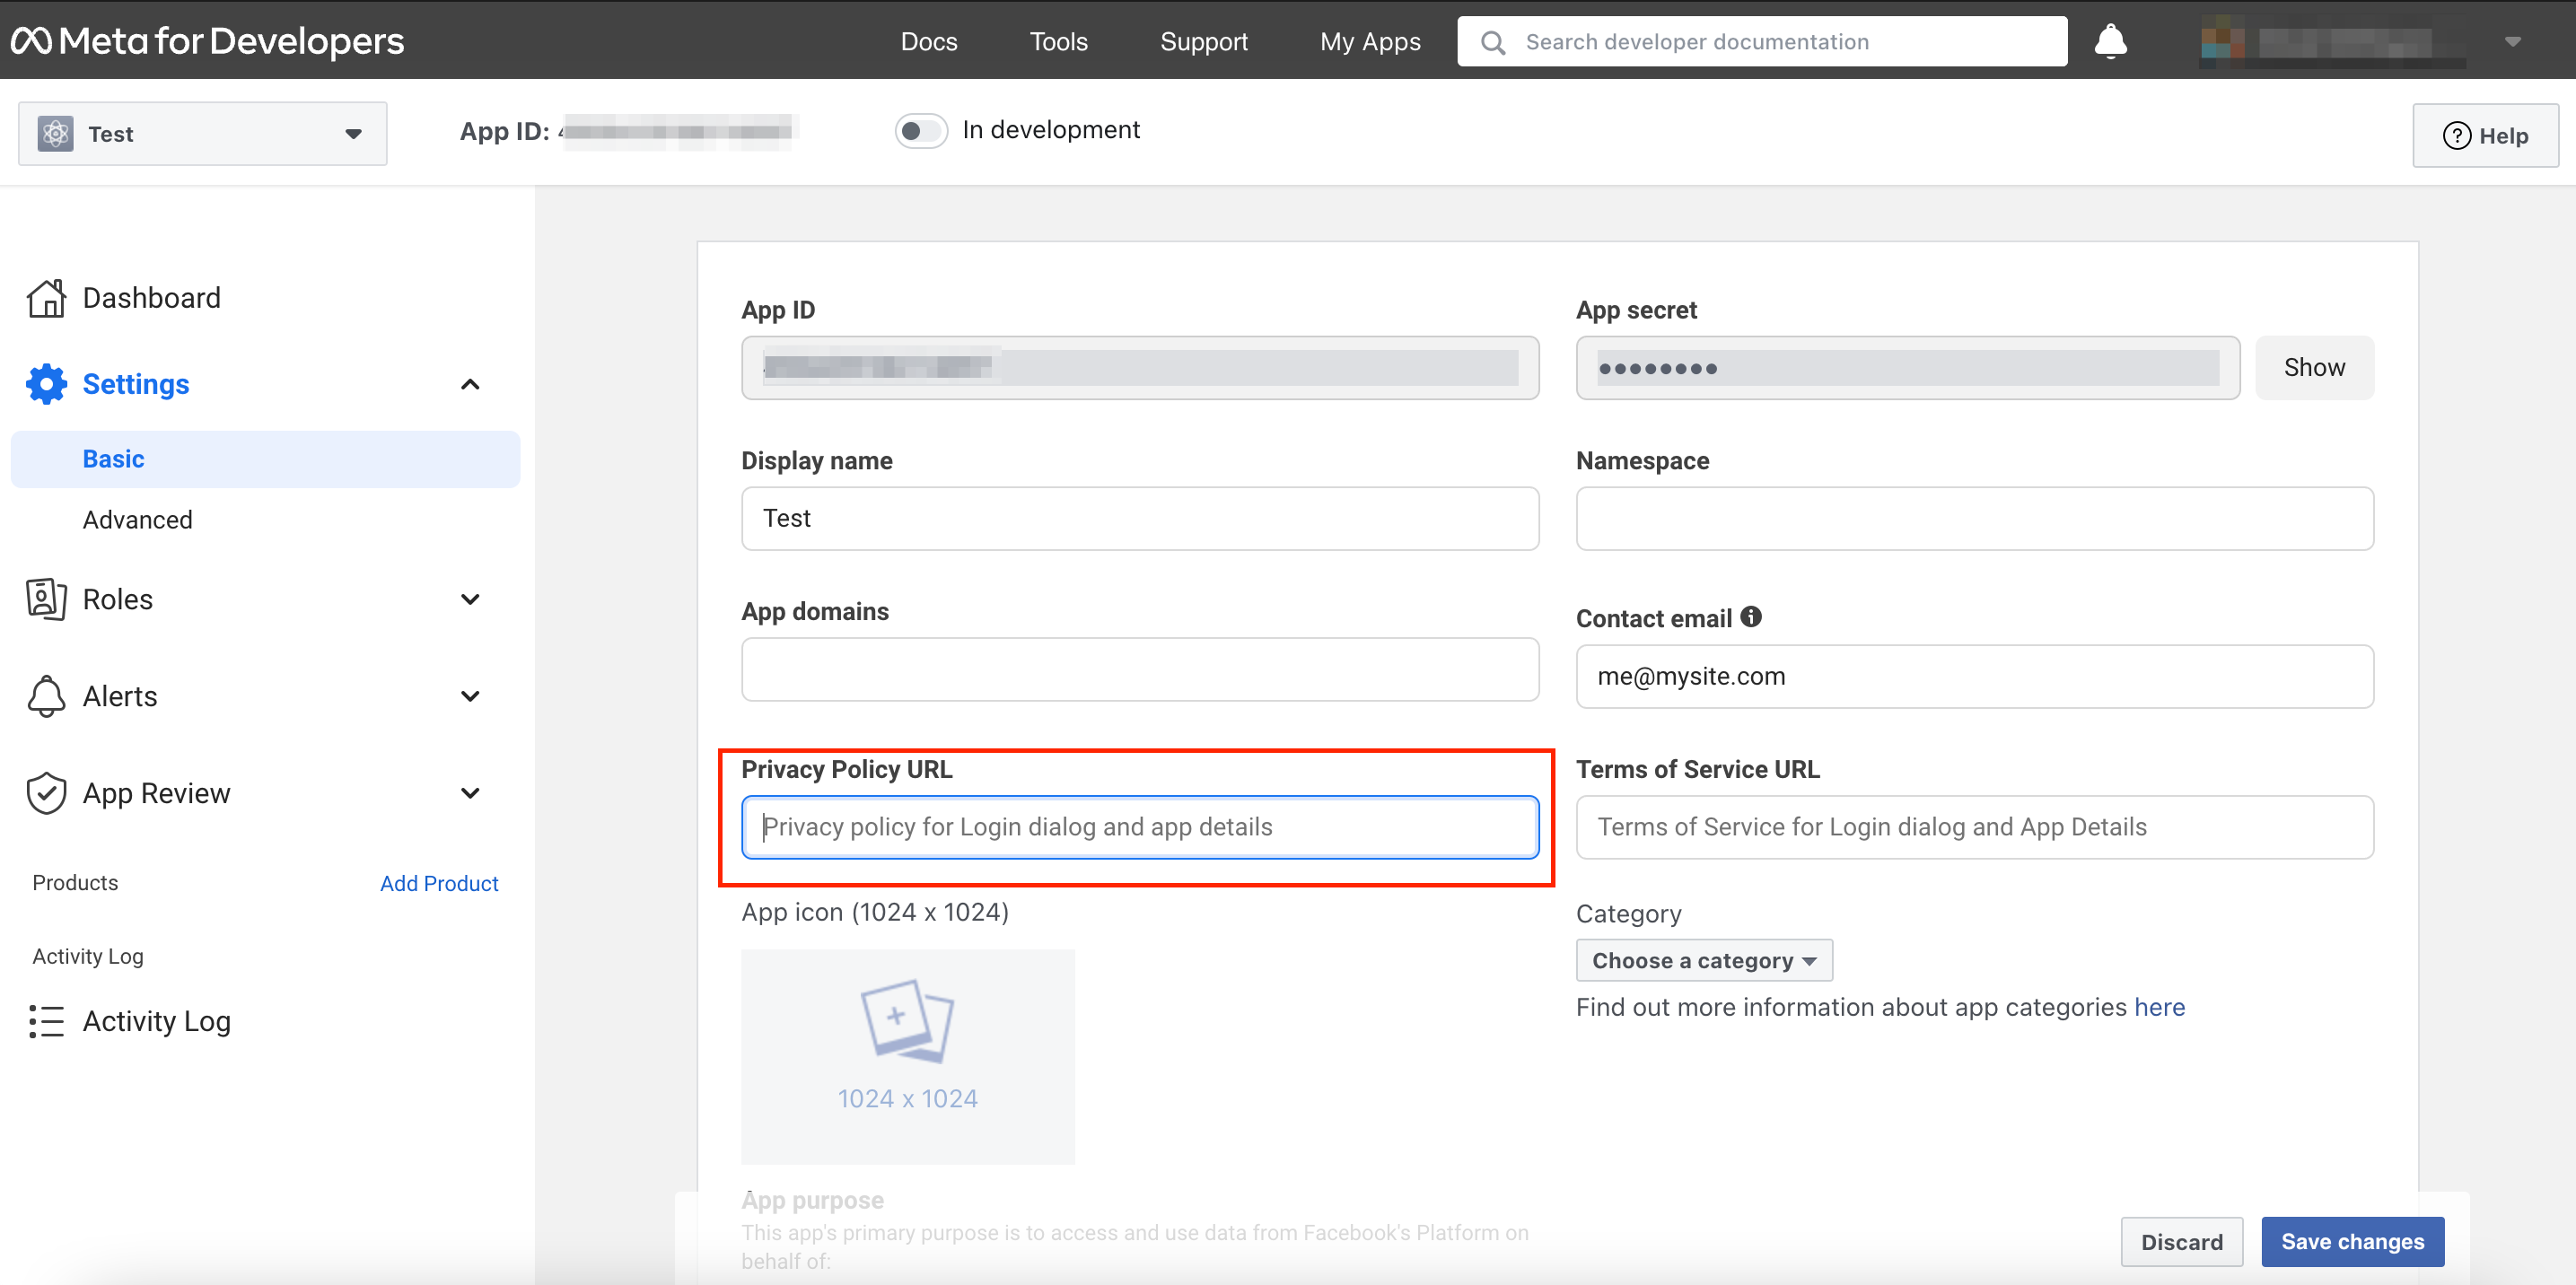
Next, click the Settings from the left side menu and add the URL for your Privacy Policy. If you don’t have one, you can simply enter your site URL.
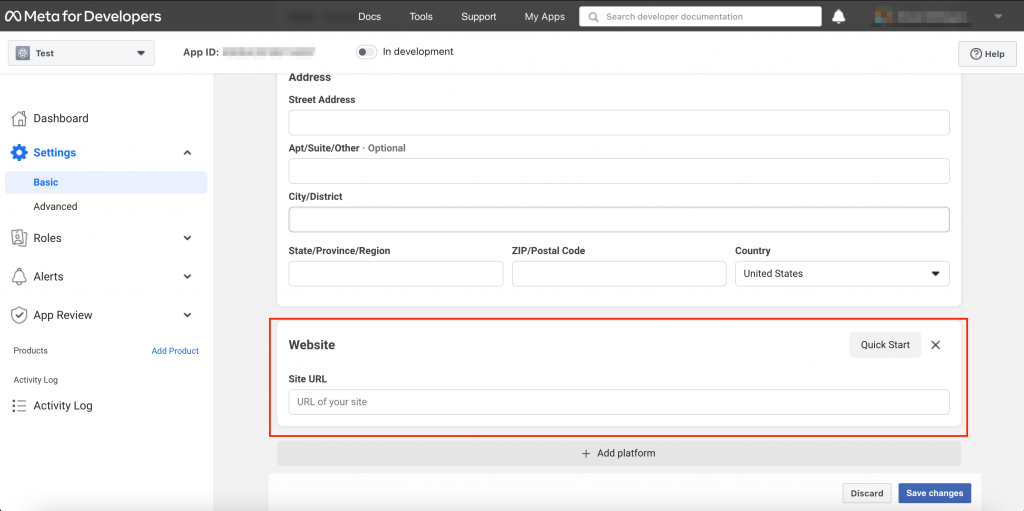
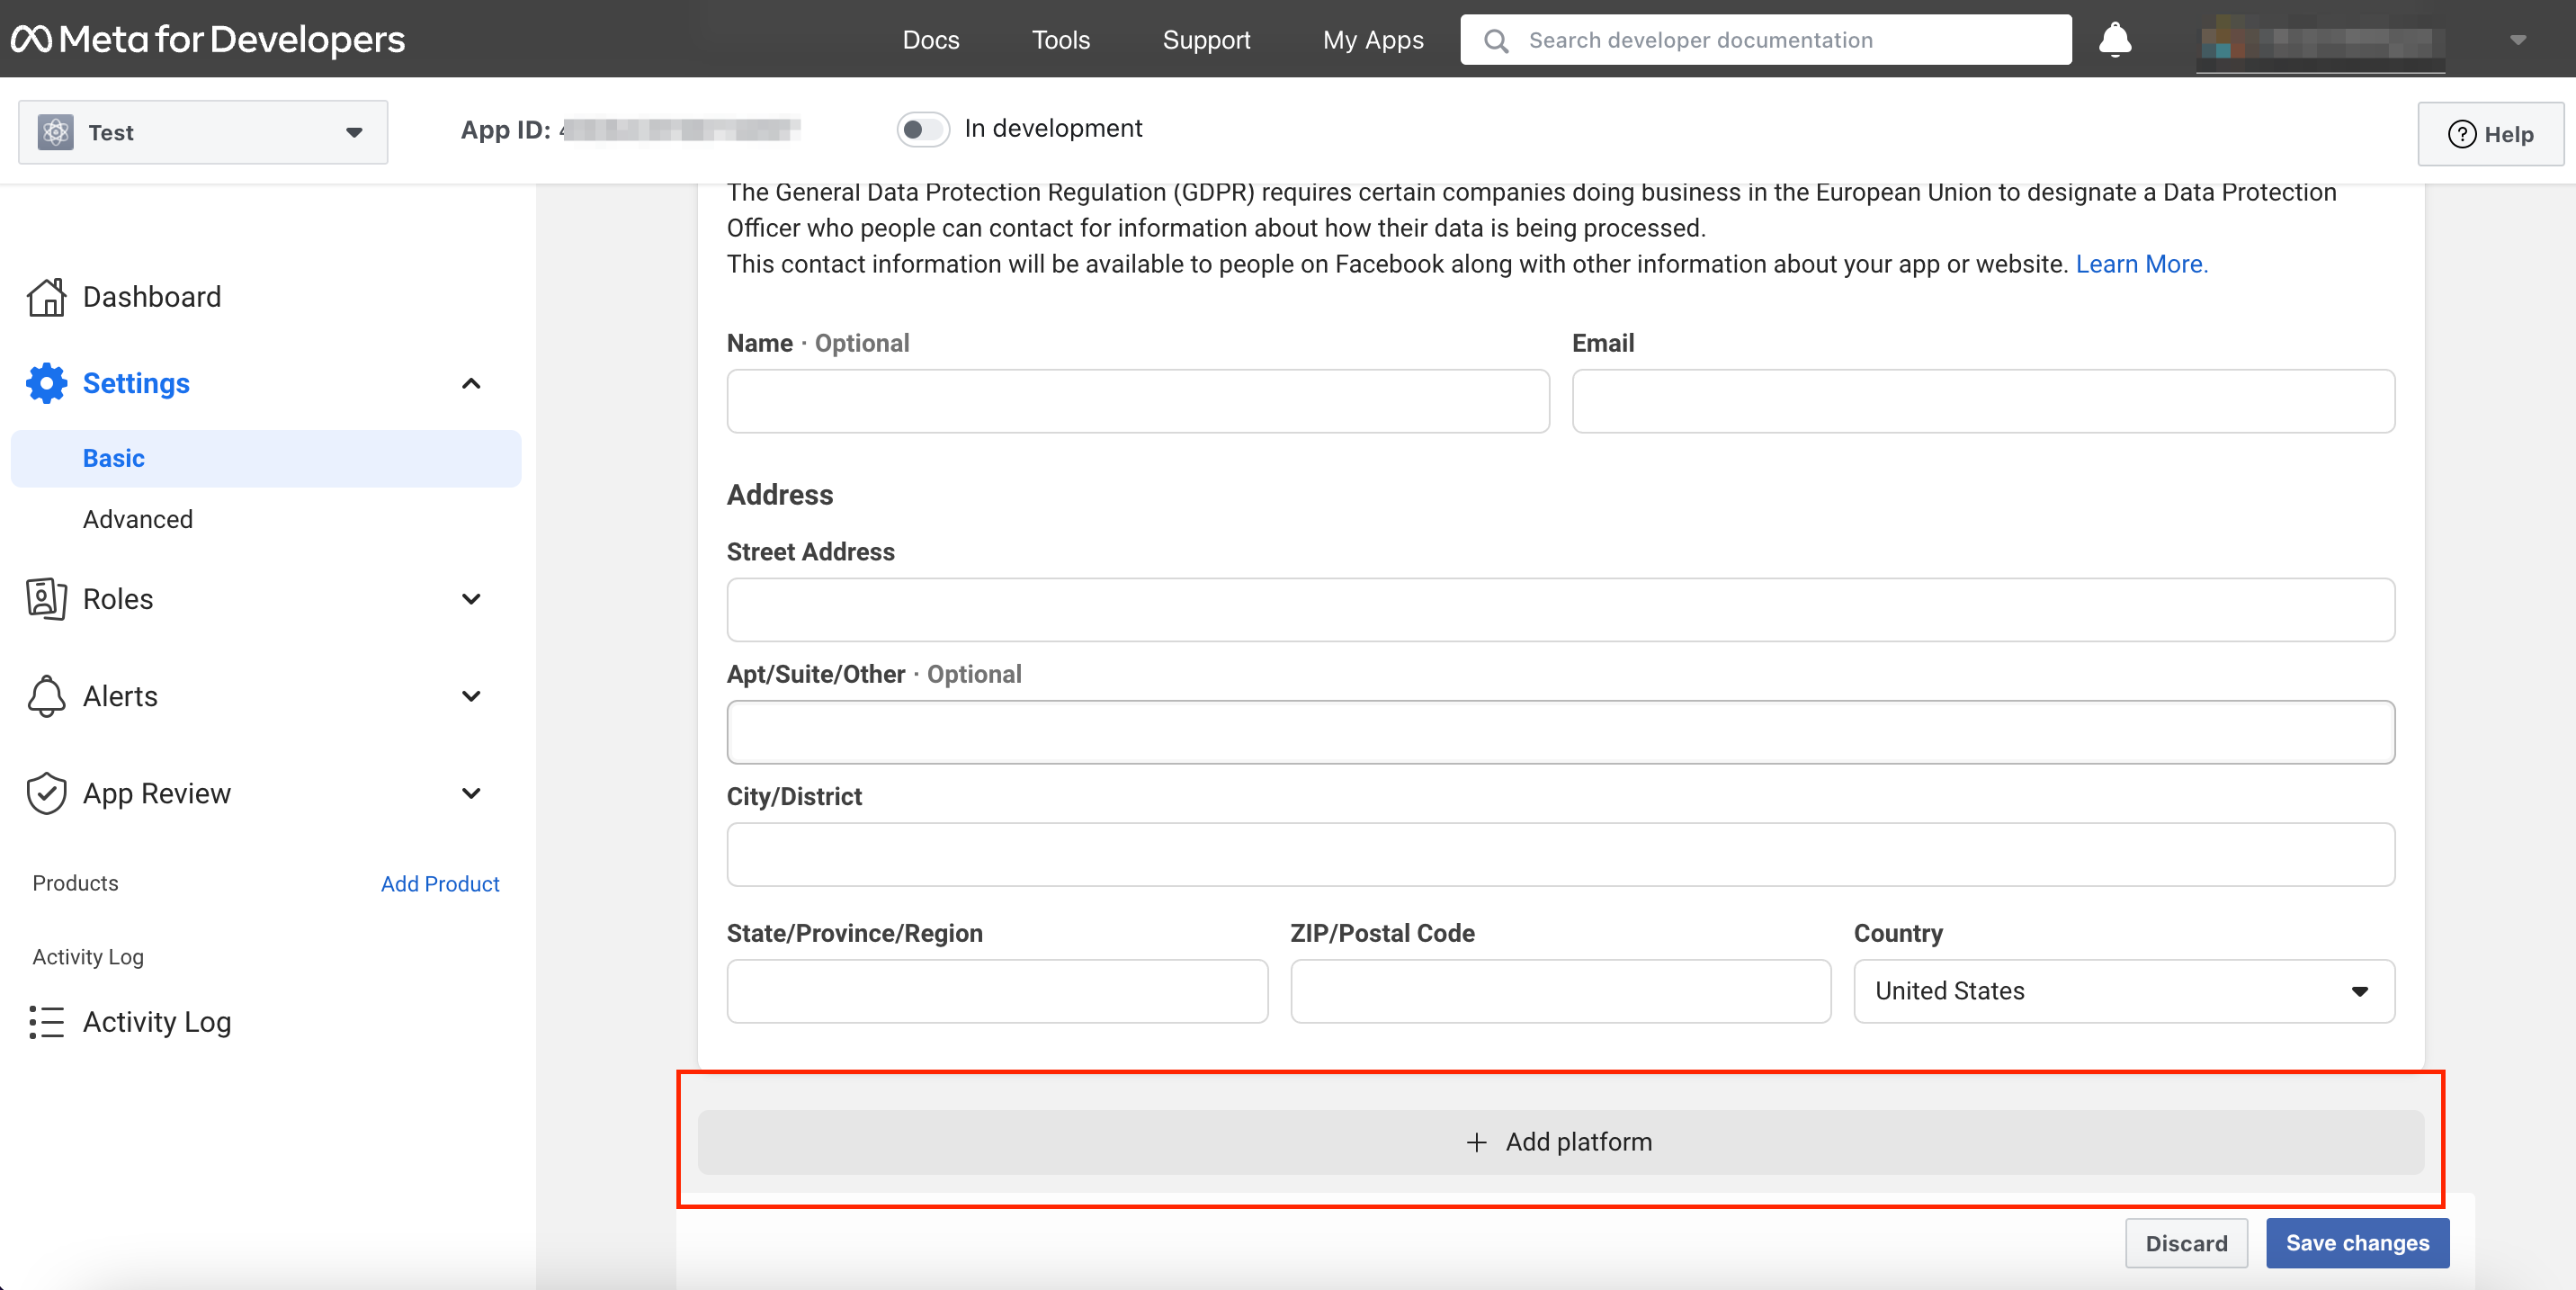
Then click the Add Platform button (at the bottom of this page) so you can add your website URL.
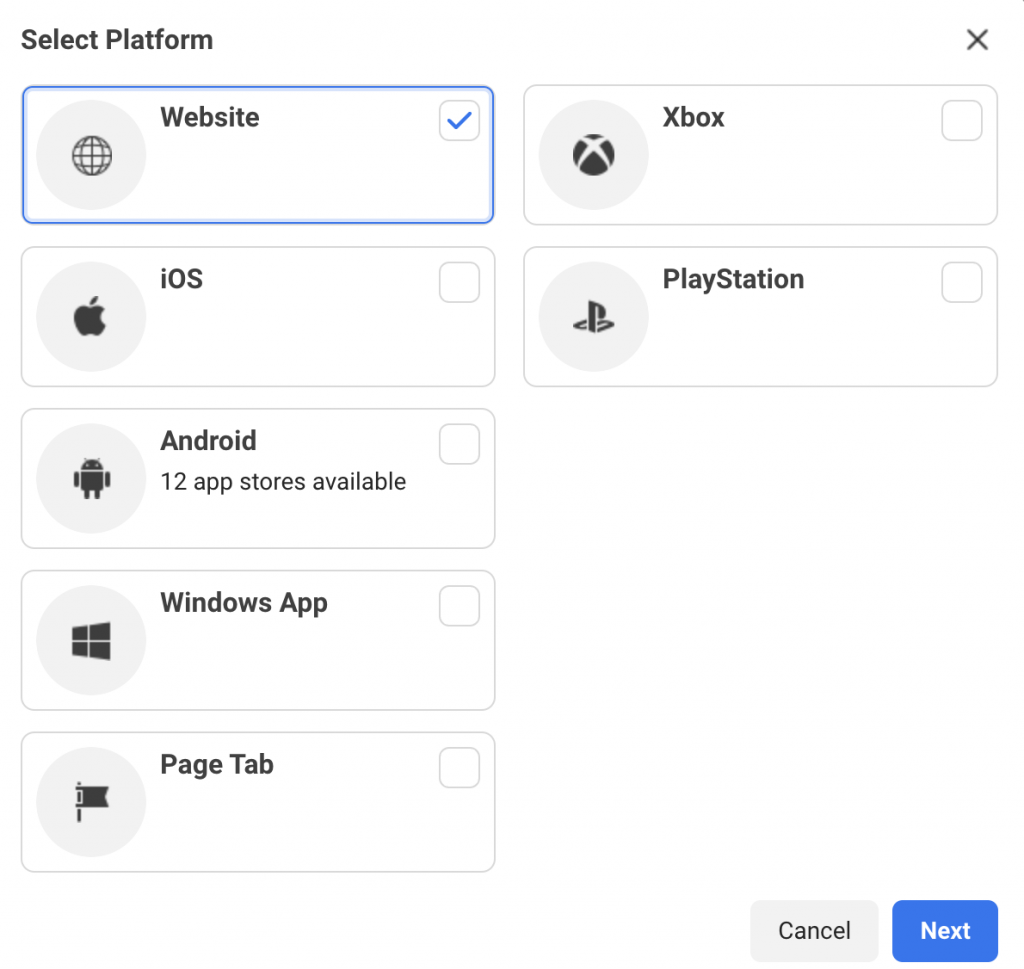
A window will open for you to select Website. This is where we’ll enter our website URL.
Next, enter the URL of your site and click Save Changes.
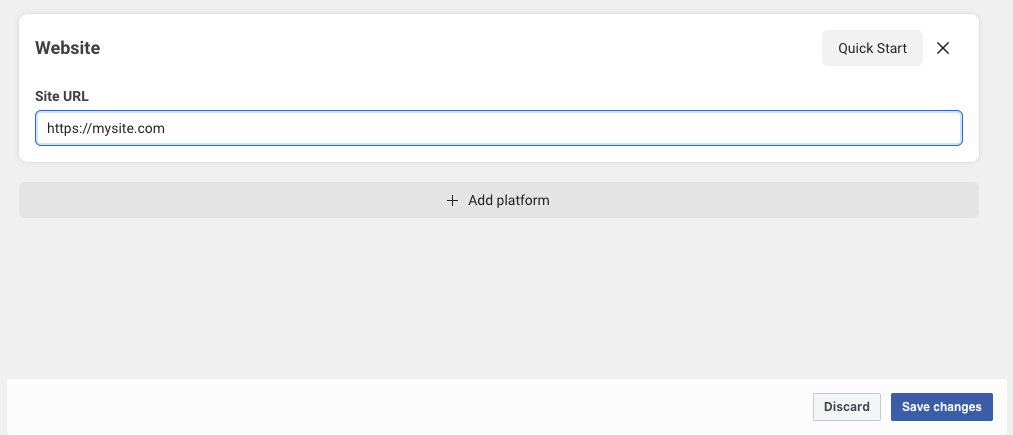
The URL should match the specific URL structure used for your site. For example, if your site uses a www. prefix, be sure this is included. If your site is loaded over SSL the protocol should be https:// instead of http://.
Step 3 – Publish the Facebook Application
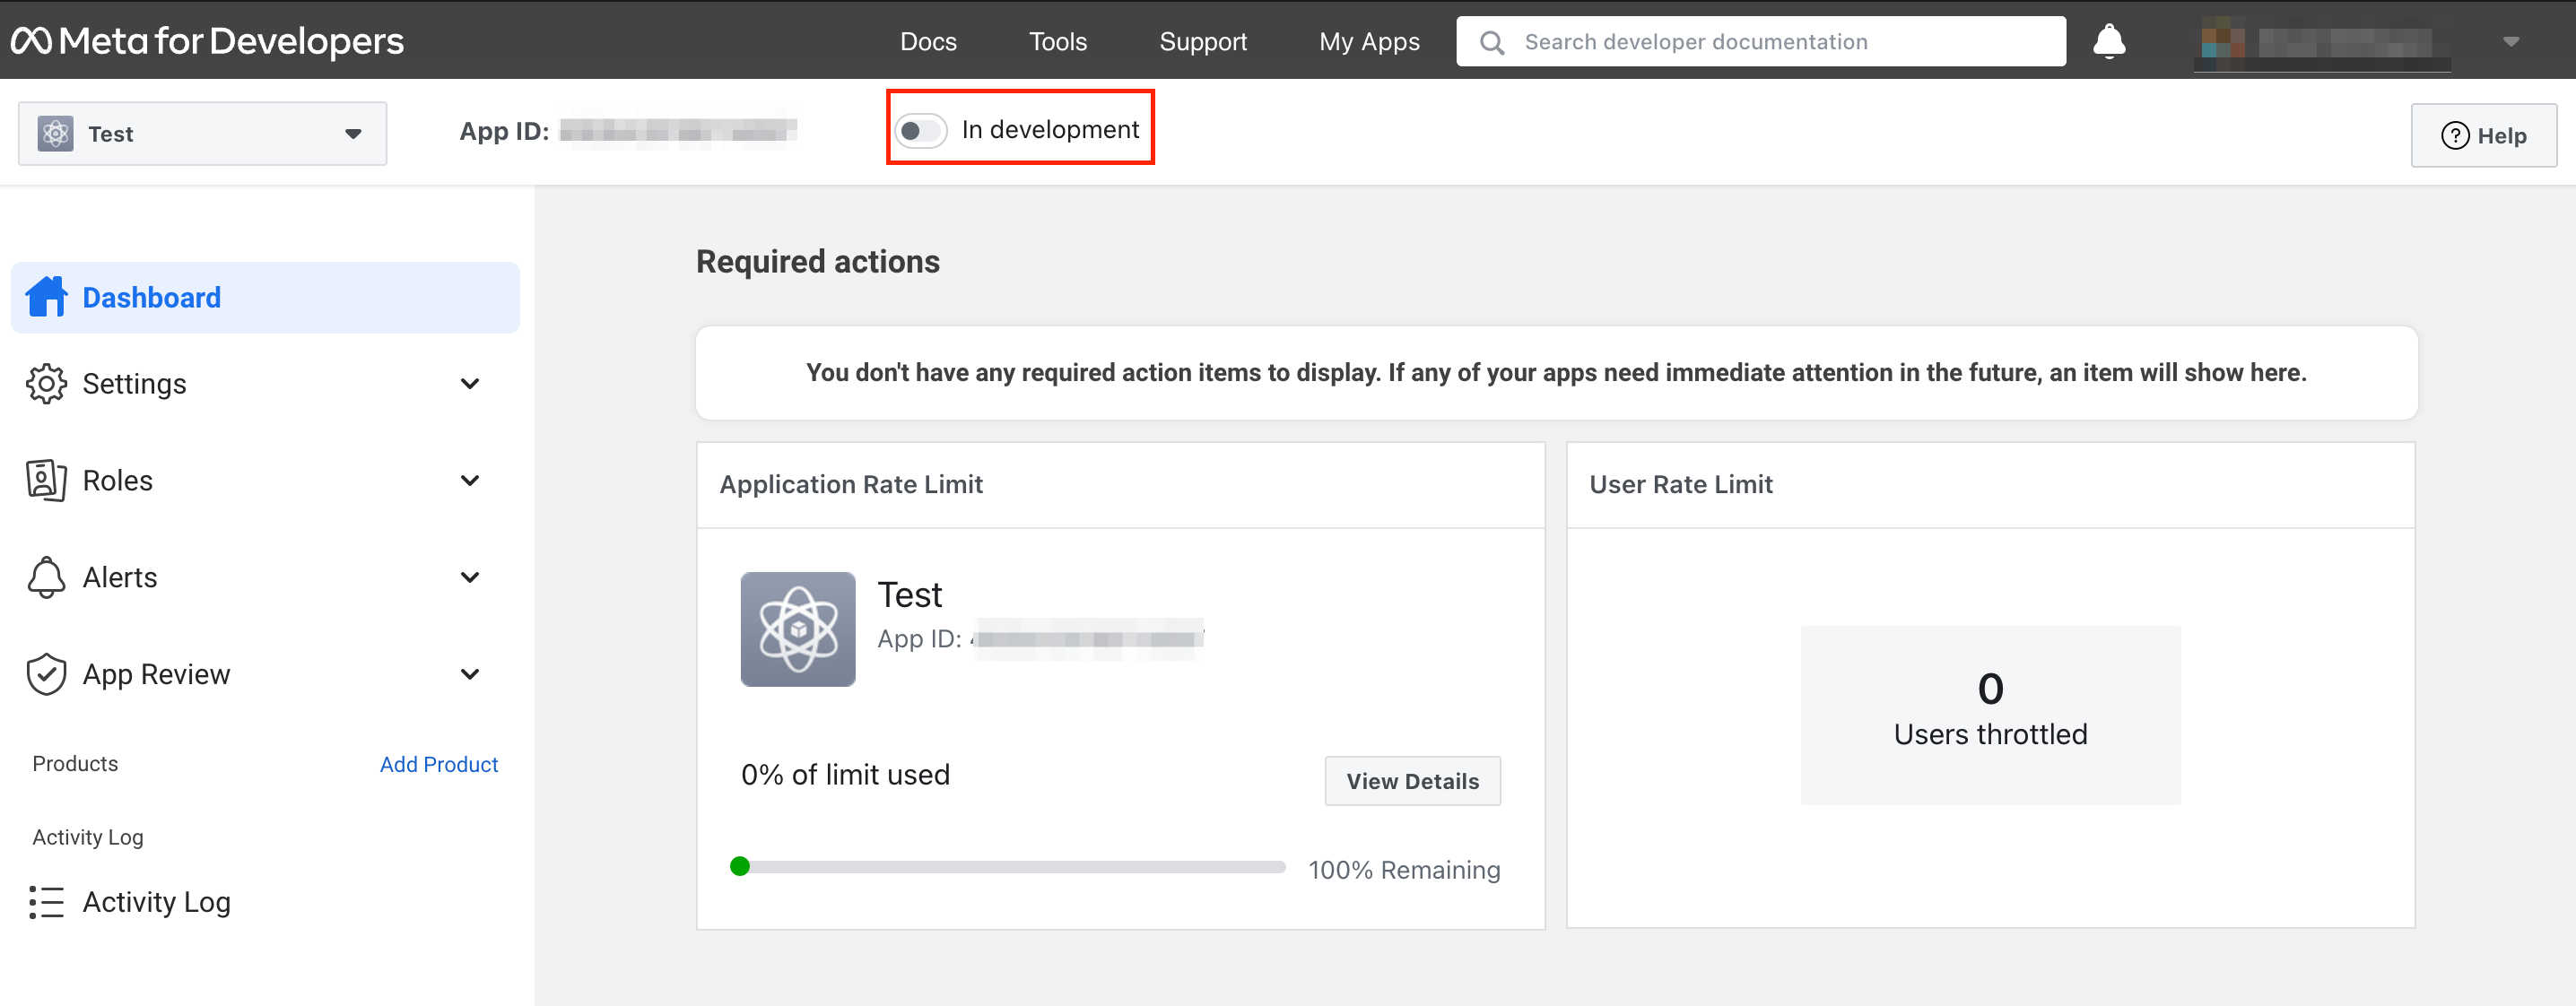
Next, we will make the App ID public. This can be done at the top of the page next to the App ID number.
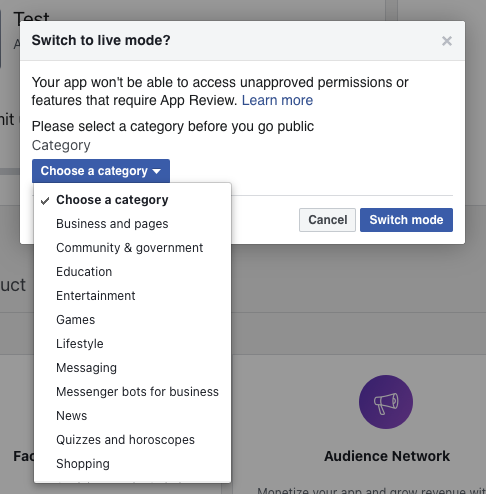
By clicking the toggle button at the top from Off to On or clicking the No button under the App Review, another window will open and ask you to choose a Category for your App. Then select your category from the dropdown and click Confirm.
Step 4 – Copy and Paste the Facebook Application ID
We can then copy the App ID by selecting the Dashboard link from the left menu, or by selecting it at the top of the page. Next, copy the App ID from this screen by right clicking on the App ID and choosing Copy.
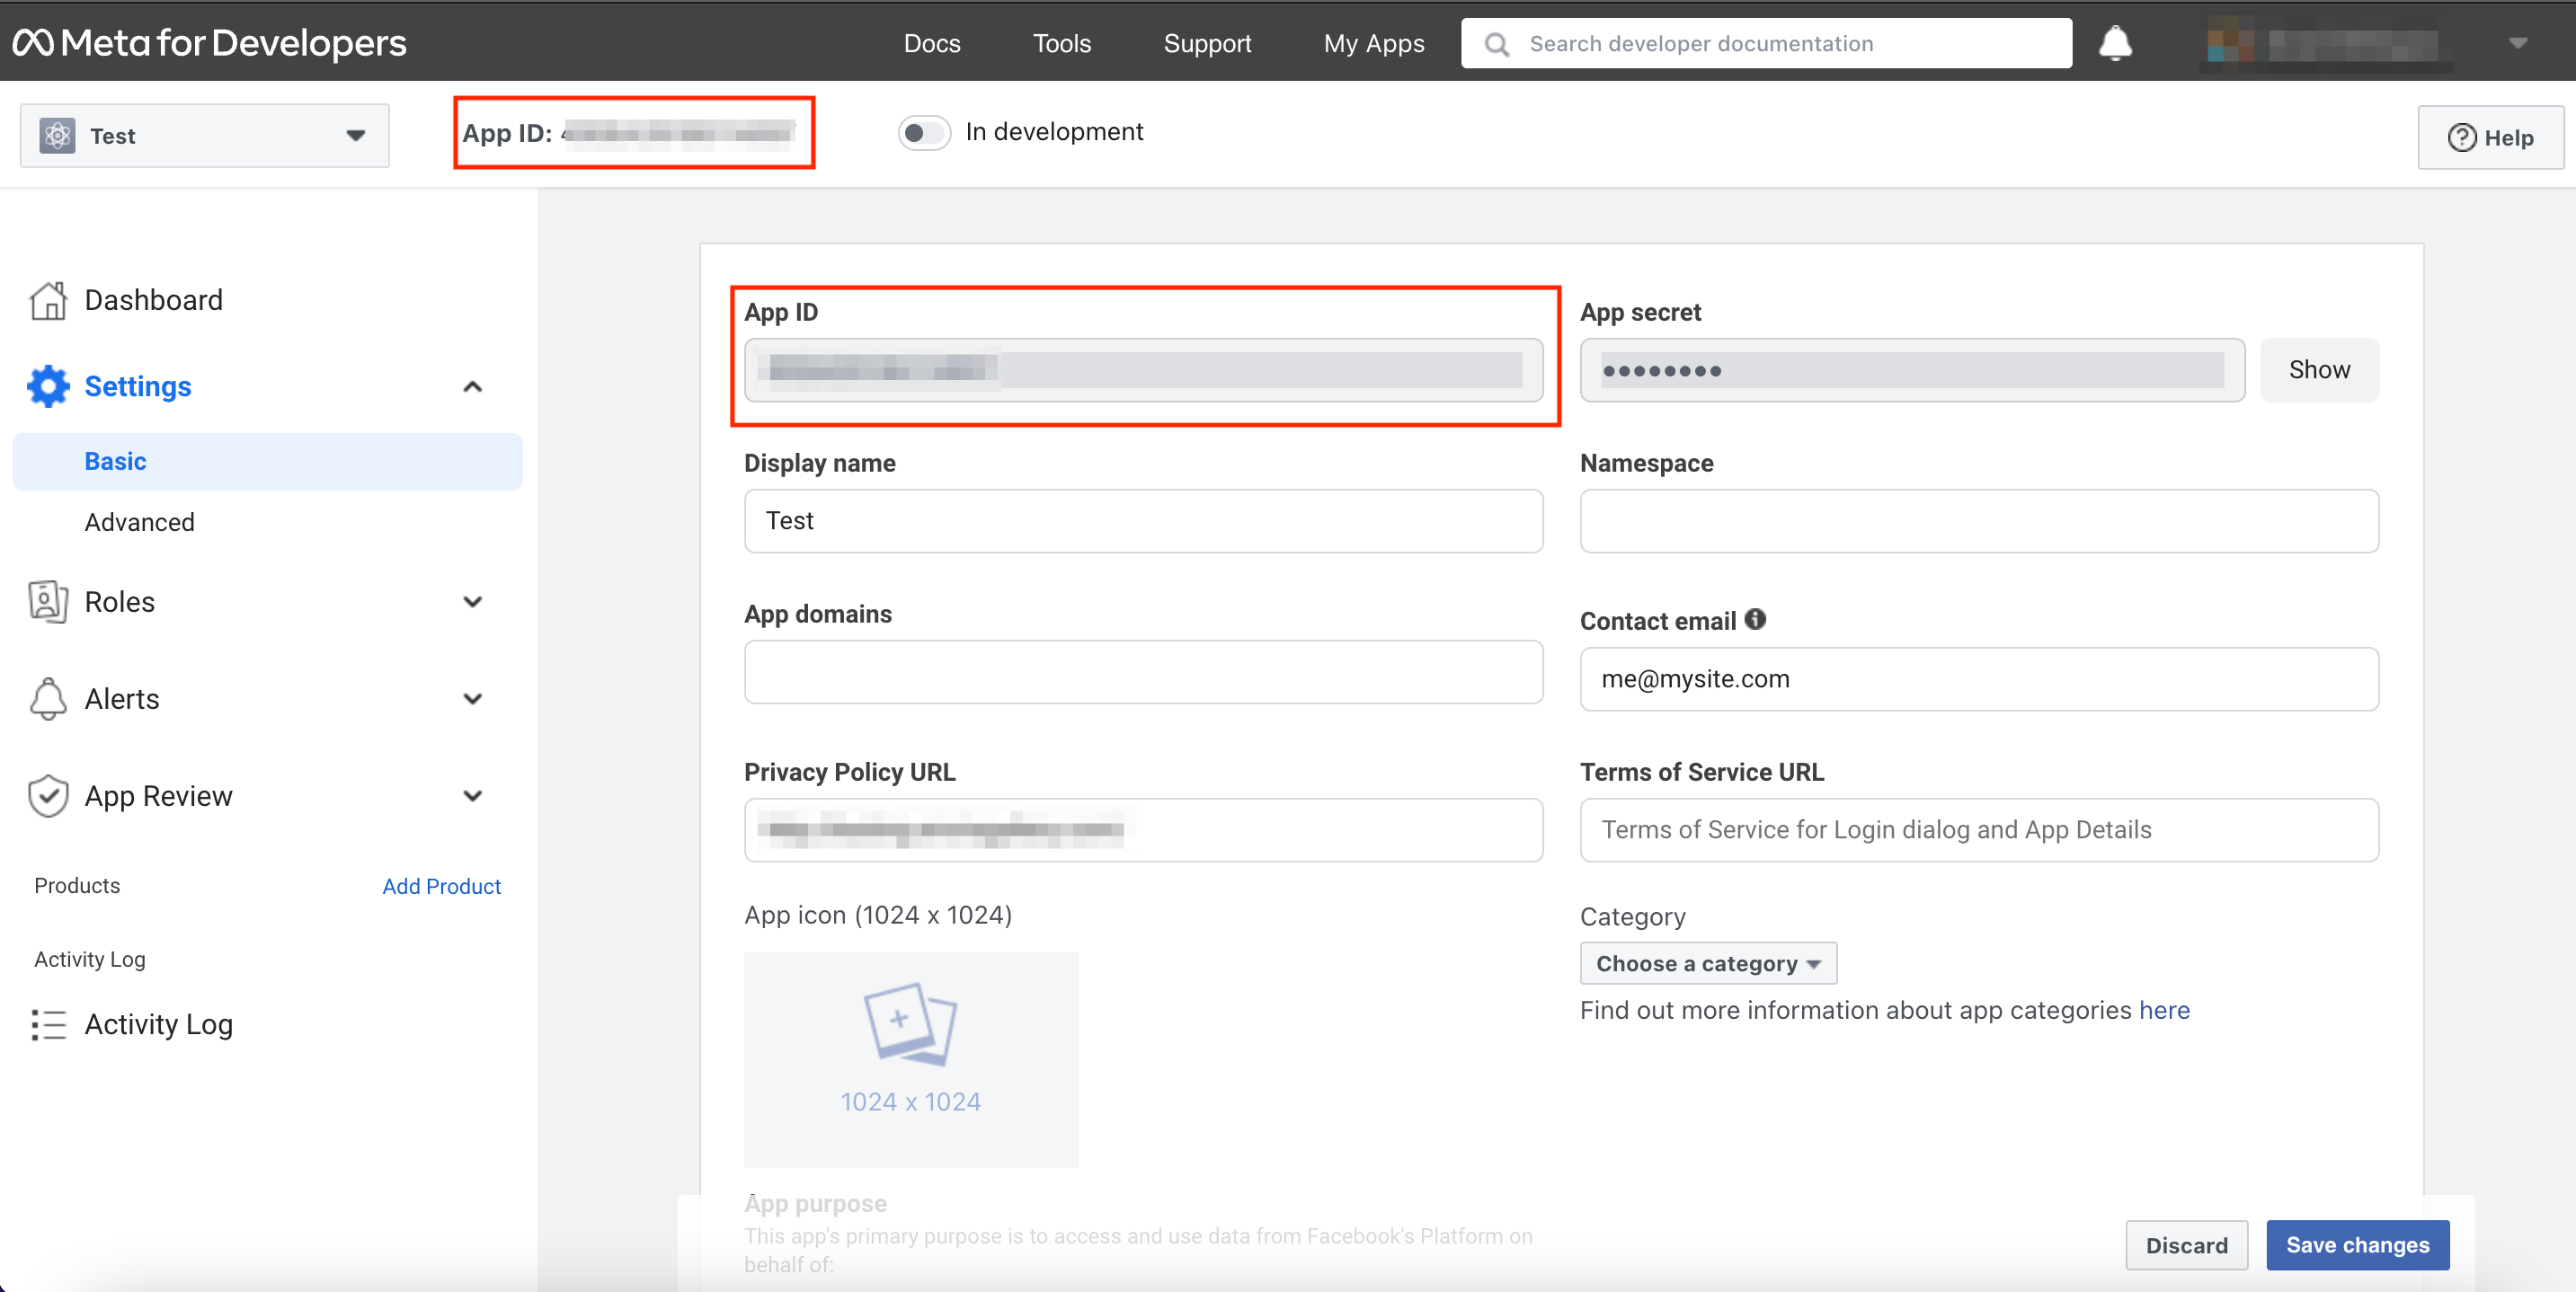
Finally, return to the Envira Gallery » Settings » Social tab » Facebook Application ID field and paste your App ID by right clicking on the field and selecting Paste and click Save.

And that’s it! You can now continue setting up your galleries and albums for sharing your images on Facebook with the Social Addon. Once you finish setting up social sharing, showcase your Instagram photos using Envira’s Instagram Addon.
FAQs
Q: Do I need to create a Facebook Application and connect it to Envira?
A: Yes! An App ID number must be entered on the Envira Gallery » Settings »vSocial tab in order to share your images to Facebook.
Q: I’ve added my Facebook Application ID. Why are my images not sharing to Facebook?
A: You’ll want to be sure and check the following which are the most common causes of failed sharing to Facebook:
Confirm your Facebook Application is Published
Confirm that you’ve set the App to live. Follow these steps to publish your Facebook Application if it has not yet been published.
Confirm your URL is listed on the App
Confirm the website address inside the App settings.
