Would you like to upgrade your license for Envira? This is very simple and we’ll walk you through each step on how to upgrade your license.
Step — 1 Log In to Envira Gallery Account
The first step to upgrade your license for Envira is to log into your Envira Gallery Account.
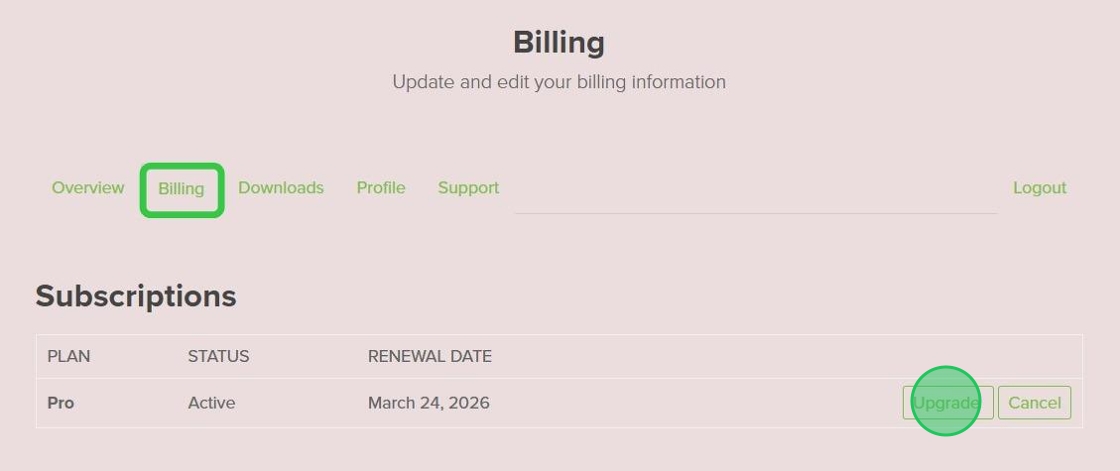
Once logged in, select the Billings tab from the menu and click the Upgrade button on the right.

Once you do that, you will be brought to the upgrade page.
Step — 2 Upgrade License
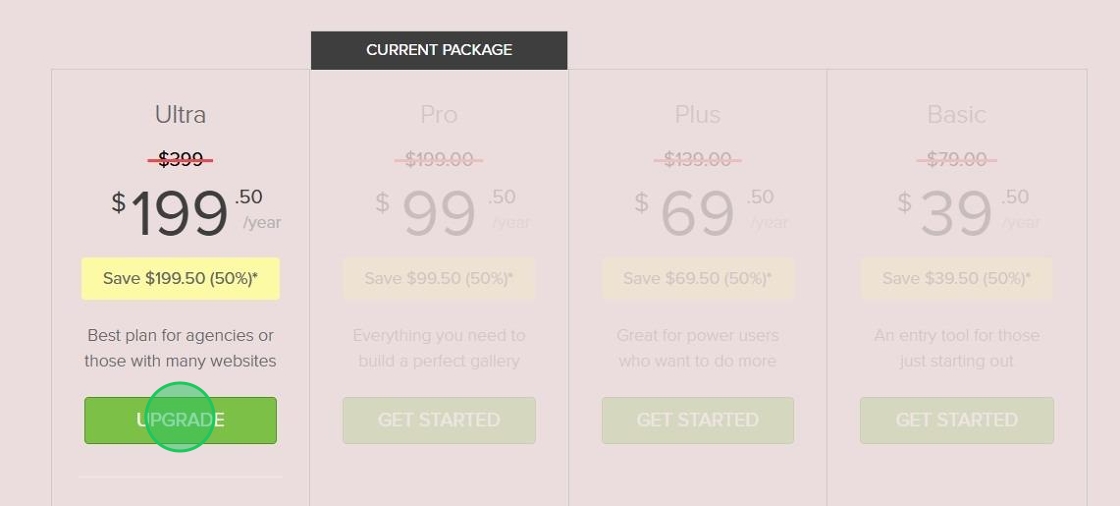
You’ll now see the license levels that you can upgrade to. Select the license level you need and click Upgrade.

All upgrades are prorated, meaning that you’ll only pay the difference between the 2 licenses, but that amount is also prorated based on the time you have left for your current license.
Select the payment method and complete your license upgrade.
Step — 3 Refresh License Key
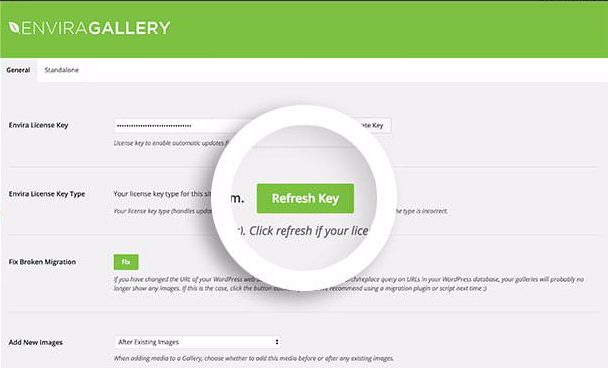
Once you’ve upgraded your license, head over to the WordPress Admin > Envira Gallery > Settings screen and select the Refresh Key button.
This will refresh the license key and will now show you the license you just upgraded to.

Congratulations, you have upgraded your Envira License!
There are many things you can do with Envira, why not check out our documentation for the addons now included in your upgraded license!


