The Pagination Addon for Envira will allow you to easily break up your larger galleries into pages that will make it faster for loading your gallery images. We’ll walk you through the steps on how to create a paginated gallery using Envira’s Pagination Addon.
Your first step is to create a new gallery or edit an existing one. You can follow along with our documentation for creating your first gallery.
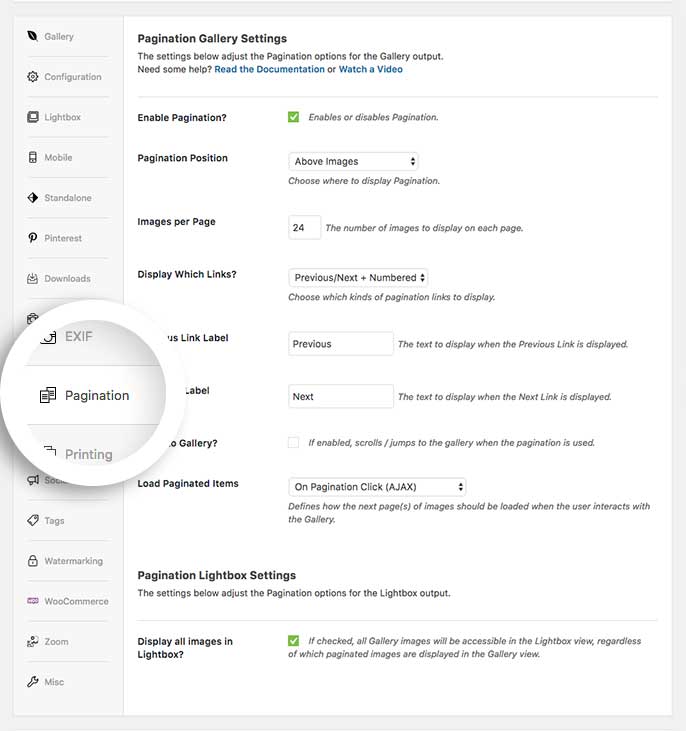
Navigate to the Pagination tab and configure the options there. Click the Enable Pagination? and continue through the remaining settings for your gallery.
You’ll be able to select the Pagination Type, how many Images per Page to show and much more.

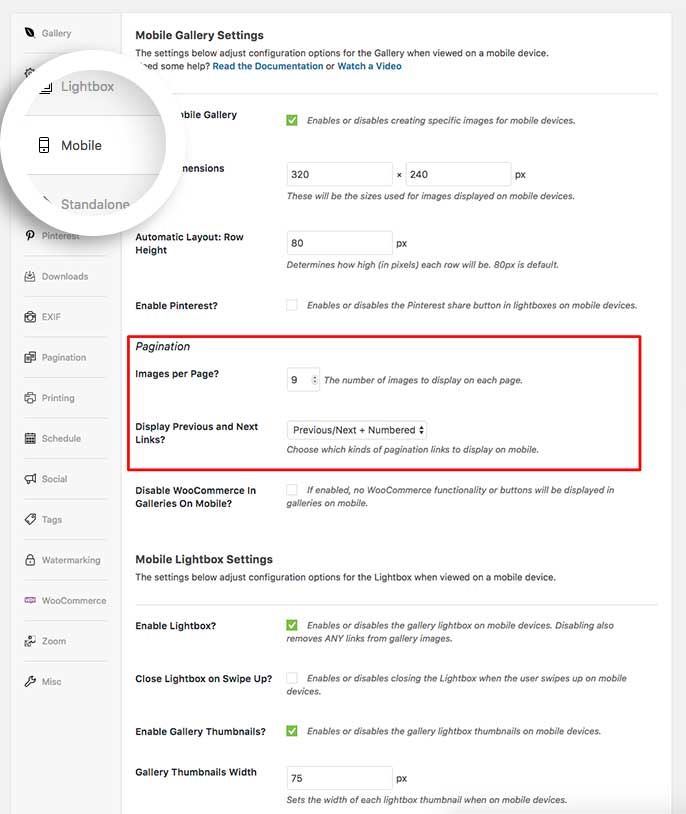
Next, navigate to the Mobile tab, you’ll have some specific pagination options here as well.

Finally, click Publish or Update on your gallery to save the changes.
See the demo!
Would you like to style your pagination links? Check out our article on How to Style Pagination Links.
A: Yes! See our documentation on how to style pagination links to get started.
A: Check the Mobile tab options for your pagination and make sure your Images per Page? is not 0.
A: If you are using Jetpack on your site, and you want to use an Ajax pagination type, you’ll need to add a filter to your site to allow this by following the tutorial.
A: Absolutely! The Pagination tab is also available when creating or editing an Envira Album.
A: This is expected behavior when using Pagination and Random sorting option. The Pagination has no way of knowing what images were already displayed on Page 1, Page 2 etc. If you notice some images from page 1 are showing on page 2 simply update the gallery to make sure the Sorting isn’t set to Random.


