If your current sites use the Envira Gallery Lite and you want to upgrade to the Envira Gallery, you’re making the right choice. With Envira Gallery, you’ll get tons of features and functionality that will take your galleries to the next level.
And the best part is — no loss of galleries, no loss of settings. Everything you’ve already created stays exactly the way it was.
Switching to Envira Gallery unlocks all the premium features like more gallery layouts, addons, password protection, AI gallery creation, and a lot more!
Ready to upgrade? Just follow the steps below to get started!
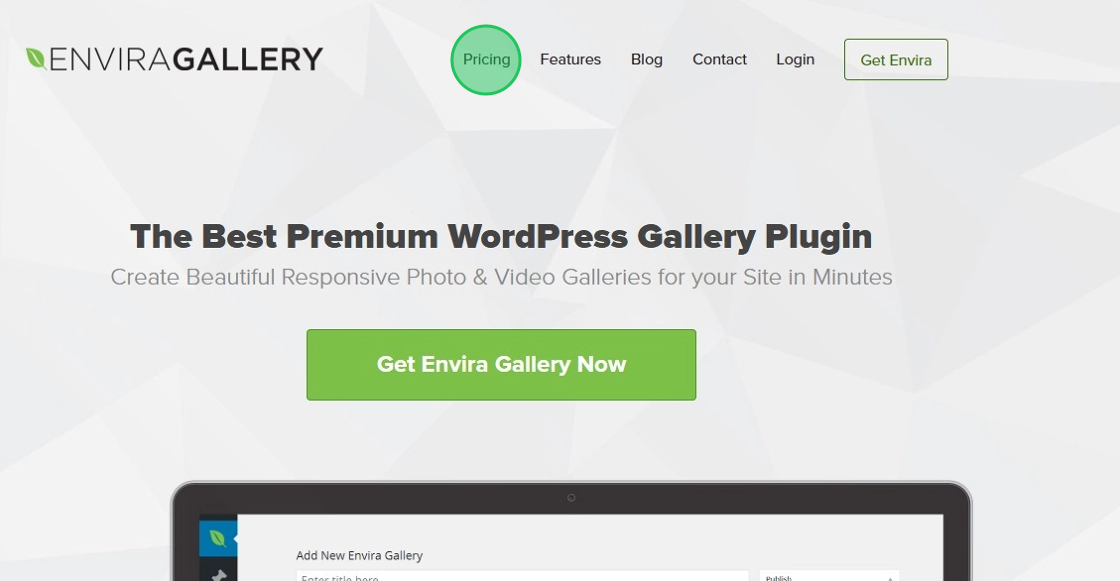
Purchase an Envira Gallery license
- Choose the plan and purchase Envira Gallery from the pricing page
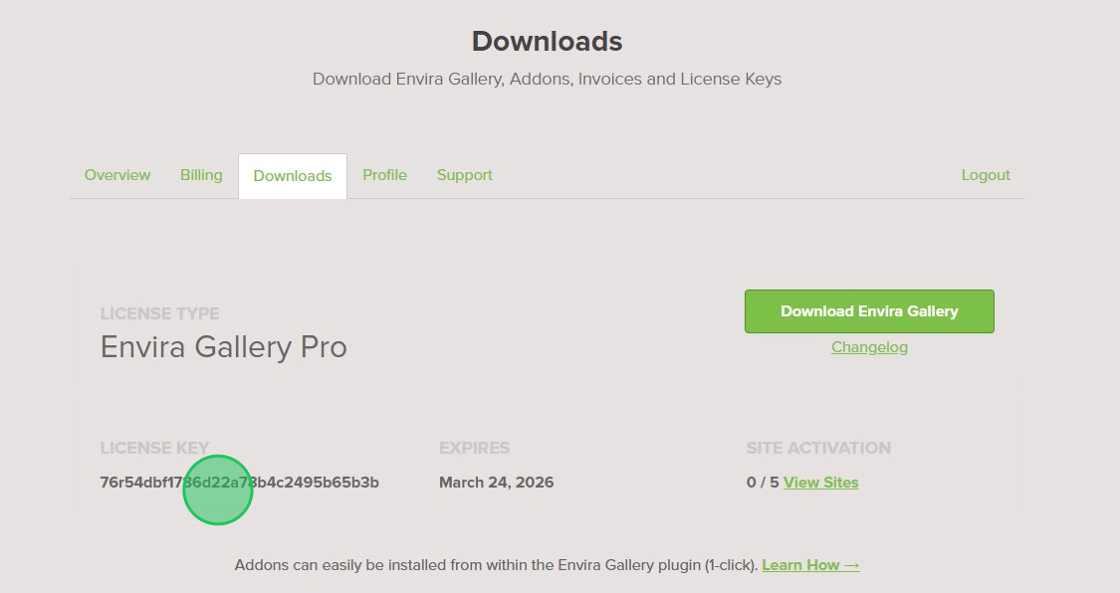
Copy License Key
- Login to your Envira Gallery Account using the credentials available under the email you used during the purchase.
- Click Downloads tab
- Copy License Key
Add License Key
- Navigate to the WordPress Dashboard
- Click on Envira Gallery > Settings
- Paste the license key inside the Envira License Key text box
- Click Verify Key
- Click Activate
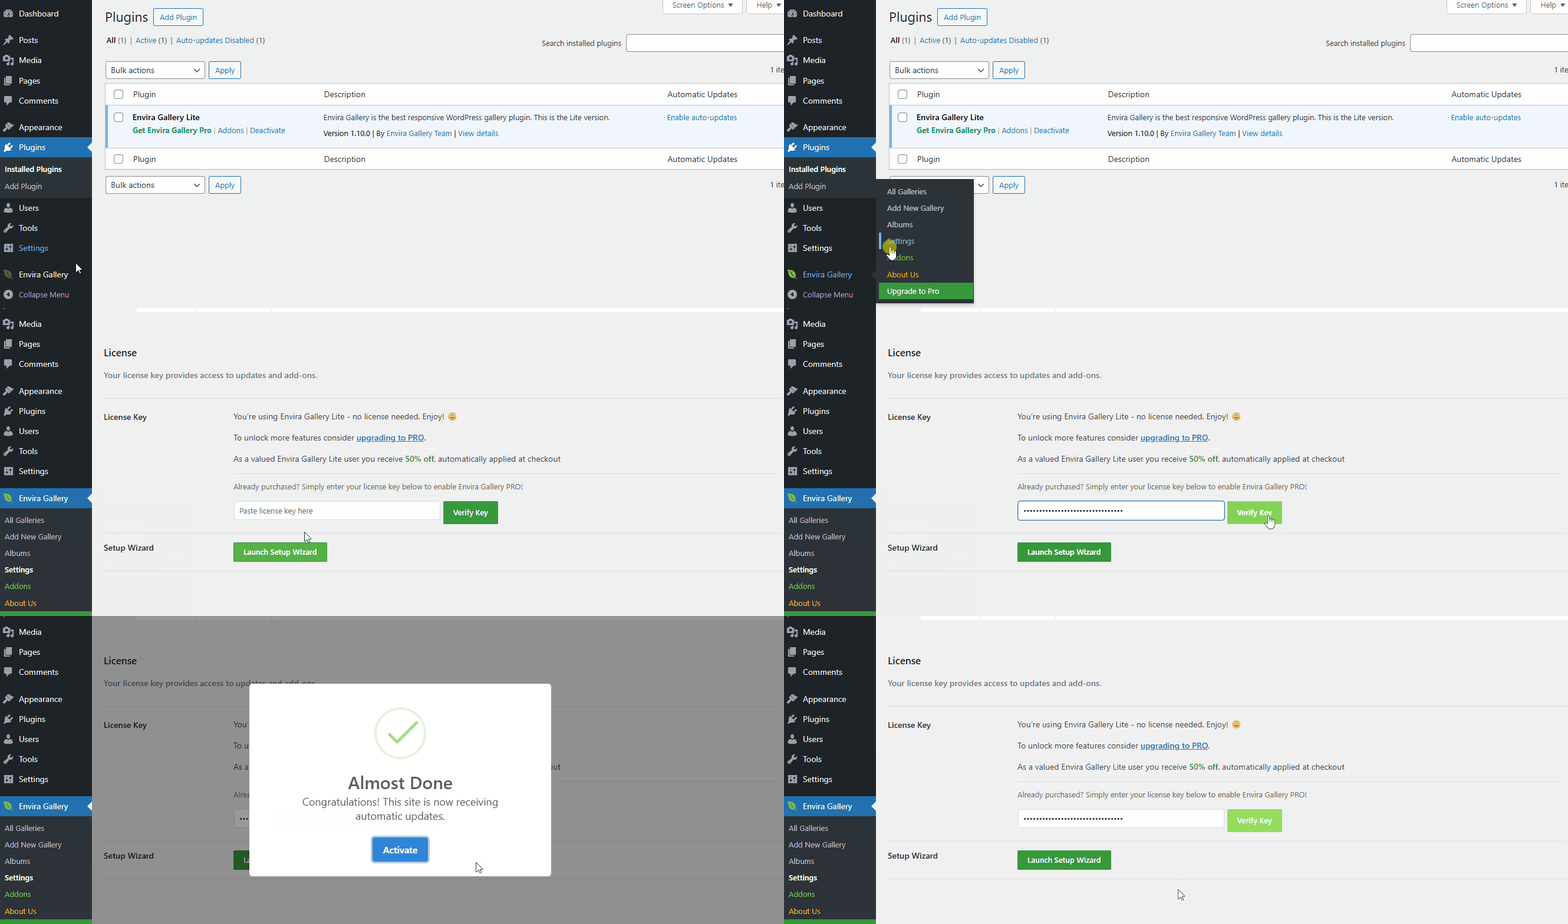
Now, you have successfully added the license key. Once the license key is added, Envira Gallery plugin is automatically Installed and Activated on your setup. Also, this automatically deactivates the Envira Gallery Lite.
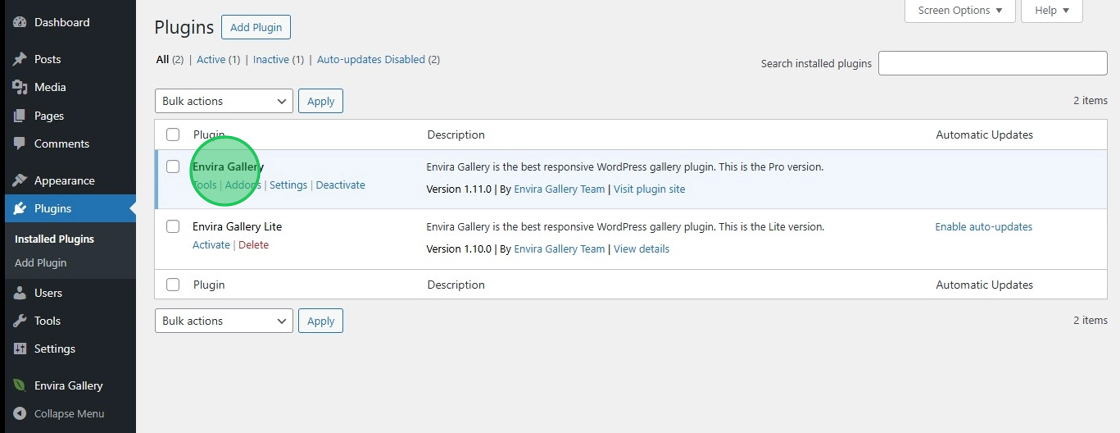
That’s it! You’ve successfully completed the upgrade to Envira Gallery.

