


Do you want to learn how to be a music photographer and take amazing concert photos? Photos are a great reminder of the fun of a concert, but it can be difficult to shoot high-quality images. Things like lighting changes, cramped spaces, and moving subjects make concerts particularly tricky to photograph.
But they don’t have to! If you approach live music photography with some flexibility and a the knowledge to maximize your camera’s settings, you can shoot stunning photos of any concert.
In this article, we’ll cover:
- Primary camera settings for taking pictures at concerts
- Challenges of taking pictures at concerts
- Best equipment for taking photographs at concerts
- Best tutorials for taking concert photos
By the end of this article, you will have the skills you need to take high-quality live music photography at any concert and feel confident while you do it.
Primary camera settings for taking pictures at concerts
What are the best tips for taking pictures at concerts? The primary camera settings to consider when photographing concerts are shutter speed, aperture, and white balance. These related features can make or break a photo, especially in a live music setting.
Shutter speed measures the length of time the shutter stays open to capture an image. You can change this setting, but how long the shutter remains open affects the finished photo.
In low-light situations like concerts, it may be beneficial to decrease the speed of your shutter. When you decrease the shutter’s speed, the shutter remains open for longer. This allows more light to reach your device’s sensor.
A decreased shutter speed allows for more detailed images, but at a cost. Decreasing the speed too much often results in motion blurring. This occurs when your subject moves mid-photo while the shutter is still open.
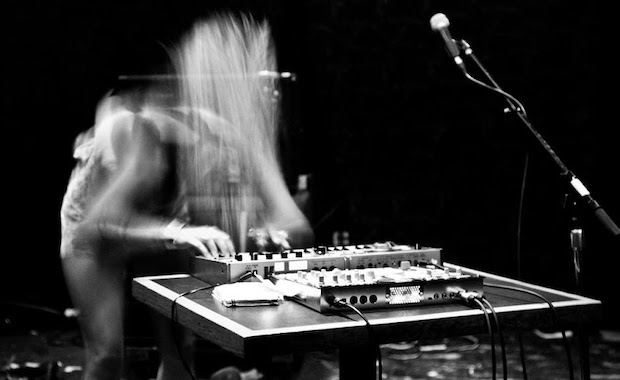
If you want a clear image, do not decrease the speed lower than 60 frames per second. This is the longest your shutter can stay open without the risk of producing camera shake. This generalized blurriness in your photo happens when your hand shakes the device as you press the shutter button.
In order to achieve crisp images of people in motion, increase your speed so that it stays open for less time. In low-light environments, an increased shutter speed has to be moderated with a change in aperture.
Aperture is the most important setting to consider when photographing at concerts. Like shutter speed, aperture can be adjusted to allow more light into your camera. A wider aperture will produce a better image the dark.
Aperture, measured in f-stops, is the opening through which light passes into your imaging device.
Because concerts are typically dark, you’ll want to let as much light into your digital device as possible. The safest way to do that is by widening the aperture.
When you widen your aperture, the amount of light to your device’s sensor increases. Widening your aperture is a good first start because it does not create a possibility for motion blur.
The final tip for taking photos at concerts is to set your white balance before you begin to shoot.
White balance is a measure of the camera’s internal color balance. Sometimes, the colors your device sees aren’t the same colors that your eyes see. White balance allows you to fix the difference.
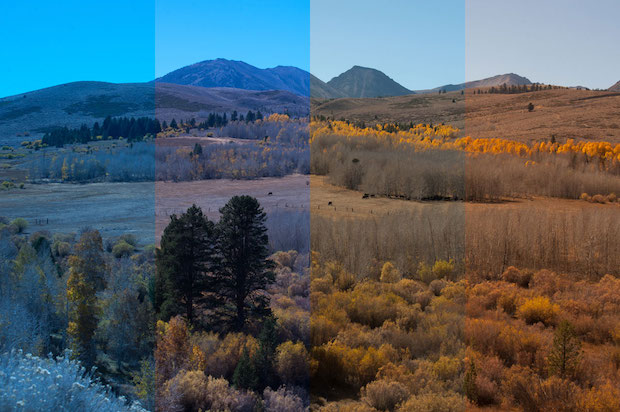
The best way to achieve accurate coloration in your photo is to set your white balance before shooting. Simply find something white in your environment and access your device’s settings. Adjust the white balance until the object in your viewfinder appears as it does to your eyes.
Digital devices come with pre-set white balance settings for common lighting situations. But this setting can be manually programmed or set to “Auto.” In Auto, your device will adjust the measure automatically as the lighting changes.
Challenges of taking pictures at concerts
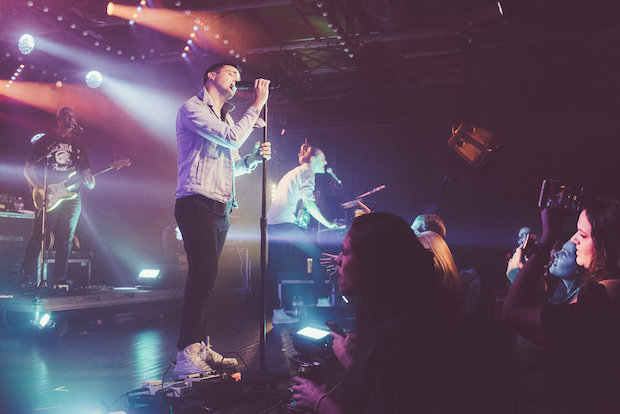
Compared to shooting still-lifes or portraits, music photography involves a lot of variables outside your control. The conditions of each concert are different. Lighting, venue layouts, performers, and even audiences can make shooting concert photography challenging.
The type of concert you plan to shoot can tell you a lot about what kinds of challenges you may face.
If you’re at an electronic dance concert, you’ll have to navigate bright light shows and energetic crowds to get a good photo. But you probably won’t have to worry about those issues at an acoustic concert.
The best way to face these challenges as a concert photographer is to embrace your creativity. If the crowd gets in the way of your shots, think about using them to frame a new photo. Think about incorporating tricky lighting to make more interesting photos.
You may also find that the venue or performer have limited the kind of equipment allowed. Especially if you’re a beginner music photographer, it’s best to bring your most basic equipment. A regular digital device and a zoom lens should be fine for most concerts.
You’ll never be in control of your concert environment. But you are in control of yourself and your imaging device. You have the tools to adapt to your scene. If the lighting conditions change, you can adjust your aperture or shutter speed.
Being concert photographers means keeping a level head and using some strategy. But it can be a rewarding experience. Research ing your concert beforehand and brining a positive attitude can make all the difference.
Best equipment for taking photographs at concerts
The best equipment for taking great shots of concerts is equipment that you are familiar with. Because concert settings are variable, your equipment should be easily adjustable.
A mirrorless camera is the best to use for concert photography. Mirrorless devices work like traditional DSLR devices, but they are lighter and more compact.
Like other cameras, mirrorless cameras still allow you to control your basic settings. They do have fewer lenses and accessories, but they still take a great photo.
A DSLR camera will take good concert photographs if that is your preferred device. But their bodies are heavier than those of mirrorless cameras. They also come with features that won’t be necessary in a concert environment.
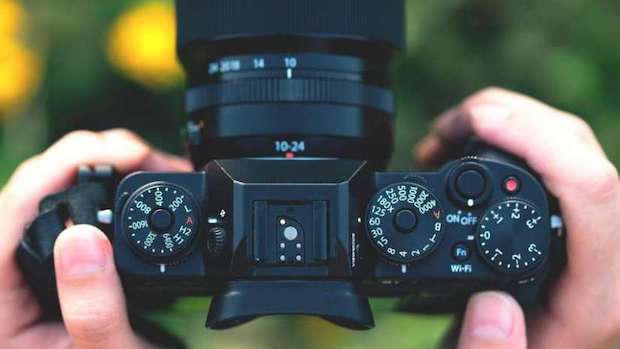
Whatever device you choose, it’s best to get to know its features before you take it to any concerts. Make sure that you know where the shutter button is and how to adjust your settings.
Follow some online tips to learn new skills faster to help you get to know your device before your first concert shooting.
A strong neck strap is another essential for any concert photographer. Camera equipment will grow heavy over the course of a concert.
A camera strap will help support your device if you are bumped in the crowd.
Finally, every concert photographer should shoot concerts with a zoom lens. Zoom lenses are more beneficial for concerts because they have a flexible focal length.
Focal length is the distance between the lens and the camera’s sensor. In short, focal length determines how far your lens is able to focus.
A zoom lens allows you to adjust your image frame without having change lenses. You’ll pack lighter with a zoom lens and have more control over your images.
That’s it for technical equipment, but don’t forget to pack a bag for yourself. Concert photography requires a lot of energy, especially if you’re shooting a festival.
Bring a backpack filled with water and snacks to any concert you plan on photographing. The bag will be out of your way. And you won’t have to miss any of the show if you get thirsty.
If you’ll be shooting outside, you can also pack sunscreen or a rain jacket just in case.
Best tutorials for taking pictures at concerts
Ultimately, the best way to learn to take concert photos is to take them. Buy a ticket or find a free concert, and bring your camera along. In this instance, practice does make perfect.
However, online tutorials explaining how to use camera apps to create beautiful concert photographs can be useful.
YouTube has some of the best tutorials for taking pictures at concerts. Some YouTube videos even show you their recommended camera settings. And, YouTube is free!
You can also find paid tutorials, courses, and ebooks online about concert photography. Many of these are written by people who take concert photos for a living. These are great resources for someone getting started in concert photography.
We hope this introduction to concert photography has left you feeling excited and ready to take photos.
You may be interested in learning How Much Does it Cost to Start a Photography Business now that you’ve captured concert images like a professional photographer. You never know who might like to buy one!
If you’re still having trouble with concert lighting, our guide to Everything You Need to Know About Photography Lighting will help. Feel like you’re ready to take stunning concert photographs? Follow us on Facebook and Twitter for more photo editing advice.


