Do you want to add links to your photos in WordPress? Sometimes you may want to link a photo to a blog post, or a reference from another website. In this article, we will share how to link a photo to a website in WordPress.
Adding a Link to Your Photo
First thing you need to do is add your image to a page or post (check out our guide on how to add photos in WordPress or simply follow the steps below).
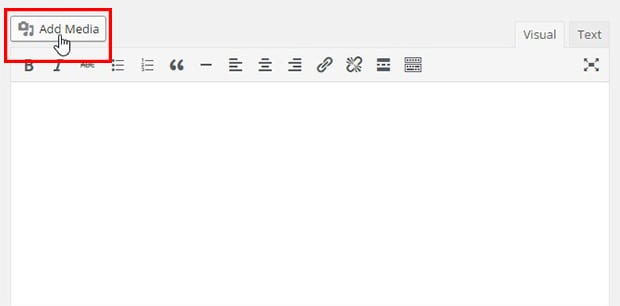
To add an image from the post or page edit screen, click on the Add Media button (right above the editor).
You can select an image from previously uploaded photos. If you want to upload a new image, then drag and drop it to your screen as shown below.
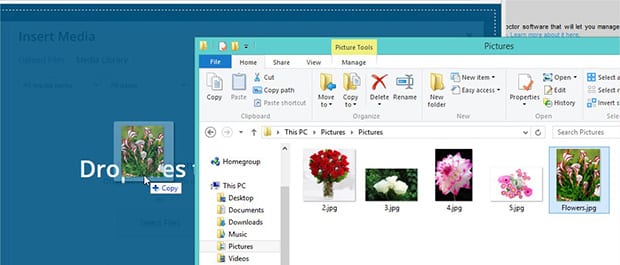
(By default, the maximum upload file size is 2 MB. If your image is larger than 2 MB, then you should check out our post on how to upload large images in WordPress.)
After uploading your image, fill out the Title and Alt Text fields. You can also set the Alignment and the Size for your photo.
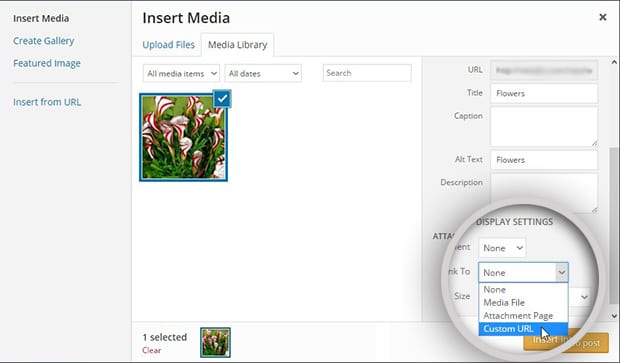
In the Link To dropdown menu, you need to select Custom URL. A new field will appear where you can add the URL you want to link your photo to.
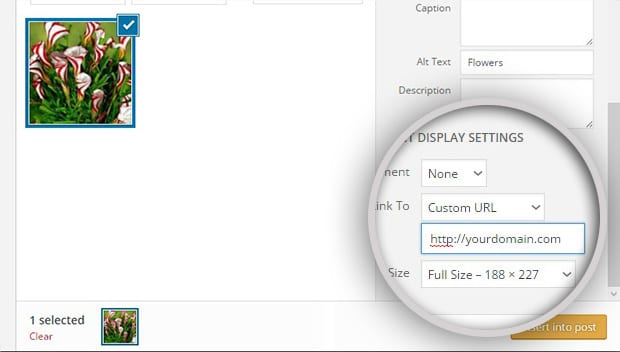
Once you’ve entered the URL, go ahead and press the Insert into post button.
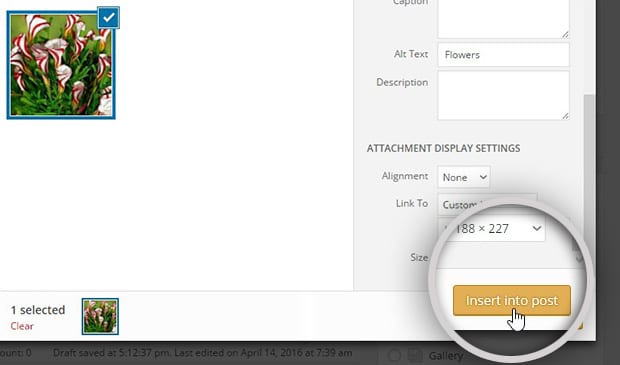
That’s it! Your photo will be added to the page or post with a link to the specified website.
Adding Links to Photos in an Image Gallery
If you’re a photographer, you probably use image galleries to group photos and organize them in WordPress.
If you use the Envira Gallery WordPress plugin for your image galleries, you can easily add links to your photos.
To start with, you’ll need to install and activate the Envira Gallery WordPress plugin.
Then go to Envira Gallery » Add New from your WordPress admin sidebar at the left-hand side.
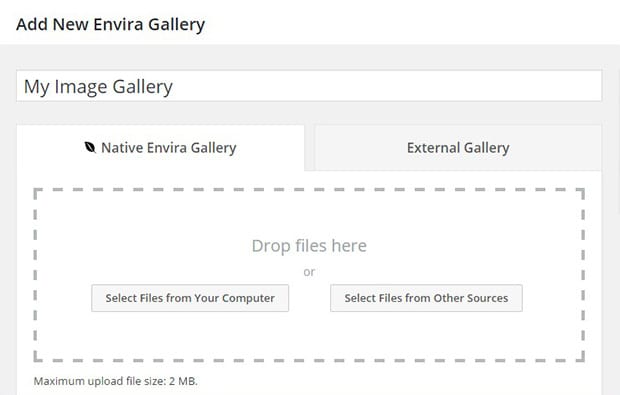
In the Native Envira Gallery section, drag and drop the photos that you want to add to your image gallery.
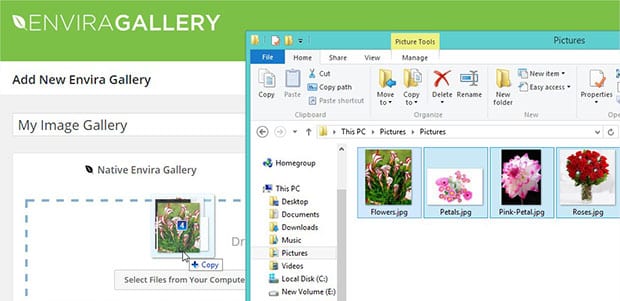
Now you can see your photos in the Images section. Go ahead and click on the pencil icon on the image that you want to link to a website.
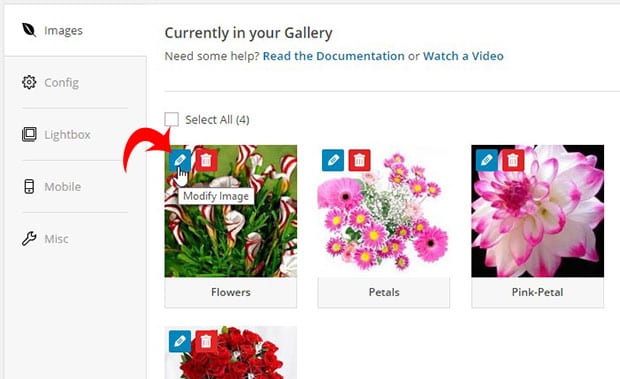
This will open up a dialog box to edit the metadata for your image.
You can add Alt Text and other details for your image. In the URL field, add the link to the website that you want to link your image to.
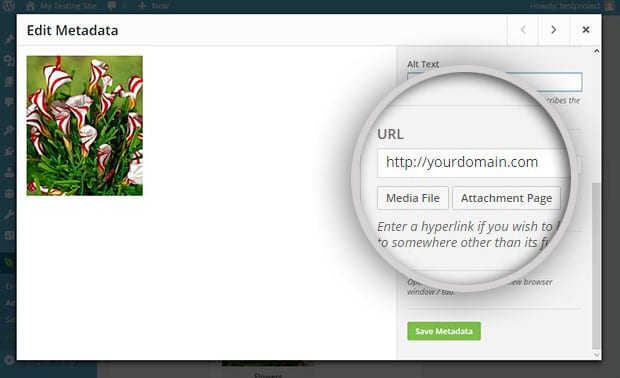
Once you’re done, click on the Save Metadata button.
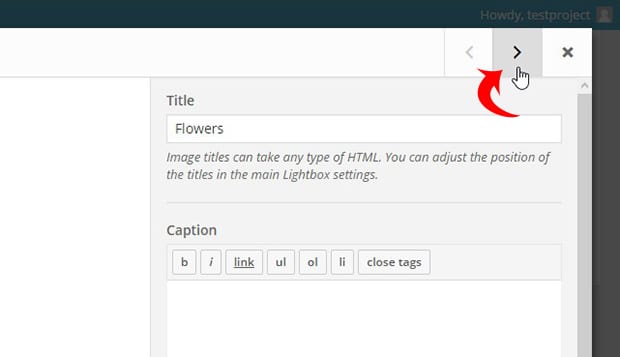
If you need to add links to a lot of images, you can use the ‘<' and '>‘ to add metadata to each of your photos in the photo gallery.
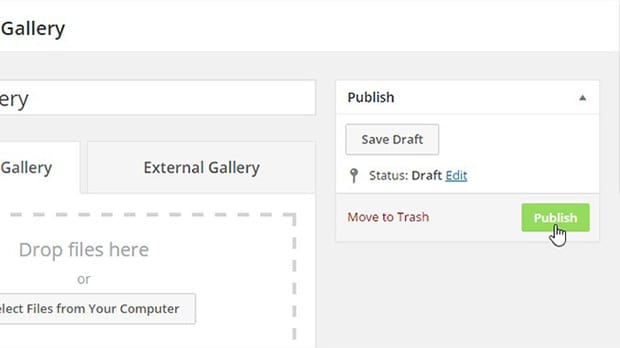
After adding all your links, remember to hit the Publish button to save your changes.
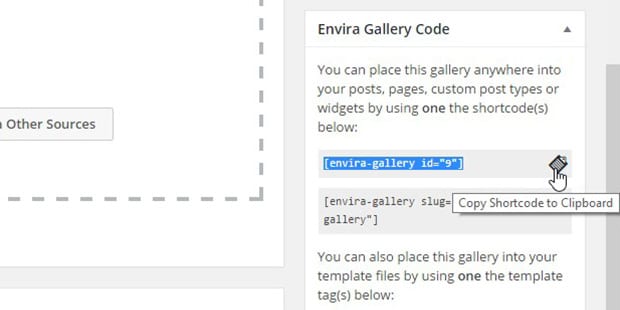
A new widget will appear in the sidebar at the right-hand side named Envira Gallery Code. It has the shortcode and some other useful information about adding the image gallery to your page or post. Copy this shortcode to use in the next step.
Now, go to Posts or Pages, and edit the post or page where you want to add the image gallery.
Simply paste the shortcode into the editor where you want your gallery to appear.
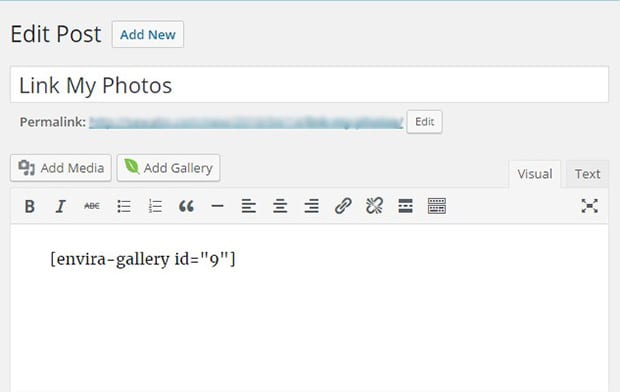
After adding the shortcode, make sure to click on the Update button.
That’s it. Your photo gallery with links is now live on your site!
We hope this article has helped you to learn how to link a photo to a website in WordPress. You may also want to check out our guide on how to create an image widget in WordPress.
If you like this article, then please follow us on Facebook and Twitter for more free WordPress tutorials.








Hi can I add image name under the images?