For any photographer, there are few feelings better than the one you get when you snap that perfect photo.
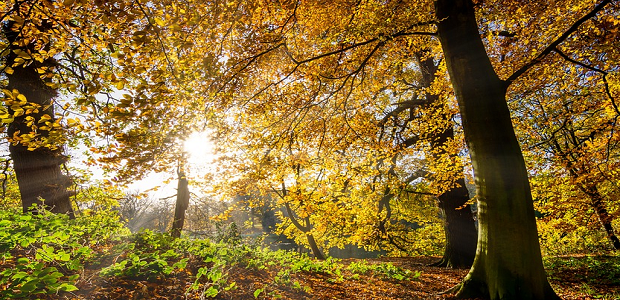
Unfortunately, even if you capture the ideal moment with the ultimate camera, there’s always a chance that the final image will seem somehow duller or colder than you expected. When this happens, the best thing you can do is turn to a trusty friend: photoshop.
Photoshop is one of the best photo-editing solutions out there for a reason. It gives you all the tools you need to correct errors and enhance your images. With the right tools, you can make sure your snapshots have the color they need.
So, how do you add warmth to photos in Photoshop?
In this article we’ll look at 3 steps you can take, including:
- Adding curve adjustment layers
- Adding color balance layers
- Using the Photo Filter tool
Let’s get started.
Adding a Curves Adjustment Layer
One of the easiest things you can do to add warmth to photos in Photoshop is play with layers and curves.
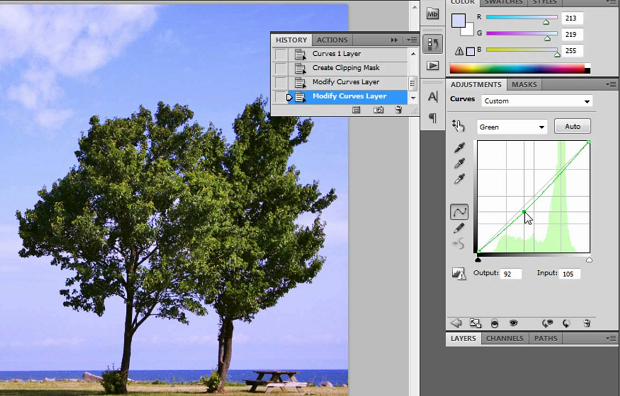
Start by opening the photo you want to edit in Photoshop and use the keyboard shortcut Ctrl+0 to size the image, so it fits into the entire screen. Next, add a Curves adjustment layer by going to the Adjustments panel and clicking the Curves icon.
Once you’re done, you’ll see a new layer appear, like so:
With this panel, you can make a couple of adjustments and discover how to add warmth to photos on Photoshop.
First, add some contrast by clicking on the Presets drop-down menu in the properties panel. Choose “medium” contrast to start – you can always increase it later if necessary. Extra contrast will help to give your photo some definition.
Next, retouch your photo slightly by clicking on the drop-down called RGB. This is where you can begin to remove some of the cold blue tones in your picture and replace them with soft yellows, reds, and oranges.
Adding Your Color Balance Adjustment Layer
The color balance adjustment layer is where you really start adding heat to your image.
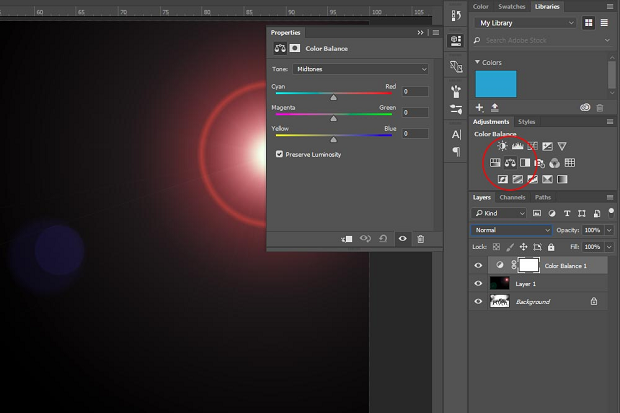
To activate the adjustment layer, head to the Adjustment panel again and click on the Color balance icon. The following panel should open:
Orange is the color that you want to really add warmth to your pictures.
To obtain an orange glow, reduce the blue line so that it moves more towards yellow, and pull the cyan towards the red. The top slider should have a value of around +25, while the bottom slider has a value of -25. Feel free to place around those numbers as you see fit.
Consider blurring the edges of your photo to give it a more glowing, ethereal look.
Using the Photoshop Photo Filter
Alternatively, if you’re looking for a quick and simple way to add warmth to photos in Photoshop, you could try the Photo Filter command.
This tool is specifically designed to help adjust the temperature of your images, and it’s incredibly easy to use.
To use the photo filter, start by opening your image in Photoshop, and heading to the Adjustments tab. If you only want to add the filter to a section of the photo, like a person or the sky, then you can select that area using the Lasso or Pen tool first.
If you want to apply Photo Filter to multiple layers, click on Layer > New Adjustment Layer > Photo Filter.
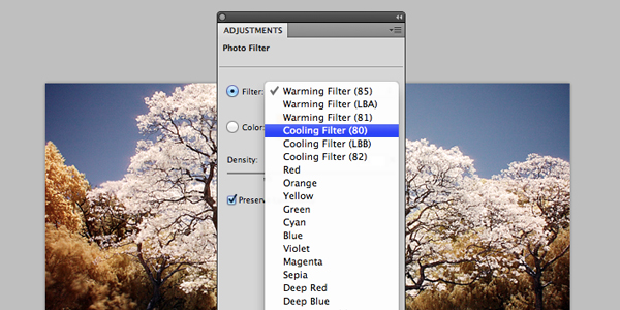
When the Photo Filter dialog box appears, you’ll be able to click on the Filter button and choose either a pre-set warming filter or a custom color, depending on the effect you’re looking for.
Remember to click on the checkbox that says Preserve Luminosity if you want to make sure that you maintain the right balance of brightness and contrast in your image.
Once your Filter is applied, you can use the Density slider on the pop-up box to control exactly how much warmth you add to your image. The higher your value, the more obvious your color will be.
There you have it – everything you need to know about how to add warmth to your photos in Photoshop, without having to worry about things like Gradient and tone maps!
For more tips and advice on how to make your photos stand out, remember you can find us on Facebook and Twitter.


Your blog may have saved my bacon. Error on my part: Left the kitchen lighting on while natural light streamed in. Rookie mistake I need to fix post, so I am grateful for you sharing your knowledge.