The EXIF Addon for Envira Gallery allows you easily display certain data from the image into your gallery and lightbox view. This tutorial will walk you through the steps on how to create a gallery and display our EXIF data from each image.
Requirements
Installation
To use the EXIF Addon, first activate and install the addon from the Envira Gallery Addons tab in your WordPress Admin dashboard. For more help, read our instructions on how to install and activate addons.
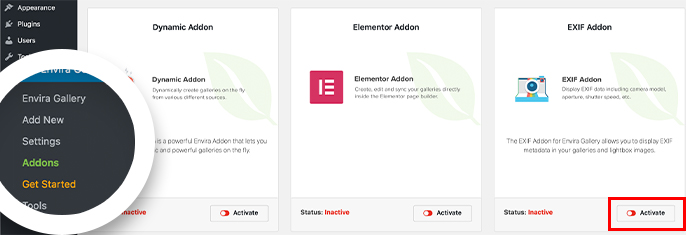
Remember, in this instance, you’ll be activating the Envira EXIF Addon.
Setup
Step 1 – Create or edit your gallery
Before you can use the EXIF Addon, you’ll first have to create a new Envira Gallery or click to edit an existing gallery. You can follow along with our documentation for creating your first gallery if you haven’t yet built your own Enivra gallery.
Step 2 – Set up the EXIF options
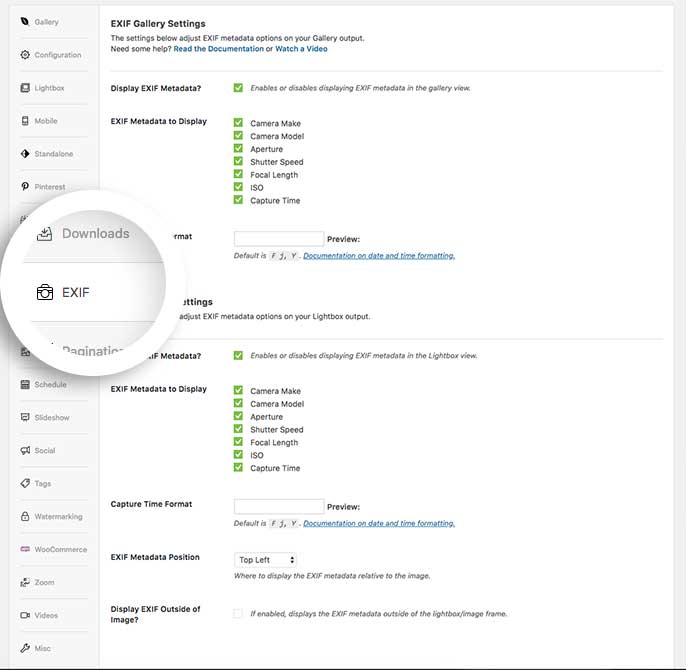
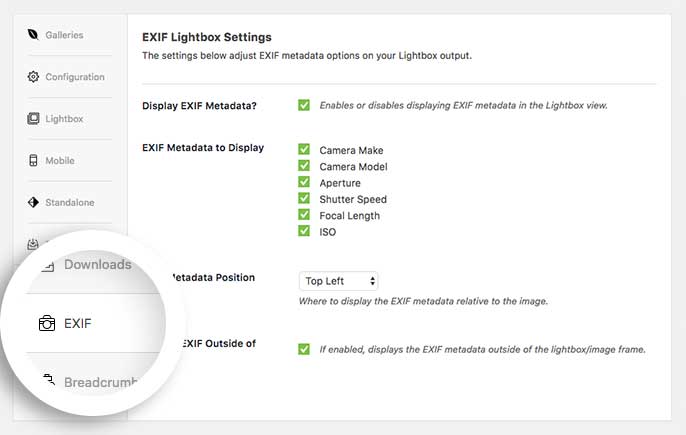
Once you’ve created a gallery, navigate to the EXIF tab in the gallery configuration panel and choose the EXIF data you would like to show on your gallery and Lightbox views.
Envira Gallery gives you the option to display a variety of EXIF data, including camera make and model, aperture, shutter speed, ISO and capture time. Inside the EXIF data configuration tab, you can select to display different data in different views. For instance, you can check to show the shutter speed at which an image was captured in gallery view, but leave that marker unchecked for Lightbox view.
Inside the EXIF data Lightbox view configuration options, you can also choose EXIF metadata position, or choose to display EXIF metadata outside the image.
Step 3 – Set up your EXIF mobile options
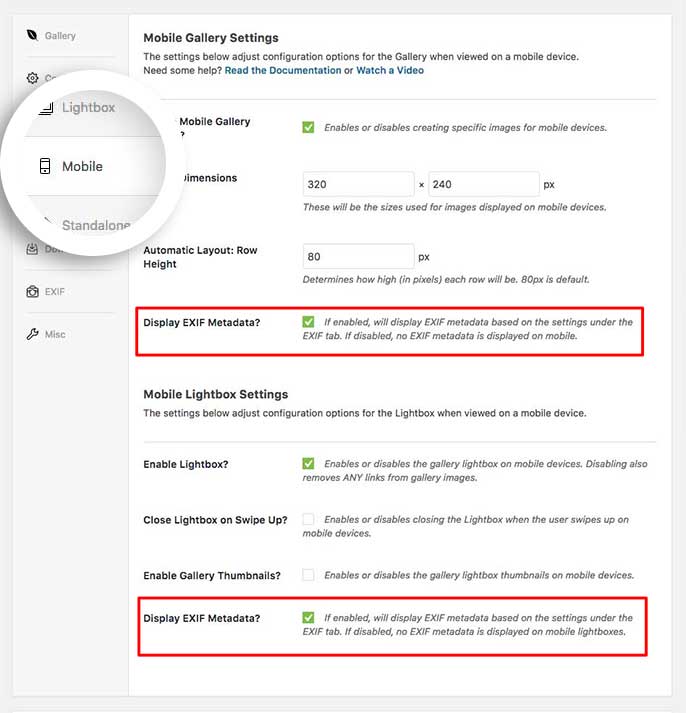
After you configure your settings in the EXIF tab, click on the Mobile tab to set your EXIF metadata options for galleries in mobile gallery or mobile Lightbox views.
Step 4 – Publish or Update your gallery
Finally, click Publish or Update on your gallery to save the changes you’ve made. You’ll now be able to see the EXIF data you’ve enabled on your Envira gallery!
See the demo!
Would you like to style your Envira Tags? Check out our article on How to Style the Tags List.
FAQs
Q: Why don’t I see my EXIF data?
A: EXIF data is not displayed when the Number of Gallery Columns from the Configuration tab is set to Automatic. To show EXIF data in the gallery view, first configure the gallery to show a specific number of columns.
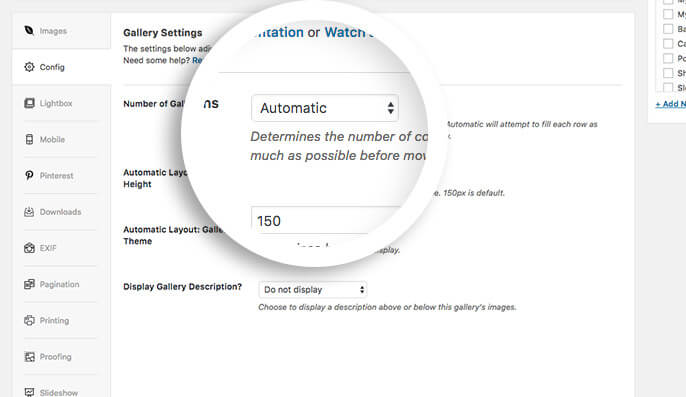
If you’ve selected a specific column layout and the EXIF data still fails to appear, check with your hosting provider to ensure exif_read_data() is enabled from the server level.
Q: Why didn’t my EXIF data import?
A: EXIF data on your images will not import unless you activate the EXIF Addon before you import your images to your site. If you uploaded your images before activating the EXIF Addon, you’ll have to re-upload your images.
Q: Can I use the EXIF Addon with albums?
A: Absolutely! The EXIF tab is also available when creating or editing an Envira Album.
However, you’ll only be able to display the EXIF metadata from the Lightbox view, so the options look a little different for albums.
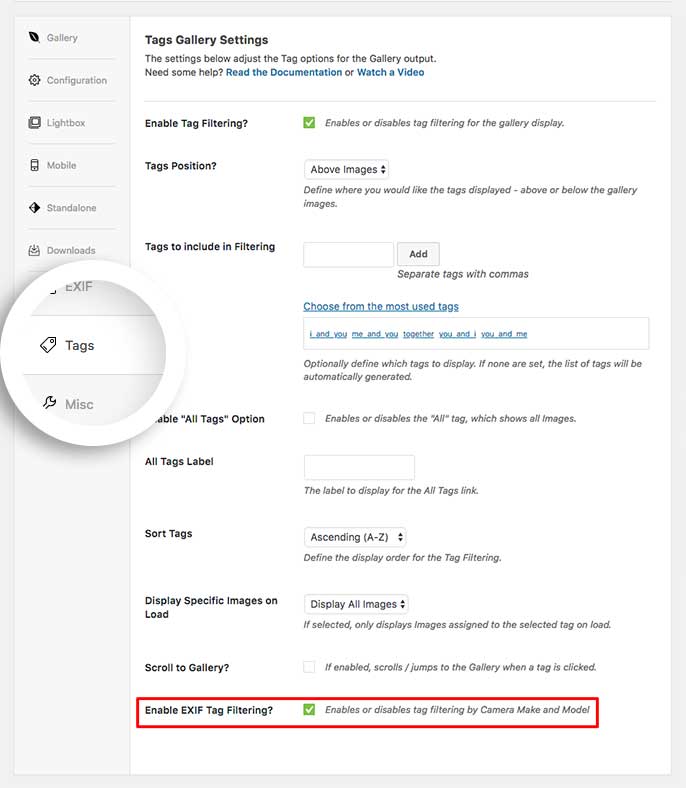
Q: Would I be able to filter by EXIF tags with the Envira Tags Addon?
A: Yes, EXIF data will show up as an option on the Tags tab when using the Envira Tags Addon.
