

Create Beautiful Responsive Photo & Video Galleries For Your Site in Minutes
Documentation, Reference Materials and Tutorials for Envira Gallery
Would you like to use Envira Gallery to bulk edit your gallery images!
It is useful, especially when linking multiple images to the same URL (such as your Facebook page) or adding multiple tags to several images when using the Tags Addon.
This tutorial will walk you through how to bulk edit your gallery images.
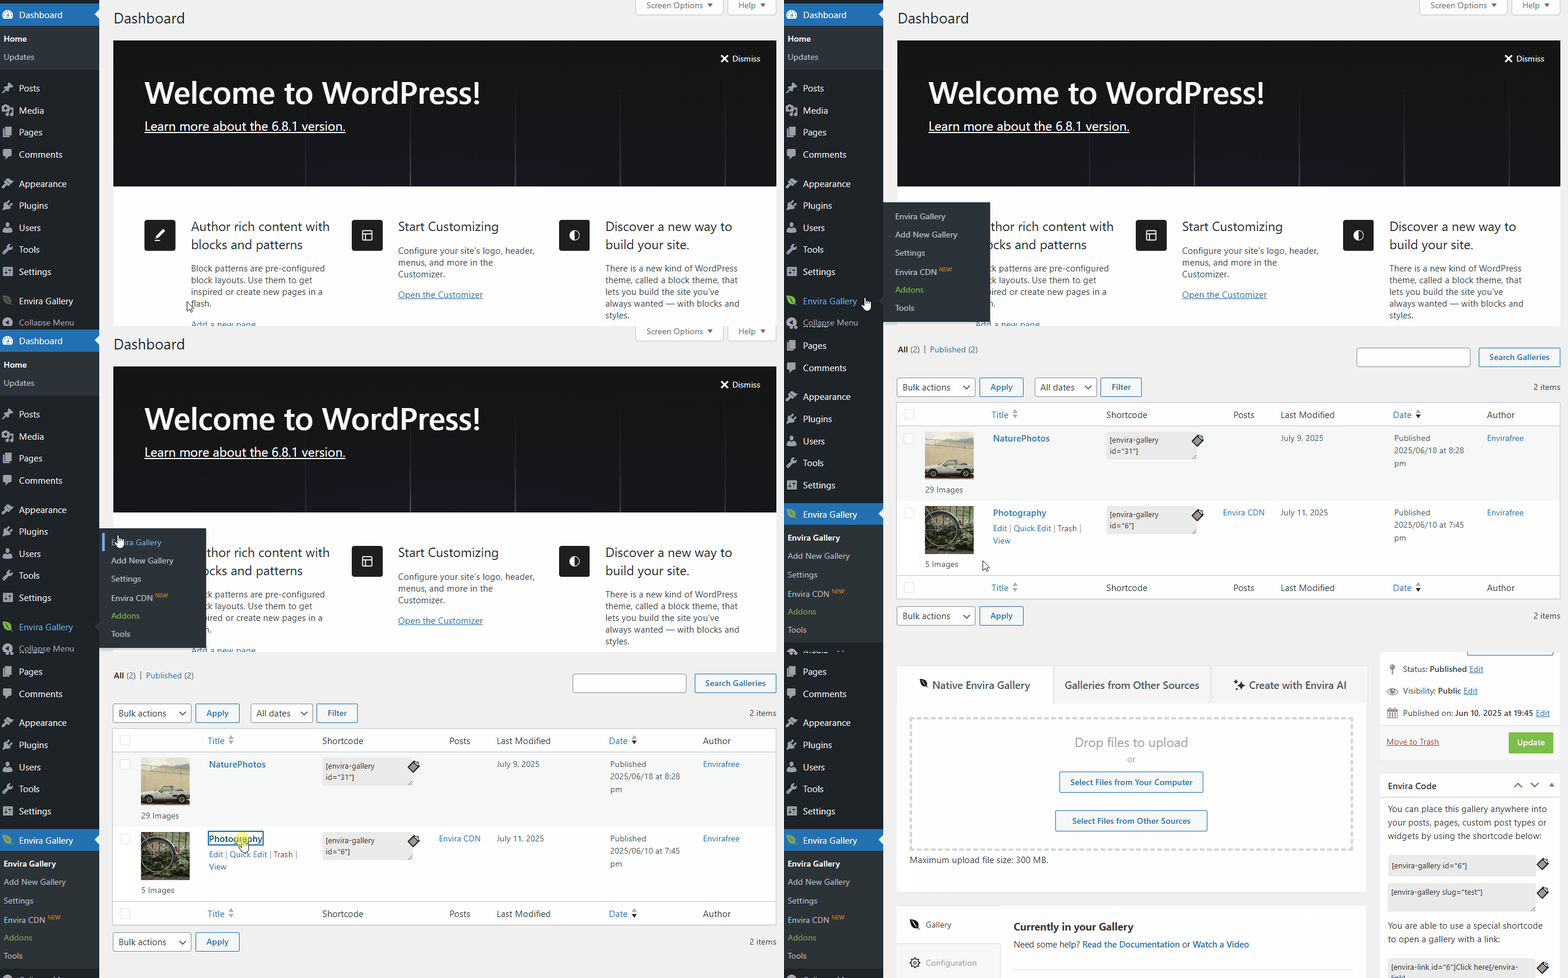
Click on Envira Gallery from the WordPress Dashboard.
Once clicked, you’ll see a list of dropdown options, and select Envira Gallery again from the dropdown. This will take you to the page where all the galleries are listed.
Choose the gallery you want to edit from the Gallery list screen.
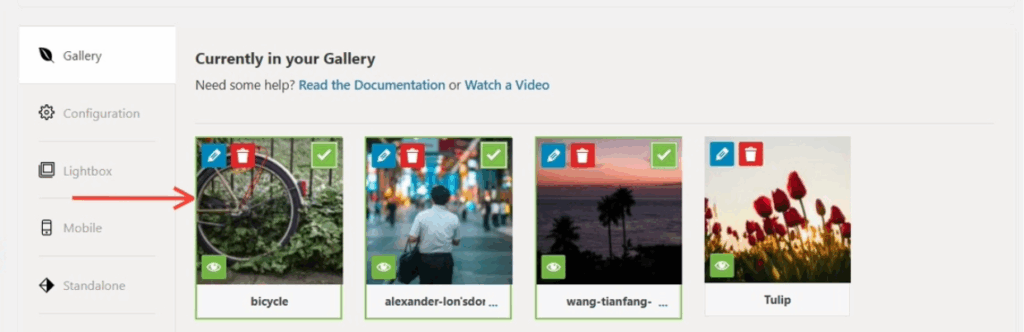
Select the images in your gallery that you wish to edit by just clicking on the images you want.
As you choose the image, it will appear with a green border as well as a green checkmark to give you a visual indication that you have selected that image.
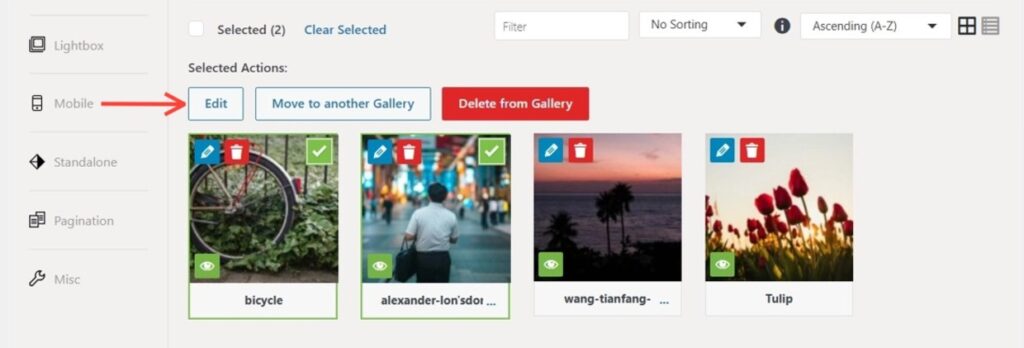
Once you’ve selected your images, simply choose one of the following options for what you’d like to do with them:
For this demonstration, we will be editing our images to add a URL and tags, so we will select Edit.
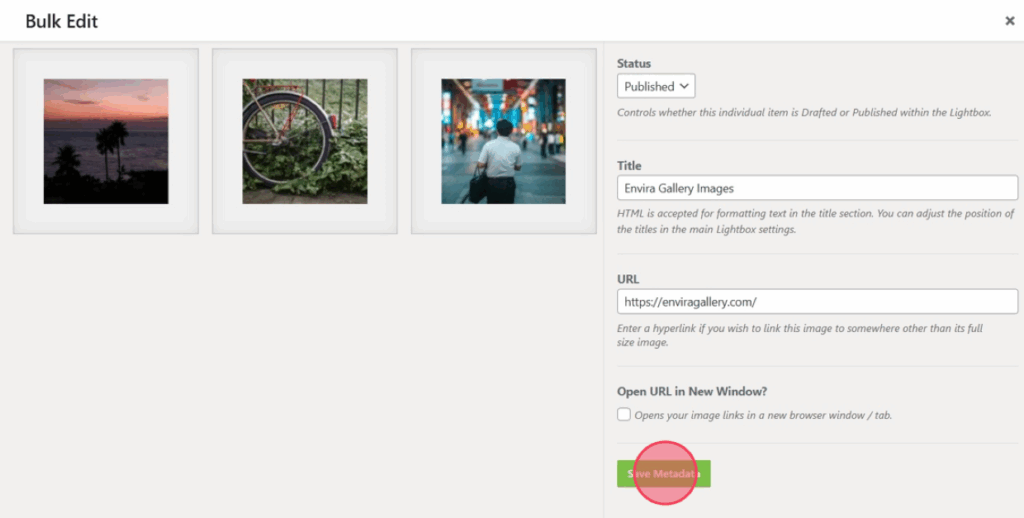
Next, a pop-up window will appear with all of your images you have selected as thumbnails to edit.
From this screen, you can give each image you’ve selected the same title, caption, alt text, URL, open in a new window option, and tags.
When you’ve completed editing the metadata, click ‘Save Metadata’.
The same metadata will be applied to all the images you have selected.
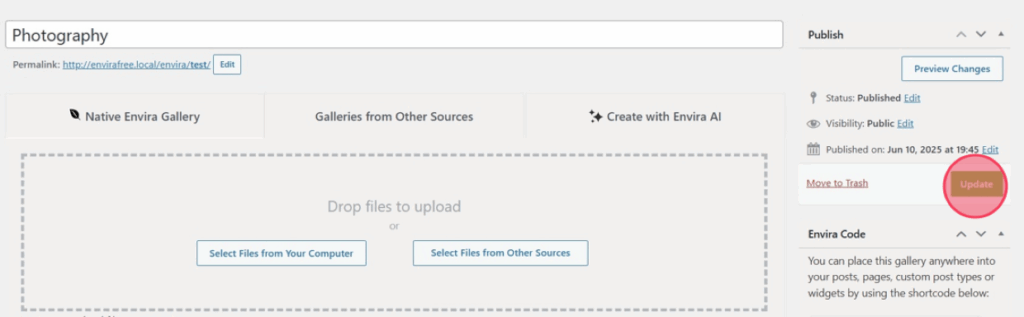
Finally, to save the new metadata on your images, select the Update button for your gallery.
Bulk Edit vs. the Bulk Image Assistant
Bulk Edit and the Bulk Image Assistant both act on many images at once, but they do very different things. Knowing which one to reach for saves you time and credits.
Bulk Edit applies the same values to every image you select. When you type a title, caption, alt text, or URL and apply it, all of the selected images receive that identical text. This is exactly what you want when a group of images shares one label, links to the same page, or should all open in a new window.
The Bulk Image Assistant writes unique AI metadata for each image instead. Rather than copying one value across the batch, it reads each image and generates its own alt text, title, caption, and tags, so no two images end up with the same wording. Because it uses Envira AI, it runs on Envira AI credits at 1 credit per image, and it shows you the credit cost before it starts.
Here is a quick way to decide:
– Use Bulk Edit when the selected images should share the same value (for example, the same alt text, the same link, or “open in a new window” for all of them).
– Use the Bulk Image Assistant when you want descriptive, per-image metadata written for you and you have AI credits available.
Running the Bulk Image Assistant
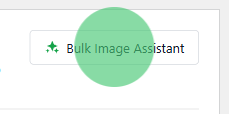
The Bulk Image Assistant lives in the same place you manage images. In the gallery editor’s Images tab, select the images you want (or leave everything unselected to target the whole gallery), then click the Bulk Image Assistant button above the image list.
A confirmation modal opens before anything runs. It shows how many images will be processed, the total credit cost at 1 credit per image, and whether images that already have metadata will be skipped or overwritten (this follows your Overwrite Behavior setting).
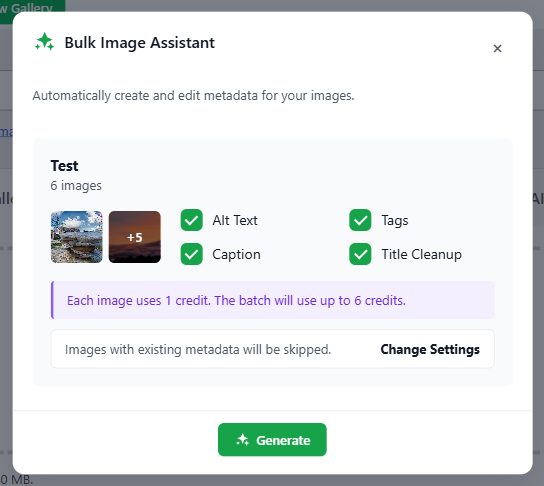
Click Generate to start. The job runs in the background, so you can close the modal and keep working, and you can cancel it at any time. Images already completed keep their new metadata.
> Note: Tag generation in the Bulk Image Assistant requires the Envira Tags addon to be active, because it reuses the same `envira-tag` taxonomy. Unlike the Imagga auto-tagging in the Tags addon, which runs only on upload, the AI Image Assistant works on images that are already in your gallery, in both single-image and bulk modes.
For the full walkthrough, including single-image generation, automatic generation on upload, and gallery descriptions, see How to Use the AI Image Assistant in Envira.
FAQs
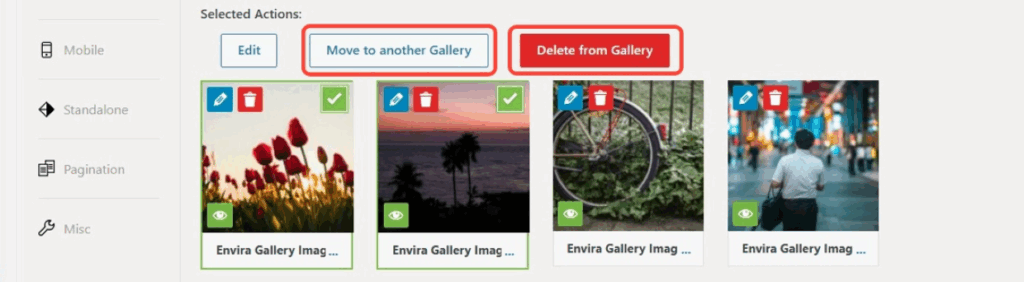
A: The same process can be completed to move images from one gallery to another or completely delete the images from the gallery by repeating the above Steps 1 and 2.
Then, clicking either the Move to another Gallery or Delete from Gallery.

Envira Gallery: Create, Showcase, and Sell Your Work – Trusted by 150k+ Sites.
Enter the URL of your WordPress website to install

Unlock even more powerful features designed to make your galleries even more beaituful.
Video Galleries
eCommerce
Social media Sharing
Adobe Lightroom
And much more!

What are you waiting for?
Copyright © [#this year :%Y] Envira Gallery, LLC. Envira Gallery is a trademark of Envira Gallery, LLC.