Would you like to create an album that can be filtered with category tags? Using the Tags and Album Addons, you can create albums that show galleries based on selected gallery categories. This guide will show you how to create your own filterable album.
Requirements
Installation
Please follow our instructions on how to install and activate addons.
To begin, you must activate the Envira Albums Addon and the Envira Tags Addon.
Setup
Step 1 – Create or Edit a Gallery
First, you’ll need to either create a new gallery or edit an existing gallery. If you need any help creating your first gallery, please review our documentation here.
Step 2 – Add Envira Categories to Galleries
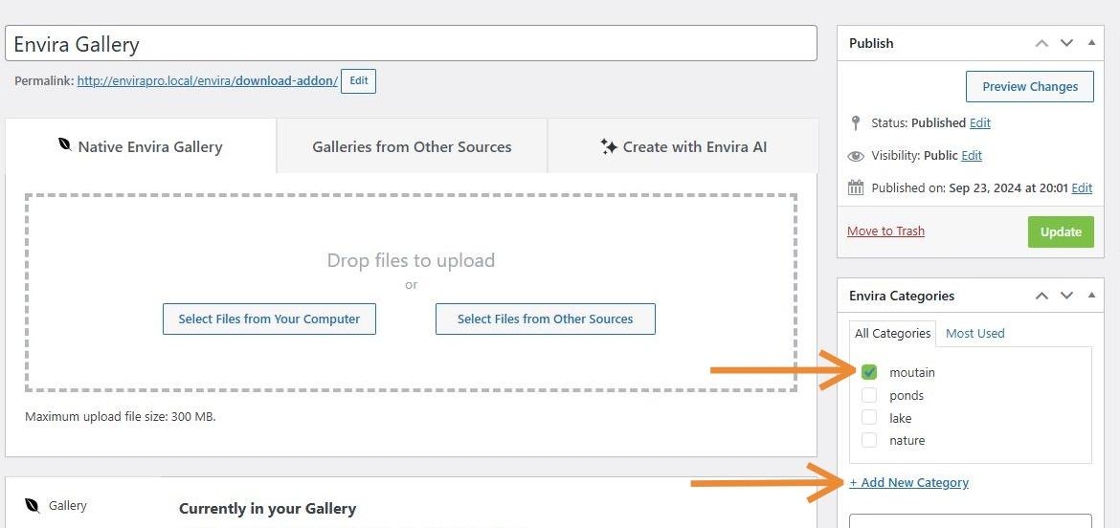
Now it’s time to add the categories to your galleries.
You can do this by either selecting the categories or creating new ones.

Step 3 – Add the Galleries to a Filterable Album
It’s time to create a new album so that you can add your galleries.
If you need any help creating a new album, please review our tutorial on creating Envira albums here.
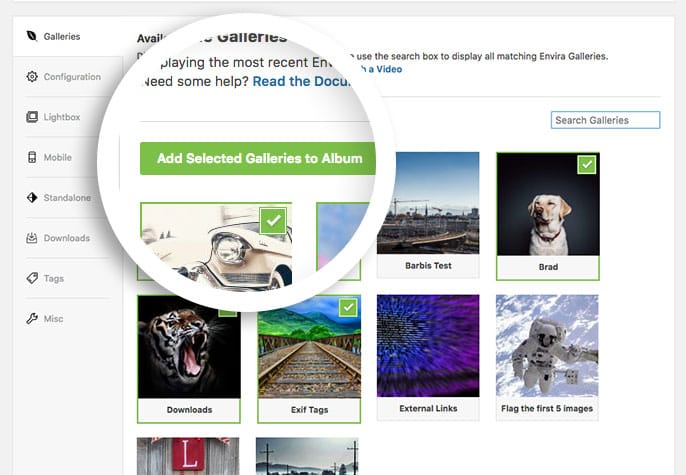
Select the galleries you want to add to your album and then click on the Add Selected Galleries to Album button.

Step 4 – Enable Tag Filtering
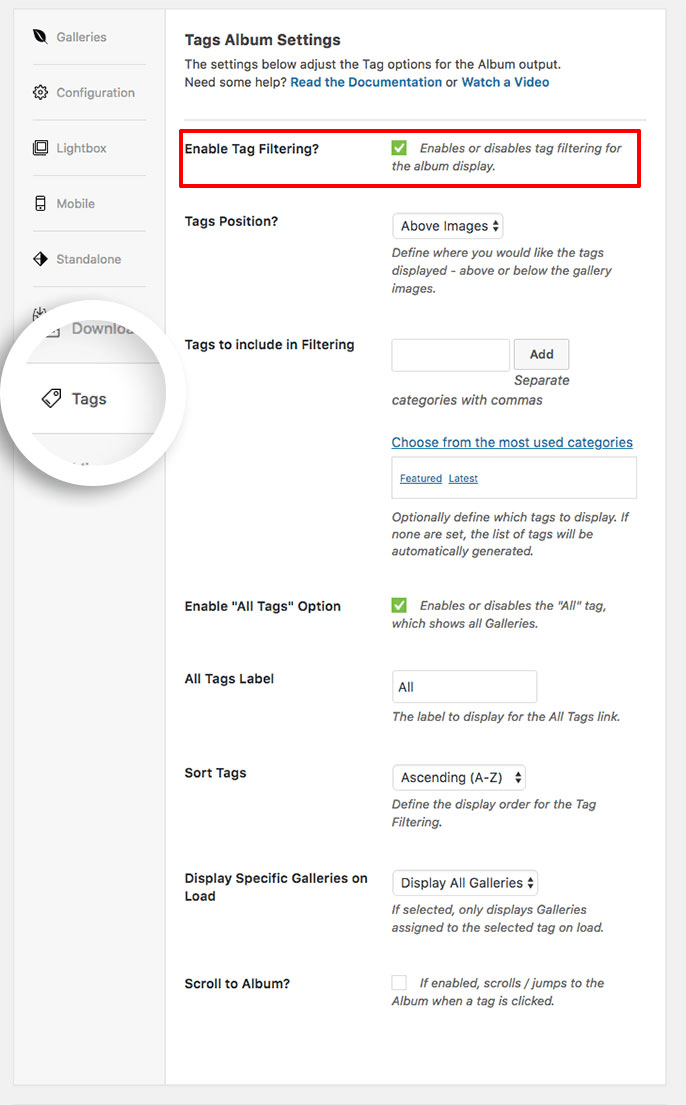
Finally, we need to enable the tags on the album. Navigate to the Tags tab and check the Enable Tag Filtering? to enable tags for the album.

Click the Update or Publish button to save and publish your album. Add your album to a post or page, then view to see tag filtering in action!
See the demo!
Congratulations! You’ve successfully created a filterable album. If you’d like to learn more about creating filterable galleries, check out the Tags Addon.


