Need help setting up Envira’s Lightroom Addon? Look no further! In this guide, we’ll walk you through the steps necessary download and install the Envira Lightroom (Adobe) addon. This is required in order to publish your collections from the Adobe Lightroom software into your WordPress site.
Requirements
Installation
First, we’ll need to download the Envira Lightroom (Adobe) Addon from your Envira account.
Download the addon
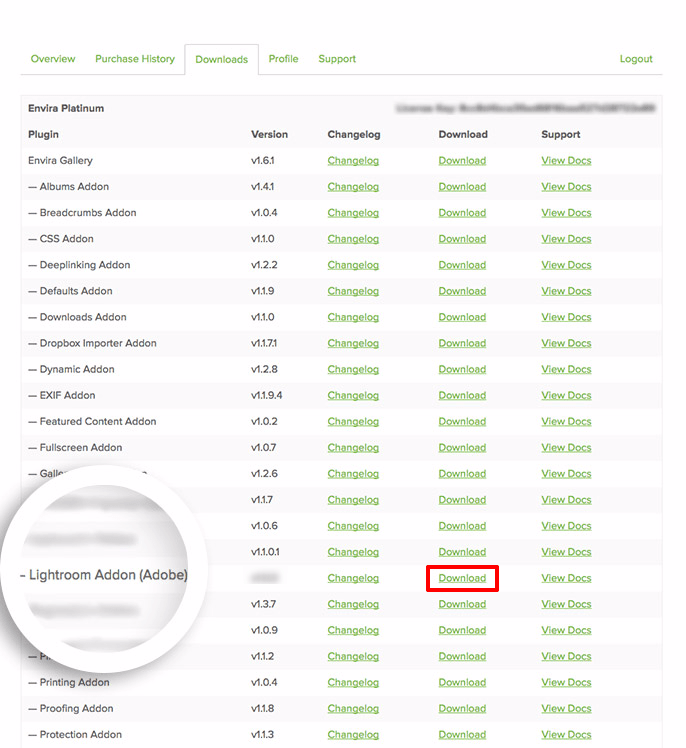
To begin, you’ll need to log into your Envira Account and then click the Downloads tab.
Here you’ll see a complete list of addons available with your Envira license. Just click the Download link for the Envira Lightroom (Adobe) file.
Locate and unzip your download
Next, find the download on your computer wherever your downloads are saved. When you locate the file, you’ll see the enviralrplugin.zip.
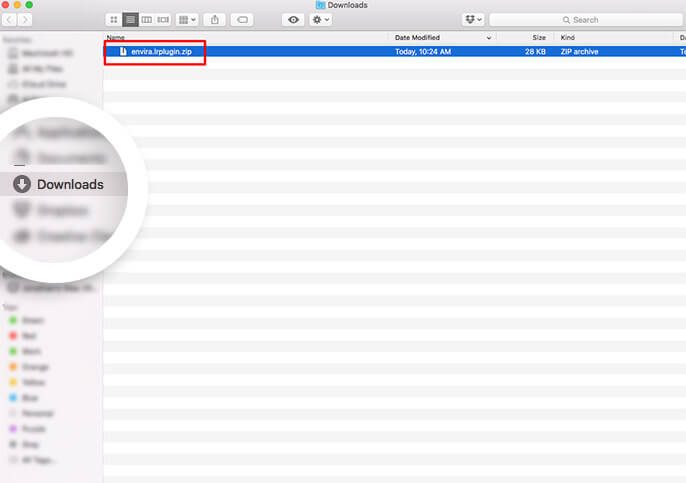
We can now unzip the file. For Mac users, you can just double-click the file to unzip. Windows users should just right-click on the file and choose Extract All.
When you unzip the file, Mac users will see a single file called envira.lrplugin but Windows users will see a folder containing the files necessary. Not to worry, these are the same files, it’s simply that Windows needs a few more files to read correctly.
Move file into Lightroom folder
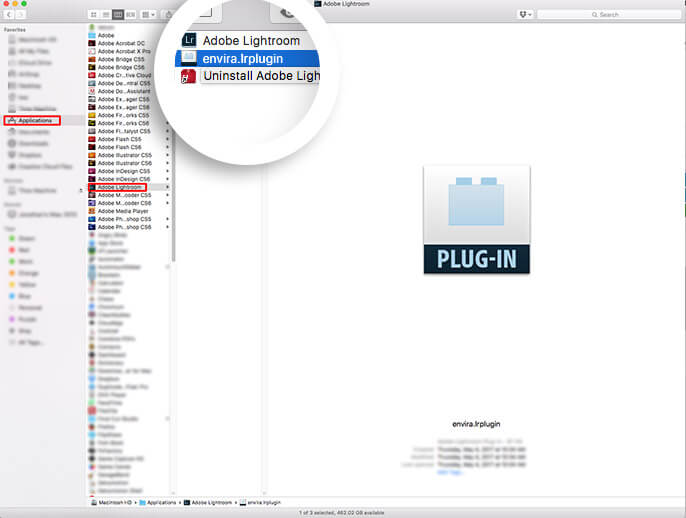
Now it’s time to move the file into a more permanent place. This will ensure that we won’t accidentally delete or lose the file.
We recommend placing the file inside the Lightroom directory on your computer, this will help in remember where it is should you need to update the file at a later time.
Simply drag and drop the file into the permanent location you’ve selected.
Plug-in Manager Installation
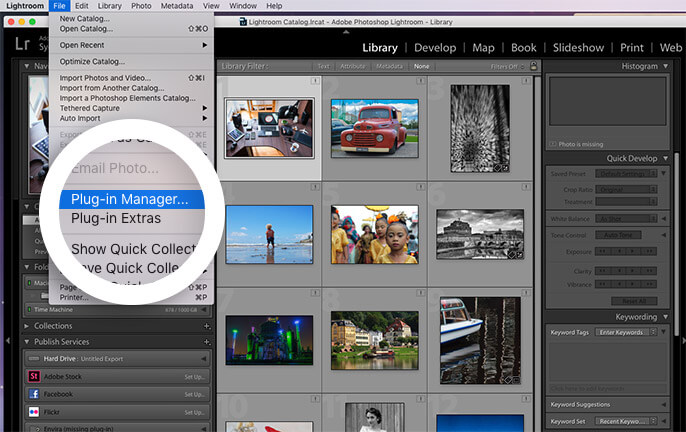
We can now finish the installation by installing the app through the Plug-in Manager inside Lightroom.
from the File menu, select Plugin-in Manager to open the window.
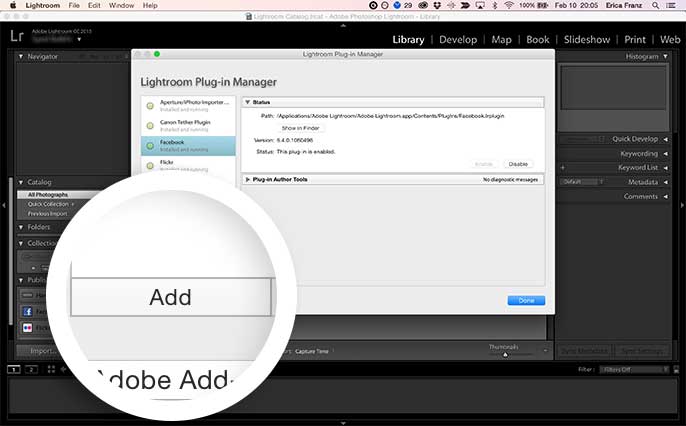
With the Plugin-in Manager window open, select Add from the bottom left corner of the window.
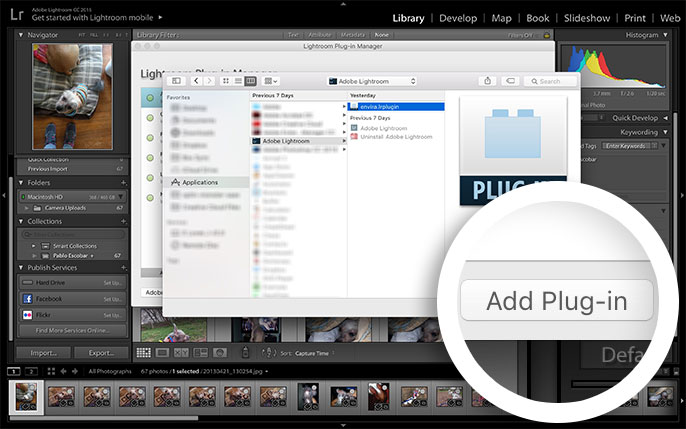
Next, navigate to the folder containing the plugin file, select the envira.lrplugin file and then the Add Plug-in button.
You’ll now see the Envira plug-in in the Plug-in Manager. Select the Done button to finish.
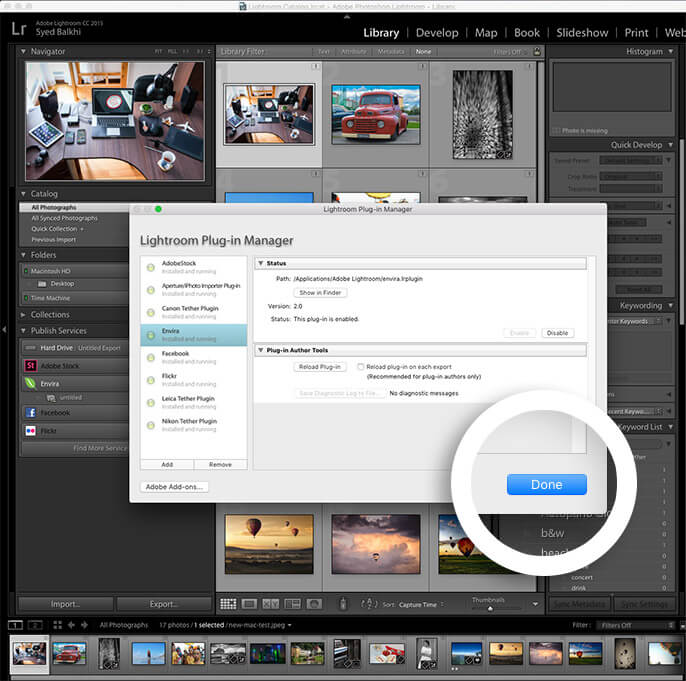
And that’s it! You’ve now successfully installed the Envira Lightroom (Adobe) app inside your Lightroom. You can return to our How to use the Lightroom Addon for Envira Gallery.
Check out our video tutorial to see the process of connecting Lightroom and Envira Gallery in action:


