The Lightroom Addon for Envira Gallery let’s you easily create beautiful Envira galleries from your Lightroom collections. We’ll show you how! This walk through guide will show you how to set up your Lightroom to immediately publish your collections to your Envira gallery.
Requirements
Installation
Please follow our instructions on how to install and activate addons.
In this instance, you’ll be activating the Envira Lightroom Addon.
Lightroom Addon Setup
If you haven’t already, you’ll need to also install the Envira Lightroom (Adobe) Addon on your computer.
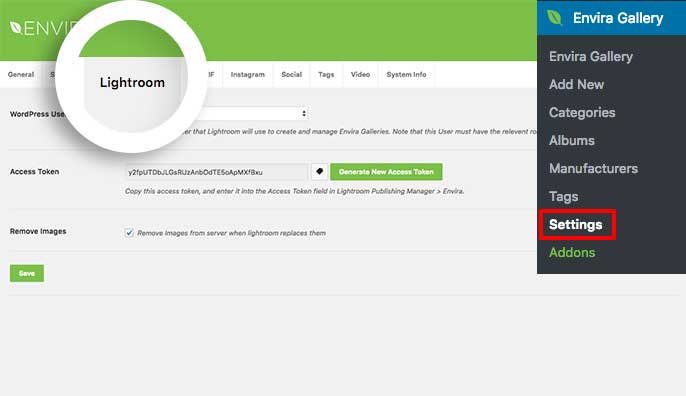
Once you’ve installed both pieces of Envira Lightroom, head over to the Lightroom tab from your WordPress admin » Envira Gallery » Settings and click on the Lightroom tab.
Step 1 – Choose the WordPress User
Select the WordPress User from the dropdown. This user must have the administrator role.
Step 2 – Generate New Access Token
Next, click Generate New Access Token button. You’ll want to copy this token as we’ll need this in Step 5.
Step 3 – Select your image removal option
The next option is optional. The Remove Images option just removes the images from your server if they’ve been edited and re-published.
Let’s say you’ve published a collection already but want to edit your images. If you re-publish the collection, this option would remove that original published image and replace it with the new edited image. Simply check the box if you would like these original images to be deleted from your server if they’ve been replaced with an edited version.
Step 4 – Save your settings
The last step for the Lightroom tab is to just click Save to save these settings.
Step 5 – Enter the access token and WordPress URL in Lightroom
To complete the setup, just copy the Access Token from the Lightroom tab and open the Adobe Lightroom software.
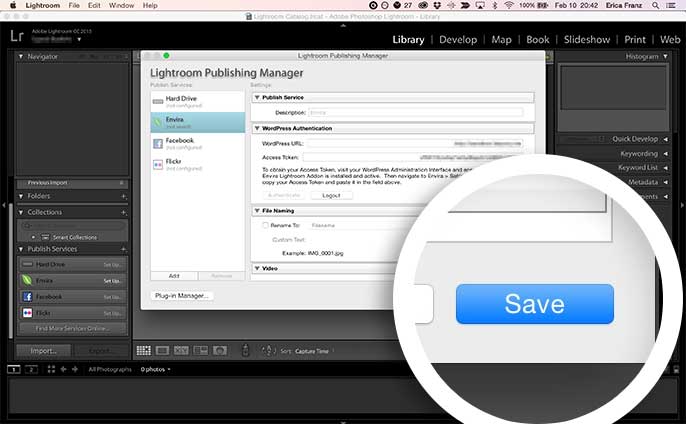
Next, right-click on Envira from the Publish Services section and choose Edit Settings.
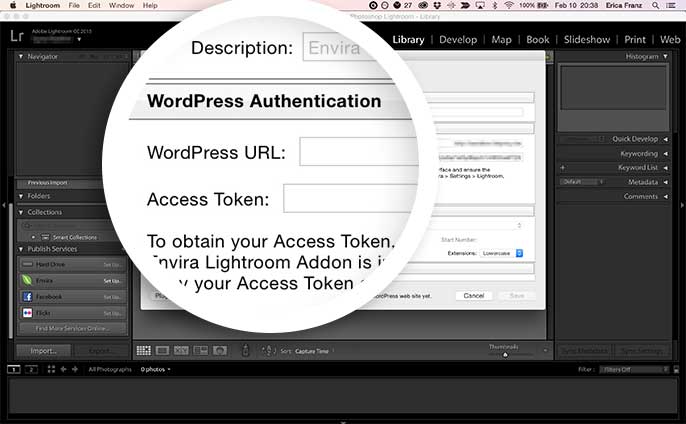
Click the Authenticate button. If authentication was successful, an on screen message will be displayed.
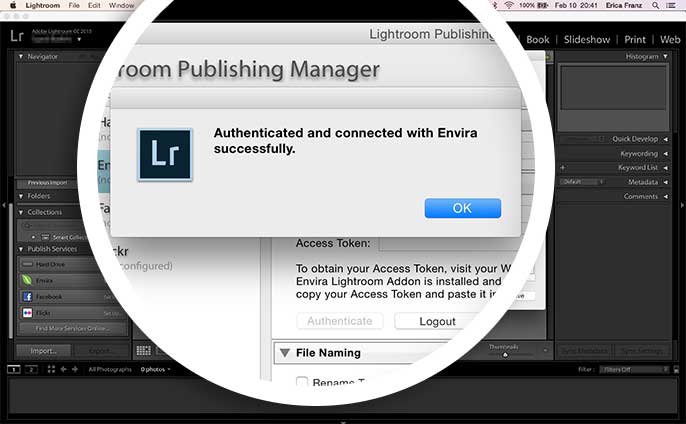
If you successfully authenticated the Access Token, just click Save to save the changes.
Setup
Now let’s create a new collection and publish this collection to Envira.
Step 1 – Create a new collection in Lightroom
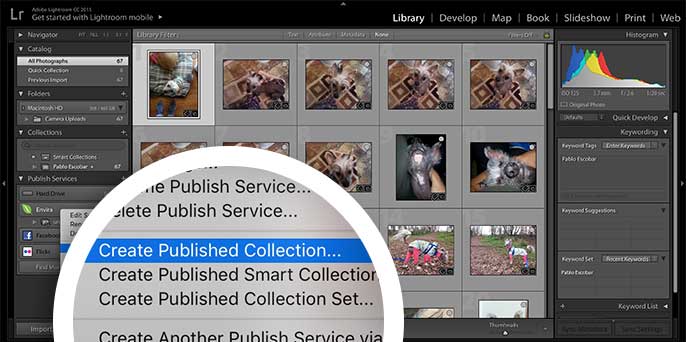
Let’s begin with creating a new Collection in Lightroom. Right click on Envira under Publish Servicesand select Create Published Collection.
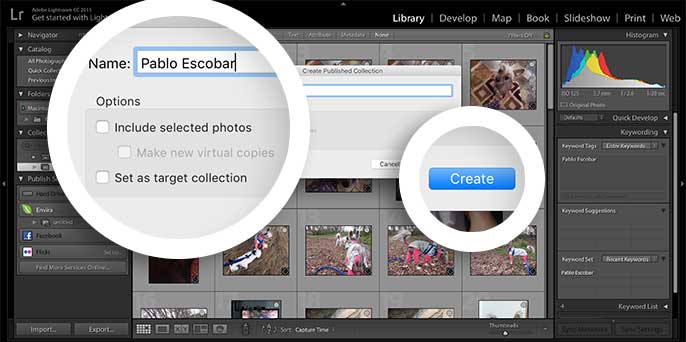
Next, enter a Name for the Collection and click Create.
The Name you give you enter here will be the title of your Envira gallery when you go to publish the Collection.
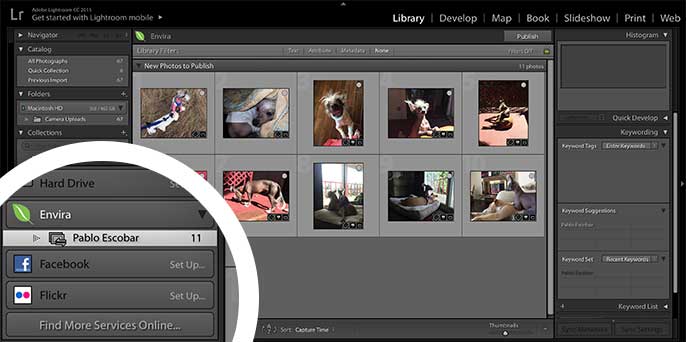
You can have as many Published Collections as you wish. Each Published Collection will have its own Envira gallery on your WordPress web site.
Step 2 – Add images to your collection
Your next step is to add some images to your Collection. Simply drag and drop your photos from the Lightroom library into the Collection.
Step 3 – Publish your collection to Envira
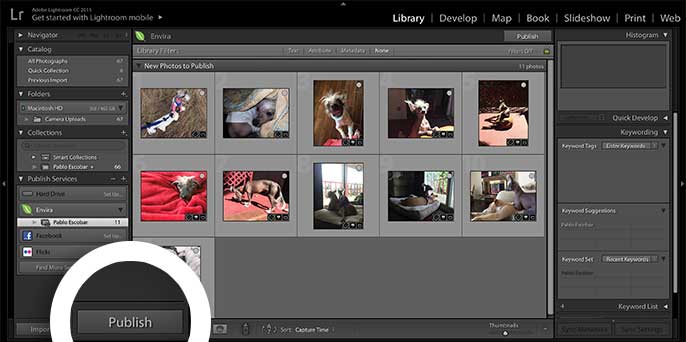
Finally, your last step is to publish your new Collection. The Publish button will be available towards the bottom left of the Lightroom screen:
You can check the progress of your publishing by viewing the progress bar in the upper left corner of the Lightroom screen.
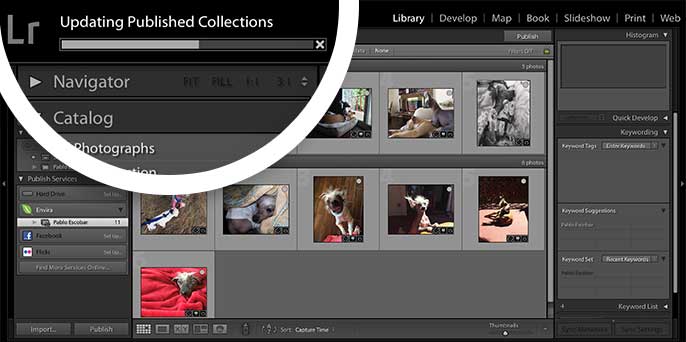
When you publish your Collection, Envira will automatically publish your gallery and set the status to Published. Your gallery will be created using a set of default settings if the Envira Defaults Addon is not installed and activated. You can log in to your WordPress site at any time to update these settings or simply install and activate Envira’s Defaults Addon to use a base configuration.
FAQs
Q: Which image types can I use?
A: At this time we only support jpg and jpeg.
Q: Why can’t I publish a Collection?
A: There can be several different reasons. If you’re having trouble with publishing a collection, please reach out to our support for assistance.
Q: I can’t seem to publish more than 20 images?
A: This a server setting. You should contact your hosting company if you’re able to publish some images to check for any remaining server limitations.
Q: What happens if I want to delete a collection?
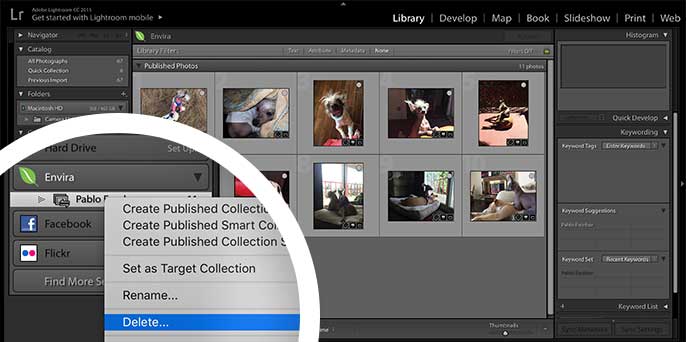
A: To delete an already published Collection, you only need to right click on the Collection and choose Delete. Lightroom will ask you how you would like to delete.
If you select the Leave on Service, the Envira gallery would remain on your WordPress site.
Selecting delete will not only delete the collection be removed from Lightroom but the gallery would also be deleted from the WordPress site as well.
Why did my watermarked get removed?
A: If image was updated and re-published, the previously watermarked image is replaced with the image from Lightroom without the watermark.
If you’ve selected “Remove Images” then Envira will already think the watermark was already applied and wouldn’t attempt to reapply the watermark. The image file name would need to change in order for Envira to reapply a new watermark.

