Have you ever wanted to use Google Analytics to track how many times your images are shared on social media using the Envira Social Addon, downloaded from the gallery using the Envira Downloads Addon, or simply just viewed in the lightbox? This tutorial will walk you through the step by step process on setting up your events to track each click using the Google Tag Manager.
This tutorial will presume you have already set up your Google Analytics account and enabled the Google Tag Manager. If you’ve not already completed this step, you’ll need to follow
this tutorial to complete these steps before beginning.
Creating your event, triggers and tracking variable
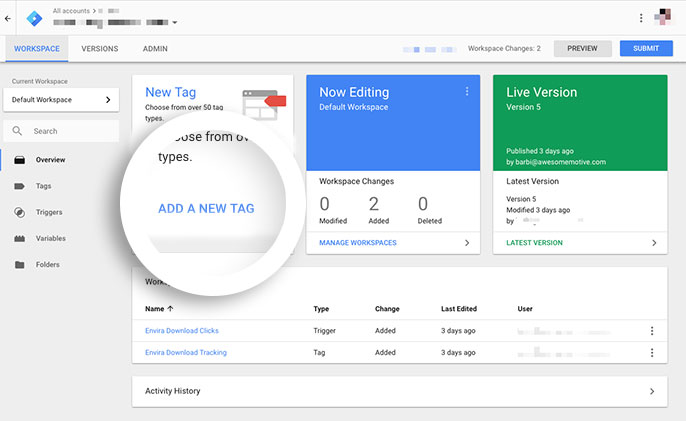
The first thing you’ll need to do is set up your tag. To do this, log into your Google Tag Manager account. From your main dashboard, click Add New Tag.
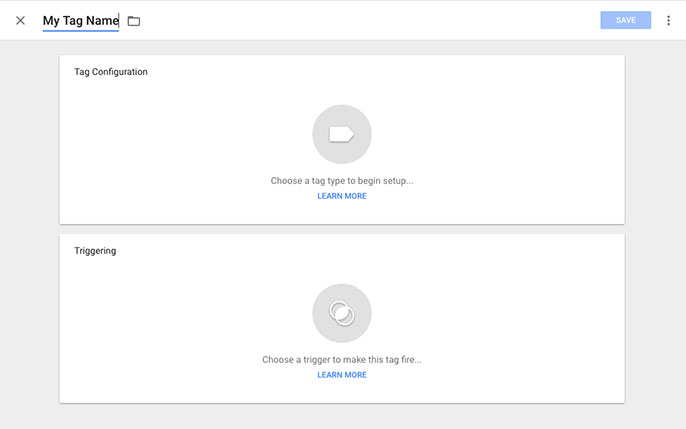
Give your new tag a name and click inside the Triggering window to set up the trigger for this tag.
Setting up the trigger
From this first screen, you’ll see all the Triggers you’ve already set up. If you haven’t set any triggers up yet, simply give your trigger a name and click the plus sign to add a new trigger. For the purpose of this tutorial, we are going to be tracking the download links with the Envira Downloads Addon, therefore our trigger name is going to be Download Clicks.
Our next step for the trigger is to figure out when we want that trigger to fire. Click on the Choose a trigger type to begin setup… to choose a trigger type. Since we’re wanting to track the clicks for the downloads, we’re going to choose the Just Links option, but we don’t want to track all links at this time, only the download links. Choose Some Link Clicks.
You’ll see a few options show for you to set up which links you want to target. Choose Click Classes, contains and in the last input box type in envira-download-button. That is the CSS class needed to track any links clicked with that class.
However, if you were setting up your social share clicks, you’d use the CSS class envira-social-network. For lightbox tracking, use the CSS class envira-gallery-link.

After this step, just click Save in the top right corner to save this Trigger.
Setting up the Tag Configuration and Variable
You’re final step for setting up the Google Tag is to complete the Tag Configuration setup. Click the Choose a tag type to begin setup… and you’ll see a slide out with many options to choose from. Choose the Universal Analytics and from the dropdown for Track Type and select Event.
This screen is where we’ll be setting up our specifics and it will accept any text you type in for the Event Tracking Parameters. We’re going to type in our Category, Action and Label names.
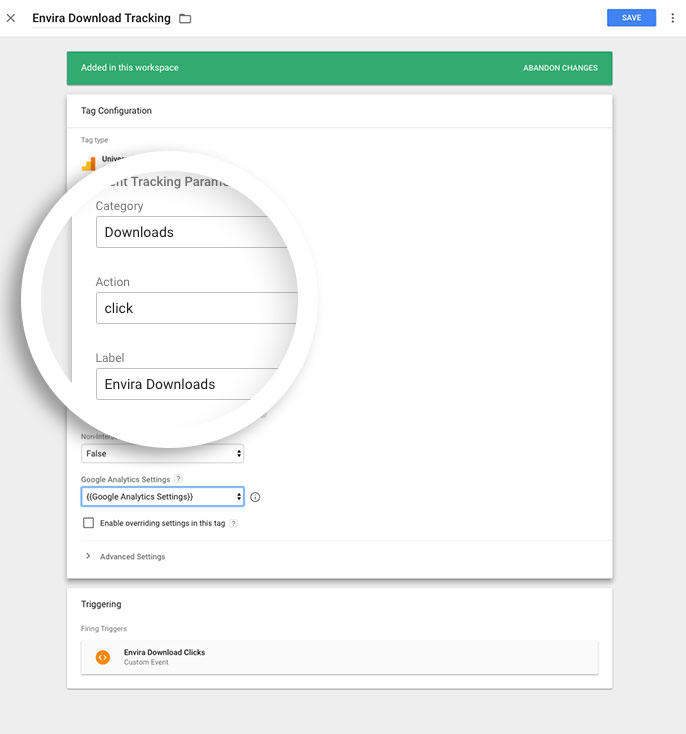
The last step in this process is to set up the Variable from the Google Analytics Settings.
If this is your first time, you can select New Variable from the dropdown to set up your Google Analytics tracking ID. That would be your UA-*********-* number that you would place in this field. You can find this number by logging into your Google Analytics account and going to Admin » Property » Tracking Info » Tracking Code.
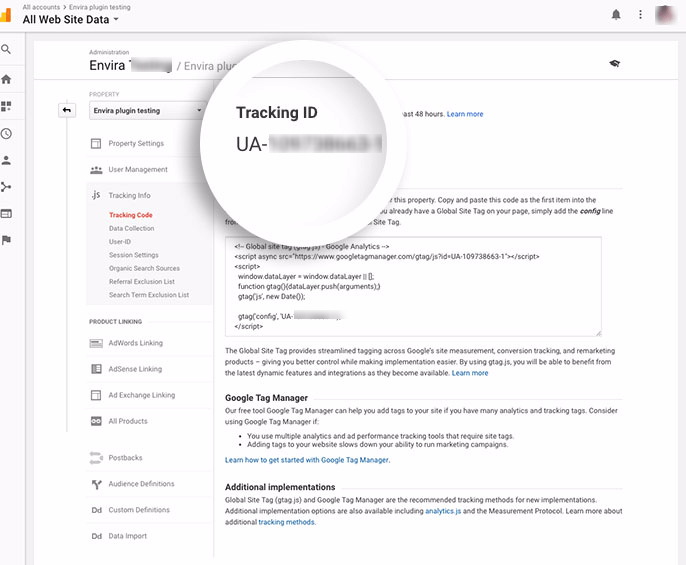
Copy and paste your ID to the Tracking ID box on the Variable Configuration and click the Save in the top right corner.
That will close the slide out and allow you to now click Save in the top right corner for the Tag Configuration.
Adding the script to your site
Now that we have set up tag set up, we just need to add this script to our site so we can begin tracking the links. There are several ways to do this.
- Use your theme’s footer.php file. We never recommend this particular option. If the theme author pushes out an update, you could lose your changes when you update the theme package.
- Use a child theme to add your script to your child theme’s footer.php file.
- Create a custom plugin for you to add your custom scripts to your site.
- Use a plugin like Simple Custom CSS and JS to add the script to your site.
For the purpose of this tutorial, we’ve used a child theme. If you would like to learn more on how to create a child theme, check out this article from our good friends at WPBeginner.
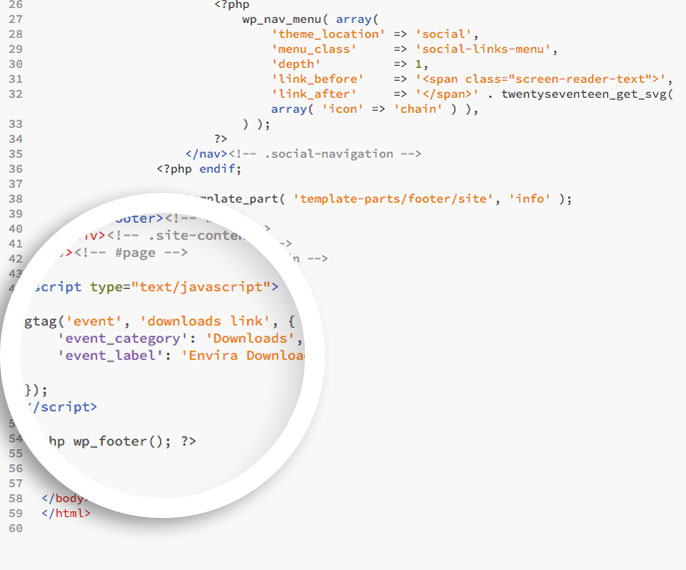
Inside the child theme’s footer.php file, before the php wp_footer(); call, we’ve added this javascript to finish setting up tracking the download links.
<script type="text/javascript">
gtag('event', 'downloads link', {
    'event_category': 'Downloads',
    'event_label': 'Envira Downloads'

});
</script>
Viewing your analytics
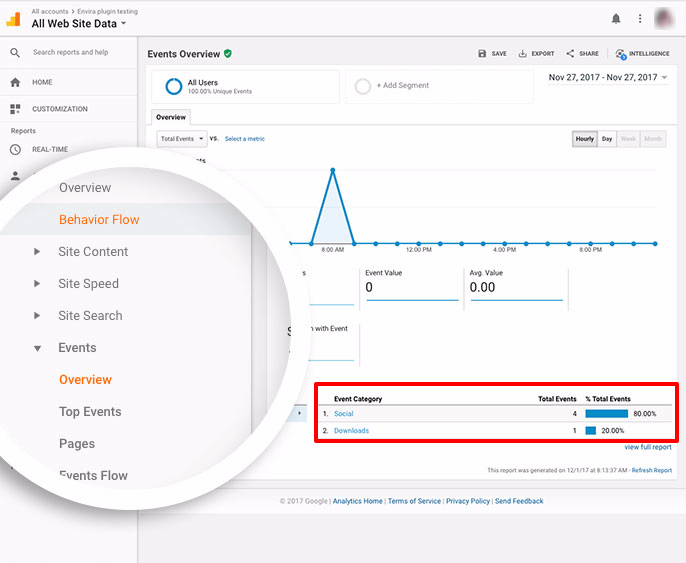
To view your events in Google, simply log into your Google Analytics account and go to Behavior » Events » Overview.
And that’s it! Want to do some more fun things with Envira? Why not check out our tutorial on How to Load Your Gallery Lightbox from a Text Link.


