


The Lasso Tool in Photoshop CC is a fundamental selection tool for all image editors. Being able to edit and enhance exact portions of a photograph is a tool you need in your arsenal. How can you best use the Lasso Tool in Photoshop CC?
The Lasso Tool has remained similar across versions of Photoshop. From early versions of CSX to the current Photoshop CC, it hasn’t really had a fundamental change. This does not mean the tool is outdated, it means the tool has not really needed a change.
Creating a selection in Photoshop seems like a rather simple process. You can use a variety of tools, select an area, and edit it. However, learning all the ins and outs of the Lasso Tool can lead to making difficult selections much more simple.
Learning to be a Photoshop wizard is all about knowing how best to use each tool. Basic tools, like the Lasso Tool or the Brush have immense amounts of settings. Knowing where these settings are, what they do, and how to use them allows you to accrue the building blocks.
Once you know all these tools inside and out, Photoshop becomes easy. Instead of having to figure out how to do something to an image, you can focus on the creative aspects. How can I impact this image in a positive way through editing?
You will know what your final product will be, and the steps to get there. You won’t need to figure out the tools and settings because they will be ingrained in how you use the application. Photoshop will be the tool which allows you to perfectly transform your images.
This tutorial will cover:
- What is the Photoshop Lasso Tool?
- Best uses for the Photoshop Lasso Tool
- How to use the Photoshop Lasso Tool
- Best tutorial for using the Photoshop Lasso Tool
First, make sure you have Photoshop downloaded on your device. If you don’t already have the program, you can get it through Adobe’s Creative Cloud Plan for only $9.99/month.
What is the Photoshop Lasso Tool?
The Photoshop CC Lasso Tool is primarily a selection tool. In this section, you are going to learn the basics of the tool as well as its applications.
What Does the Tool Do?
As mentioned above, the Lasso Tool is a selection tool. This means that it allows you to create selections. Using selections, you can edit a specific area, allow an area to ignore edits, or apply effects to an area.
The idea is that you can draw around an area with a range of controls, and that area will become your selection. Changing these controls allows you to sway the exactness of your selection. If you want a more or less exact selection you can change how the tool works.
The Lasso Tool also allows you to remove from selections, or add to them. This means you can have two areas of an image edited in exactly the same way, even if they are spaced out from each other. Furthermore, the Lasso Tool allows you to change what layer a selection is in!
Modes of the Photoshop Lasso Tool
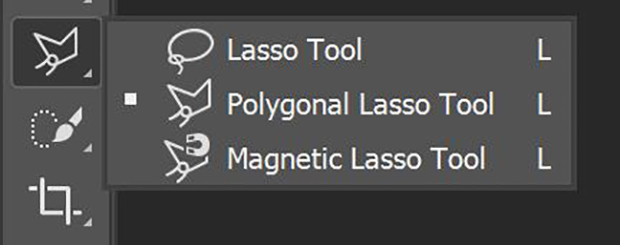
The Photoshop Lasso Tool has three primary modes. To access these modes, first press the keyboard shortcut L to access the Lasso Tool. You can also access the Lasso Tool from your Toolbar. Then, use you right mouse button on the Lasso Tool while selected and use the drop down menu to select the three tools.
When using any of the three Lasso Tools to create a base selection, you need to complete the selection for it to be created. To complete a selection, simply wrap back around to the original point where you began the selection. You cannot create a selection which is not closed.
The basic Lasso Tool:
- Make selections by simply left-clicking and dragging.
- Great to use with an external tablet to circle around curves and other harder objects.
- Harder to use for perfect selections with a mouse.
- Good for slight modifications to selections.
The Polygonal Lasso Tool:
- Make selections by clicking your left mouse button and connecting several points.
- Fast selections around general areas, especially where the simpler Marquee Tool fails.
- Perfect for selecting polygonal shapes.
- Lots of control for design focused work.
- This example tutorial makes use of the Polygonal tool for a fast selection of a general area.
The Magnetic Lasso Tool:
- Make selections by simply dragging your mouse around borders.
- Great for quickly selecting around non polygonal desired selection shapes.
- Automatically does the legwork of the selection for you.
- Can be finicky and require additional edits to your selections using other Lasso Tools.
The Basics of Working the Lasso Tool
The three variations of the Lasso Tool in Photoshop work with slight differences. The Basic Lasso Tool is the foundation. The Polygonal Lasso Tool and the Magnetic Lasso Tool work as extensions of this base.
Lasso Tools work by creating a starting selection or deselection point and encircling an area to select, add to your selection, or remove from your selection. When you align your initial point and final point, a small circle next to your cursor will pop up. Complete your selection there to see the effect pop up on your screen.
Best Uses for the Photoshop Lasso Tool
What are the Best uses for the Photoshop Lasso Tool? Learning when you should be using a tool is just as important as knowing what the tool does. The saying goes, “Choose the right tool for the job”.
The Basic Lasso Tool
Using the Basic Lasso Tool can be infuriating. A lot of the selections are hard, especially with a traditional mouse or trackpad. To make this easier, I highly suggest a drawing tablet to pair with the Lasso Tool.
This variation of the tool is best suited for editing selections. After you have already created a base selection, you may need to modify it. Using this tool to make quick and simple modifications to a selection is a smart move.
However, adding to selections is likely best left to other tools. Removing from selections is really where the Basic Lasso Tool shines.
You may have an incredibly complex selection that took several minutes to create. If the case is that you have this selection, but may have spilled it over an edge or around something, you can easily manipulate it with the base version of the Lasso Tool.
For example, this tutorial uses the Lasso Tool to help create a background replacement. Try to recreate it for practice! Another fun tutorial teaches you how to create face swaps using the basic Lasso Tool.
The Polygonal Lasso Tool
The Polygonal Lasso Tool is my favorite tool for any selection with more complexity than the Marquee Tool can handle. It is a substantial tool for a base selection which you can modify further.
It is not the best tool for creating selections around eclectic surfaces, such as a person or their head.
Many times when using a tool such as Content Aware Fill while retouching, the Polygonal Lasso Tool handles the situation well. Another way it is used is when you need to apply a filter to a specific space for a graphical effect.
The Magnetic Lasso Tool
The Magnetic Lasso Tool is an underused tool when creating complex selections. An important part of the tool is understanding how to use it additively for selections.
A common goal with the Magnetic Lasso Tool is to cut people out from backgrounds.
Certainly, selecting around someone with the Magnetic Lasso Tool in one fell swoop presents its difficulties. For each person, it is easy to make a mistake and have to restart. Instead, cutting people out in smaller chunks lets you not have to repeat this process.
How to Use the Photoshop Lasso Tool
Using the Lasso Tool without understanding the different parameters you have the ability to manipulate is akin to jumping in without doing your research. This section will reveal all the different ways to manipulate the variables which control the Lasso Tool and its variations.
Understanding the Options
Both the base Lasso Tool and the Polygonal Lasso Tool draw from the same options. The Magnetic Lasso Tool does as well, but also contains additional settings. Use the drop-down menu on the Lasso Tool to find these or press Shift + L.
Initially we will cover the base settings, and then we will uncover the additional options available in the Magnetic Lasso Tool. To find the options bar, select the Lasso Tool by using the keyboard shortcut L or click you left mouse button it on your Toolbar.
Here is the options bar visible after you followed these steps:
The Home icon returns you to Photoshop CC’s home tab.

Tool Presets allows you to create and use previously created presets for the tool.

New Selection allows you to create a brand new base selection with a Lasso Tool.

Using the Add to Selection option allows you to expand your current selection with a Lasso Tool.

Subtract from Selection allows you to remove certain areas from a current selection, which may not align with your editing goals.

Intersect with Selection allows you to create a new selection over an existing selection. When you do this, a third selection will be created which is the intersection of the previous two selections.

The Feather option allows you to feather your border a certain distance. Feathering is the movement from current opacity to zero over a given amount of pixels. This is useful for when you want to create an effect around a selection which may not be perfect, and you want some amount of leeway.

Anti-Aliasing smooths the jagged edges created by a selection over an amount of pixels that cannot represent it. For example, with a low resolution image, a circle will often be visible as a many sided polygon, rather than regular shape it is.

Select and Mask lets you mask around your selection. This can be useful when you want to apply something to all areas outside of your selection, or you can Invert a selection to apply a mask only to your original selection.

Furthermore, this is the option bar for the Magnetic Lasso Tool, which differs from the traditional Lasso Tool in that it uses Photoshop CC’s powerful engine to help you create a selection based on visually available information.
These are the additional options provided:
Width – a measurement of the width which will be used to create the algorithmically derived selection by the Magnetic Lasso Tool. This should be lowered for areas with a lot of different sized elements, and raised for areas which feature larger elements colliding.

Contrast – Reads a certain amount of contrast as somewhere to draw a line for you. When Photoshop CC’s algorithm sees changes in value (or brightness) or color, the Magnetic Lasso Tool will create a line. Changing this value to a lower amount allows it to hunt in lower contrast areas.

Frequency – Fundamentally the sampling rate of the tool. The higher the frequency, the larger the amount of points the tool will create on the image. This means that for images with a low tolerance, you should use a higher frequency. Images where the tolerance is looser benefit from a slightly lower sampling rate. You can manually add a point simply by clicking, in which case the tool will act like similarly to the Polygonal Lasso Tool.

Things You Should Know
What are some key keyboard shortcuts you should be using with your Lasso Tool of choice?
- Keyboard shortcut L
- Selects the Lasso Tool from the toolbar.
- Shift + L
- Using the Shift key with a tool allows you to switch between variations of tools without Right-Clicking the tools themselves. This circumvents the need to use the drop-down menu.
- Control + Shift + I or Command + Shift + U
- Inverse your selection. This is useful if you want to select everything but an object. Select the object, then use this shortcut to reverse your selection.
- Control + J or Command + J
- Create a new layer with just your selection.
- Control + D or Command + D
- Deselects your current selection
- The Move Tool
- Keyboard shortcut V, allows you to move just your current selection on the screen.
Other small things:
- Switching between layers allows you to maintain your selection.
- When using a filter, the filter will only apply to your selection.
- You can use selections in combinations with layer masks.
Creating a selection can be frustrating. Especially one of a person, or an object with a lot of hard edges that needs to be perfect due to contrast. In the next section, I will show you how I go about doing such a selection.
Editing an Image Using Lasso Tools
Now, it is finally time to edit an image. I really like this photo, but I want the background to add to an air of curiosity and mystery given off by the foreground character:

The first thing I want to do is create a selection. Instead of selecting the entire character in one, I’m going to use the Polygonal Lasso Tool to create a base selection. After creating the base selection, we are going to add to the selection using the Magnetic Lasso Tool.
This is what the base selection looks like:

Now, I’m going to use the shortcut Shift + L to switch to the Magnetic Lasso Tool. Next I will select the Add To Selection button in the options bar. I will also make sure that Anti-Aliasing is turned on.
Two other settings I will enable are a Width of 5 pixels and a Contrast of 20%. I am setting my contrast higher than the base Photoshop CC setting of 10%, as my background and foreground have relatively sharp contrast. Lastly I will increase the Frequency to around 65 to make sure that my smaller selections will be as perfect as possible.
Lastly, I will use the base Lasso Tool to trim the smallest problems. The hat was giving me the slightest issues with the Magnetic Lasso Tool, so selecting Subtract from Selection I can remove the background that I accidentally had in my selection.
This is that final selection:

Finally, I invert my selection using the shortcut Control + Shift + I or Command + Shift + U. Then I apply a couple adjustment layers in a layer mask I create, and use a gradient to add an outwards desaturation and darkening effect. This is the final image from the edit:

Learn More About Selection Methods
The Quick Selection Tool is a great tool for fast selection. The Quick Selection Tool allows minimal user control, but can do the legwork for you a lot of the time. Use the Quick Selection Tool when the zone is in clear contrast to the rest of the image.
The Polygonal Lasso is a simple tool, but sometimes you need something similar for ellipses or rectangles. Using the Marquee Tool as a Polygonal Lasso replacement for a lot of faster selections is great. A lot of the options between the two tools for the selection overlap, and the ability to create circles is not present for the Polygonal Lasso.
Want to use a Brush Tool or Clone Stamp Tool and need a boundary for the tool not to breach? Sometimes it is hard to exactly paint on a sample with the Clone Stamp Tool, or a color with the Brush Tool. To best either the Brush Tool or the Clone Stamp Tool, create a selection first!
Similarly, using a retouching tool or a layer mask without a selection can be difficult. Use a selection to make your work more accurate! A big retouching task involves replacing areas, and using the Content Aware Fill tool from the Edit drop-down menu is a great help after creating a selection.
For even more control than the Lasso Tool provides, especially regarding curvature and graphic design, you will want to use the Pen Tool. Check out the beginner’s Guide to the Pen Tool. It is a much more manual and in depth tool than the Lasso Tool, but when used correctly it is fantastic.
Best tutorial for Using the Photoshop Lasso Tool
Tutorials give a lot of great advice, and following along means that you practice. Try out a couple of these tutorials to refine your skill in the Lasso Tools. You might also pick up some other skills and techniques on the way!
Several tutorials were mentioned earlier in this guide. Removing a person from a background is a fun and easy process that you can use to retouch images down the line. You can also learn how to replace backgrounds in this tutorial.
For fun and enjoyment, you can create some silly Facebook posts learning how to swap faces, using this previously mentioned guide.
Other great methods for selection rely on many different parts of Photoshop CC. The Pen Tool, mentioned above, is especially powerful. Learn more about it here.
Color selection for a variety of reasons allows you to create selections that would be impossible to create manually. This tutorial incorporates it in a creative way that could be applicable to your style.
Finally, learning how to apply filters to selection can take a lot of practice, as well as a lot of learning what is hidden in Photoshop CC’s tumultuous drop-down menus. Work your way through it by learning how to blur edges in a portrait, trying to get that low aperture, bokeh look.
Was this tutorial helpful to you in any way? If so, please follow us on Facebook and Twitter for more photo editing tutorials and fun practice methods.


