Many great images use background separation or a blurry background as a composition tool. Though you can achieve this effect in camera as you photograph, you might want to add it to an image that you’ve already shot. If the background in your image is distracting, blurring it out can solve your problem! So, how do you best blur background in Photoshop?
You may decide to try adding a blur effect to your image backgrounds in Photoshop for several different reasons. Here are some of the ways a blur effect can enhance your images:
- Draw focus to a singular subject
- Allow for a dreamier or more creative look
- Build layers and dimension
- Fix unintentional foreground or background details
This article will show you two different methods for achieving a blurry background in Photoshop. Try experimenting with both of the methods, and even combine some of the elements from both to work on your images. Practicing your technique will help you better — and more quickly — employ it in future editing projects.

This tutorial will cover:
- Different options for blurring background in Photoshop
- Effects of blurring background in Photoshop
- Steps to blurring background in Photoshop
If you don’t have it yet, you can get Photoshop from Adobe’s site. As part of Adobe’s Creative Cloud Plan, you get Photoshop and Lightroom both for only $9.99/month.
Options for Blurring Background in Photoshop
As with many editing effects, there are multiple different options for blurring background in Photoshop. We’ll cover a few of them in this guide and talk briefly about some others. The two main methods for achieving this effect both involve applying a Gaussian Blur to your photos, and then using different masking tools to contain the blurry effect.
But, everyone edits differently in Photoshop, so there are other methods of achieving blur. Many of them require you use Photoshop’s extensive Blur Gallery. To access the Blur Gallery, go to Filters >> Blur Gallery. There, you’ll find a selection of various types of blur filters, all with their own unique approach to blur.
When you apply a blur filter to an entire image, it often affects the entire image. But, you can then use some of Photoshop’s other tools to remove blur from select portions of the image. For example, you could choose to use the Eraser Tool to remove blur from your main subject, or you could use a combination of Layer Masks and selection tools like the Lasso Tool.
Actually, the Lasso Tool is just one of several Photoshop selection tools. The Object Selection Tool might be a better fit, depending on your image. To access the Object Selection Tool press Shift + W, then simply drag the tool across the object you wish to select.
Using some new and nifty artificial intelligence technology, Photoshop will automatically make a selection for you! Sometimes it isn’t perfect, so you may have to retouch the selection using the Lasso Tool. But, it provides a good start!
Getting the hang of object selection using Photoshop’s selection tools will only help you in the long run. Many editing techniques — even the most basic — require the use of selection tools. For example, selection tools can make applying dodge and burn effects easy because they help you isolate sections and objects from the rest of the image.
Using a Layer Mask to Separate the Background
Layer masks provide the foundation for many editing techniques in Photoshop. This tool allows you to apply layer edits and adjustments only to a portion of your image. These local adjustments can help you isolate particular areas of a photograph, whereas global adjustments made without a Layer Mask applies to the entire image.
So why would you use Layer Masks to blur a background? Well, Layer Masks help us control where the blur appears. With Layer Masks, we can apply a blur across the entire photo, and then choose a focal point to reveal without blur.
Again, like many other operations in Photoshop, we could accomplish this task a couple of ways. We could stack our layers so that the blur layer is on top, and then mask out the area with the original foreground. Or, we could make our in-focus subject the highest level layer and mask out the background to reveal the blurred image.
Layer masks are a fantastic tool, and you should be using them across your photo editing! They’ll end up cutting your editing time down, and they’re pretty easy to work with after some practice.
Separating a Photo Background in Photoshop
Separating a background can be a lot of work, but thankfully, Photoshop has several tools designed to make the process much easier. For very technical methods, check out this guide. Otherwise, let’s get into it.
The first step to separating a subject from its background and foreground is to select the subject. As mentioned above, the new Object Selection Tool (W) is a great starting point when it comes to creating a selection of your subject.
Once you create a base selection of your subject using the Object Selection Tool, you can use Photoshop’s other selection tools to perfect it. Here’s where tools like the Lasso Tool and Quick Selection Tool come into play. The Quick Selection Tool works best when your subject and background contrast starkly with one another.
You’ll find as you experiment that each selection tool has its own strengths and weaknesses. Play with them until you find the right combination for your image.
After you’ve isolated your complete subject, you’ll want to move it onto its own layer. When you do that, you’ll be able to edit the background and the subject separately. That way, you’ll be able to create detailed separation between layers.
To see this done step by step with images, read on!
Effects of Blurring Backgrounds in Photoshop
Before we get into the tutorial, it’s important to understand the potential side effects of blurring a background in an image. It is also important to understand how you should think about applying this technique, as well as how Photoshop actually manipulates images.
How Does Photoshop Make a Blurred Background?
As we mentioned earlier, Photoshop offers several different types of blur options or filters. When blurring backgrounds, you’ll primarily use the Gaussian Blur filter. Find Gaussian Blur by clicking Filter >> Blur >> Gaussian Blur.
This blur, created by and named after mathematician and physicist Carl Freidrich Gauss, create a smooth effect over your image. Photoshop manages this blur by running Gauss’ equation, which calculates the smoothest possible blur for your photograph.
Depending on your photo, you may want to apply Photoshop’s Motion Blur instead. You apply Motion Blur the same way, by navigating to Filter >> Blur >> Motion Blur. But, Motion Blur differs from Gaussian Blur in that it mimics blur created through motion or panning. Thus, the effect it brings is more random and less smooth than a Gaussian Blur.
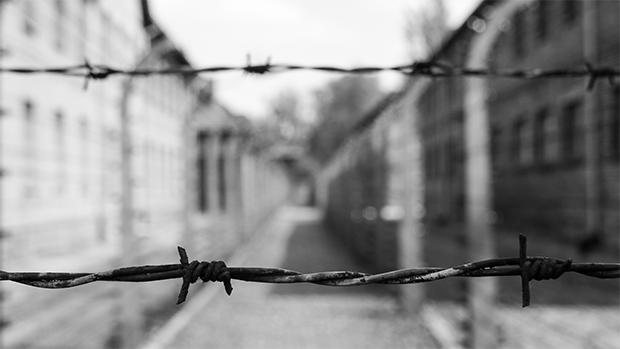
You should apply Motion Blur when you want to give your primary subject the feeling of being in motion. In fact, this blur filter can even make your images look like you shot them while panning with your subject. Of course, the amount of Motion Blur you apply to your image will determine how fast the subject appears to be moving.
Why Should You Use Gaussian Blur in Photoshop?
Gaussian Blur gives the most natural blur effect in Photoshop, which makes it best for blurring backgrounds. And, Gaussian Blur actually lowers visual noise because it mixes noise with other colored pixels so that the noise is less visible. The overall smoothing and blurring makes it a great tool to use for background editing.
Other types of blur, such as an Average or Motion Blur, will produce different effects that work well on specific images that require specific results. A Gaussian Blur produces the most standard blur.
Although you can use Gaussian Blur to achieve an out of focus background, be aware that it won’t mimic the in-camera effect exactly. For example, this blur can’t give a bokeh effect when it comes to brighter lights. There is also no simple way to mimic chromatic aberration typical of large aperture lenses with blur filters. If you’re interested in those effects, it’s best to work on them in-camera.
When You Should Use the Blurry Background Effect?
If your photo has a busy background that can distract viewers from the main subject, consider using the blurry background effect.
As we mentioned earlier, there are two ways to achieve a blurry background in your photos. You can produce blurry backgrounds in-camera as you take the photo by adjusting your lens’ focal length. A longer focal length and a wider aperture will mean the largest amount of separation in your images, and thus the most amount of blur.
You will not, however, always be able to take photos with such perfect settings. The other main option for adding blur is to use Photoshop to edit blur into the images after you’ve taken them.
If you’d like to try achieving a blurred background result in-camera, read our guide on how to manage shallow depth of field in your photos.
But, if you’re ready to introduce blurred backgrounds in post-production, let’s take a look at how you can do that in Photoshop.
Steps to Blurring a Background in Photoshop
Of course, to begin editing, you’ll need to open your image in Photoshop. This is the image that we will be using for this guide:
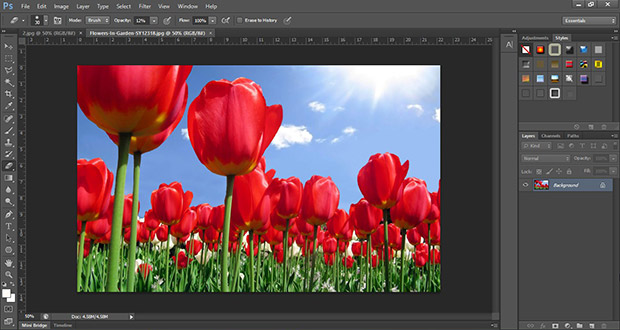
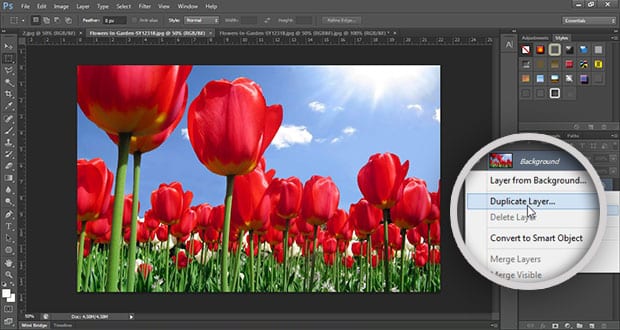
Now, we need to duplicate our image layer so that we can begin our edit without permanently altering the original image.
To make a duplicate layer, simply right click on the image layer, and then click on the Duplicate Layer option. You can also duplicate a layer by utilizing the keyboard shortcut Command/Control + J.
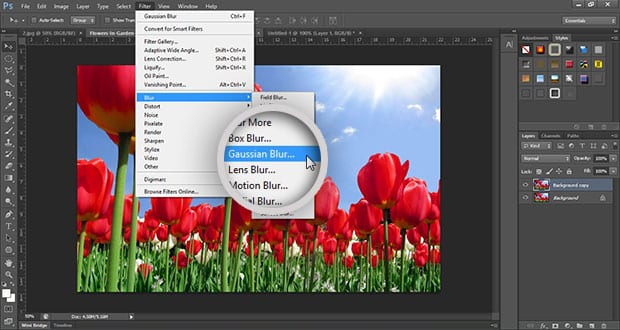
Next, select your duplicate layer, which will rest on top of your “Background” layer, and go to the Filter » Blur menu. There, you’ll find over 10 blur options to choose from. We recommend using the Gaussian Blur effect, as explained earlier in this tutorial.
You will then need to set a radius of the blur. The larger the radius number, the blurrier the photo will be. For the sake of this tutorial, I’ll choose a radius blur of 10. This number is completely arbitrary in this case; I just liked the way it looked!
Depending on the size of your image, your radius blur amount can change. For a typical image, any value from 3-15 pixels will work, depending on the blur intensity you want.
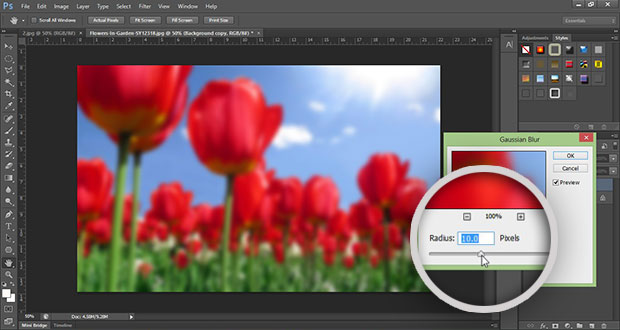
Click OK, and Photoshop will apply a Gaussian Blur to your duplicate layer.
Now that we’ve blurred our image, we can work on clarifying our subjects. Depending on your image, you may want one or several subjects to be sharp, so follow the following steps closely!
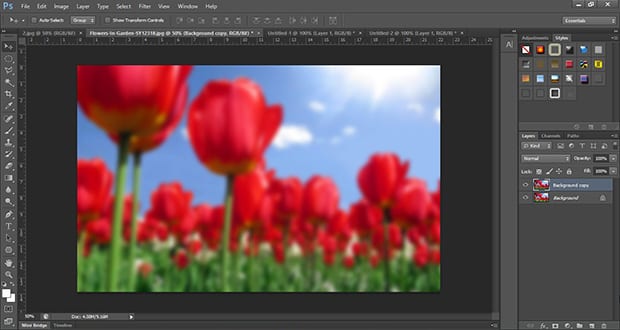
We can use one of two different methods to bring your image’s subject into focus. Let’s take a look into these different options one at a time.
The first method will require the Eraser Tool. You can use Photoshop’s eraser to remove the blur from the portion of the image you want to be in focus. Adjust the Opacity and Hardness of your Brush Tool to best capture the edges of your subject.
Lowering your eraser brush Hardness and Opacity makes it easy to hide any mistakes! These settings will also lead to a less noticeable gradient in separation between the subject and the background, which is typical of a wider angle lens. For a telephoto look, consider maintaining a harder gradient between blur and focus.
Using the Zoom Tool with this editing approach will help you perfect the edges of your edit. When freehand editing with the Eraser Tool, it can be difficult to see how accurate your erasures are from a distance. Take the time to zoom in and clean everything up.
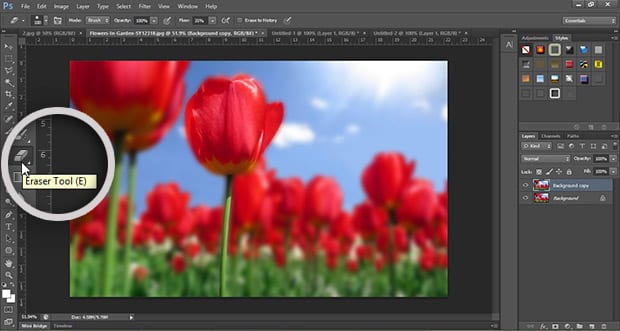
The second option is a little trickier but, in general, will produce far better results.
This second approach requires the use of Photoshop’s selection tools, of which there are several. Try each of the different selection methods outlined earlier, as well as the ones I used for this part of the tutorial to find what works best for your photo.
For the image that I’m working with, I’ve chosen to use the Lasso Tool to make a selection around my subject. In this case, we can use the Magnetic Lasso Tool to select this central flower, which is our main subject.
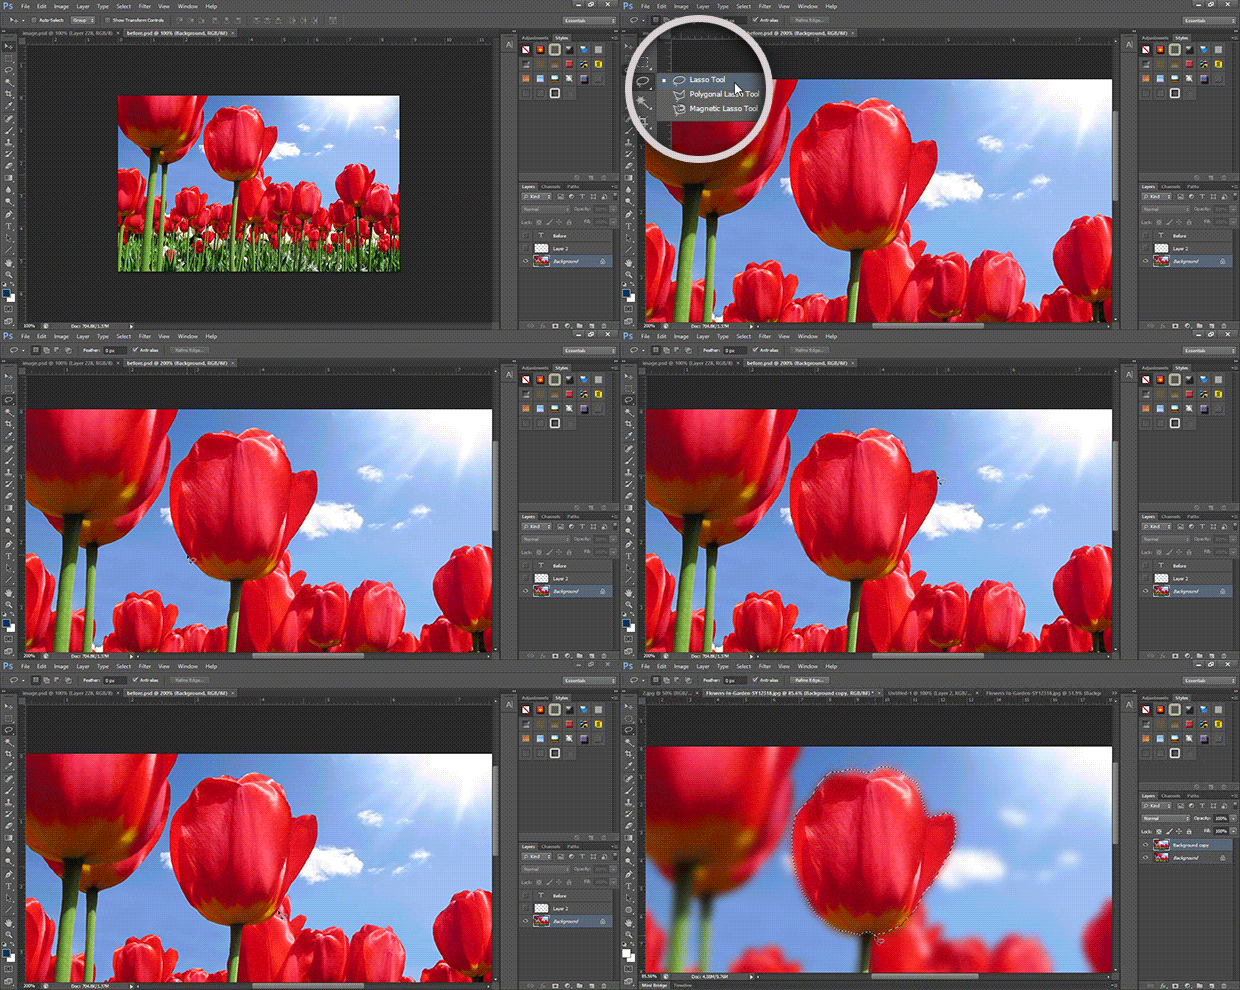
I’ll simply use the tool to trace the edges of the flower. Once you’ve selected your subject, make sure to close the selection by clicking on your first original point.
As you can see, both editing methods achieved a similar look. Depending on the scale of your project, you can combine these techniques and take a more realistic or creative route. Either way, make sure that you save a Photoshop file so you can come back to your project!
Finally, flatten your image to easily save it as a JPEG. Flattened images save in smaller image files, which make them easier to share online. If you do plan to share your edit online, make sure that the image profile is sRGB, and consider adding a watermark to protect your work.
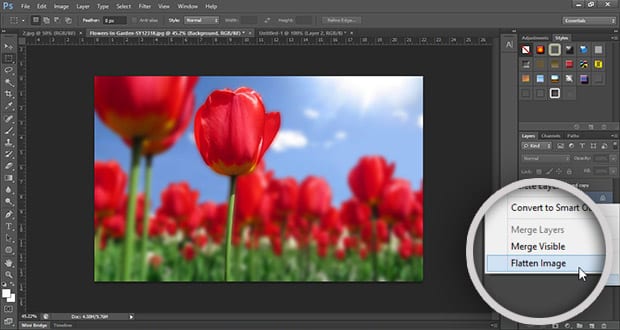
Now, you’ve successfully achieved a blurry background effect in Photoshop! Let’s take a look at the before and after results. You can adjust your blur values to town down your results, or you can go all out! It’s up to you.
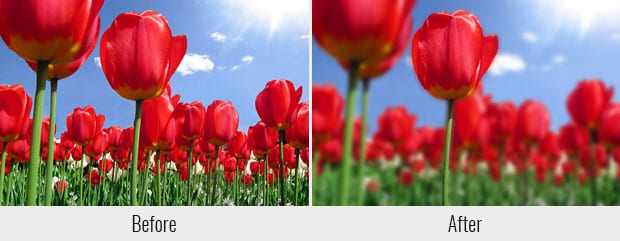
We hope this article helped you to learn how to achieve a blurry background using Photoshop. If you also use Adobe’s Lightroom, check out our guide to 117 Free Lightroom Presets that you will fall in love with. Or, to achieve the opposite effect, read how to sharpen your images in Photoshop.
If you liked this article, follow us on Facebook and Twitter for more Photoshop tutorials, photography tips and WordPress info!






Excellent! Worked perfectly. I just have to learn to use the Lasso tool a little better.
Thanks!
Mike
It helped
Hey Rendolf, we are glad. 🙂
Brilliant you saved my sanity , Thanks
Hey David, we are glad you like it. 🙂
After selecting the Duplicate layer and clicking on Gaussian blur, it blurs both the original layer and the duplicate layer. So this method isnt working for me. I have photoshop CS6 on mac
It sounds like either the layers are linked or possibly grouped somehow but there’s no way it would apply it to both as long as only the one layer is selected. So, the layers could be grouped or linked. Does that help?
My lasso too is still there and the whole picture is still blurred even though I followed the steps one by one