Do you want to know how to balance the colors in your photos? Sometimes you need to change one of the colors in your photo so that all of the colors work together in harmony. In this article, we will show you how to use color theory to balance colors in Photoshop.
If you don’t have it yet, you can get Photoshop from Adobe’s site here.
Use Color Theory to Balance Colors
As a photographer, you probably already understand the importance of color theory. Color theory is a set of guidelines for combining colors so that they look harmonious together. To use color theory for balancing out the colors in your photographs, you can create your own color schemes in Photoshop.
First thing you need to do is open your image in Photoshop.
Now go to Window » Extensions » Kuler. A window will pop up at the right hand side of your Photoshop screen.
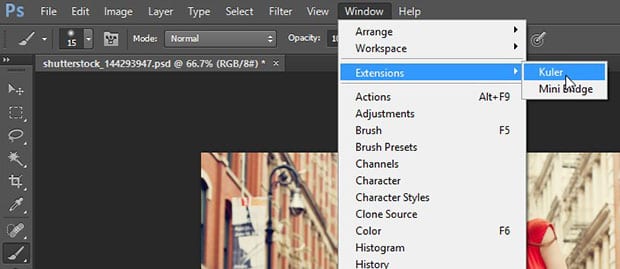
Next, select the Brush Tool from the toolbar at the left-hand side of your screen and press Alt + Click on the color that you want to pick for the next steps. (We will choose one of the colors from the hair of the subject that matches the background and the neutral colors in the image.)
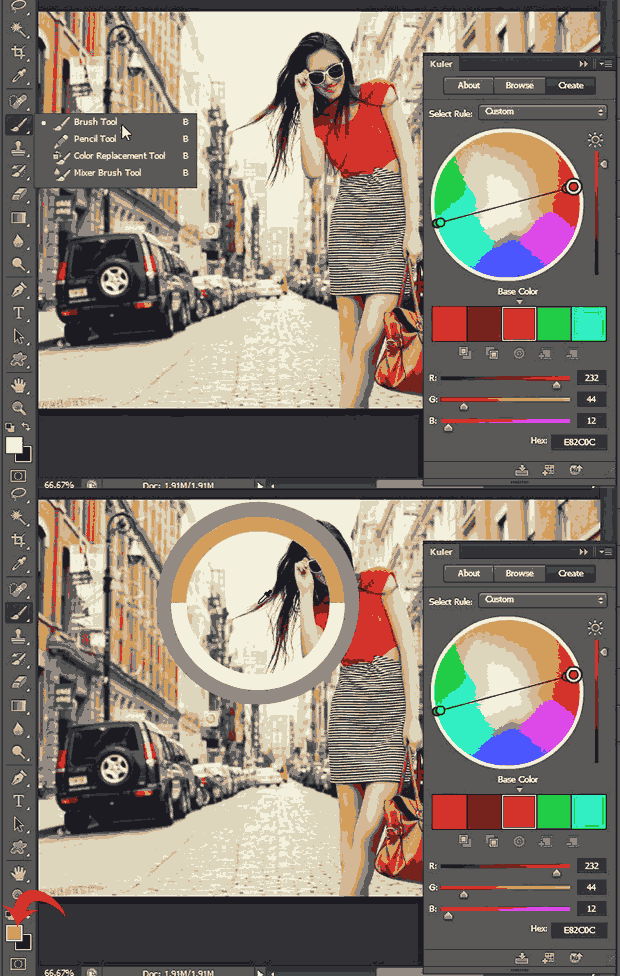
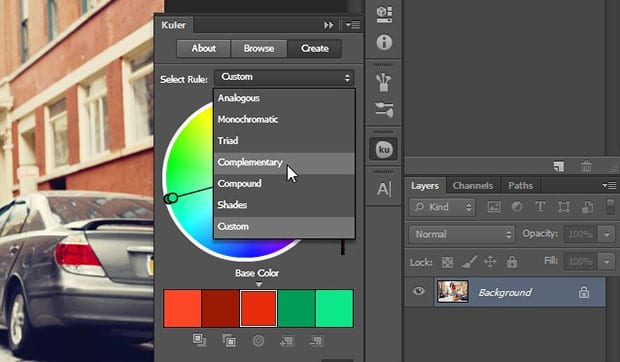
After the color is selected, you can simply click on the dropdown in the Kuler window and select Complementary.
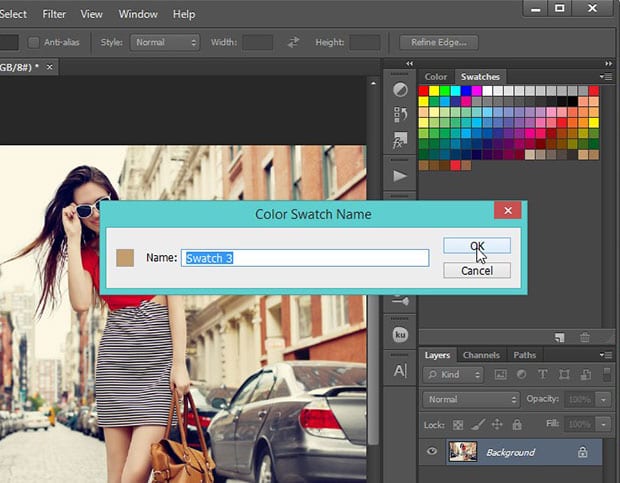
Next, go ahead and click on the Swatches panel to add your chosen color as a new swatch (If Swatches panel is not available, then go to Window » Swatches).
Since our background color matches the subject’s body, but the red shirt is clashing with the neutral tones, we want to replace the red color.
Choose a solid color from the Swatches panel that you want to use to replace the unwanted color.

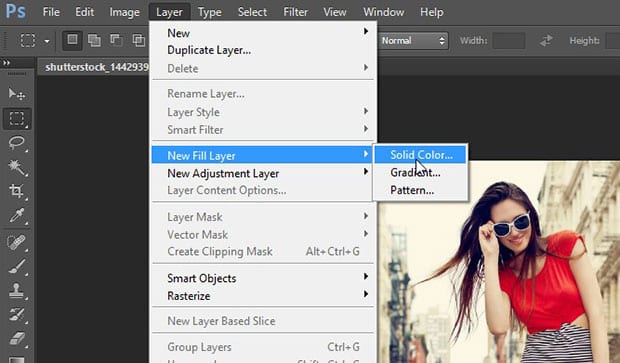
Now go to Layer » New Fill Layer » Solid Color and press OK. It will fill your image with the solid color selected from the swatches.
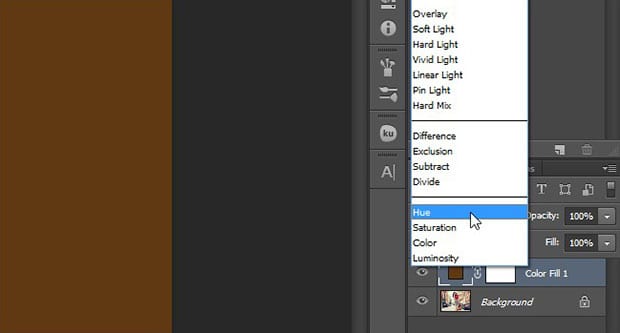
Next, go to the blending options of the layer and select Hue.
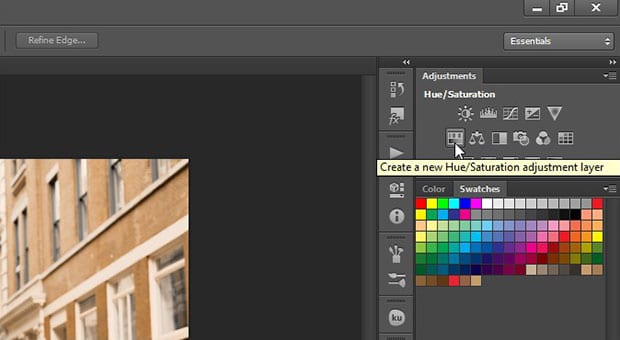
Create a new Hue / Saturation adjustment layer from the Adjustments panel (if the Adjustments panel is not there, then go to Window » Adjustments).
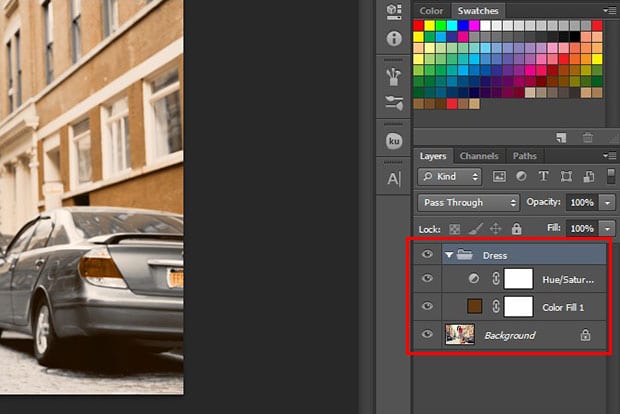
You should select the two top layers in the Layers panel, and press Ctrl + G to add them in a group. (We named this group, “Dress”).
Now press Alt + Click on the Add Layer Mask icon at the bottom of the Layers panel. It will add a inverted layer mask on the group.
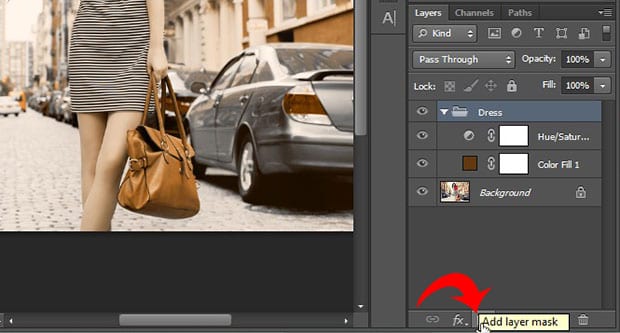
Select white as the foreground color and pick the Brush Tool from the toolbar. Brush over the red dress to bring it back to your selected color.

To refine the color of the dress, we went to the Hue / Saturation settings and decreased the Saturation to -25.
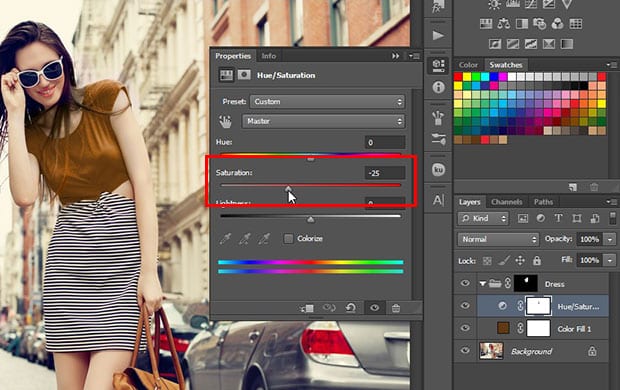
Next, select the Dress group in the Layers panel and press Ctrl + J to duplicate the group. (We named the duplicate group, “Lips”.) Your Layers panel will now look as shown in the image below:
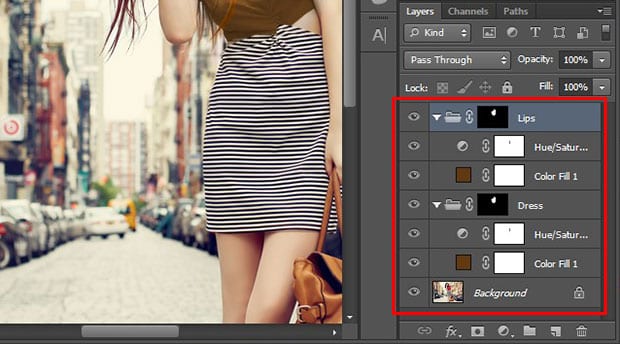
Keeping the Brush Tool selected, you can brush over the lips. In this group, you can change the Saturation back to 0 in the Hue / Saturation layer.
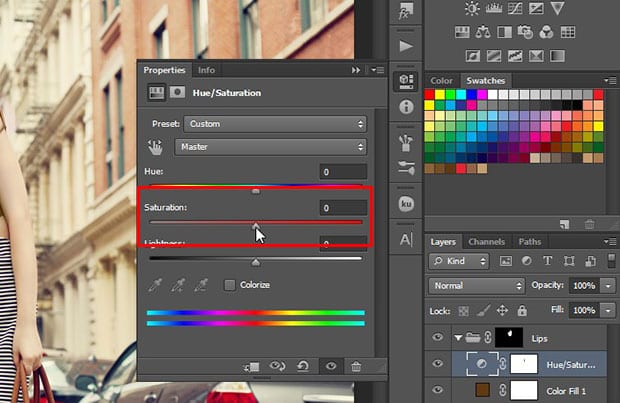
Finally, we reduced the Lightness to -15 for a natural looking result.
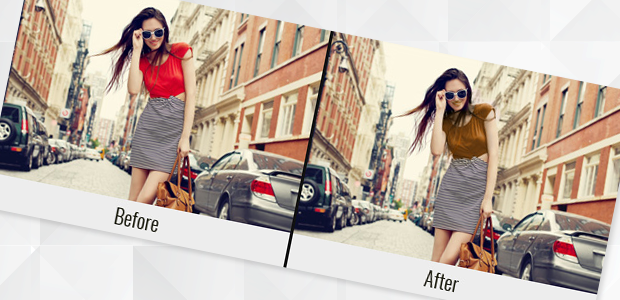
That’s all. You can see the before and after image below.

We hope this article has helped you to learn how to use color theory to balance colors in Photoshop. You may also want to check out our guide on how to replace colors in Photoshop.
If you like this article, then please follow us on Facebook and Twitter for more free photo editing tutorials.




It is very lengthy method to correct colour ,u don’t have any short trick??
Hey Heena, it’s explained with each and every detail. However, it won’t take much time in practical. 🙂