Envira Gallery Blog
Digital Photography Tips, Tutorials and Resources
Digital Photography Tips, Tutorials and Resources

Last updated on Mar 29, 2017 by Waseem Abbas
Do you want to get wedding photography clients from your website? With the right setup, you can easily turn your website visitor into clients. In this tutorial, we will share how to get wedding photography clients using WordPress.
To go from website visitor to making a purchase is a big leap.
That’s why smart business owners build an email list. That way, website visitors can get to know you before they decide to hire you for their wedding.
When you gather email addresses on your website, you can keep in touch with prospective clients with email marketing until they’re ready to make that leap.
The absolute best way to collect email addresses on your website is to use optin forms. OptinMonster is the best optin form plugin to help you to get clients from your WordPress site.
To get wedding photography clients using WordPress, you’ll need to follow these 5 steps:
Ready to get started? Let’s go!
First thing you need to do is to install and activate OptinMonster plugin in WordPress.

You can learn more about how to install a WordPress plugin.
Upon activating the plugin, you need to configure it. Simply go to your OptinMonster account and click on the API from the secondary menu.
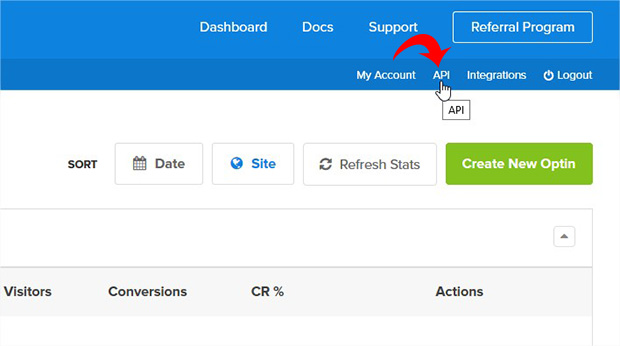
You’ll see a new page with the API credentials that include the username and key. Copy both the credentials from here.
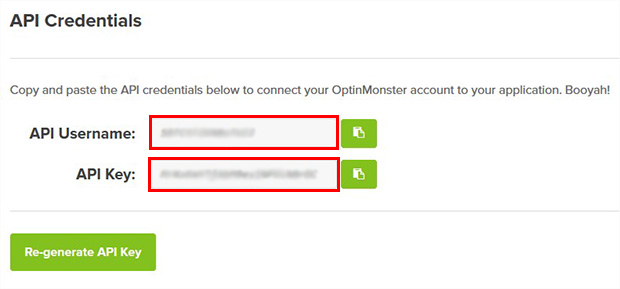
Now go back to OptinMonster from your WordPress admin backend and click on the API Credentials tab. You need to paste the username and key in the respected fields.
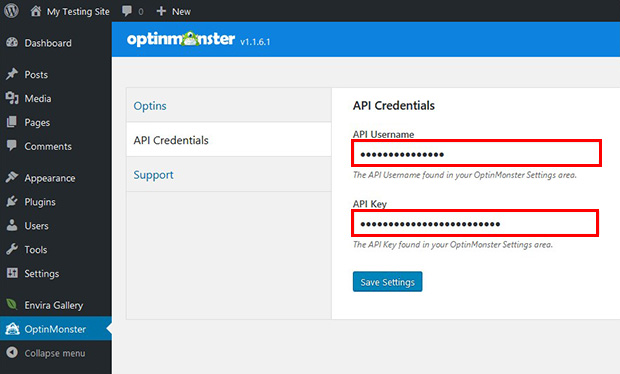
Make sure to click on the Save Settings button, and you successfully configured OptinMonster account.
To add a new optin, go back to the dashboard of your OptinMonster account and click on the Create New Optin button.
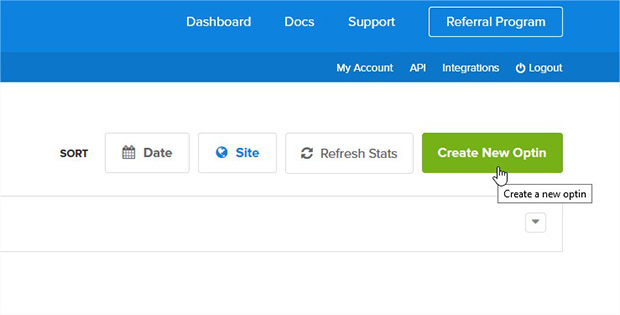
You should enter the Optin Campaign Title and Website to start creating the optin.
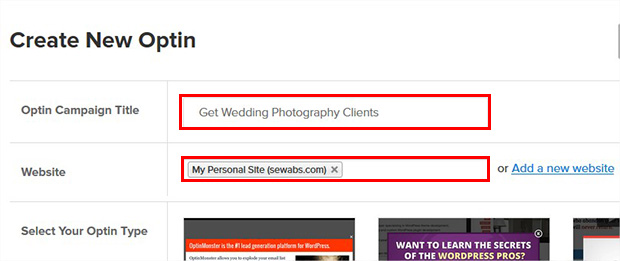
Next you need to select the optin type. There are multiple pre-built optin types to make the process easy. Each optin type has several templates, so you can be real quick in converting your visitors into clients.
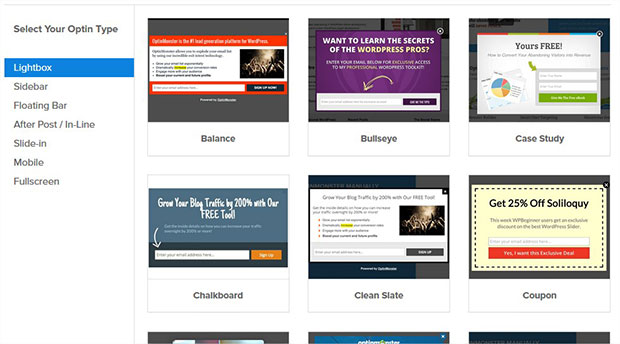
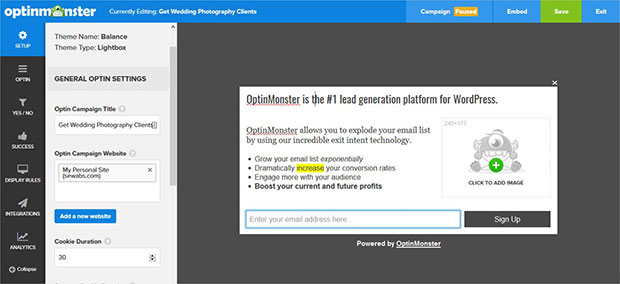
Simply use any one of the templates to start creating the optin. Once you click on the template, it’ll take you to a new page to edit your optin.
In the Setup tab, you can manage cookie duration, powered by link and more. You can also click on the template’s dummy text to replace it with the text for your campaign.
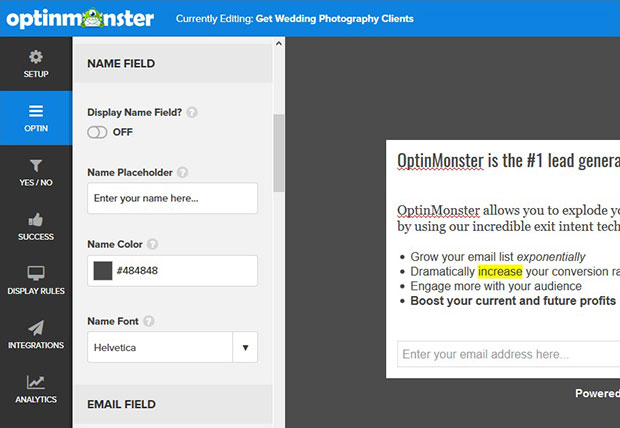
After the Setup, you can go to Optin tab to modify fields. You can modify name and email fields. There’s an option to add CSS to customize the design of the fields and buttons.
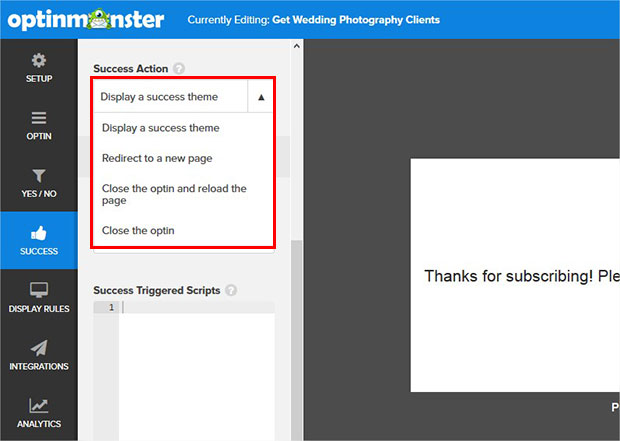
You can setup the Success Action from the Success tab. There are multiple options to display the success message or to add a redirect.
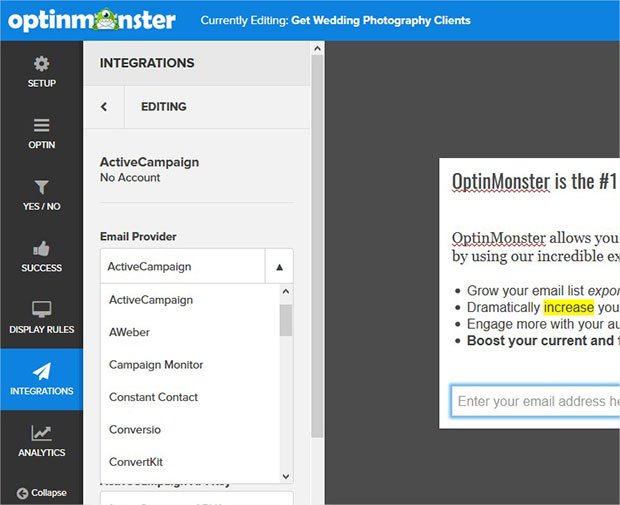
In the Integrations, you can add your email marketing service to receive the email addresses from your optin. There are multiple options for this including ActiveCampaign, AWeber, MailChimp and more.
After all these settings, you can setup the display rules.
You need to set the display rules for the optin, so the optin appears when you want to show it to the visitors.
OptinMonster has the most advanced targeting rules, so you can target the exact audience that should see your optin form.
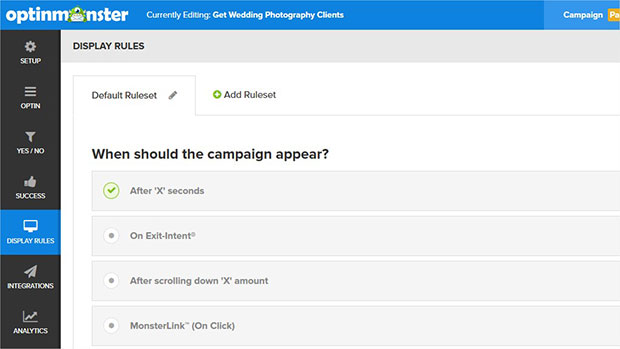
In the Display Rules tab, there’s a Default Ruleset option with two rulesets: When should the campaign appear? and Who should see the campaign?
Both the rulesets have several multiple options, and you can select the best choices for your campaign.
For more details, you can see this checklist for getting started with OptinMonster and WordPress.
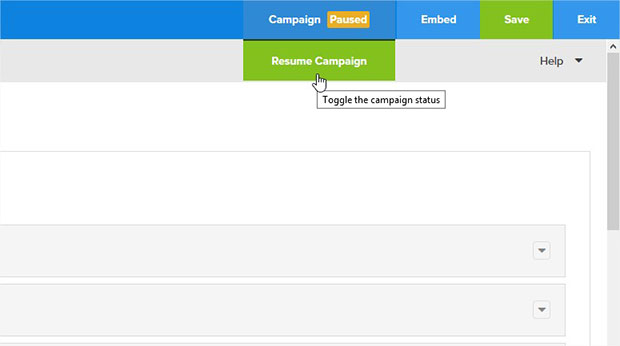
Once you are done with all the settings, Save and Resume the campaign from the top right corner of the screen.
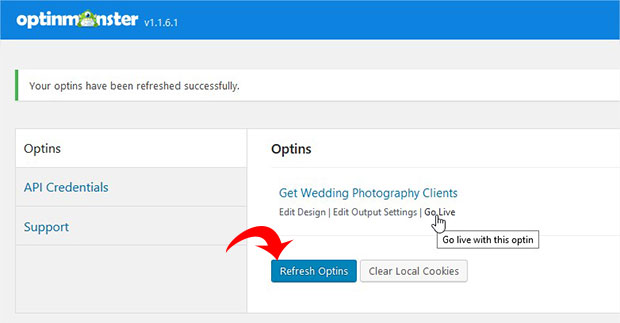
Now go back to your WordPress admin dashboard. In the OptinMonster menu, click on the Optins tab and press the Refresh Optins button.
You’ll see the optin that you created in the above steps. Simply click on the Go Live link.
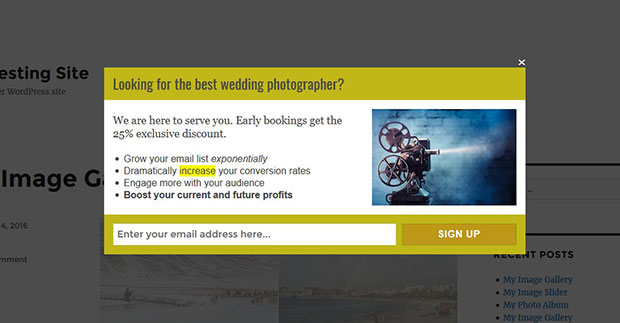
The optin will appear at your site with the display rules set by your in the previous step. You can see this image below for a lightbox optin example:
We hope this tutorial has helped you to learn how to get wedding photography clients using WordPress. You may also want to check out our guide on how to start a wedding photography business, and our guide on how to market your photography business to get more clients.
If you like this tutorial, then please follow us on Facebook and Twitter for more free WordPress tips and resources.
Envira Gallery helps photographers create beautiful photo and video galleries in just a few clicks so that they can showcase and sell their work.
