If you’re not sure how to preview Envira galleries you’ve come to the right place! Envira makes it easy to preview all of your galleries and albums. This tutorial will walk you through what you need to know to preview your Envira galleries!
Requirements
- WordPress 4.9+
- Envira Gallery 1.5.2+
Setup
Step 1 – Enable Standalone for all galleries
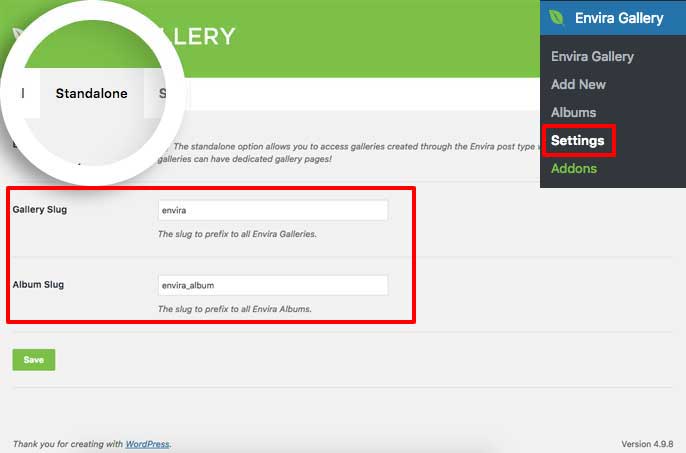
Your first step will be to enable the Standalone feature. To do this, navigate to the WordPress Admin » Envira » Settings page and select the Standalone tab.
Here you can enable or disable the Standalone feature by toggling the first option as well as setting up the slug names for your standalone.

Step 2 – Create an Envira Gallery
Next, you’ll need to create a new gallery or edit an existing gallery. If you need any help creating your first gallery, please review our documentation here.
Step 3 – Preview Your Gallery
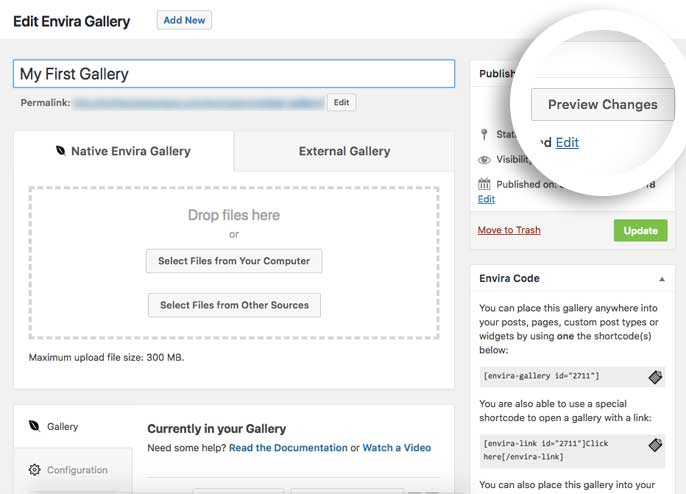
Your final step is to click the Preview Changes button.
A new tab will open displaying your gallery.

Envira will use your theme’s single.php template for the page template.
On the Standalone tab you can select another page template if your theme supports this.
For further information on the templates, check out our article on How to Use the Standalone Feature in Envira Gallery.
That’s it, you’ve successfully previewed the changes to your Envira gallery! Next, you can read more about how to bulk edit your gallery images.
FAQ
Can I do this for Envira Albums too?
A: Absolutely! With Envira Albums, enabling the Standalone feature is a requirement, but you’ll also have the same Preview Changes button when viewing your Envira Albums.
Why am I getting a 404 error?
A: Anytime you deal in slug names for WordPress this can be quite a common error. To resolve this, just go to Settings » Permalinks and click Save to flush the out the rewrite rules.


