The WooCommerce Addon for Envira Gallery easily allows you to synch up your gallery images to existing WooCommerce products. We’ll walk you through how to set up your Envira gallery and add an Add to Cart button to each of your gallery images or lightbox images.
Installation
Please follow our instructions on how to install and activate add-ons.
In this instance, you’ll be activating the Envira WooCommerce Addon.
Create WooCommerce products
Before you can connect your gallery images to WooCommerce products, be sure you’ve created at least one WooCommerce product you want to link to. See WooCommerce’s documentation to get started with adding products if you’re not already familiar.
Important!
Our WooCommerce Addon integrates Envira Gallery with WooCommerce, allowing you to easily sell your photos using WooCommerce. However, please note that all e-commerce functionality, including product variations, attributes (such as size), cart, product featured image, and more, are handled directly by WooCommerce.
Create or edit your gallery
Your first step is to create a new gallery or edit an existing one. You can follow along with our documentation for creating your first gallery.
Configure the WooCommerce options
Next, navigate to the WooCommerce tab.
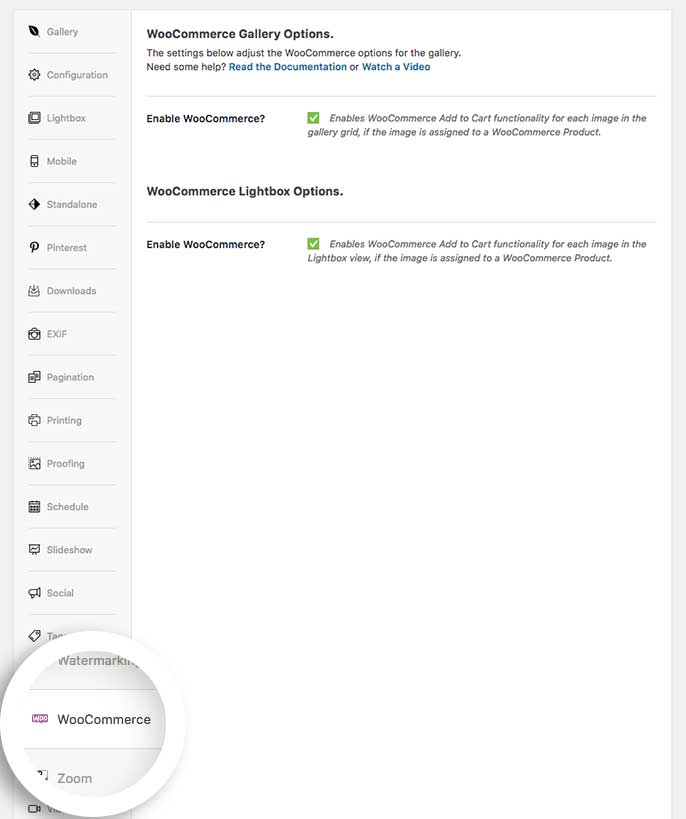
On this tab, you can choose to show your purchase form on the gallery view and the lightbox view.
Set up the Mobile tab options
Next, click on the Mobile tab of the gallery.
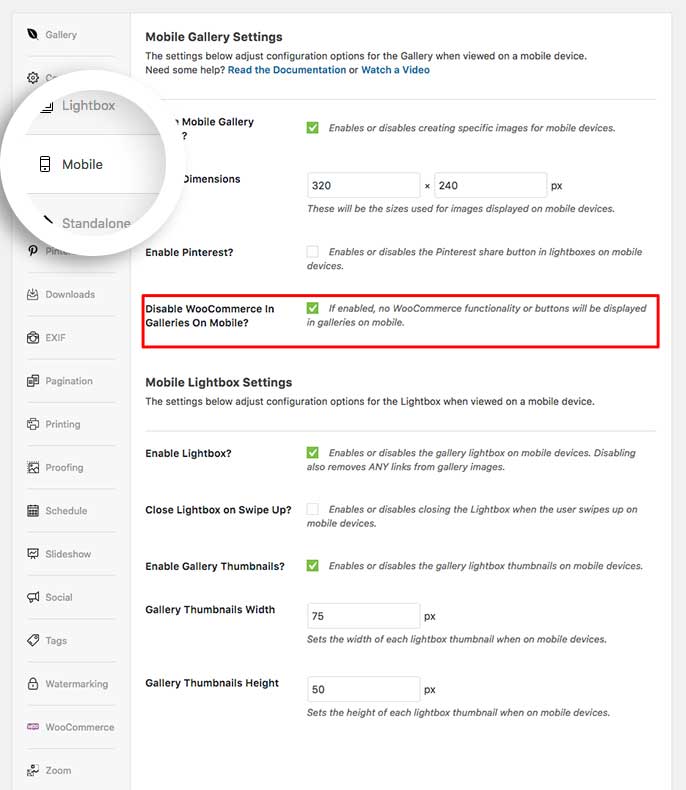
Here, you can also choose to show the purchase form for mobile devices.
Assign the gallery images to products
Now it’s time to set up each gallery image to be assigned to a product.
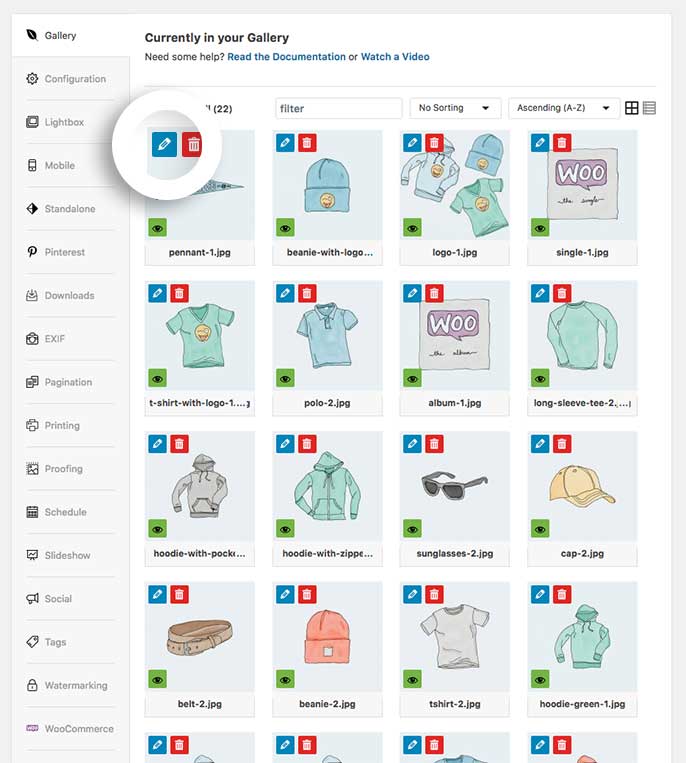
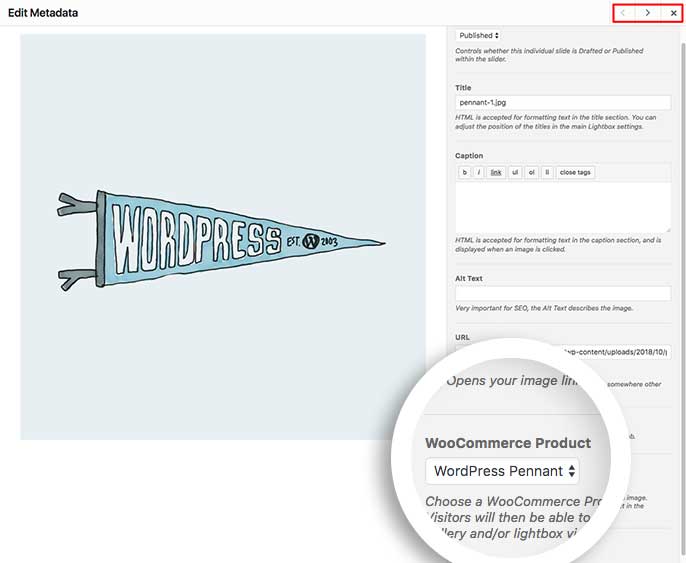
Once you’ve added your images to the gallery, click the blue pencil icon to open up the Edit Metadata window.
From the options on the left of the image in the WooCommerce Product drop-down, select the product the image should be assigned to. This allows Envira to send the item to the cart when your visitors select an item to purchase.
Then click the Save Metadata button to save the changes. You can use the right and left arrows at the top of the screen to repeat these steps for each image in the gallery. When you’re all done, click the X icon to close the Edit Metadata window.
Alternatively, if you’re going to have 1 product for all gallery images, you can just click the Select All check box and choose Edit to assign the WooCommerce Product to all of your gallery images.
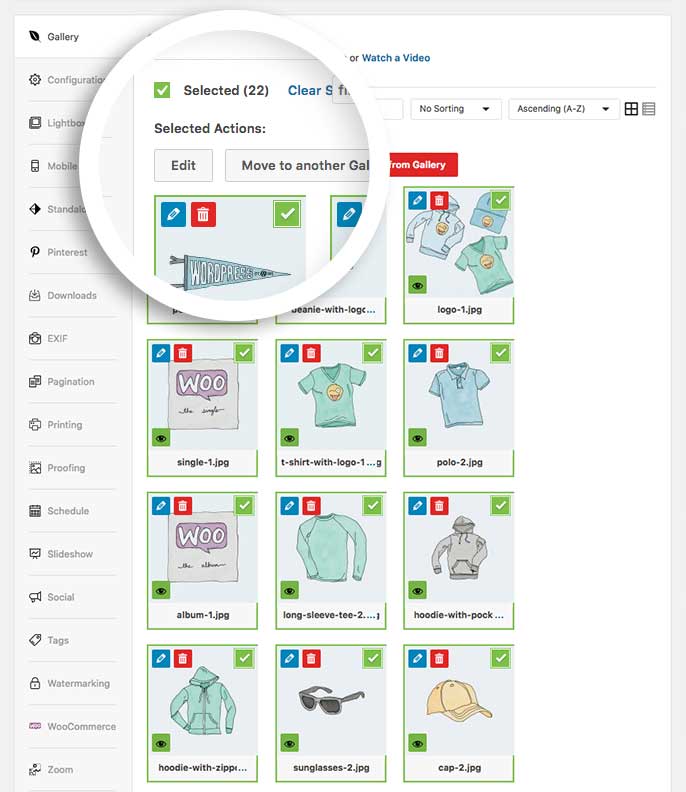
When you click Save Metadata, the Bulk Edit window will automatically close.
Publish and View WooCommerce Gallery
Finally, click Publish or Update on your gallery to save the changes.
See the demo!
Alternatively, you can also use Envira’s Proofing Addon to receive orders for your gallery images from an email. Check out our tutorial on How to use the Proofing Addon for Envira Gallery.
FAQs
Q: Can I connect gallery images to WooCommerce variable products?
A: Absolutely! The WooCommerce Addon supports both simple and variable products. It’s a good idea to make sure you’ve set a default when using variable products.
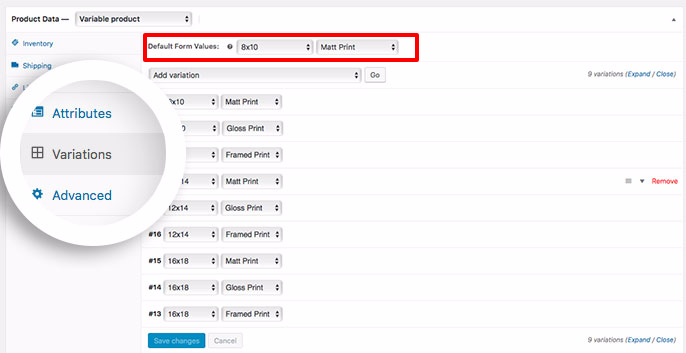
Q: Why isn’t my Add to Cart button displaying?
A: Check that you’ve set a price for your WooCommerce Product. If your product is free, be sure to set a price of 0.00.
Q: How can I get help with WooCommerce setup?
A: You can check out WooCommerce’s Getting Started page for Documentation, Reference Materials, and Tutorials, or you can check out the helpful videos on the WooCommerce 101 Video Series.
Q: Why isn’t my Add to Cart button displaying on mobile devices?
A: Check that you’ve completed Step 4 above. The mobile options would need to be set up in order to show the purchase form.
Q: Why didn’t my products get assigned to my gallery images when I imported my gallery?
A: The importing process will look for unique ID #s that are assigned to the WooCommerce product on export. If your ID #s are different on the site you are importing the gallery to, the products wouldn’t get assigned to that gallery image.
Q: Can all of my gallery images use the same product?
A: Absolutely! Refer to Step 5 above to bulk edit your gallery images.
Q: Can I sell digital downloads using Envira’s WooCommerce Addon?
A: Absolutely! When dealing with digital downloads, you would need to create 1 product for each gallery image so that WooCommerce would know what download link to send your visitor upon successful checkout process. You can even use Envira’s Watermarking Addon to watermark your gallery image while having a separate image for downloading on your WooCommerce product.
Q: How do I disable the quantity field?
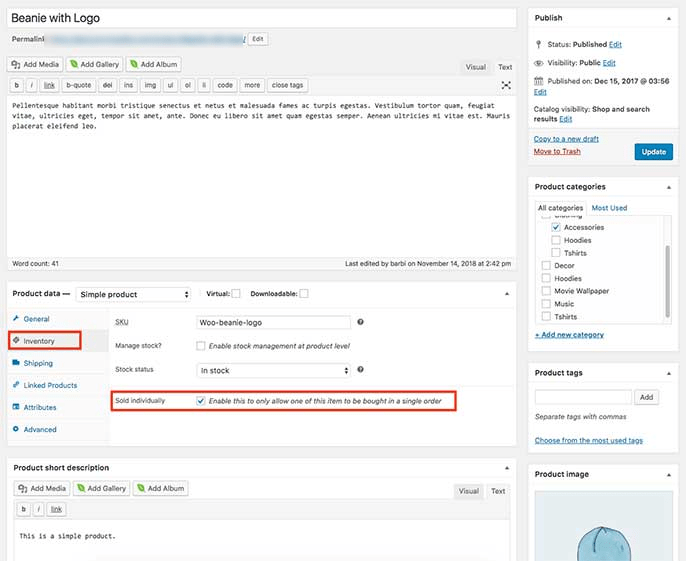
A: If you want to disable the quantity field, just edit the products and check the box for Sold Individually:
