Do you want to add a dark grunge effect to your photos? Some images look striking with a grungy, textured effect in the background. In this article, we will share how to add a dark grunge effect to your images in Photoshop.
If you don’t have it yet, you can get Photoshop from Adobe’s site here.
Adding a Dark Grunge Effect
The first thing you need to do is open your image in Photoshop.
We’ll start by renaming the Background layer. To rename it, double click on it from the Layers panel at the right-hand side of your Photoshop screen. Then you will be able to give it a new name. We’ll call it, Original Image. Click OK.
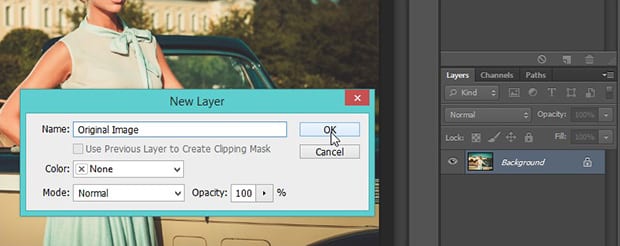
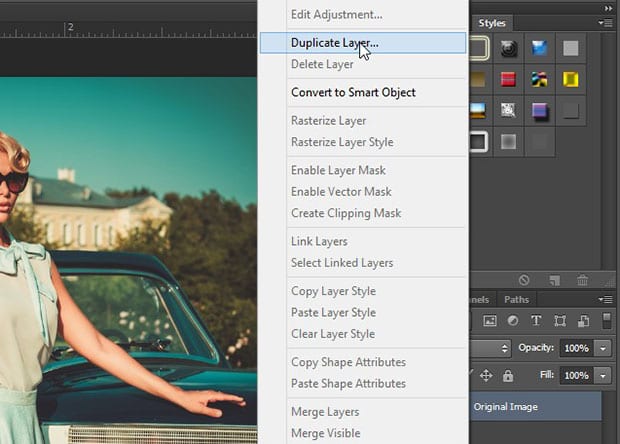
Now, create a duplicate layer of the Original Image layer. We will use this layer for all the following steps, so you can go back to your original image anytime you want.
To duplicate the layer, simply right click on the Original Image layer from the Layers panel and select Duplicate Layer.
We will name this duplicate layer, Grunge Layer.
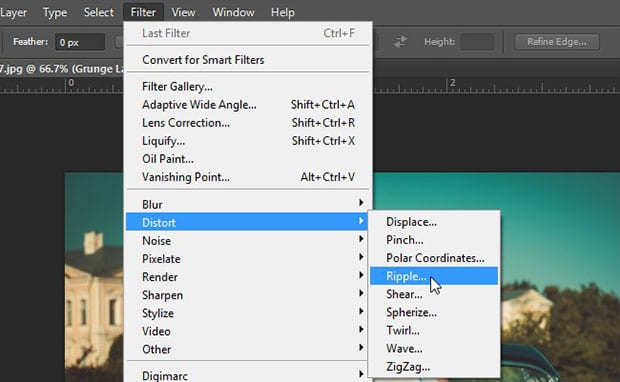
Next, you need to go to Filter » Distort » Ripple….
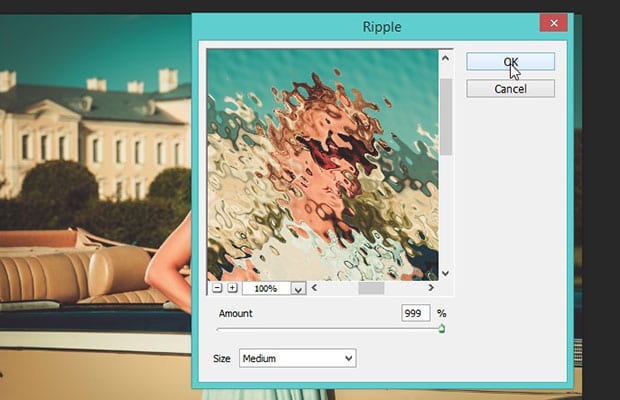
In the settings, set the Amount to 999%. This will really distort the image.
After you’ve added the Ripple filter, you can go ahead and add another filter. This time, go to Filter » Stylize » Diffuse….
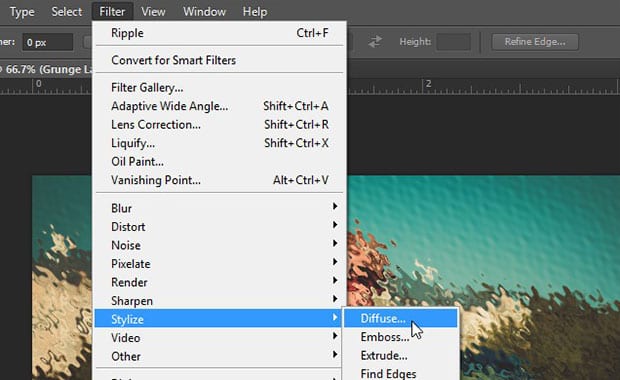
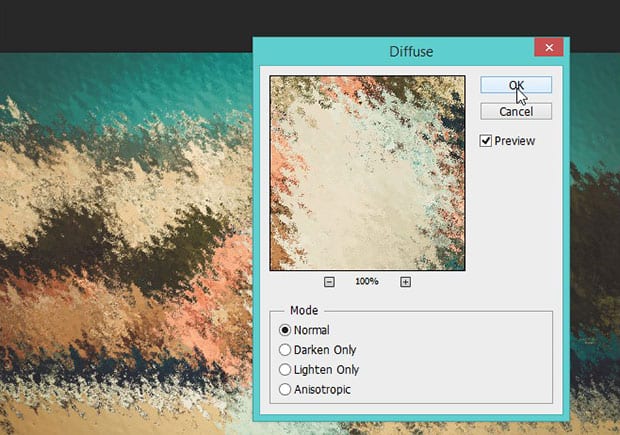
Leave these settings as-is, and click on the OK button. This is going to texturize the image, so it starts to look more grungy.
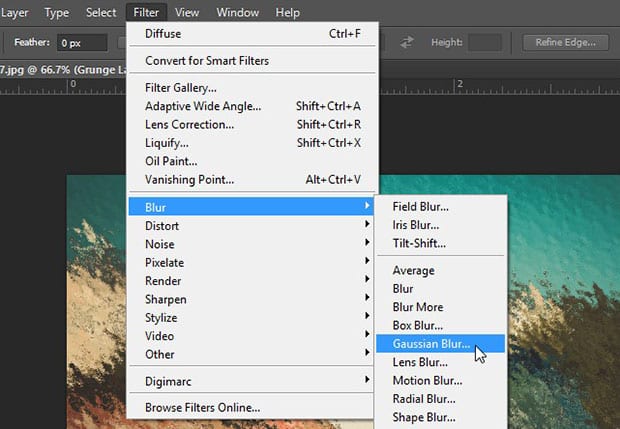
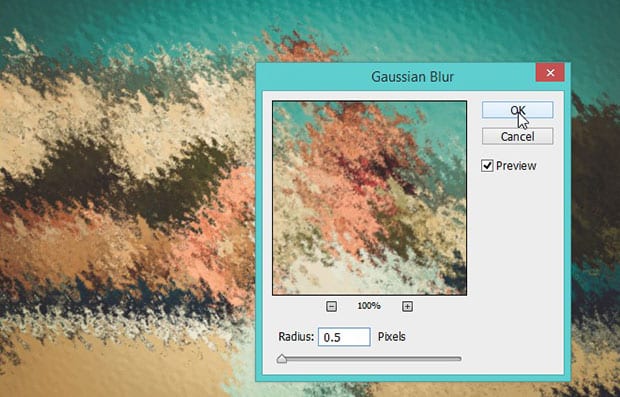
Now, go to Filter » Blur » Gaussian Blur… to reduce the effect of two previous filters.
Simply set the Radius to 0.5 pixels.
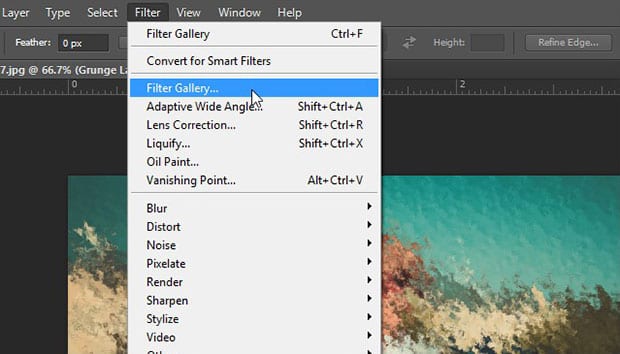
Next, go to Filter » Filter Gallery.
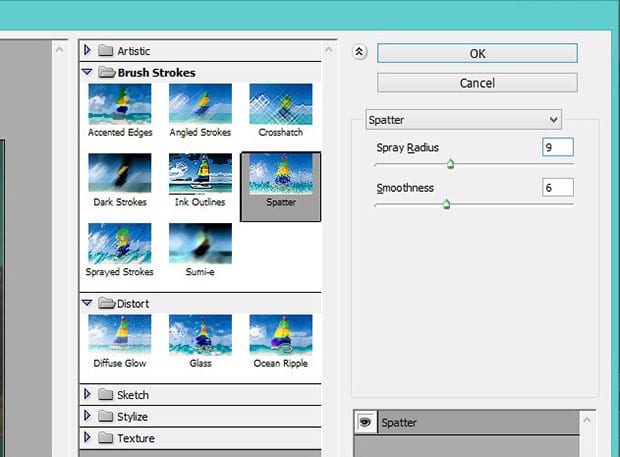
A new window will pop up, and you’ll need to select Spatter from the dropdown menu. Set the Spray Radius to 9 and Smoothness to 6.
Now, since you applied the grunge effect to the entire image, you’ll need to cut the person out so that only the background is grungy.
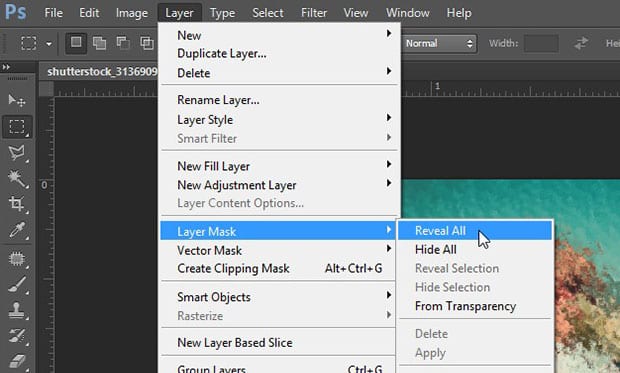
Go to Layer » Layer Mask » Reveal All to add a white mask for your Grunge Layer.
Here comes the tricky part… Select the Brush tool from the Photoshop toolbar at the left-hand side and set the foreground color to black.
Now, carefully paint with the brush over the person that you want to separate from the grunge effect.
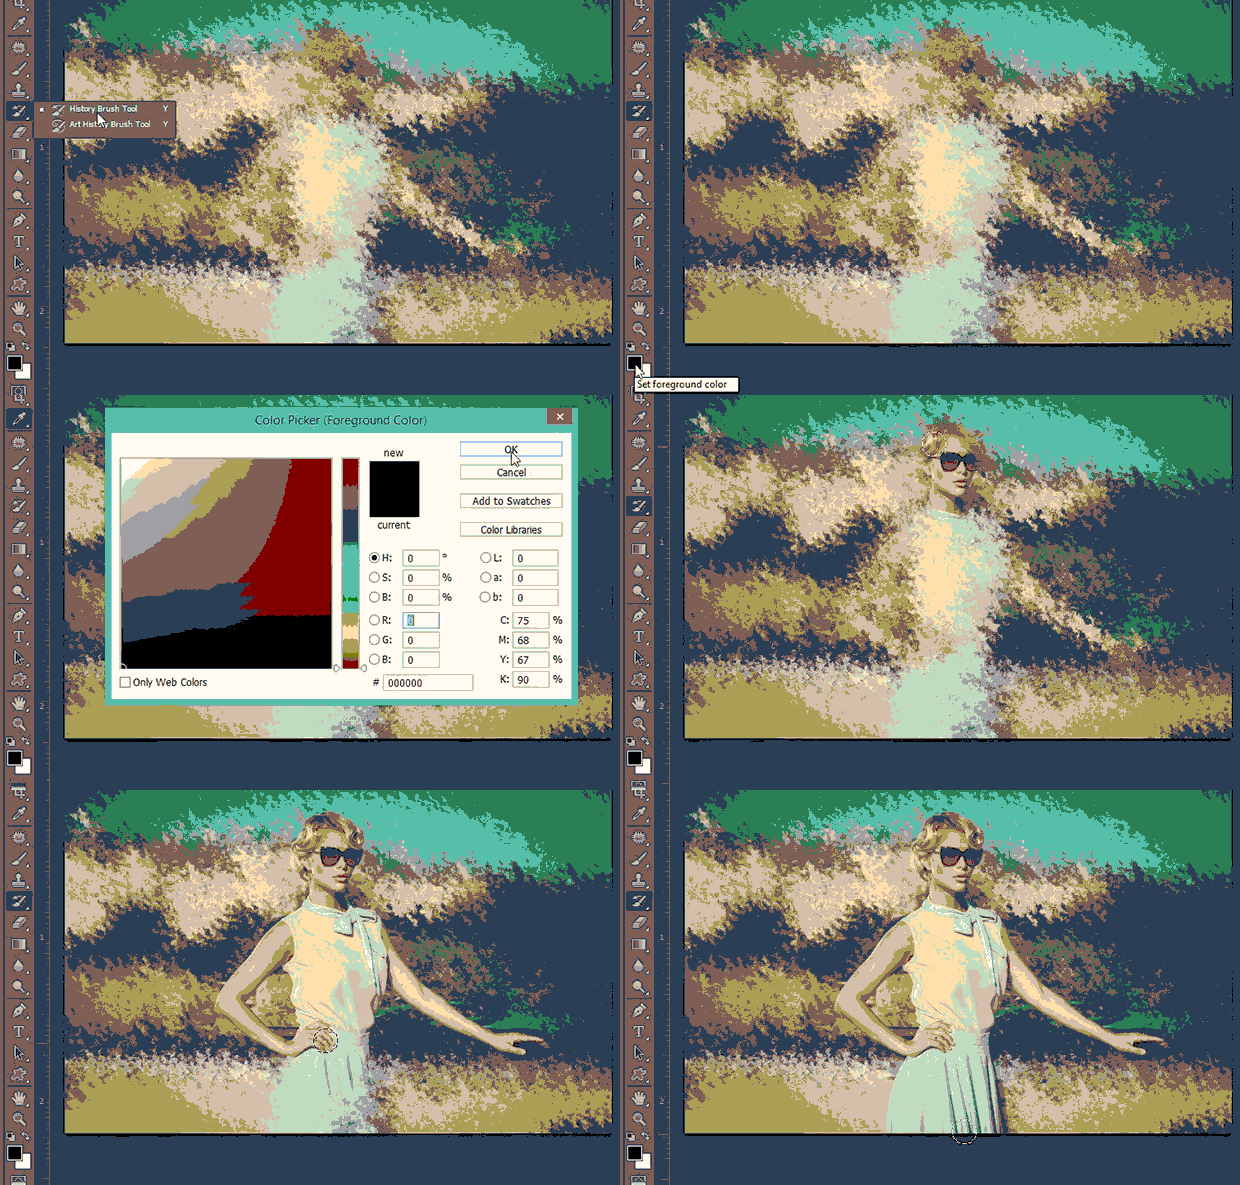
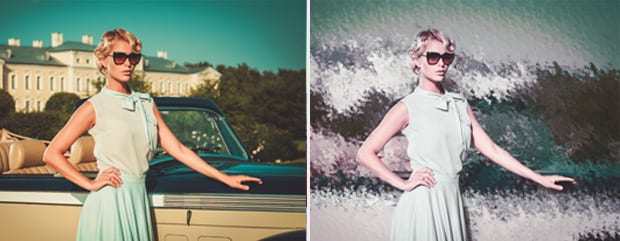
Now you should have a clear image of the person in the foreground with the grunge texture in the background.
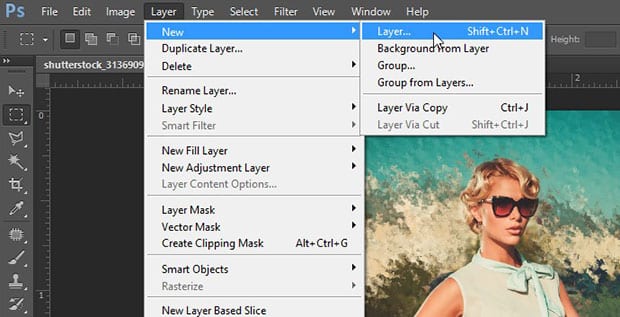
Next, we’re going to change the colors a bit. You’ll need to add a new layer by going to Layer » New » Layer… (we’ll name this layer, Gradient).
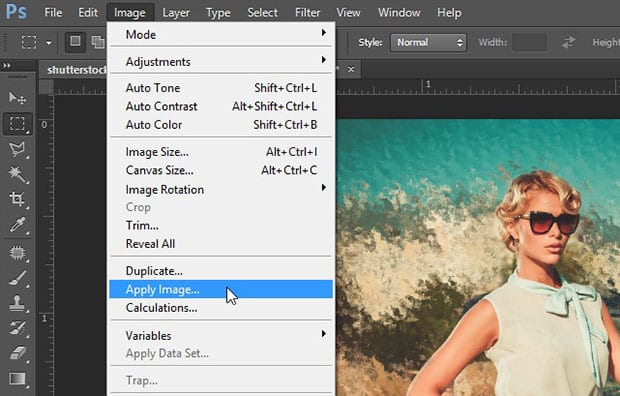
Now go to Image » Apply Image…. This will merge all your edits into the new Gradient layer.
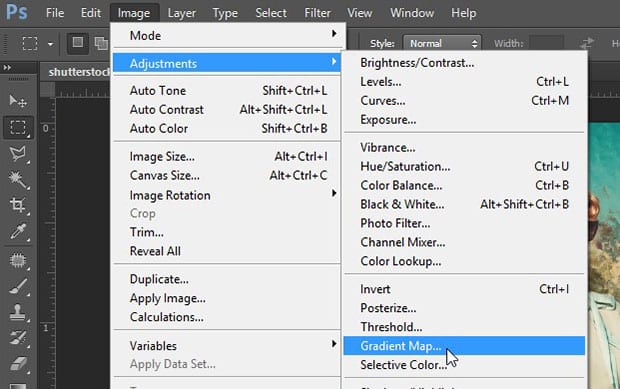
Now that the layers are merged, go to Image » Adjustments » Gradient Map….
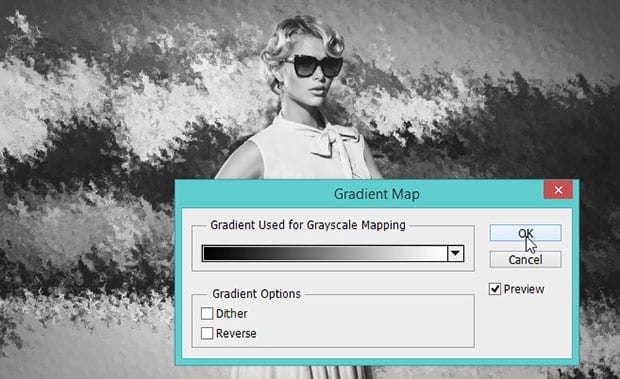
Select the black to white gradient from the dropdown menu.
Next, change the blend mode of the Gradient layer to Lighten from the Layers panel (it is set to Normal by default).
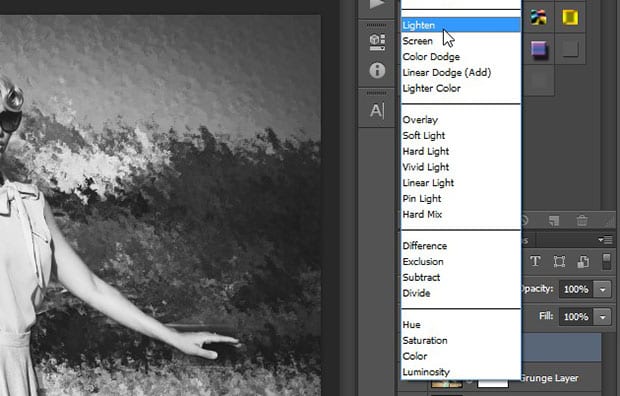
Then, create another layer (Layer » New » Layer…). Go to Image » Apply Image… to merge the settings (we call this layer, Channel Mixer).
After merging the settings into the Channel Mixer layer, go to Image » Adjustments » Selective Color.
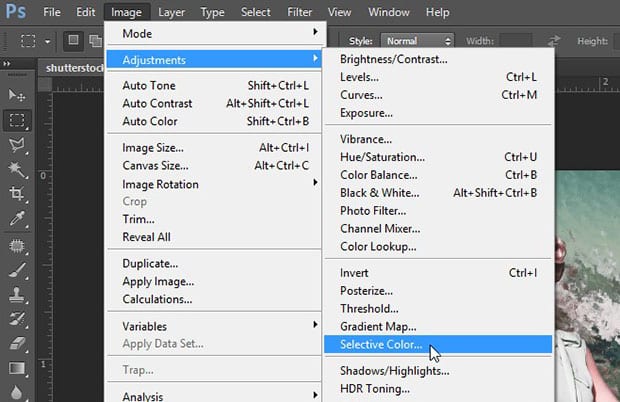
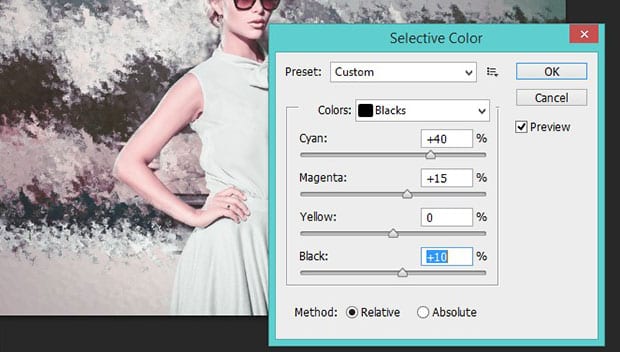
Once you’ve created the Selective Color layer, a new panel will open up with some settings. You’ll be able to change the settings for the different colors in the dropdown menu.
We used the following settings:
Whites: +15, -10, 0, 0
Neutrals: -5, +5, -5, -20
Blacks: +40, +15, 0, +10
We’re done! You can see the before and after image below:
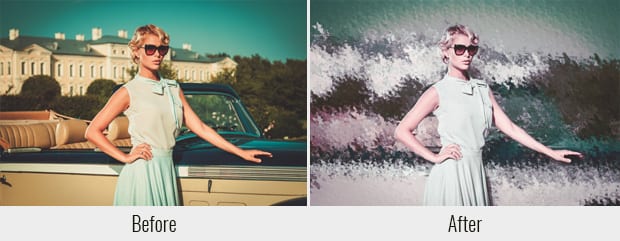
Any settings that you change or skip will make yours come out slightly different. We thought this dark grunge effect worked well for our photo, but you should experiment to get the look that you like.
We hope this article has helped you to learn how to add dark grunge effect to your image in Photoshop. You may also want to check out our guide on how to add a vintage black and white effect in Photoshop.
If you like this article, then please follow us on Facebook and Twitter for more free photo editing tutorials.






Thankyou this helped lots