Product photography can be a great way to learn new skills and make some cash as a photographer, all from the comfort of your own home! This lucrative genre of photography is always in demand by businesses in nearly every industry. After all, every business needs clean, high quality images of their products to use on websites, ecommerce sites and social media pages! So, do you want to be a professional photographer?
Product photography can be a great way to learn new skills and make some cash as a photographer, all from the comfort of your own home! This lucrative genre of photography is always in demand by businesses in nearly every industry. After all, every business needs clean, high quality images of their products to use on websites, ecommerce sites and social media pages!
Like any new skill, product photography can present some challenges to beginners in the field. But, by learning just a few techniques, you can start producing professional product images right away without ever leaving home.
So, want to know more about how to get started as a product photographer? Check out this guide, which will cover:
- What product photography is
- How to find your first clients
- How to shoot product photography from home
- Ways to overcome challenges unique to product photography
- Where to find great tutorials for product photography
Let’s get started!
What Is Product Photography?
You see product photography in action every day. In fact, it’s one of the most common types of commercial photography that exists! Product photography includes any photographs of merchandise or other goods for sale by businesses.
When you think of product photos, you might imagine a thumbnail image that accompanies a listing on a web store like Amazon, and you’d be right! But, product photography can also include “lifestyle” shots of the product in use, as well as styled product shoots. The type of product photography a business needs likely depends on their branding and corporate style.
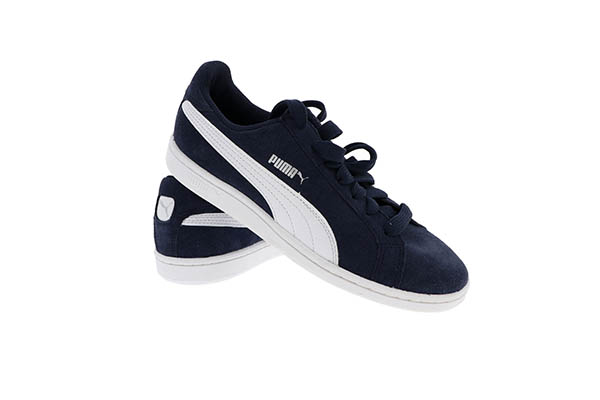
Of course, a product photograph with a white background like the one above is a product photographer’s bread and butter shot. Why? Because every business can use a photograph like this. It’s versatile, simple to shoot and lends itself well to modifications like being “cut out” of the background and pasted into a larger designed advertisement.
Each of these attributes is essential. A typical product shoot may involve dozens or even hundreds of separate products which need to be photographed in a consistent manner that will make them easy to work with in the future.
Lifestyle Product Photography
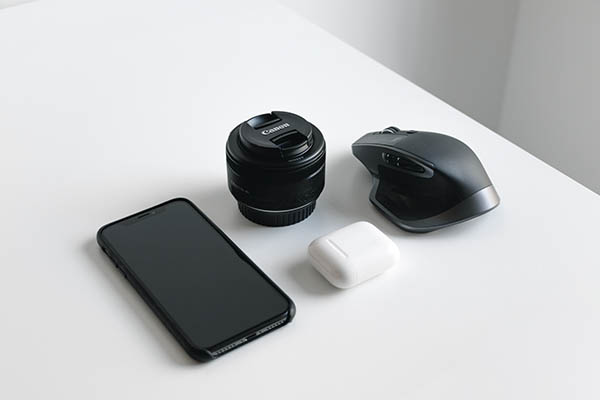
Lifestyle product photography serves a different purpose than these simplistic white background shots. A lifestyle product photo is designed to help the buyer understand what the product looks like in action. They can also help prospective customers get a sense for the product’s relative size and see how it connects with other products in the lineup.
For example, lifestyle photography of a sleeping bag might also include a tent and some hiking boots, all photographed in a mountainous location. These shots aren’t always necessary, but go a long way to helping the buyer understand what they’re actually getting.
Styled Product Photos
Styled shots are similar to lifestyle shots in that they include additional elements for context. But, these types of product photos focus on building the brand’s image rather than promoting any single product. Additionally, these photos have room for more significant artistic styling, since they don’t require true-to-life product colors, for instance.
Who Needs Product Photography?
Every business that sells a product needs product photography. Retailers who sell online need product photos for each new item they add to their website. If they sell the same product in multiple colors, patterns or specifications, they’ll need a photo of each of those variations.
For product photographers, that means you’ll have to shoot photos of each product variation, or shoot a single product and edit it in post-production using Adobe Photoshop to alter its appearance. It also means that what may seem like a quick job may actually be a gig that earns you quite a bit of money — and maybe even repeat business!
Even small and local businesses need product photos. In fact, you may find that small businesses are your best clients, since they have the potential to scale their brand and their product lines to eventually reach more people. As a product photographer, that often means steady work for you.
Even people running informal businesses use product photography. If you’re looking to get started building a portfolio, consider shooting product photos for family or neighbors to use in their eBay and Craigslist ads. They’ll get great photos, and you’ll get practice with your lighting and post-processing. It’s a win for everyone!
Product Photography Essential Tips
Product photography works best as a system. Ideally, you’ll want to keep your camera settings constant throughout your shoot, since similar products tend to require similar settings.
Imagine shooting a stack of 20 different T-shirts. Maintaining the same camera settings for each shirt photo makes shooting easier and ensures that the photos will look consistent next to one another on your client’s website.
But, in order to keep your settings constant, you’ll need a tripod and a controlled source of light, as well as a clean, white surface to place the products on. If you’re just getting started, you can work without a tripod and external lighting, but both are a small investment that can pay huge dividends in the quality of your images.
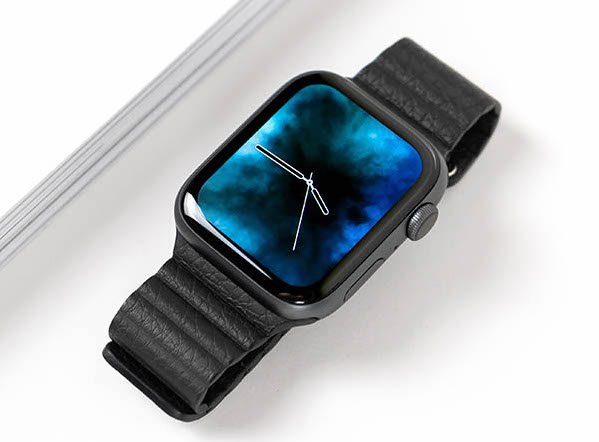
When shooting, you’ll likely spend most of your time on the first image. This is where you can dial in your settings and composition. Once you’ve got a setup you’re happy with, it’s just a matter of styling each product photo similar to the last and clicking the shutter. Switching between products is easy enough! Just remember to check your work as you go.
How to Be a Product Photographer From Home
One of the things product photographers love about their job is that it allows them to work from home! Almost every product a product photographer photographs can be shot from the comfort of the home — except cars! If you can fit an item through your front door, you should be able to take a professional quality photo of it, right in your house.
Still, you will need some key equipment to get started:
Gear for Product Photography
Two key pieces of equipment are required for shooting product photography from home: great lighting and a backdrop.
Adjustable, consistent lighting — either from studio strobes, flashguns or a different constant source — will help you capture clear, bright images that look professional and crisp. Furthermore, these purpose-built lights all allow for easy modification with diffusers, softboxes or grids, all of which are useful for refining a product’s look. Artificial light simply own’t cut it!
When choosing a light, don’t worry about complex features like TTL metering, high speed sync or massive power figures. None of these are necessary for a successful product image. Instead, what’s important is to find a set of lights that is adjustable and triggers reliably. Ease of modification is a bonus, but there are a number of workarounds you can use if you choose to work with a speedlight.
Make sure to purchase at least two lights. You can technically use one light with a reflector, but this makes for a challenging lighting setup. Two less expensive lights are better than one premium light if your budget is tight.
You’ll also need a backdrop, which can be as simple as a roll of white paper or a bedsheet stretched taught against a wall. Of course, you can also purchase higher-end seamless backgdrops with stands. Whichever you choose, it’s essential that the backdrop is dense enough to block out whatever may be behind it, while being smooth and neutral enough to disappear itself.
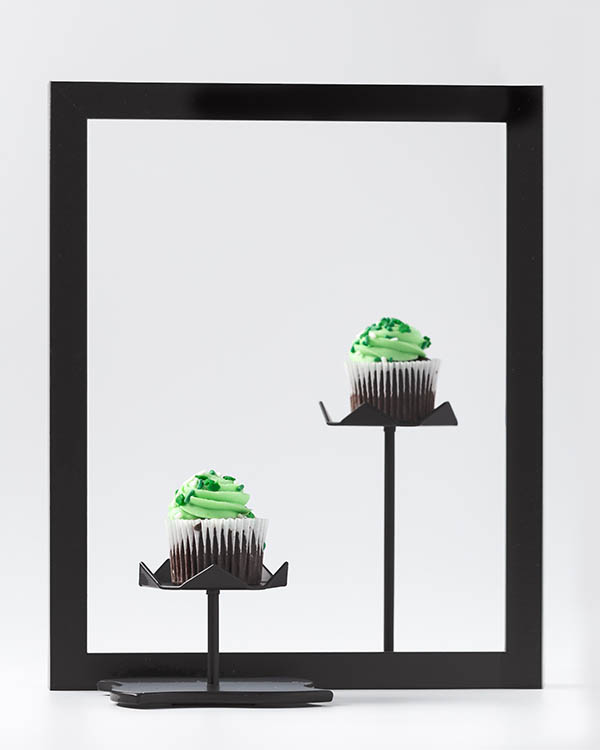
Again, the cheapest background option will likely be a roll of white paper. It’s also one of the easiest backgrounds to find, and it works perfectly! Depending on the paper’s size, you may be limited to shooting smaller products, but an average-sized roll will work for items like t-shirts.
How to Take Product Photos
Once you’ve gotten your essential components together, setting up for your first shot is easy.
Arrange Your Scene
Arrange the backdrop so it cascades down onto a platform like a chair or table, then spills over the front. This setup gives you a single surface that appears continuous to the camera. Then, place both your lights at a 45 degree angle to the backdrop, so that they overlap on the center of the paper. This arrangement limits shadows and provides consistent lighting.
Adjust Your Camera Settings
When it comes to setting up your camera, you’ll want to adjust your aperture, ISO and shutter speed. Consider using these settings:
- Aperture — f/8
- ISO — between 100 and 400
- Shutter speed — 1/60 frames per second
Depending on the strength of your the lights, you may need to tweak these settings.
Using an aperture around f/8 ensures that there’s enough depth of field, so your entire product is in focus from front to back. And, a low ISO prevents noise from appearing in your shot.
Your shutter speed depends in part on your camera. You’ll want to make sure to set your shutter speed below the flash sync speed. Put simply, this is the fastest your camera can shoot while working with a flash. Setting your shutter speed too fast will cause a black bar to appear across part of your image where the shutter curtain has obstructed a portion of the flash. If you see this in your test photos, just set a slower shutter speed.
Should you decide to use a manual flash, just take your product shots and adjust the flash power on both strobes until you get a pleasing image. If your flashes offer TTL metering, you may get an accurate result from the first shot. Or, you may need to dial in just a little exposure compensation for tricky subjects.
To help with consistency, use your camera with a tripod, set all your settings to Manual mode and even use manual focus. Keeping all these variables constant makes it easy to produce a series of shots with a consistent look. And that’s the key to a successful product shoot!
Challenges to Shooting Product Photography
Shooting product photos can involve a number of challenges. Fortunately, you can solve many of these with simple equipment changes or tweaks to your shooting technique. Spending the time to get your photos right in camera ultimately saves you time in post-processing.
Think of it like this: getting everything right before you shoot a set may take 5 extra minutes, but it saves you 5 minutes per photo in post-processing time!
Product Photography Lighting Challenges
Lighting will likely be your largest challenge as a home product photographer. Flash photography adds a whole new set of considerations and settings to your shooting workflow. Now, instead of just tweaking the shutter speed, ISO and aperture, you also have to consider your flash power, flash distance, flash zoom level and more. And, all of these variables can change your effective exposure.
Fortunately, digital cameras provide instant feedback on your setup. You can see the photos you’ve taken immediately, and then make adjustments accordingly. If you’re working with continuous lighting, it’s even easier to see your adjustments in real time by looking through the viewfinder.
Troubleshooting with Product Photography Lighting
To troubleshoot your flash technique, consider some of the basic issues you might run into:
- Your flash doesn’t fire.
- You’re shooting beyond your camera’s sync speed.
- Your lights aren’t well-positioned.
These problems often depend on the exact flash and camera you’re using. To solve these issues, reread the manuals that came with your flash, camera and triggering solution. The problem could be something as simple as dead batteries in your remote or as complex as a missed setting in your camera.
For that reason, consider falling back on a more simple option like optical slaves or sync wires. These older solutions are reliable and can eliminate a major source of confusion.
Behind the camera, make sure to focus on image quality. Keep your ISO low, set your focus carefully and consider using an exposure delay to reduce your camera shake. Slowing down and being deliberate can also help you catch any mistakes, before they’ve impacted too many photos.
Finding Clients for Product Photography
Like any type of photography, building a portfolio is essential. Fortunately, you can get started with the items you already have in your home. That old band shirt works perfectly well for a clothing sample photo, while a bottle of wine or jar of jam can work great for a food and beverage product photo.
As you build your portfolio, make sure you shoot a variety of photos and lighting styles. While even, balanced lighting on a white background is the most common type of product shot, showing your skills can help you land a wider range of work.
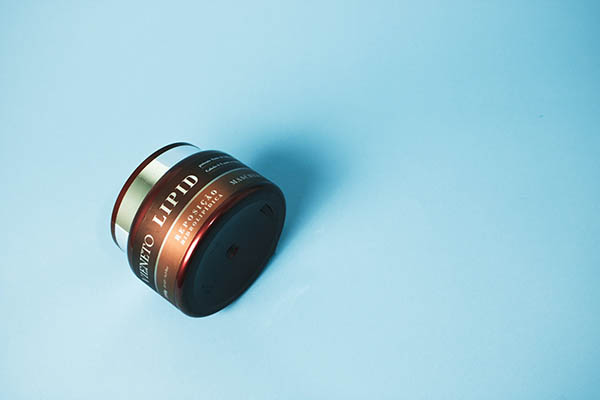
With your portfolio built, networking and bidding on jobs is the next step. Reach out to some of your favorite local small businesses. Share your portfolio and a business card, and don’t be afraid to reach out to them again in the future. Even if they don’t have any new products now, they may need a product photo in the future.
Bidding online for jobs is also possible. Consider listing yourself for employment on freelancing platforms like UpWork or posting on Craigslist. Many businesses outside your local area are willing to send their products to professional photographers in the mail.
When you’ve landed your first client, congratulations! Make sure to take into consideration what work will be involved in their shoot when quoting a price, and don’t underbid. Setting up, shooting, reshooting and editing all adds up. Fortunately, your fixed expenses should be pretty low, since you don’t need dedicated studio space.
Make sure you’re clear about what deliverables you provide. Some clients may want the products cut out from the background or ask for multiple color variations in post. These jobs can be more complex, so check out tutorials like this to better understand the techniques involved.
Conclusion
Hopefully you enjoyed this guide on how to get started with product photography! Here are some other guides on product photography that you may find helpful:
- How to Set Up a Home Photography Studio
- 5 Best Free Product Photography Contract Templates
- How to Market Your Product Photography Services
- Essential Gear for Product Photography
- Post Processing Workflow for Product Photography
Make sure to follow us on Twitter and Facebook for more photography guides! Sign up for our email newsletter so you don’t miss the next installment on product photography, including product photography pricing.


