Envira Gallery Blog
Digital Photography Tips, Tutorials and Resources
Digital Photography Tips, Tutorials and Resources

Last updated on Sep 22, 2019 by Waseem Abbas
Do you want to add a HDR effect to your photos? Portraits can look especially stunning with the HDR style. In this article, we will share how to add a HDR effect to your images in Photoshop.
If you don’t have it yet, you can get Photoshop from Adobe’s site here.
First, open your portrait in Photoshop.
Now, let’s start by creating a duplicate layer of the image. That way, if you make a mistake, you can start over from scratch anytime.
To create a duplicate layer, right click on the image layer inside the Layers panel on the righthand side and select ‘Duplicate Layer’.
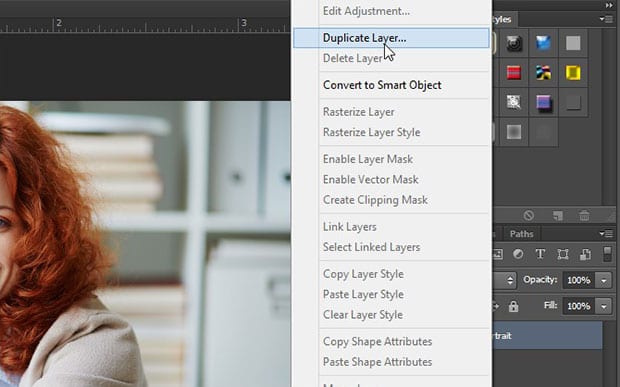
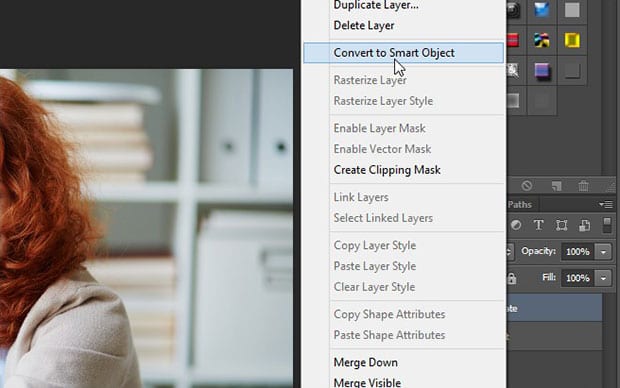
Now you will need to convert this duplicate layer into a smart object. Simply right-click on the duplicate layer you just created and select ‘Convert to Smart Object’. (This will allow you to fine-tune your settings later, without having to start all over.)
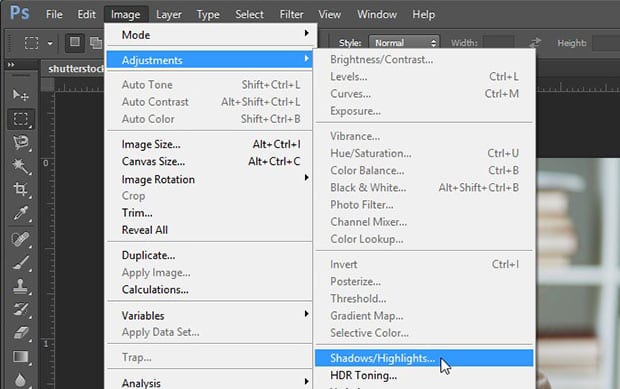
Next, go to Image » Adjustments » Shadow/Highlights.
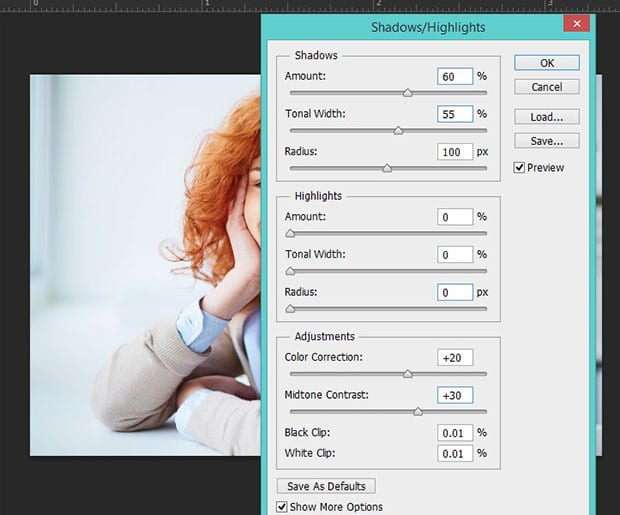
In the Shadows/Highlights dialog box, adjust the settings to brighten up the shadows of the photo. This will start to create that HDR effect. We used the following settings:
Shadows
Amount: 60%
Tonal Width: 55%
Radius: 100px
You can leave the other settings as-is.
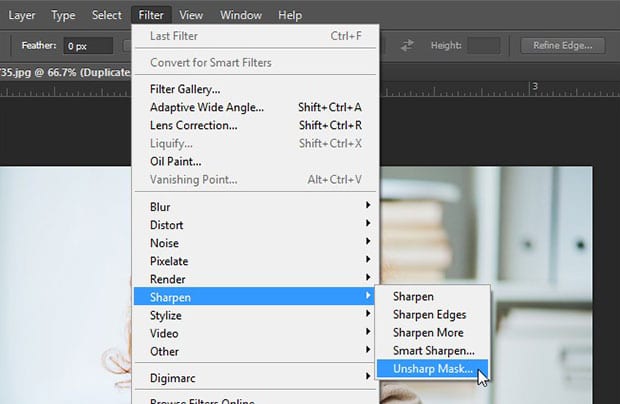
After you’ve adjusted the shadows, go to Filter » Sharpen » Unsharp Mask to add some sharpness and definition to your photo.
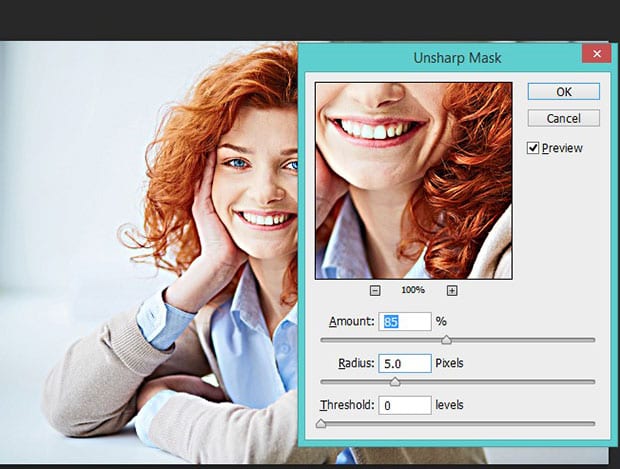
In the Unsharp Mask dialog box, use the following settings:
Amount: 85%
Radius: 5.0
Threshold: 0
This will really make the eyes stand out nicely.
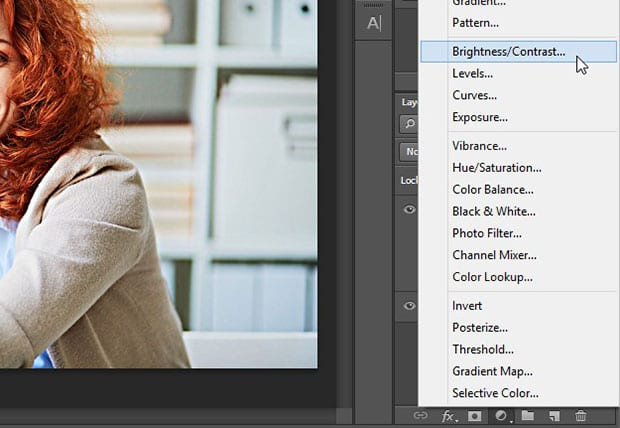
Lastly, you’ll need to add just a bit more depth to your photo.
Click on the circular icon at the bottom right corner of your screen (beneath the Layers panel) and select ‘Brightness/Contrast’.
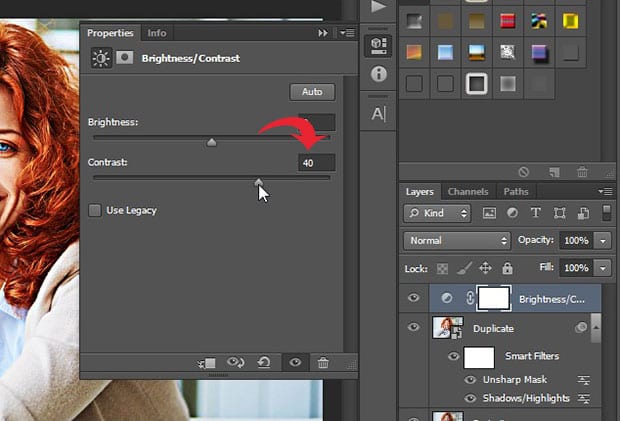
Leave the Brightness as-is, and set the Contrast to 40.
That’s all. You can see the before and after image below:

You can use the settings above to add a HDR effect for most of your portrait shots. However, we recommend testing small variations as needed to get the perfect effect for your image.
We hope this article has helped you to learn how to add a HDR effect to your image in Photoshop.
If you’re looking to create amazing galleries and help speed up your WordPress website, you should get Envira Gallery here and create your first gallery.
Join our email list on the right of this page to get more helpful tutorials and then follow us on Facebook and Twitter for more free photo editing tutorials.
Envira Gallery helps photographers create beautiful photo and video galleries in just a few clicks so that they can showcase and sell their work.

I really love you guys.. well done
Waw!!! Thank you for the EASY way to explain everthing step by step SUPER!!!