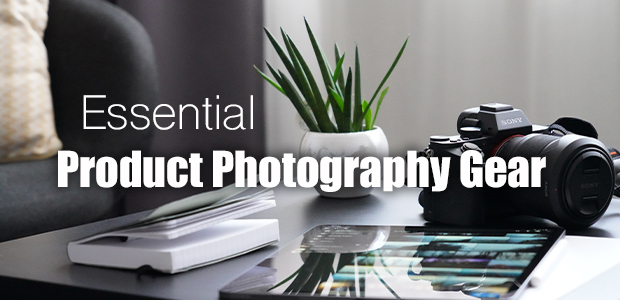
Product photography is a great way to practice your technical photography skills, learn how to use creativity in limited spaces and even earn an income without making a big investment. Of course, like most other photography genres, product photography requires you have some gear to get started. If you’re wondering what is the best and most essential gear for product photography, you’re not alone!
Product photography gives new photographers the opportunity to learn studio and post-processing fundamentals, all from the comfort of their own home. In fact, all the skills you need to be a successful product photographer also apply to other photography genres! If you can become a proficient product photographer, you’ll see improvements across the rest of your work.

Photography may seem like an expensive hobby — and it can be! But, it doesn’t have to be. You only need a few things to get started making great product photography for local and online businesses. You’ll need this equipment for product photography:
- A good camera setup for product photography
- Proper lighting and studio setup for beginner product photography
- Post-processing tools suited for product photography
Without further ado, let’s get you started on creating the best product photography gear kit!
Camera Setup for Product Photography
The great part about product photography is that your camera setup doesn’t matter, at least as much as you may think it does. As a product photographer, you’ll be shooting at tight (small) apertures and on a tripod. That means that your camera’s sensor resolution and your camera lens will have the largest effect on the quality of your images.

When you’re looking for a camera for your product photography setup, choose one with a sensor above 20MP. While larger format product photography might require a medium format camera with a 50 or 100MP sensor, beginning product photography doesn’t demand such a high resolution. If you don’t already have a camera, try to find a durable and recent generation APS-C camera with a compatible flash system.
We’ll talk more about flash systems a little later, but what is an APS-C camera? APS-C stands for Advanced Photo System type-C which, in practical terms, simply means that the sensor in these cameras is smaller than those in a full frame camera. A smaller sensor means a cheaper and more compact camera that will still take great product photos and is perfect for beginners.
If you already have a DSLR, you won’t need to upgrade in order to start shooting product photography. Just make sure that you’ve updated firmware, and that the lighting solution you elect to use pairs well with your camera.
As a beginner, you may not be the most familiar with your camera. That’s okay — camera manufacturers create manuals for a reason! Your camera manual is your best friend. It will help you learn how to set your camera settings and make adjustments.
Lens Choices for Product Photography
Whatever digital camera you choose will come with a kit lens, or starter lens. The kit lens included with your camera is a great starting point.
You can always upgrade your product photography lens later, if you’re on a tight budget. When it’s time to find a new lens, try a medium zoom lens.
Product photography doesn’t require that you shoot with a fixed aperture, but a lens similar to a common 24-105mm f/4 is a great choice. Any lens that can shoot clean images at f/8 or f/11 will work well, too.
Not sure where to go, or what these numbers really mean? That’s a sure sign you should stick to your kit lens! If you want to learn more about aperture, focal length and prime versus zoom lenses, see this guide.
Other Components of a Product Photography Camera Setup
There are three other pieces you’ll need to complete your product photography camera setup:
- Tripod
- Remote shutter
- Lens filters
Tripod
A tripod is an essential part of almost any camera setup because it keeps your camera still and in position to capture your image. When working in product photography, you’ll likely need to stack exposures in post-production to achieve the perfect exposure level. That means you’ll have to take several photos of the product from the exact same position with slight variations in lighting and exposure.
If your photos aren’t well aligned, it will be all but impossible to align them in post production. A tripod ensures that your photos are all shot from the same vantage point.
Fair warning: tripods can be a big investment. A cheaper tripod will be a pain to work with, while a good tripod is a pain on your wallet. Fortunately, recent advancements in tripod technology aren’t really important. So, getting a used heavy studio tripod from a site like eBay or Craigslist is the perfect budget-friendly alternative.
Remote Shutter
A remote shutter allows you to take photos without having to physically touch your camera, which can cause camera shake. Remote shutters are cheap and really great tools. If you buy one, your product photography will thank you for it!
Or, if you have a recent generation camera, you can try connecting a phone app to work as a remote shutter.
Polarizing Filter
Lastly, consider picking up a polarizing filter for your product photography. This is only really necessary if you want to shoot glass products, like drink bottles. A polarizing filter will reduce glare from the flash reflecting off the glass.

If you do want to photography glass products, invest in a filter that fits your lens. If you are still working with a kit lens, wait to get a good filter until you have upgraded to a lens you really love so you don’t have to buy another.
Studio Gear for Novice Product Photographers
There are a lot of online guides that will tell you that you need tons of gear to start shooting product photography. The truth is, you don’t. You can get by with a bare minimum of gear and create a pretty nice home photography studio.
Studio setup
The great thing about product photography is that you can take professional level photos in a home studio with just a few simple materials. These items are fundamental to taking clean images, even though they may sound basic.
Here’s what accessory essential gear for product photography you need to get started:
- Sheets of white, black and 18% gray poster board. You can paint these with a matte medium paint or buy them pre colored.
- A pane of glass
- “A” clamps
- An old lighting stand or tripod
- A small table or a pair of construction saw horses
The sheets of poster board make great backdrops and mats to place the products you’ll photograph. You can also use seamless paper, but it is more expensive, and you can’t repaint it when it rips.
You can use a pane of glass to make a really nice reflective base for your product photos, especially when you layer it on top of a black poster board. This technique will make the products you photograph look as though they’re sitting atop black water, which is a really sleek effect.
Use “A” clamps to secure the poster board and glass to your table or sawhorses, as well as the backdrop to the lighting stand or tripod or any other stand that you want to use to hold your backdrop.

If you’re looking to upgrade, try purchasing a dedicated background and a proper backdrop stand. Keep in mind though that, unless you’ve got an unlimited startup budget, these items really aren’t necessary.
Minimum Lighting Setup
Choosing a lighting setup is extremely important to product photography, and there are several different lighting setups you can pick. But, if you’re unfamiliar with photography lighting, a single setup is the best way to learn how to light your photos.
Start by looking for the cheapest flash system that works with your camera and has good usability recommendations. Make sure that the system has lights that can be gelled, and that it connects to your specific camera model.
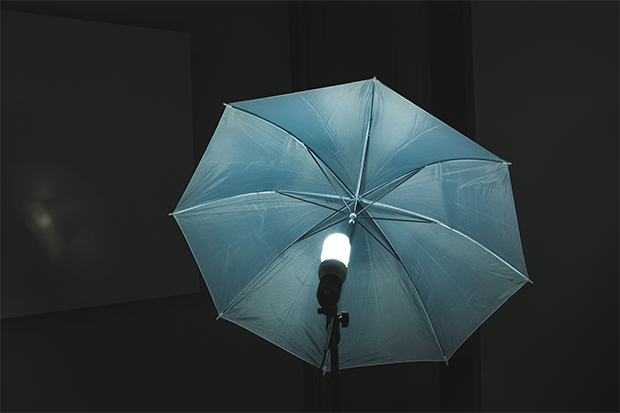
Then, invest in one good light stand, one speedlight, which mounts to your camera, and one receiver for that light. You can purchase receivers that work with more than one light, which will save you money if you decide to upgrade your lighting setup in the future. A set of cheap gels is great to start with, too.
Then, you’ll need lighting modifiers. A small softbox and an umbrella are all you’ll need to start. In fact, you can get by with only an umbrella if you’re on a tight budget.
Of course, the way to make your lighting setup work best for you is to practice using it! You can do more with one speedlight and a modifier than you can imagine. Starting with this system is fantastic for all genres of photography, but especially for product images, where you will use only one light in most circumstances.
Why one light? Because you’ll be stacking exposures later on. That brings us to the next section: post processing!
Remember, artificial light is better than natural light for product photography. The sun moves, which will create shadows on your product over the course of the shoot. Instead, you want continuous light from LED lights that will give the product shots even lighting.
Post Processing Essentials for Product Photography
Post processing is all about finding a photo organizer and a photo editor that work for you, and these products are essential for your product photography kit. We recommend starting your post-processing journey with Adobe Lightroom and Adobe Photoshop.
You can get both Adobe Lightroom and Adobe Photoshop as part of Adobe’s Creative Cloud Plan for only $9.99/month!
Once you have gotten into these programs, learn some specific skills like stacking exposures and using layer masks. Learn how to dodge and burn and create minor touch ups will come in handy for editing your professional photographs, too.
Conclusion
That’s all! You’re ready to assemble your kit of essential gear for product photography and get started taking photos. Need more help jumpstarting your at-home product photography business? Check out these related articles:
- How to Get Started as a Product Photographer
- How to Set Up a Home Photography Studio
- 5 Best Free Product Photography Contract Templates
- How to Market Your Product Photography Services
- Post Processing Workflow for Product Photography
If you like this article, follow us on Facebook and Twitter for more free photography resources. Don’t forget to sign up for our email newsletter so you’re up to date on all of our great photography information!

