




Create Beautiful Responsive Photo & Video Galleries For Your Site in Minutes
Documentation, Reference Materials and Tutorials for Envira Gallery
Envira Payments lets you sell the photos in your galleries without building an online store. You connect your Stripe account once, set a price on the images you want to sell, and Envira Gallery handles the checkout, the receipt email, and the download link for you.
There is no cart to configure, no product pages to create, and no extra plugin to learn. Your visitor clicks a purchase button on the image, pays with Stripe, and receives a download link by email.
The setup has three parts: connect Stripe, turn payments on for a gallery, then set a price on the images you want to sell. Each part is covered below.
sodium and zip extensions enabled on your server, which most hosts provide by defaultNote: On a non Pro license, Envira Gallery adds a 5% transaction fee on top of Stripe’s own fee. Upgrading to Envira Gallery Pro removes that fee.
From your WordPress dashboard, go to Envira Gallery > Settings and click the Payments tab.
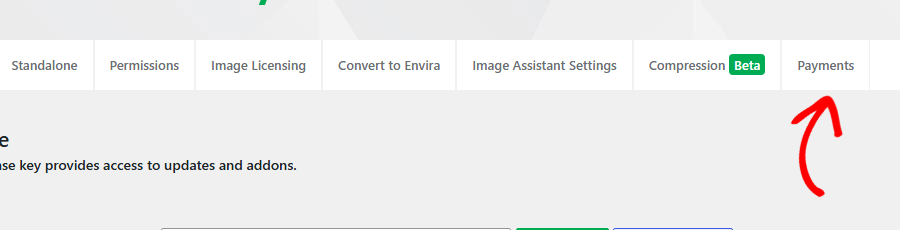
This tab holds the site wide payment setup. You only need to do this once, no matter how many galleries you sell from.
Under Payment Methods, pick a Payment Mode:
Then click Connect next to the Stripe logo.
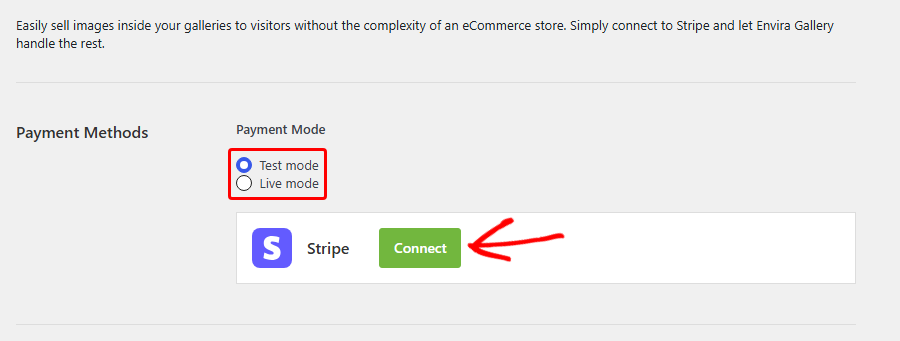
Note: You cannot switch between test and live mode while an account is connected. The mode buttons stay locked until you disconnect, so choose your mode before you connect.
Clicking Connect sends you to Stripe. Sign in with your Stripe account, or enter your email address to create one, and approve the connection.
Stripe sends you back to the Payments tab when it is done. The Stripe row now shows a Disconnect button and the name of the connected account, which is how you confirm the connection worked.

Note: Envira Gallery never stores your Stripe keys. It keeps only the ID of the connected account, and Stripe handles the payment pages and card details.
Payments are enabled per gallery, so you decide which galleries are for sale and which are not.
Open the gallery you want to sell from, then click the Payments tab in the gallery editor.
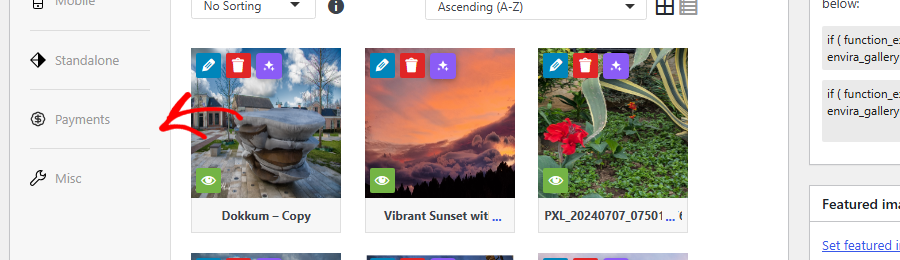
Switch Enable Payments? on. The Stripe Account row below confirms which account the money goes to, and links back to the settings page if nothing is connected yet.
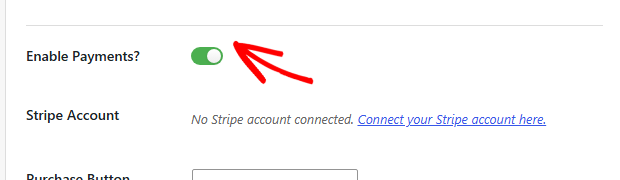
Turning payments on does not put anything up for sale yet. Each image needs its own price.
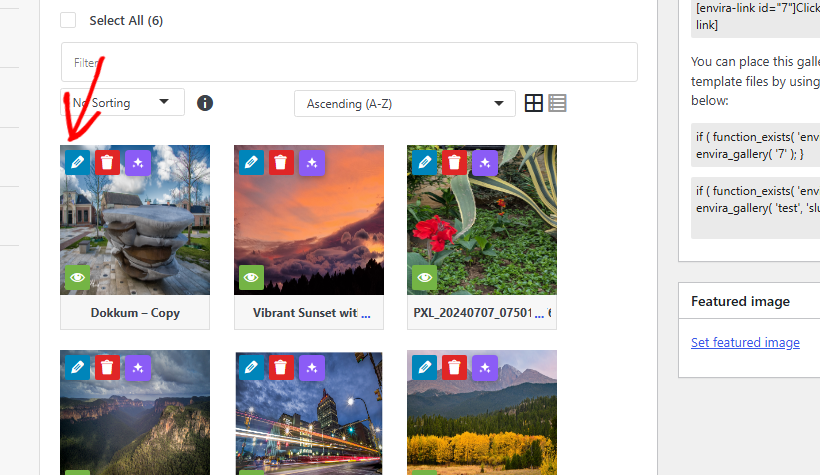
Go to the Gallery tab, hover over an image, and click the pencil icon to edit it.
In the image editor, check Sell This Image with Envira Payments, enter your price in the Sell Price field, then click Save Metadata.
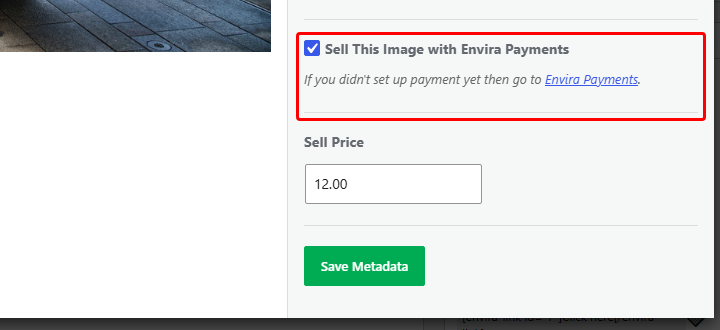
Repeat this for every image you want to sell. Images without a price stay free to view and show no purchase button.
If most of your images share the same price, set them together instead of one at a time.
On the Gallery tab, select the images you want, or use Select All. A Sell with Envira Payments checkbox appears next to the toolbar.
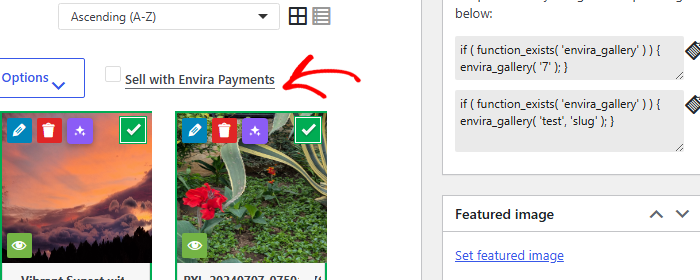
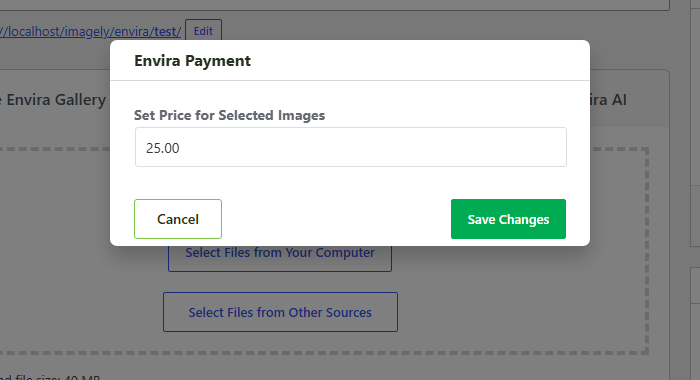
Check it and a small window opens. Enter the price under Set Price for Selected Images and click Save Changes to apply it to everything you selected.
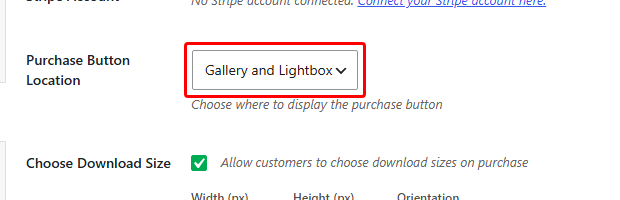
Back on the Payments tab, Purchase Button Location controls where buyers see the button:
Further down, Purchase Button Text sets the wording on the button. The default is Purchase This Image, and you can change it to anything that suits your store, such as Buy this print.
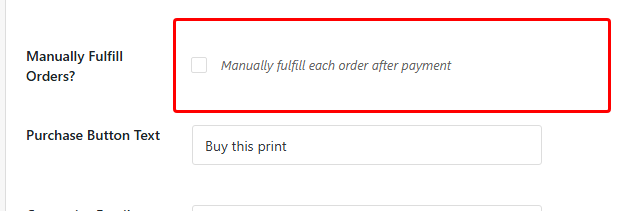
Manually Fulfill Orders? decides what happens after a payment clears. Leave it off and Envira Gallery emails the download link right away. Turn it on and each order waits at Pending until you approve it yourself, which is useful if you retouch or watermark files before sending them.
Note: With the Vertical Focus layout, the purchase button only works inside the lightbox.
You can sell the same photo at several sizes and let the buyer choose.
Check Allow customers to choose download sizes on purchase, then fill in a width, a height, and an orientation for each size. Click Add Size for another row, or the red X to remove one.
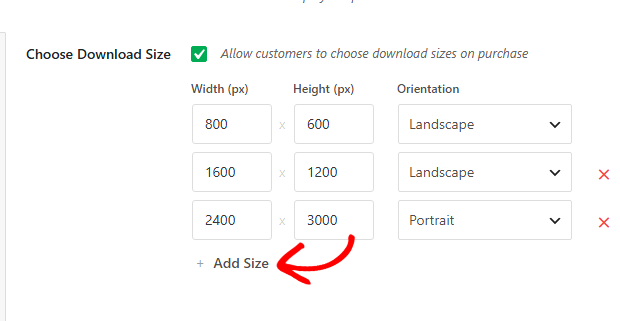
Envira Gallery resizes the original for every size the buyer picks and delivers them together in one ZIP file. Leave this option off to sell the full size original on its own.
Customize Email sets the reply address on the receipt, so replies reach you instead of your site’s default address. Click Reset to put your admin email back.
Email Body is the message your buyer receives. The buttons under the box insert the details Envira Gallery fills in for each order:
{{Customer Name}} is the name from the Stripe checkout{{Download Link}} is the buyer’s private download link{{Order Total}} is the amount paid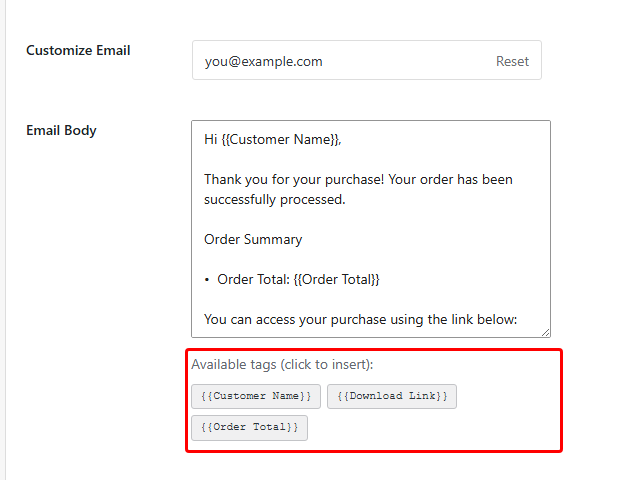
Keep {{Download Link}} in the message. Without it, your buyer has no way to collect the files.
When you are happy with the settings, click Publish or Update to save the gallery.
Note: These emails are sent by your site, not by Stripe. If your site struggles to send mail, use an SMTP plugin such as WP Mail SMTP so receipts arrive reliably.
Add the gallery to a page or post the way you normally would, using the Envira Gallery block or the shortcode, then view the page.
Each image that has a price shows the price and your purchase button.
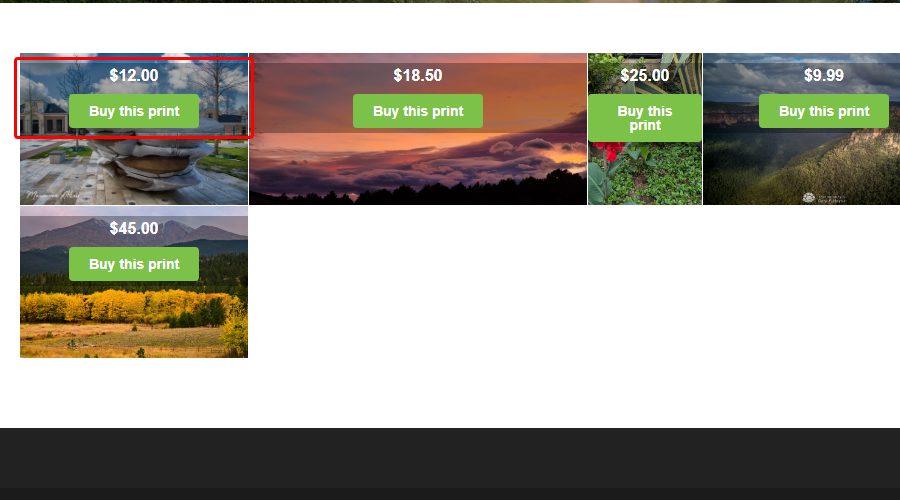
Clicking the button opens a small window with the price, the sizes you offered, and the purchase button again.
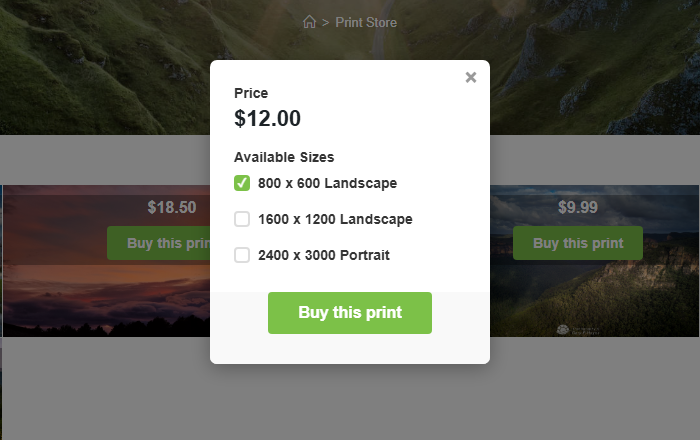
From there the buyer goes to Stripe’s secure checkout page. After paying, they return to your page, see a Payment Successful message with their order number and amount, and receive the download link by email.
While you are still in test mode, place an order yourself with one of Stripe’s test cards to see the whole flow before you go live.
Every payment is recorded under Envira Gallery > Payments. The list shows the order ID, the buyer’s name and email, the image purchased, the gallery it came from, the amount, and the status.
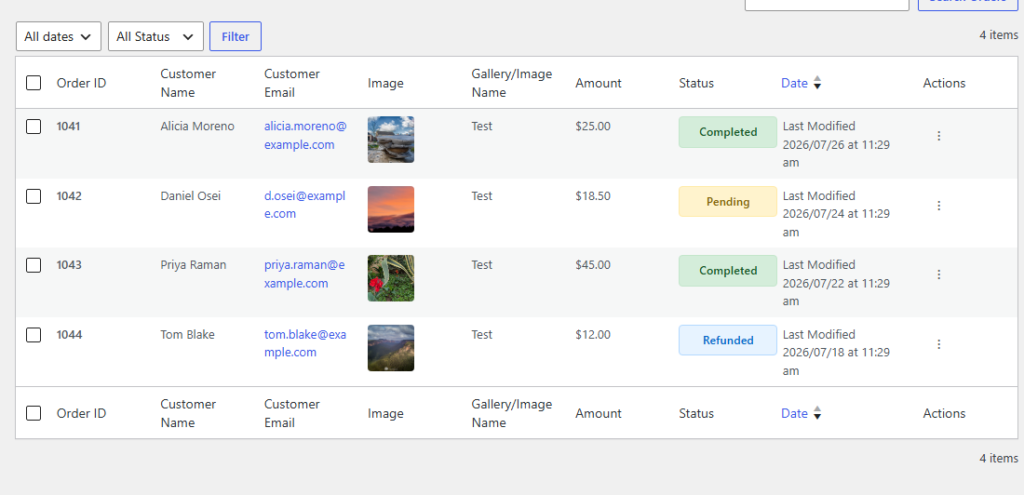
Use the search box to find an order by ID, buyer name, or email, and the date and status filters to narrow the list. Orders can be Completed, Pending, Refunded, or Canceled.
The Actions menu at the end of each row is where you take care of the order:
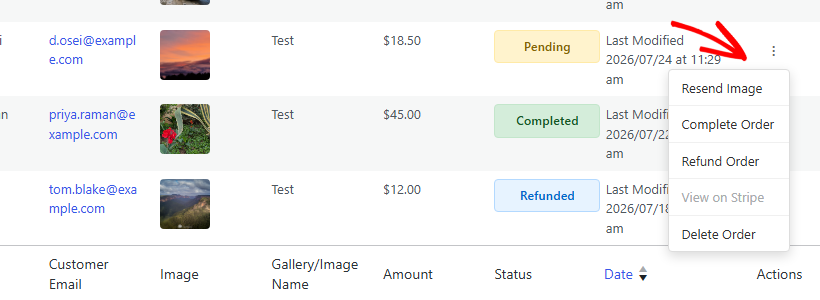
Note: Refunding an order through Stripe’s own dashboard instead of this menu leaves the status here unchanged, so refund from this menu when you can.
Once your test order works end to end, switch to live mode:
Your gallery settings and prices stay exactly as they are. Only the Stripe connection changes.
Still stuck? Contact our support team and we are happy to help.

Envira Gallery: Create, Showcase, and Sell Your Work – Trusted by 150k+ Sites.
Enter the URL of your WordPress website to install

Unlock even more powerful features designed to make your galleries even more beaituful.
Video Galleries
eCommerce
Social media Sharing
Adobe Lightroom
And much more!

What are you waiting for?

Copyright © [#this year :%Y] Envira Gallery, LLC. Envira Gallery is a trademark of Envira Gallery, LLC.