As a photographer, you can probably imagine this scenario: you think you’ve taken some great shots when you press the shutter, but then you realize that your exposure is wrong! It’s a pain when this happens, but all is not lost. This article will look at fixing common exposure problems in digital photography so that you’ll know exactly how to deal with them in the future.
As the world of photography becomes more competitive, many professional photographers have begun to use “RAW” photo files in their work.
RAW files are great for everything from portrait portfolios to wedding photography because they come packed with data that you can adjust during the editing process. With powerful processing tools, it’s possible to instantly transform a standard RAW file into a highly detailed and vibrant photograph.
One of the best tools available for transforming your RAW photos is Luminar. This photo processing application that can eliminate over-exposure, improve contrast and even apply filters. Today, we’re going to answer the question: “How do I fix exposure problems with Luminar?” by looking at how to:
- Import RAW files
- Set-up your photo editing process
- Adjust exposure in Luminar
We’ll also discuss:
- Common exposure problems
- How to identify exposure problems
- Best tutorial for fixing exposure problems with Luminar
But first, you’ll need to download Luminar.
Common Exposure Problems in Digital Photography
Every photographer has messed up their exposure at one time or another (sometimes I still do!). It’s one of those errors you have to make as you learn your craft. Regardless of whether you use a mirrorless camera or a digital one, you will probably still flub your exposure from time to time.
RAW Files
Hopefully you shoot in RAW format instead of JPEG, because fixing exposure problems on a JPEG is more difficult due to the lack of image data available in that compressed file format.
RAW files contain so much more image information, which is why they are much larger in file size than JPEGs. Thus, fixing exposure issues becomes much easier. You can also change your white balance after shooting when you use RAW format, though you can’t with JPEG. RAW files also have fewer issues with noise in the editing process.
Having said that, underexposure is slightly easier to fix than overexposure, even in RAW. We won’t bore you with science, but essentially underexposed photos contain more visual detail that’s just hidden in the shadows. In overexposed images, details are burned away, so it can’t be brought back as easily. You can restore a surprising amount of detail, but it reaches a point where the image starts to look unnatural.
Underexposure and Overexposure
Underexposure occurs when not enough light hits your digital camera sensor to give expose the scene correctly, resulting in images that are too dark. This can happen if your shutter speed is too high for the lighting conditions, your aperture isn’t set correctly or your ISO is too low. Lens focal length also plays a small part in correct exposure — the longer your focal length, the less light reaches the camera sensor.
Overexposure works the opposite way. When too much light floods your camera sensor, your photos come out far too light. Sometimes only parts of your photo will be overexposed, like the reflections in water or the clouds in the sky.
Snow scenes are also tricky to expose correctly, especially if you rely on your camera’s exposure meter. The snow usually ends up looking a dirty grey instead of white unless you deliberately overexpose a bit.
Modern mirrorless cameras as well as digital cameras also have exposure compensation settings that you can use to increase or decrease your exposure. You can also use a faster or slower shutter speed, different aperture and higher or lower ISO to change your exposure.
Steps to Fixing Exposure Problems with Luminar
To fix your exposure problems with Luminar, you’ll first need to identify the type of exposure problems you’re dealing with. Is your image too dark overall, too light overall or is it some combination of both? Remember, images can be both over and under exposed, especially if your image contains high contrast subjects like skies and landscapes.
Step 1: Open Image
Importing a RAW file into Luminar is simple. But if you’re just starting with the photo editing software, then the interface could be a little confusing.
To import a RAW file to fix exposure problems with Luminar, start by selecting the Open Image option on the startup screen.
Look for the photos with the .NEF file extension, as these are the ones in RAW format. Once your photo loads into Luminar, you’ll see an interface that’s very similar to Adobe Lightroom.
I’ll be using the photo below, which is too dark overall, or underexposed. The white balance is fine, so I’ll only need to adjust the exposure.

Step 2: Setting Up Your Luminar Workspace
The lack of editing options to choose from when you first open Luminar may seem concerning. But the tools are there and available to use, you just need to set up your workspace first.
Luminar differs from other photo editing tools on the market, because instead of giving you a pre-set layout that you’re stuck with, the developers allow you to choose your own development window. This essentially means you can build your tools to suit your photography business.
To start setting up your workspace, hit the Add Filters button on the sidebar. You’ll need the RAW Develop filter to deal with things like exposure and contrast, and you’ll find this within the Essentials category. You can also use the search function to find your filters if you prefer.
Step 3: Fixing Exposure Problems with RAW Develop
Now that you’re ready to fix exposure problems with Luminar, you can start playing with the sliders on your screen. One thing to remember is that the Filters Amount slider works similar to an Opacity slider, which means it should always remain at 100% while you’re editing.
The Adjust tab in RAW develop is where you’ll find your typical adjustment options like Exposure, Contrast and Highlights.

The set-up will probably feel quite familiar if you’ve gotten used to editing photos in other tools like Lightroom before.
To fix exposure problems with Luminar, simply adjust the slider next to the Exposure title. This action changes the darkness or brightness of the image.
Move the Exposure slider to the right in small steps. Adjust the Shadows, Contrast, Clarity or any of the other sliders until you are happy with the results. You can see below what a difference this has made, and the adjustments I completed with the sliders:
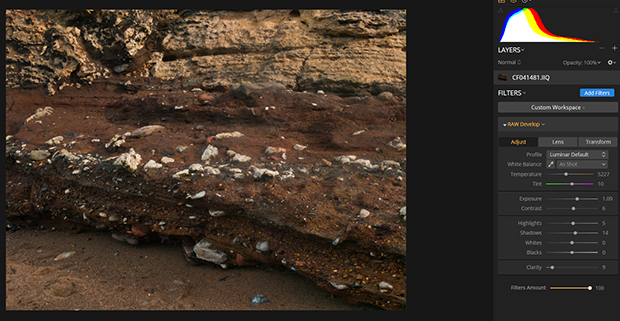
Here’s what my images look like, before and after my exposure adjustments:
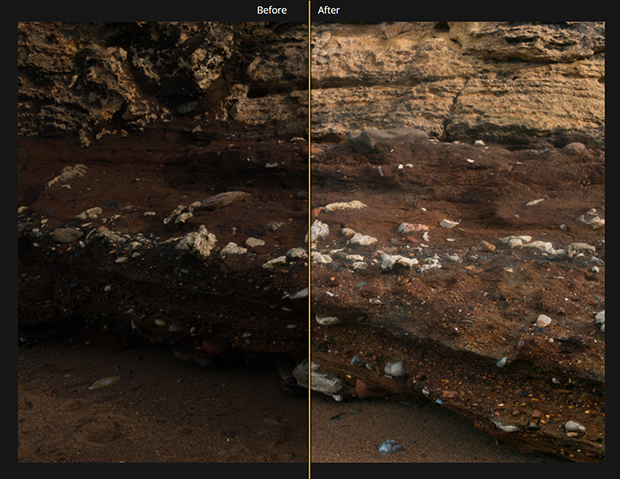
Underexposed photos often suffer from excessive digital noise in the shadows, so you may need to add a noise reduction filter to your image.
Fixing Overexposed Photos in Luminar
Again, open your overexposed photo in Luminar’s image viewer and fix any white balance issues.
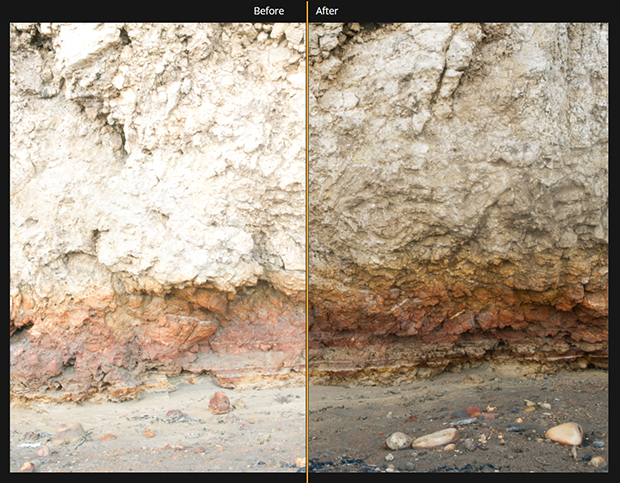
This photo is overexposed, but still salvageable:
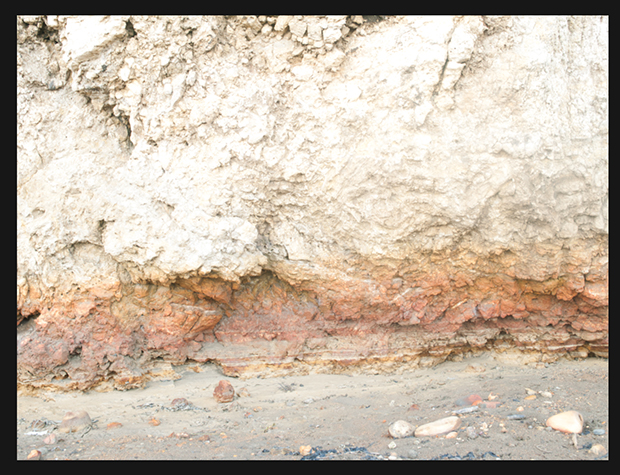
Again, open up the RAW Develop Module.
This time, move the Exposure slider to the left, and adjust the Highlights. Add a little more Contrast and Shadow if needed.
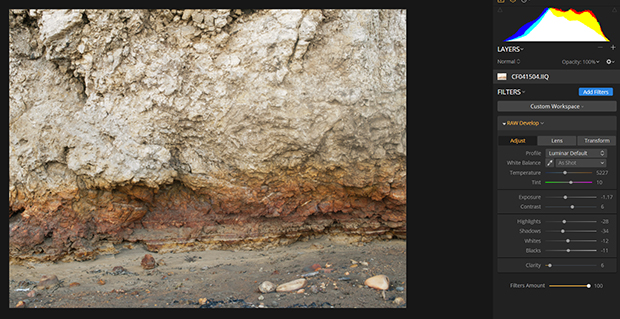
Another big difference. Here’s the before/after split:
Fixing Photos That Are Both Over- and Underexposed
This can be the trickiest of all exposure issues. In the photo below, the sky is exposed correctly (apart from some overexposed spots), but the landscape is underexposed:
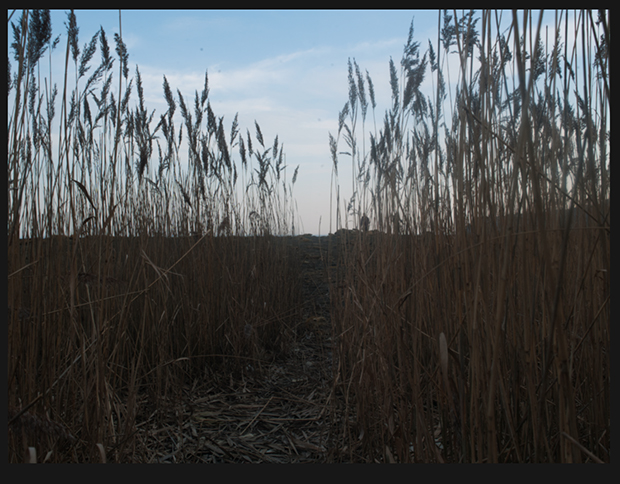
After opening the image and the RAW Develop Module, I tweaked the Exposure, Shadows, and Highlights. I also added the Accent AI 2.0 filter, which uses artificial intelligence to fix issues like exposure, contrast and color.
Here’s the result:
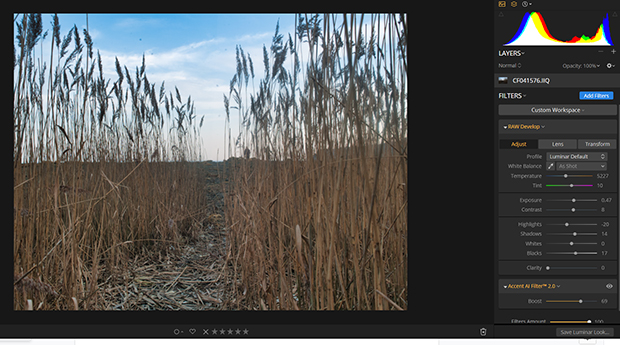
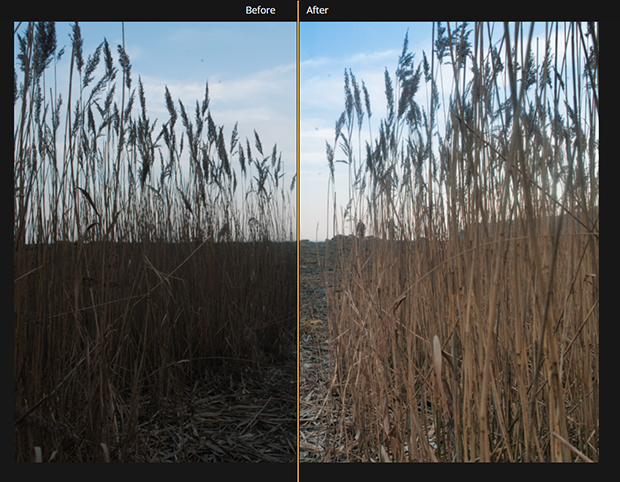
Pairing RAW develop with Accent AI 2.0 can produce good results in cases like this. You could also make adjustments to separate parts of the image with masks and brushes, but that can be time-consuming. This method fixes things quickly!
Here’s the before/after photo:
Making Additional Adjustments on Luminar
You may also need to look at other elements of your picture to improve its overall appearance. For instance, you might adjust:
- Noise Reduction: You may find that you need to use the Noise Reduction filter after you’ve adjusted the exposure. Don’t get carried away with it, though, because it can really dampen the sharpness and clarity of your photo.
- Contrast: Making the difference between your whites and blacks more prominent is a good way to give more depth to your photo. If you’re concerned that your exposure issues have made your image too “flat,” this trick will help.
- Highlights and shadows: Many photographers start editing their photos by using the highlights and shadows sliders. RAW files give you much more detail when it comes to working with shadows and highlights, but you’ll still need to be careful about how much of an adjustment you make. Going too far in either direction can make your image look very obviously edited.
- Clarity: This slider is great for when you’re enhancing the exposure of your images, as it adjusts the difference between your dark and light edges. The clarity slider improves things in your image and gives your photo more of an impact.
Easiest Ways to Fix Exposure Problems with Luminar
Probably the quickest way to fix exposure problems in Luminar is to use the Accent AI 2.0 filter, which can work out exactly what needs changing in your image. As mentioned before, it’s best to use RAW files for editing with photo editing software, because they contain extra image data.
The AI Sky Enhancer filter can fix exposure problems in the sky area of your images without altering other parts of the photo. The AI masking and adjustment features helps this filter decipher sky from the rest of the image and apply selective edits.
You can also find some Luminar Looks (Luminar’s version of presets) that will work on image exposure issues, like AI Landscape Enhancer. Luminar has numerous Looks categories for different types of photography, so you’re sure to find one that works for your image.
One thing you can’t use to improve exposure is Luminar’s LUTs. Many people think that LUTs are just another genre of presets and filters, but they are very different. Yes, LUTs alter the colors in an image, but they do not change exposure settings. Instead, LUTs only deal with color shifts.
You should always add a LUT after you’ve done all your basic adjustments like noise reduction, sharpening, exposure fixing, etc.
If you’ve never used Luminar photo editing software before, or are considering buying it, why not check out this Luminar review to get the complete lowdown on what it’s capable of?
Best Tutorial for Fixing Exposure Problems with Luminar
Google is your friend here! In addition to the tutorial above, there are many video and written tutorials online for fixing exposure issues with Luminar.
Following a tutorial can be very useful so that you don’t make huge mistakes while trying to fix your photo by trial and error. It will also save you time. Having said that, there’s no substitute for hands-on experience, and you’ll only get that through experimenting and seeing what works best for your photos.
The success of your exposure adjustments will depend on what photo file format you use. It’s worth repeating that RAW images are better than JPEGs for making editing adjustments. Modern cameras also offer you a choice of medium or small RAW files, so they don’t take up as much space on your memory card or your hard drive.
Luminar is a good Lightroom replacement, if you are looking for a subscription-free alternative. And, as we saw above, if you’re familiar with Lightroom then Luminar’s user interface won’t pose you any problems. Luminar and Lightroom both open RAW files to allow you to work from start to finish. Photoshop won’t open RAW files on its own. Instead, it uses Adobe Camera RAW to do that, which can be a bit of a nuisance.
If you’re worried about making an irreversible mistake on your photo when adjusting it, you’re quite safe with Luminar. It offers non-destructive editing, which means that your original photo stays untouched until you decide to save the changes you’ve made.
If you want extra peace of mind while fixing your exposure problems, you can always add an Adjustment Layer to on top of your original RAW file. Adjustment layers allow you to work on your photo on a separate layer, leaving the base layer underneath untouched.
Conclusion
Hopefully you’ll have realized that messing up your exposure in camera isn’t a disaster, and that with a bit of post-processing you can salvage most photos. You can’t save them all — really over-or-under exposed photos may not be repairable — but the majority of them will be.
Your camera’s exposure meter is mostly reliable, but it will really help if you can move to using a semi-manual or fully manual camera mode. It’s only by moving to the manual mode that you learn how to get the best exposure, regardless of what your camera’s exposure meter tells you.
On manual, you’ll use your shutter speed, aperture, and ISO to control your exposure, and soon you will be exposing images correctly as second nature. Don’t forget though, that even pros with years of experience still mess up their exposure from time to time!
There you have it, everything you need to know to fix exposure problems in Luminar and improve the reputation of your photography business.
Remember, if you liked this post, follow Envira on Facebook and Twitter for more tips and tricks on how to make the most out of your photo editing software.







How can you show the burnt areas in Luminar 4?
In LR it’s as easy as pressing “j”, which shows blue for dark areas and red for bright areas.
I cannot find this simple but ESSENTIAL setting anywhere on their website, which is VERY poor in doucmentation!
Itàs actaully “j” on Luminar as well. If onyl they said that in the documentation.. what documentation…!??