Have you ever wondered how to make your photos look like film in Lightroom?
Although modern pictures can look incredible in the right circumstances, the look of dramatic, old-fashioned film can really bring a unique life and style to your images.
Whether you’re a wedding photographer who wants to capture the romantic, timeless nature of a couple in your shots, or you want an unforgettable landscape image, knowing how to add the film effect to your images can be a great way to differentiate your portfolio.
In today’s blog, we’re going to look at:
- How you can use Lightroom to make your photos look like film
- How to choose the right images
- Which sliders to adjust for the best effects
If you don’t have Lightroom you can pick it up here from Adobe’s site.
Step 1: Picking the Right Photo
There are many types of photography that work well with the “film” look. However, it’s important to choose the right photo if you want the best outcome. Some pictures are simply more likely to respond well to this filter than others. For instance, you should generally look for images that have:
- A sense of emotion in them
- A reasonable spread of midtones, highlights, and shadows
- Plenty of color or visual depth
Try to avoid any washed-out photos, as it can be difficult to adjust them to a “film” look without losing the beauty of the image.
Step 2: Playing with Clarity
Once you’ve selected a photo that seems perfect for a film look, open Lightroom. There are plenty of great sliders and filters on Lightroom that can help you to adjust the feel and nature of your images.
When you’re making photos look like film, your aim will be to mimic the characteristics of older film cameras. These cameras had lenses that were less sharp and had fewer problems with fringing and flares. This means that it’s worth starting by taking the clarity of your picture down very slightly to copy that effect.
Start slowly and adjust the clarity only a fragment at a time, until you start to get the image that is right for your portfolio.
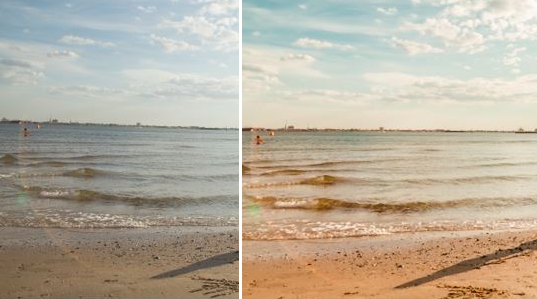
Step 3: Work with the Tonal Curves
There are many different characteristics that make old film photos so unique. One of the most well-known is the faded shadows and highlights present in older photos. Fortunately, it’s easy to recreate this look in your Lightroom applications.
Use the tone curves to pull the black or dark shades in your pictures up, while giving your whites a more faded and vintage look. By the time you’re finished playing with the tone, your images will look a lot closer to film.
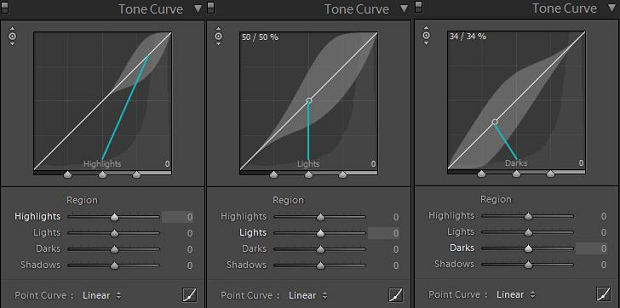
Step 4: Embrace the HSL Panel
Have you ever noticed that old film cameras used to leave an almost golden tone on photos? If you want to know how to make pictures look like film, then you need to recreate the right colors using your HSL panel. The HSL panel (Hue, Saturation, and Luminance) is one of the best color adjustment options in Lightroom, and it’s a massive part of making your photos look like they came straight from a film camera. There’s no perfect level of adjustment here, as it will depend on the kind of image you want to create. Some people may even decide to go entirely black and white.
Simply start by adjusting the hue to warm up your images a little and see what happens. Slide your luminance down a little in certain areas, and make sure that you have plenty of saturation in colors like yellow and orange if you want a vignette effect.

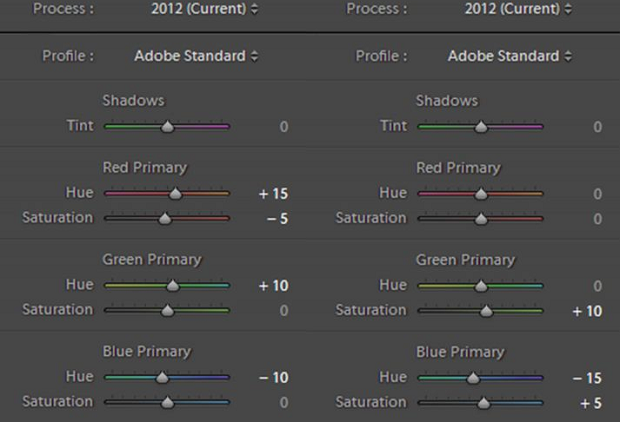
Step 5: Use the Camera Calibration Panel
Many photographers feel a little intimidated by the camera calibration panel, but it’s not as tough to handle as it seems. It’s a lot like your standard HSL panel; the only difference is that you’re not working with a range of colors. Instead, you’ve only got your three primary colors to work with. Tweaking those shades slightly can help to give your photos the rich and warm film-like feeling you’re looking for.
Step 6: Add Some Grain
Finally, one of the most crucial things to remember when you’re learning how to make photos look like film in Lightroom is that old images were rarely perfect. We didn’t have the tools required to blur and adjust those images back then, so you’re sure to have had some grain.
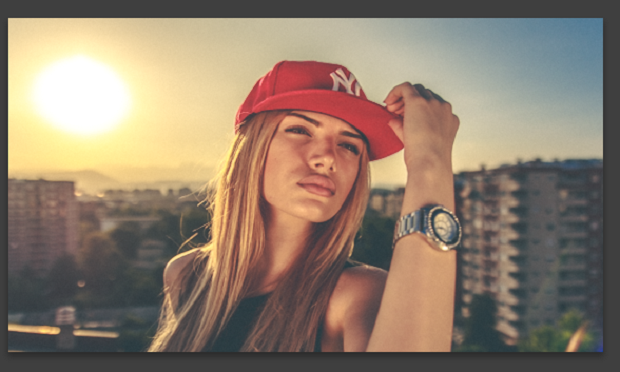
If you want to make sure that your photos look as realistic as possible, add a little grain back into each image. Be careful not to go over the top here!
There you have it! Everything you need to know about how to make your photos look like film in Lightroom!
You might also like these articles:
- How to Upload Photos Directly from Lightroom to WordPress
- 14 Best Photo Editing Software for Photographers
- 121 Best Free Lightroom Presets That You Will Fall in Love With
- How to Create Vintage Old Style Thumbnails in WordPress
- How to Add a Vintage Black and White Effect in Photoshop
Remember to follow us on Twitter and Facebook for more tips and tricks on getting the most out of your photography.






Why not just use real film profiles? In 2020 all the film stocks ever made are already digitised by specialist companies (like RNI) and available as profiles for Lightroom.
Personally I use RNI All Films 5 and apply a Kodak Ektar 100 or Kodak Portra 400 profile as a default on import.
Not only they sort out the colors but also render better highlights from the same RAW, prevent clipping if required and do other nice things. Can’t recommend enough.