Many of those who use photo editing software apply filters to their images. They can be a part of a good editing workflow, or put the perfect finishing touch on a photo. Filters offer a way of adjusting photos, and many filters are made specifically for certain types of photography. But the big question is: which image editing software has the best filters — Luminar or Photoshop?
We’ll be looking at:
- The differences between Luminar and Photoshop filters
- How image filters work
- The most effective ways to use image filters
- Pros and cons of Luminar and Photoshop filters
- How to choose between Luminar and Photoshop filters
What are the Differences Between Luminar Filters and Photoshop Filters?
Adobe and Skylum have produced a very different range of filters for their editing software.
Photoshop is frequently used by graphic designers as well as hobbyist and professional photographers. The software’s filter gallery tends to lean more heavily towards special effects categories like Distort, Stylize, and 3D.
The Blur Gallery (including the Tilt-Shift effect), Noise, Sharpen, and Lens Correction filters are other commonly used photography filters in Photoshop.
Luminar, on the other hand, is a software made solely for photographers, and their filter gallery reflects this.
It contains many more filters, which are very easily found on the software’s home screen. Their filters are grouped into categories, such as Professional, Utility, Creative, Issue Fixers, and Essential.
Each of these categories contains many filters, including Develop, Dehaze, and LUT Mapping. Accent AI 2.0 and the Sunrays Filter are also contained here. Luminar seems to have a filter for every photographer, from beginner to professional.
They also group Curves, Exposure and HSL into filter categories. In Photoshop, these come under Adjustment Layers. Photoshop’s Filter Gallery is a different thing altogether.
Skylum has also invested heavily in artificial intelligence development for some of their software’s filters, namely Accent AI 2.0 and AI Sky Enhancer.
Later in this article, we’ll take an in-depth look at Skylum Luminar photo filters versus Adobe Photoshop filters to measure the pros and cons of each.
How do Image Filters Work?
Image filters are a technique through which the image editing software changes certain parts of the image. Filters can apply effects to colors, tones, sharpness, and other characteristics.
It does this by making changes at pixel level, and each individual pixel is affected by these changes.
Here are some common ways filters are used:
- Change the exposure/brightness/contrast/sharpness of an image
- Change the overall colors, look, and feel of an image using LUT Mapping
- Add special effects, such as the Orton Effect or other creative filters
- Add textures to an image
- Change a color image to black and white
What are the Most Effective Ways to Use Different Image Filters?
The effectiveness of image filters depends on the type of photo you wish to change. What you want your photo to convey to the viewer?
The most basic filters are those that the majority of photographers use in their everyday editing workflow. These filters tend to be exposure, saturation, contrast, shadows, highlights, sharpening and noise reduction. Most images will always be improved by adjusting one, or any combination, of these filters.
Many photographers leave it there, and put out great images without needing or wanting to do further editing. However, there are so many types of filters available in modern editing software. You can find something to further enhance your photos through either program.
There are some ways to effectively use image filters to improve your workflow:
Black & White Filters
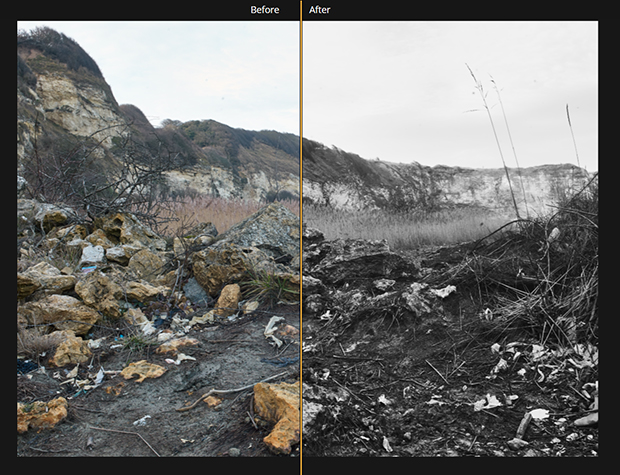
Many people will use the Black & White Adjustment Layer in Photoshop to turn their color images into monochrome ones. But, you can go much further than that with plugins specifically for black and white conversions. Those plugins will offer you many different looks, from slick, high-contrast film stock to grainy, grungy black and white.
Luminar also has black and white conversion filter, as well as presets (called Looks) that will give you specific types of black and white saturations.
Noise Reduction Filters
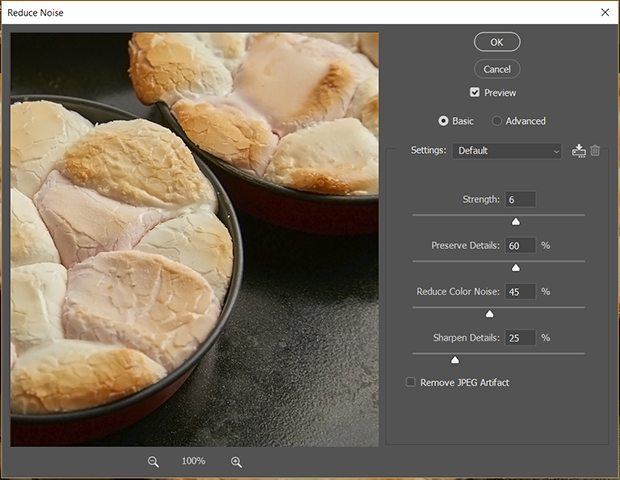
When you shoot at a high ISO, you get more digital noise in your images. Noise is the blotchy, graininess in the shadows and darker areas of your image that reduce the quality.
There are two types of noise — color and luminosity. A good noise filter will deal with both without making your images too soft.
Sharpening Filters
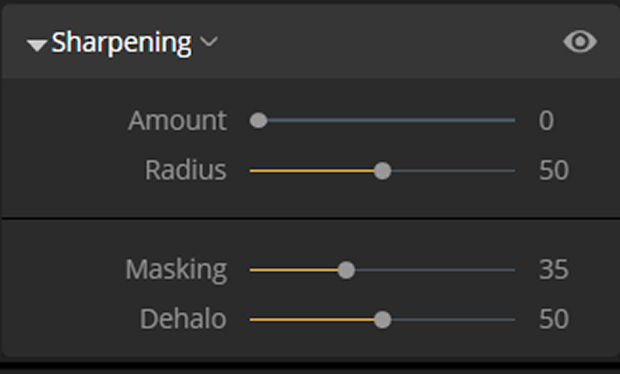
All RAW images need some form of sharpening. If you shoot JPEGs on your camera, then the sharpening will already have been applied in camera. Your camera will also apply color and contrast adjustments, so extra sharpening isn’t really necessary.
If you shoot RAW, then you will need to apply sharpening. Only apply a little to start, as your final sharpening ought to be done on your TIFF file. This is the last thing to do before you save it and convert to JPEG.
Nearly all image editing software has a sharpening filter, but some are easier to use than others. Most of us don’t want to mess with the Unsharp Mask or follow complicated steps in Photoshop. We just want a one or two slider filter to make our images a bit more defined.
Exposure Adjustment Filters
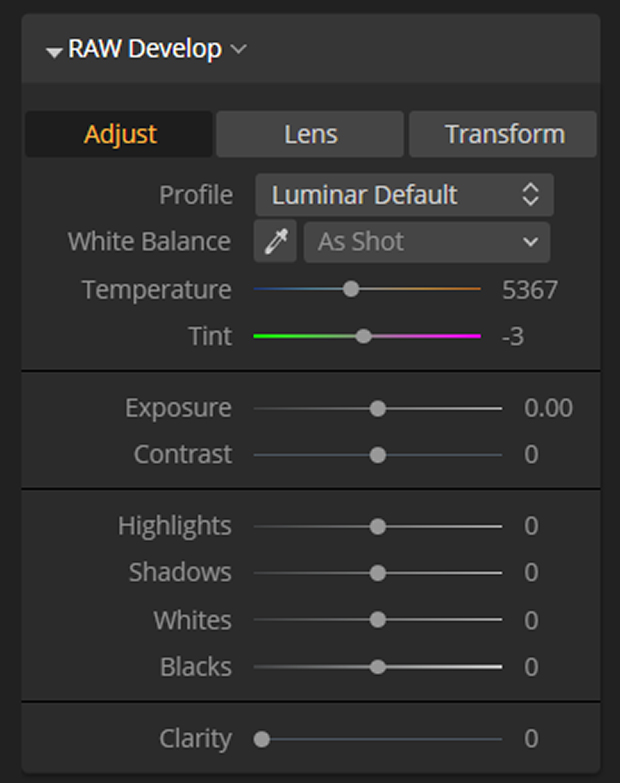
If you have exposure issues with your images, then exposure adjustment filters are a godsend.
They allow you to adjust your exposure and contrast. If you shoot RAW, you can fine-tune your shadows and highlights, as well as blacks and whites in your photos.
That’s another great reason to shoot RAW instead of JPEG!
Pros and Cons of Skylum Luminar Filters
Skylum’s Luminar offers a lot of filters, so let’s look at the good and the not-so-good aspects of them.
Luminar offers several unique filters that you won’t find on any other image editing software. These include Accent AI 2.0, AI Sky Enhancer, and the Sunrays filter. Luminar is an image editor, pure and simple. You will only find filters for photography in Luminar — none for graphic design.
If you are interested in delving further into Luminar Filters, try your hand at creating custom filters.
Pros of Luminar Filters
1. Very Easy to Find and Use Filters
Luminar has helpfully grouped together all of its filters into both different categories and into handy workspaces. This user-friendly interface makes it a breeze to find the filters you need.
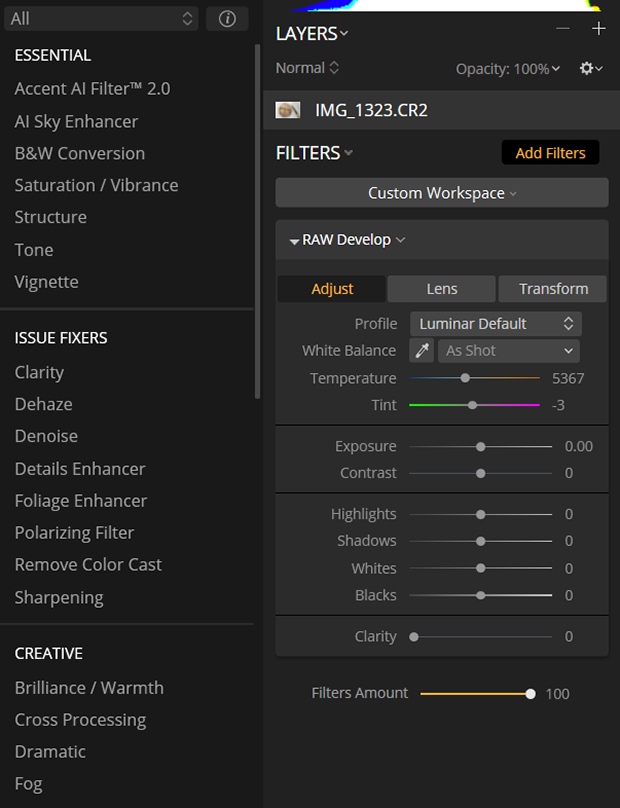
You can find Luminar filters by clicking on the Add Filters button on the right-hand side of the screen. This will bring up a list of filters you can scroll through:
2. Filters Categorized in Workspaces
You can also find filters arranged in the Workspaces tab. Here, they are grouped into categories based on who might find them useful, or the type of editing they perform:
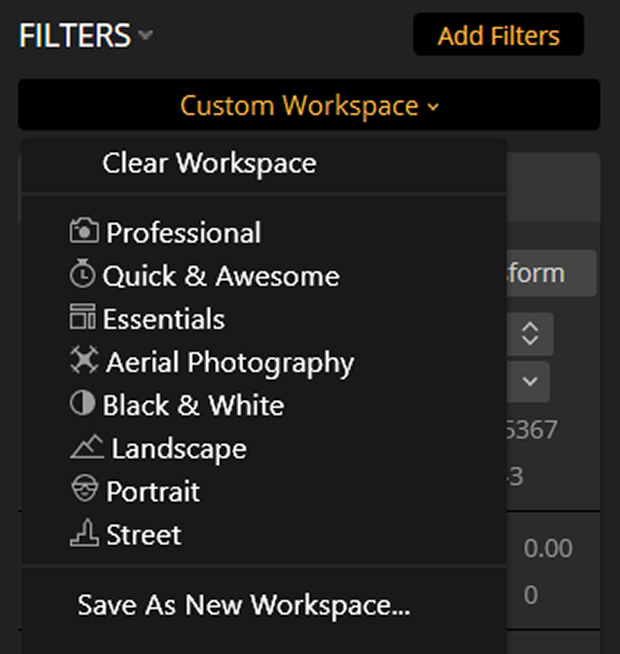
For instance, there’s a Quick and Awesome Workspace for beginners or those in a rush. This workspace contains only a few filters: Accent AI 2.0, AI Sky Enhancer, Saturation/Vibrance, and Clarity. The filters in this Workspace are all you need to edit an image start to finish. If you don’t mind artificial intelligence doing all the basic adjustments — and it does a pretty good job — use these.
The Professional Workspace, on the other hand, has all the filters professional photographers might use to edit a photo. There’s Denoise, Dehaze, Advanced Color Contrast, HSL, Curves, and Dodge & Burn, among many others.
Other Workspaces include Essentials, Aerial, Black and White, Portrait, Landscape, and Street. All of these contain filters that are of specific use for their type of editing.
3. Some Filters Are AI Driven
Skylum has invested a lot of time and money in their flagship artificial intelligence filters Accent AI 2.0, and AI Sky Enhancer.
Accent AI 2.0 uses artificial intelligence to evaluate and automatically adjust exposure, color, contrast, clarity etc.:
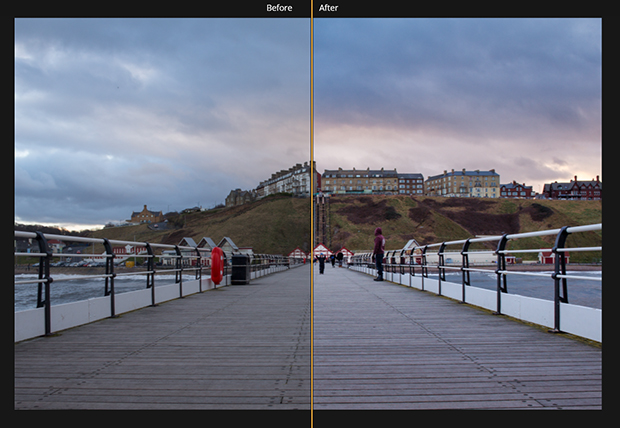
This filter treats and adjusts each image individually, so it’s not just a one-size-fits-all filter.
Accent AI 2.0 is the second generation of the Accent AI filter. Compared to the original, it has improved facial and shape recognition as well as enhanced masking capabilities. I often use this filter on quarter to half strength when I am in a hurry.
AI Sky Enhancer uses AI to adjust and enhance only the skies in an image. It enhances sky colors, adjusts too-bright highlights, and makes clouds look more dramatic. It is able to work out what is sky and what is not, and mask accordingly so that the rest of the image isn’t affected:
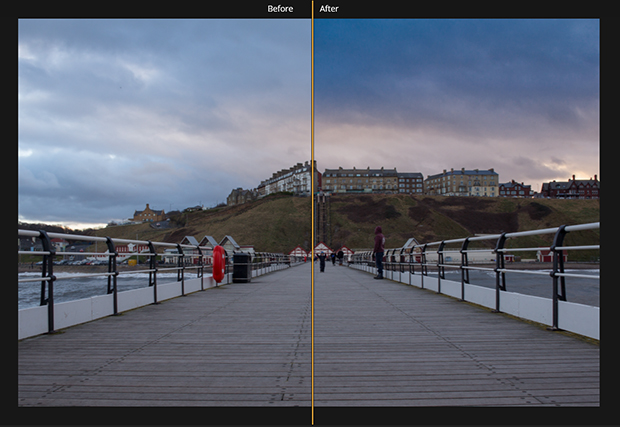
Although it’s fairly good, I tend not to use this filter except on a very low setting. It can create some obvious banding and false colors when used on a high-strength setting.
These AI filters are a great way of getting your images to stand out without a lot of effort. This is important if you are looking to create better blog posts, impress on social media, or do some quick edits for a client contact sheet.
4. RAW Develop Filters
One of the great things about Luminar is that you can add and develop your RAW images directly in the software. Unfortunately, you can’t in Photoshop.
Luminar’s RAW Develop filter has all the tools you need to adjust and hone the exposure in your RAW image, as well as change the White Balance:
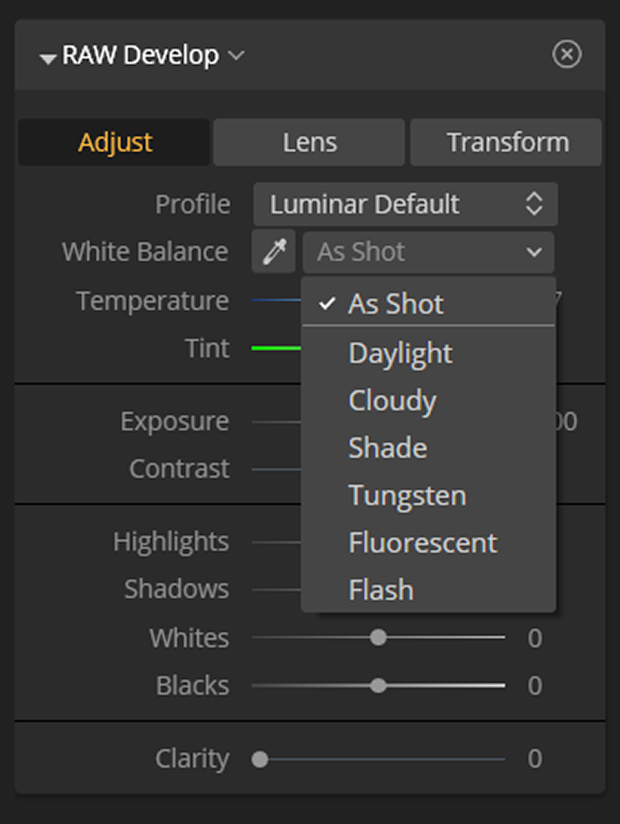
If you want to edit RAW photos in Photoshop, you’ll first need to open them up in Photo RAW.
5. Luminar is Very User Friendly
Photoshop can be a bit daunting for beginners. It has so many tools and features that it can be difficult to find the ones you want easily.
Luminar is designed so that you can find whatever you need quickly. A quick mouse-over of the filters will tell you what each one does:


6. Lots of Creative Filters
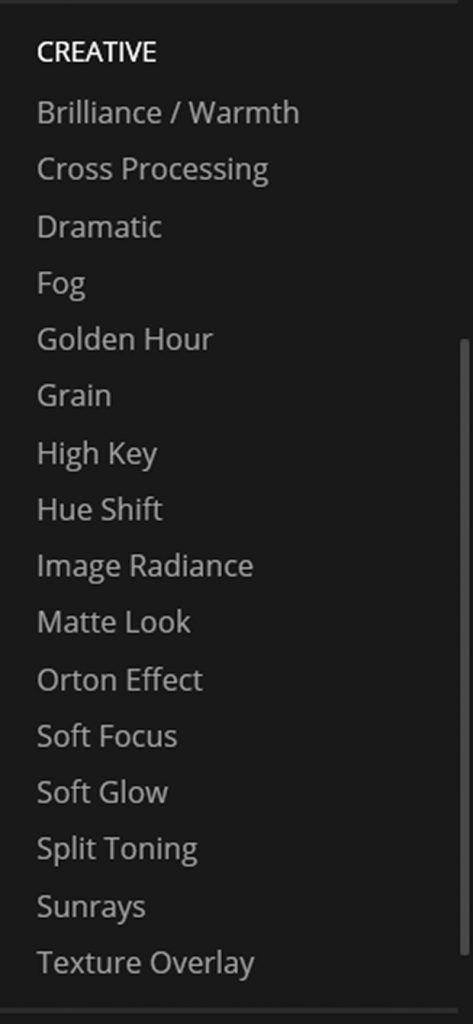
As well as the basic and most-used adjustment filters, Luminar is packed with several useful Creative filters. These include Matte Look, Orton Effect, Dramatic, Fog, Golden Hour, Sunrays, and many more:
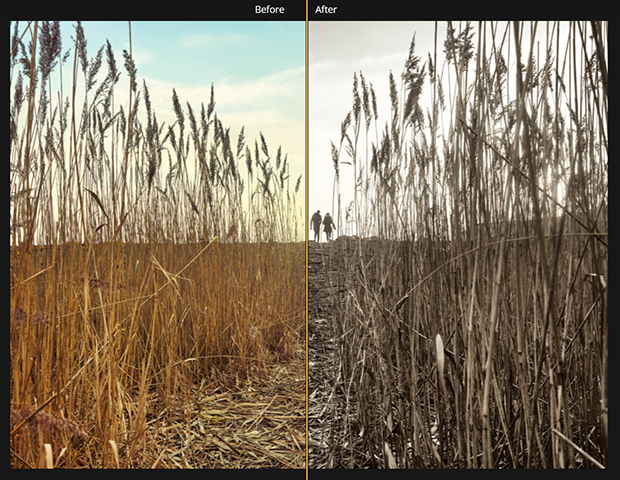
I also particularly like Luminar’s LUT Mapping filter, which is used in color-grading images to give them a certain look and feel by adjusting all the tones in a specific way:
7. Easy Strength Adjustment
Making adjustments in Luminar filters is easy. All you do is move the sliders to one side or the other, and the image changes dynamically. This means you can see in real time exactly what a filter will do to your image.
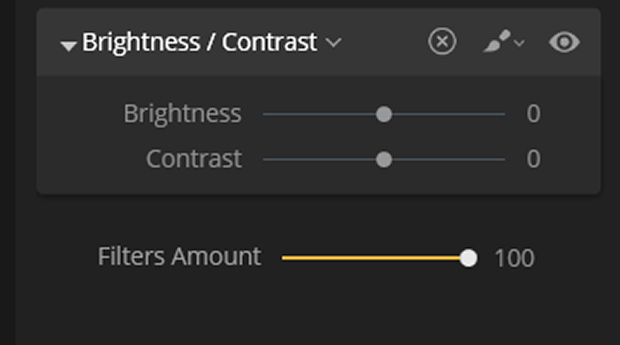
All the filters in Luminar also have Filters Amount sliders to adjust the strength of the final filter look. You can also discard a filter quickly from your image by clicking the ‘X’ in the filter title bar. Each filter also has a brush tool in the title bar so that you can paint the filter on to only certain parts of the image.
8. Save Filter Combinations to Re-Use as Looks
Luminar allows you to add and adjust as many filters as you like. It also offers you the choice to save your filter settings and apply them to other images. These are saved as Luminar Looks, which you can find under the User Luminar Looks category.
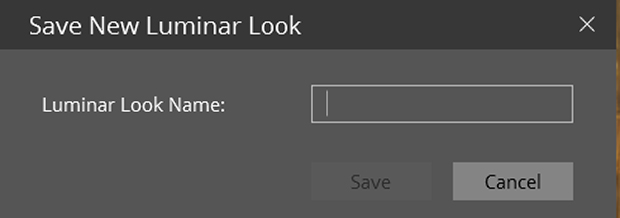
This is useful if you are editing a series of images and you want them all to have a consistent look. It’s a big time saver!
Cons of Luminar Filters
1. Advanced Image Editors May Find Some Filters too Simplistic
Those who are advanced in their photo editing skills may find that some of Luminar’s filters don’t let them go as far as they want. Compared to Photoshop, Luminar filters don’t offer such fine control as Photoshop does.
For instance the Dodge & Burn Filter just has the one main control slider:
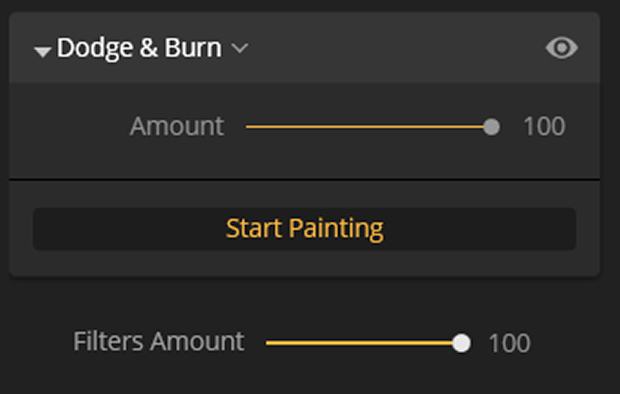
Although the top bar offers some more controls, it’s still not as in-depth as creating your own dodge & burn filters in Photoshop.

If you are just beginning to learn about dodging and burning, then Luminar’s Dodge & Burn filter will work just fine.
The Denoise filter may also be more basic than many would like. To combat that issue, you can get specific noise-reduction software to target noise.
2. Are There Just Too Many Filters?
Sometimes you can have too many options, and there are some who think Luminar offers too many filters. Luminar has been criticized for having too many Creative filters, but I don’t see that as a problem.
I don’t particularly like Luminar’s drop down filter menu, as sometimes the things that I use a lot are near the bottom. However, there is a way round that – create your own Custom Workspace with all your most-used filters in it.
3. Some Filters May Not Work Very Effectively
Some filters don’t always work very well on certain types of images. For instance, the Polarizing filter can create ghosting issues around branches of trees where the filter doesn’t quite read the change from tree to sky. I think it’s fair to say that this can happen with many plugin filters too, not just Luminar.
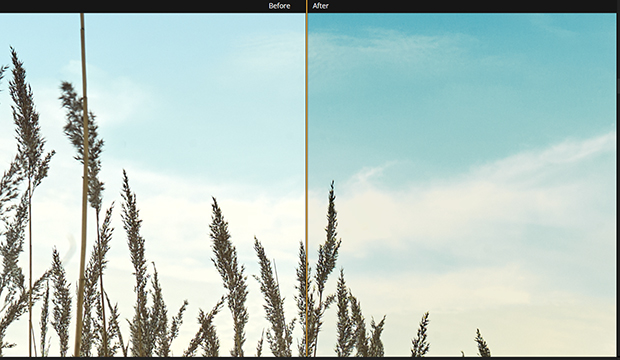
As mentioned previously, AI Sky Enhancer can create banding across the sky in images. The color transitions don’t look natural at full strength when you look closely:
Pros and Cons of Adobe Photoshop Filters
After taking a good look at Luminar’s filters, what does Photoshop have to offer?
Photoshop does more than just edit photos (which is all Luminar currently does). Many of the filters in Photoshop are of the artistic variety, but it does have photo filters too.
Photoshop has a lot of unique effects in its filter gallery which you won’t find in Luminar:
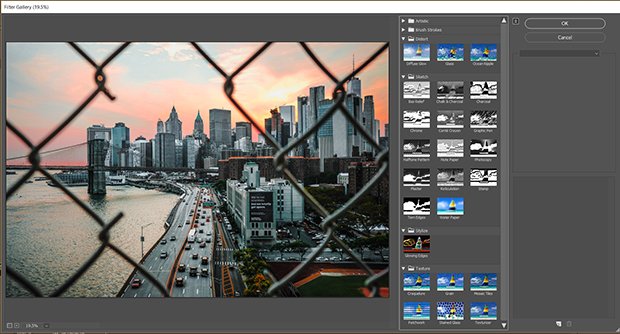
It also offers 3D filters, as well as Smart Filters, which we’ll look at later.
But not all of the filters are necessarily user-friendly. You need to know where the photography filters are, for a start! (Hint: they’re not in the main filter gallery).
Another difference between Luminar and Photoshop filters is that Luminar groups certain filters into categories. Photoshop keeps some aspects like exposure and brightness separate from the filters as Adjustment Layers.
Pros of Photoshop Filters
1. Large Range of Image Manipulation Filters
When it comes to creating composites or manipulating photographs, you can’t beat Photoshop.
They have filters like Liquefy and Distort, which allow you to create a lot of special effects as well as making things (or people) look smaller or larger than they are.
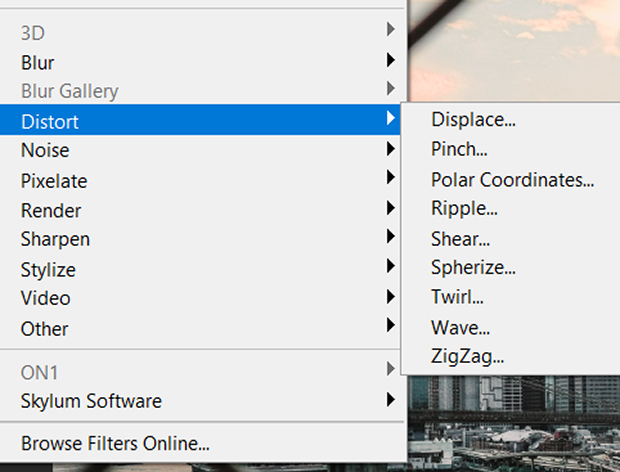
If you are a retoucher or photographer who also does graphic design, Photoshop has everything you could possibly need in tway of filters.
2. Great Blur Filter Gallery
One of the things Photoshop has that Luminar doesn’t is a Blur Filter gallery:
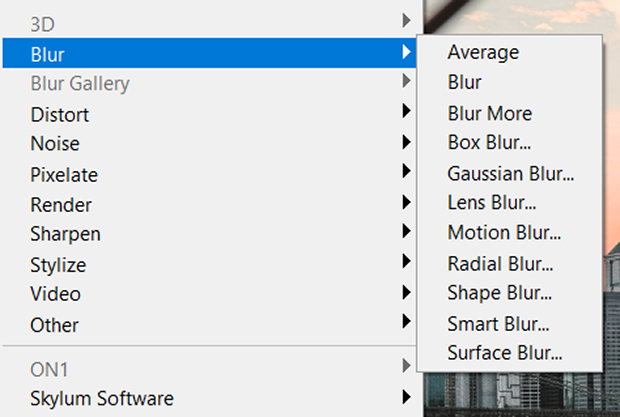
Sometimes, you want to add blur to certain areas of your image, or give it a Tilt-Shift blur, like in the screenshot below:
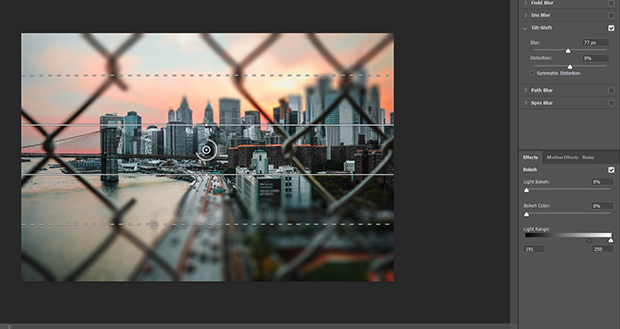
As you can also see, the control panel has several different sliders and options to control the blur, which allows you to really fine-tune your results.
Photoshop allows you to add many different types of blur to your photos, not just good old Gaussian blur!
3. Smart Filters
Are you wondering what the difference is between a Smart Filter and a regular filter is? They are applied to Smart Objects in Photoshop. In a nutshell, it means that the filter becomes totally non-destructive to the original image.
This means you can edit without fear. All of Luminar’s filters are non-destructive too. But, in Luminar, you don’t have to turn your images into smart objects to do it.
4. Reliable Results
If you know how to use Photoshop’s filters then you will get reliable, consistent results. However, for some of the filters you will probably need to read or watch a tutorial or two in order to get the best out of them.
5. Photoshop has a Great Range of Plugin Filters
Being able to add plugins to Photoshop is a massive advantage. You can even get the Luminar Flex plugin, which has all the filters and Luminar presets that the standalone version of Luminar does. Flex allows you to edit without having to shut down Photoshop and transfer your image to Luminar.
There are many good plugins available with filters for Photoshop — ON1 and Luminar Flex are just two. If you’re interested, check out some more information on over 80 of the best Photoshop filters and plugins for creative effect.
A lot of the filters made for Photoshop are called ‘Actions’, just to confuse things further! Actions are a series of adjustments that users make and save in the ‘Actions’ panel. These work much like Luminar’s User Looks, and can be used on other photos:

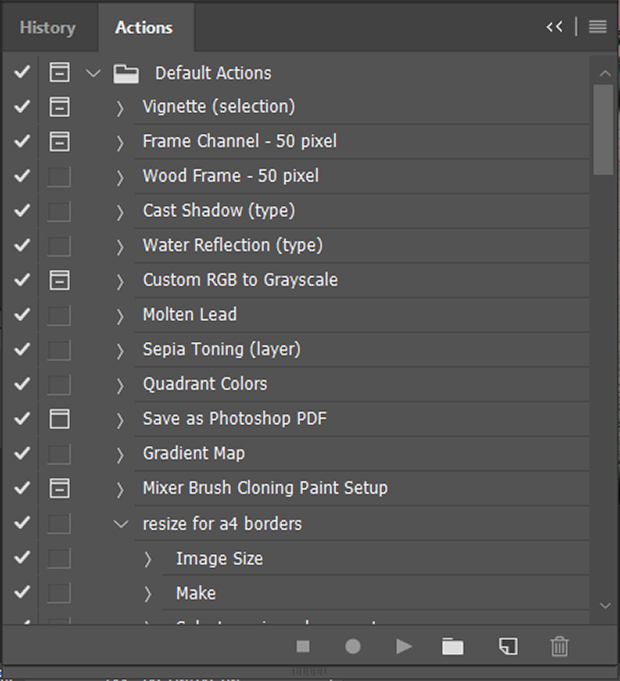
You can download new Actions from lots of sources on the internet, and they should install very easily in the CC versions of Photoshop.
Cons of Photoshop Filters
Photoshop is great for advanced photo editing and graphic design, but it’s rather lacking in creative photo filters.
1. Photographic Filters Are Not Easy to Find
The actual range of Photo Filters in Photoshop are found in the Adjustment Layers section, and not in the Filter Gallery as you might assume:
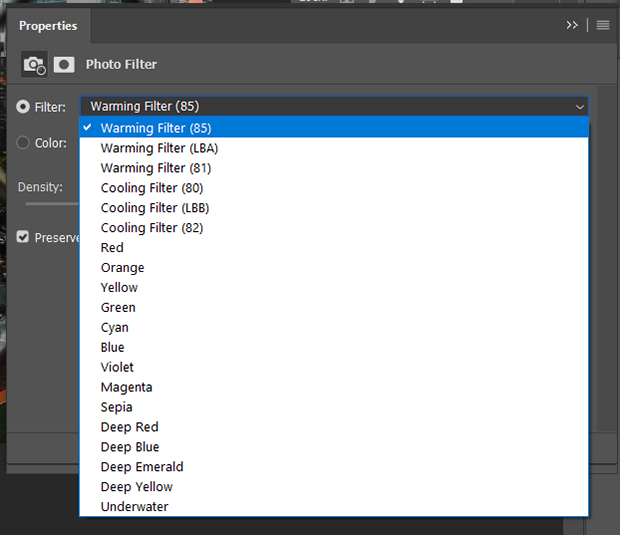
The Actions mentioned earlier are found with the History panel. The issue here is that the filters are all over the place in Photoshop. That’s fine if you know where everything is already, but it’s not the most accessible interface for beginners.
2. Rather Small Range of Photo Filters
As you can see from the screenshot above, that is all the dedicated Photo Filters that Photoshop actually has. It’s not a huge list, nor is it geared towards creative looks.
I included this here as it’s more of a niggle than a con. If you want Adobe creative filters, you need Lightroom rather than Photoshop. Or you can get both on Adobe’s CC monthly subscription photography package for only $9.99/month.
Adobe’s Lightroom photo editor has many presets and filters – especially creative ones. This leaves Photoshop itself as more of a utility image editor. With all the plugins you can install, it becomes very versatile.
3. Not Beginner Friendly
This probably won’t come as a surprise, but it’s Photoshop’s user interface that is its primary drawback.
Those of us who have used it for years know where all the editing tools and gadgets are that we need — and how to use them! But a beginner doesn’t stand a chance without an intensive course of tutorials. When all you want to do is add a filter to your photo, who has time to do that?
Photoshop Elements is the simpler version of Photoshop, but it lacks many of the tools.
How to Choose Between Skylum Luminar and Photoshop Filters
So, which image editing software is best for filters?
As usual, it comes down to what you need from your filters. Are you editing your images to be printed and hung in a gallery? For a client? Or for social media and blogging?
You need to ask yourself what the must-have features are when it comes to filters. Do you need graphic design filters as well as photo filters for your business or website? In that case you would be better off choosing Photoshop with a good filter plugin or two.
If you need to edit RAW files and add extra filters, then Luminar would be a good choice. This is because you can edit RAW files directly in it, whereas you can’t in Photoshop. Again, if you want to quickly and easily color-correct photos, then Luminar offers selective adjustments.
If you want creative filters especially for landscape photography, Luminar is the best bet. The Foliage Enhancer, Golden Hour and Sunrays filters are just a few of the Luminar landscape filters that will be useful for you.
If you want to do some advanced retouching or photo manipulation, then the Liquefy and Distort filters (among others) in Photoshop will likely work for you.
If you are a graphic designer who needs to work on an image-based design, then Photoshop will likely be your go-to image editor. This is because of the actions, layers and plugin filters that will give you a professional result.
Which Has the Best User Tutorials?
I love written tutorials, so tend to avoid those that are solely video-based. That preference goes for both Luminar and Photoshop. I think Photoshop and Luminar have an even split on the quality of their tutorials. There are many more tutorials out there for Photoshop at the moment, simply because it’s been around for much longer than Luminar.
Conclusion
Hopefully this article has given you a bit more insight into photo filters and what you can find in Photoshop and Luminar. Creative filters can add a new dimension to your photos, so don’t be afraid to experiment.
Follow us on Twitter and Facebook, and sign up for our email list to learn about photography and image editing.


