Envira Gallery Blog
Digital Photography Tips, Tutorials and Resources
Digital Photography Tips, Tutorials and Resources

Last updated on Aug 27, 2020 by Alexandra Bateman
Many people want to build a website without having to worry about writing any code. If that sounds like you, then you have a couple of options. You could hire a developer, but that could cost you a lot of money. Or, you could use a WordPress page builder to help you design your perfect website.
Page builders allow you to skip the code and instead create your website and web content using ready-made drag and drop content elements. If it sounds easy enough, that’s because it is! Page builders were designed to make creating a customized website simple for every user without forcing them to sacrifice functionality or design.
You’ll find plenty of reviews on WordPress page builders online, but few compare to Elementor. This page builder powers the websites of over 5,000,000 professionals in all kinds of industries. With over 300 designer templates and 90 widgets to choose from, you can use Elementor to make the site of your dreams.
Plus, the new Elementor Addon for Envira Gallery allows you to easily create, edit and sync your image and video galleries directly inside the Elementor page builder. That means a more streamlined workflow, less hassle, and more time spent photographing and editing!
Here’s how you can use the Elementor Addon for Envira Gallery:
First, install and activate the Elementor Addon for Envira Gallery by logging into your WordPress dashboard, then selecting Envira Gallery >> Addons.
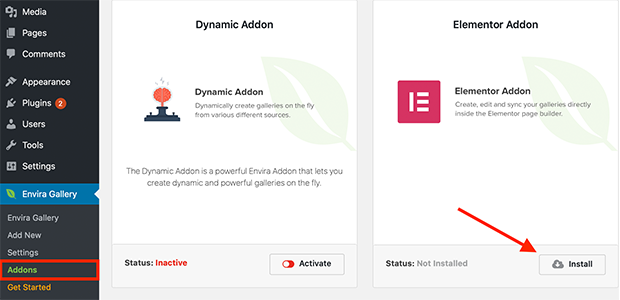
Remember, in order to use this addon, you’ll also have to have Elementor installed and active on your site. If you don’t already have Elementor equipped to your WordPress website, go to Plugin >> Add New, then search for Elementor.
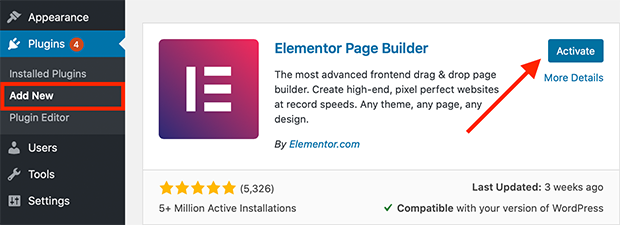
Now, you’re ready to create a new page with Elementor and use the Elementor Addon for Envira Gallery!
To add an Envira gallery you’ve already created to your website using Elementor page builder, first create a new page. Navigate to the left-hand WordPress toolbar, then hover over Pages until you see the option to Add New page.
Select the Add New button. This opens up WordPress’ page editor. At the top of the editing screen, you’ll see a blue button to Edit with Elementor. Select this button so that you can edit your new page with the Elementor Page Builder.

Inside the Elementor page builder, you’ll see a left-hand menu with options of blocks you can add to your page. This is where you build your web page!
Scroll to the bottom of the menu and you’ll see the Envira Gallery plugin. Simply click and drag Envira onto the page.
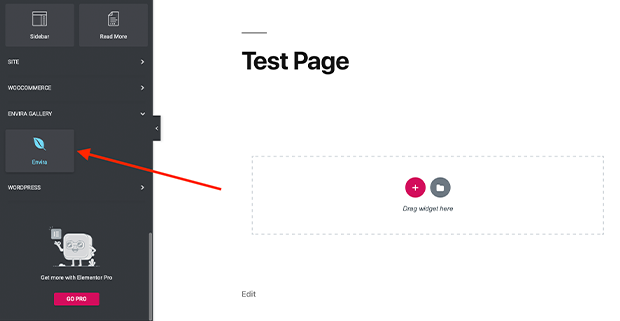
When you drag the Envira Gallery widget onto the page, Elementor will show you options to edit the space, including the option to select which gallery you want to display. Choose which of your Envira galleries you want to display on the page from the dropdown called Gallery.
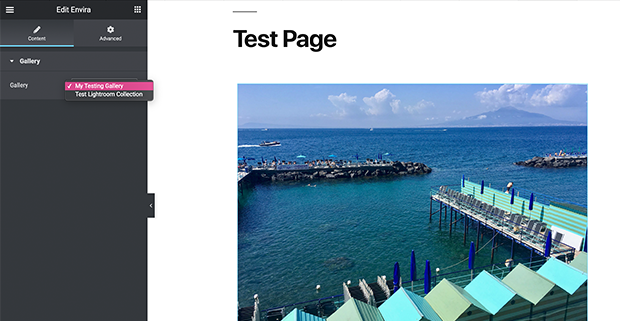
Then, when you’re ready, click Publish at the bottom of the screen to launch your page live.

Now, you can see your Envira gallery on the page your built with Elementor page builder!
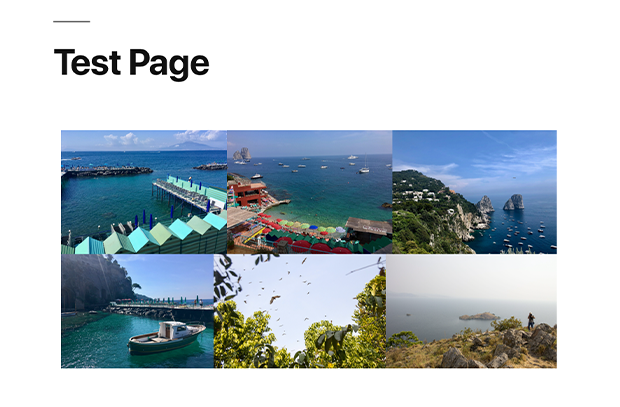
Envira Gallery’s Elementor integration makes putting your images on your website using Elementor page builder all the easier. Download Envira Gallery, and try it today.
Want to see the Elementor Addon in action before you try it yourself? View our video demo on adding an Envira gallery to your page or post in Elementor.
Want to make the most of your Envira Gallery subscription? Check out these related guides:
Envira Gallery helps photographers create beautiful photo and video galleries in just a few clicks so that they can showcase and sell their work.
