


Managing hundreds or thousands of images on your WordPress site shouldn’t feel like an impossible task. Yet for photographers and anyone running image-heavy websites, manually tagging each photo is tedious, time-consuming, and often gets neglected entirely.
Without proper tags, your beautiful images become buried in an endless media library. You waste valuable time searching for specific photos, and worse, your images miss out on SEO benefits because search engines can’t understand what they contain.
The good news? You don’t have to tag every image manually. With automatic image tagging, AI analyzes your photos and applies relevant keywords instantly as you upload them.
In this guide, I’ll show you exactly how to set up automatic AI tagging for gallery images in WordPress.
Why Automatic Image Tagging Matters for Your WordPress Site
Before we dive into the setup process, let’s talk about why automatic image tagging deserves your attention, and why it’s especially valuable for photographers and anyone managing large image collections.
Massive Time Savings
If you’re a professional photographer managing a portfolio of thousands of images, manually tagging each photo could take weeks or even months.
A wedding photographer might upload 500+ images from a single event. A stock photographer could have tens of thousands of images across multiple galleries.
Automatic tagging handles this in seconds. Upload your images, and they’re instantly organized with relevant keywords.
Improved SEO Performance
Search engines can’t “see” images the way humans can. They rely on tags, alt text, and other metadata to understand what your images contain.
When your images are properly tagged, search engines can:
- Index your images more accurately
- Show your photos in relevant image search results
- Better understand the context of your content
- Improve your overall page rankings
This means more organic traffic finding your work through Google Image Search and other search engines.
Better Organization and Searchability
Imagine trying to find a specific sunset photo from three years ago in a library of 10,000 images. Without tags, you’re scrolling endlessly through thumbnails hoping something catches your eye.
With automatic tagging, that sunset image is instantly categorized with tags like “sunset,” “landscape,” “orange,” “sky,” and “nature.” Finding it becomes as simple as searching for any of those keywords.
Enhanced User Experience
For your website visitors, automatic tagging creates a significantly better browsing experience.
When paired with tag filtering (which we’ll briefly cover at the end), your galleries become interactive. Visitors can filter your portfolio by subject matter, color, style, or any other criteria your tags provide.
A potential wedding client can instantly view only your outdoor ceremony photos. An art buyer can filter your landscape gallery to show only mountain scenes.
This targeted browsing keeps visitors engaged longer and increases the likelihood they’ll take action.
Consistency Across Your Library
Manual tagging is prone to inconsistency, due to human error.
You might tag one beach photo with “ocean” and another with “sea.” One sunset might be “golden hour” while another is “dusk.” These inconsistencies make searching frustrating and ineffective.
Automatic tagging applies consistent terminology across your entire image library, making organization more reliable and searches more accurate.
How to Add Automatic Image Tagging in WordPress (In 5 Easy Steps)
Now that you understand why automatic tagging matters, let’s walk through the exact steps to set it up on your WordPress site.
By default, WordPress doesn’t include automatic image tagging functionality. You’ll need a specialized gallery plugin that connects with AI-powered image recognition services.
While there are several gallery plugins available, Envira Gallery stands out as the best option for photographers and anyone managing large image collections.

Here’s why I recommend Envira Gallery for automatic image tagging:
- Seamless auto-tagging integration: Envira connects directly with powerful AI image recognition technology to automatically analyze and tag your images as you upload them.
- Drag-and-drop simplicity: Build and manage your galleries in minutes without touching any code.
- Fully responsive design: Your galleries automatically adapt to look perfect on desktops, tablets, and smartphones.
- Lightning-fast performance: Built-in image optimization ensures your galleries load quickly without slowing down your site.
- Complete gallery management: Beyond tagging, you get albums, watermarking, social sharing, client proofing, tag filtering, and eCommerce integration.
- Professional lightbox display: Showcase your tagged images in an elegant fullscreen lightbox that creates an immersive viewing experience.
Check out our complete Envira Gallery review for more information.

Sheila McRae
This plugin has great features that allow me to do so much more to showcase great images on client sites. It’s easy to set up and configure.
Ready to add automatic image tagging to your WordPress site? Let’s get started.
Step 1: Install and Activate Envira Gallery
First, you’ll need to install Envira Gallery on your WordPress site. Head over to the Envira Gallery pricing page and choose the license level that works for you.
To access automatic image tagging, you’ll need an Envira Plus license or higher, as this feature requires the Tags Addon.
After purchasing, download the plugin files from your Envira Gallery account. Then, go to your WordPress dashboard and navigate to Plugins » Add New Plugin.
Click the Upload Plugin button at the top of the page. Select the Envira Gallery .zip file you downloaded and click Install Now.
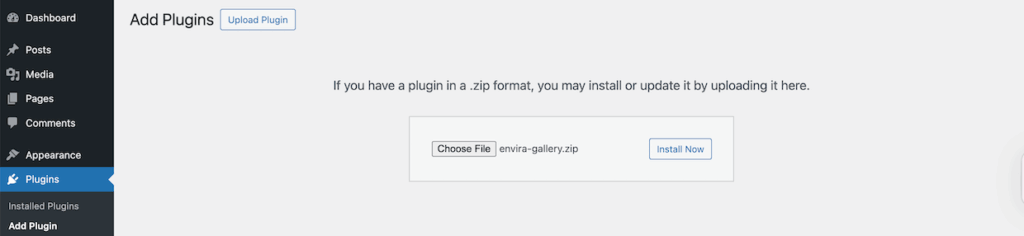
Once the installation completes, click Activate Plugin. You’ll now see a new Envira Gallery menu appear in the left sidebar of your WordPress dashboard.
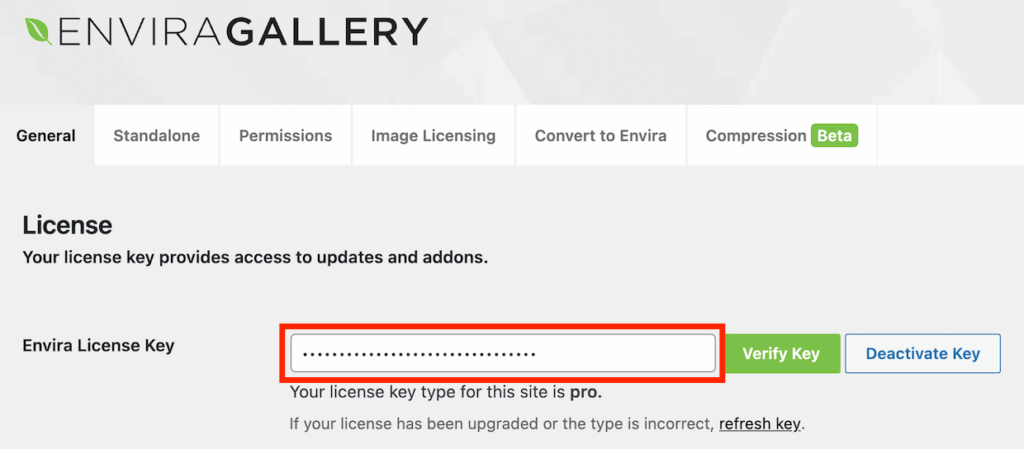
Next, you’ll need to enter your license key, which you can find in your Envira Gallery account under the Downloads section.
Go to Envira Gallery » Settings and paste in your key. Click Verify Key and then Save Settings.
If you need more detailed guidance on installation, check out our step-by-step tutorial on how to install Envira Gallery.
Step 2: Install and Activate the Tags Addon
With Envira Gallery installed, you’re ready to activate the Tags Addon, which enables automatic image tagging functionality.
Navigate to Envira Gallery » Addons in your WordPress dashboard. Scroll down until you find the Tags Addon card.
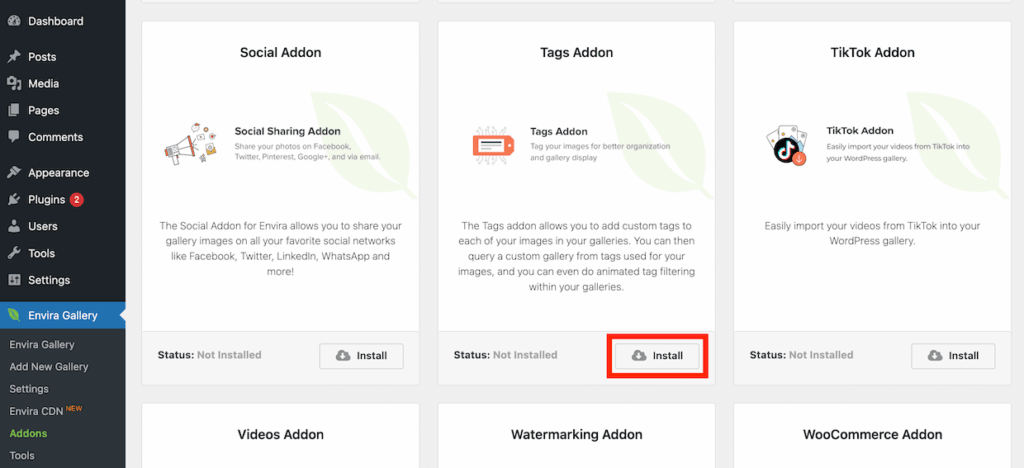
Click the Install button, then toggle the switch to activate it.
That’s it! The Tags Addon is now active and ready to use.
Step 3: Configure Auto-Tagging Settings
With the Tags Addon activated, it’s time to configure the automatic tagging settings.
You’ll connect your WordPress site to AI-powered image recognition that will automatically analyze and tag your images.
Navigate to Envira Gallery » Settings in your WordPress dashboard. Click on the Tags tab.
You’ll see several options for configuring automatic image tagging:
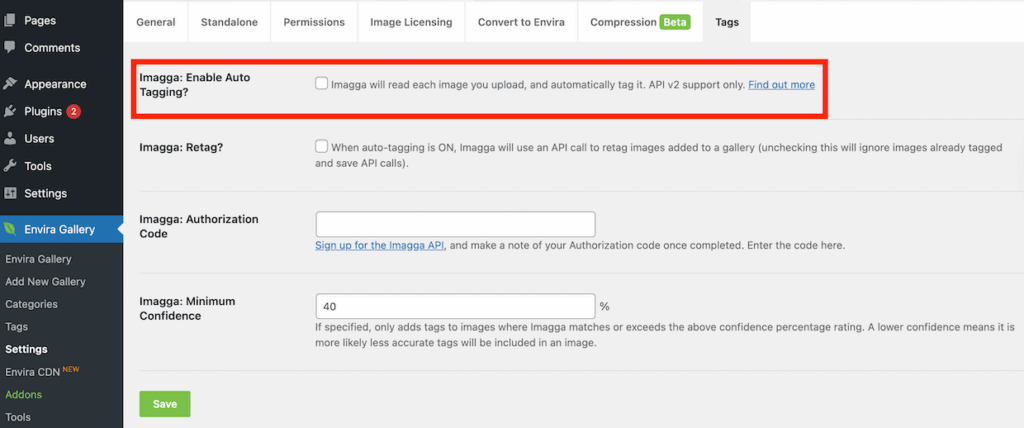
Enable Auto-Tagging
Check the box next to Imagga: Enable Auto Tagging? This is the master switch that turns on automatic tagging functionality.
Once you enable this option, you’ll see a field for the Imagga: Authorization Code.
Get Your Authorization Code
To use automatic tagging, you’ll need to create a free account with the image recognition service. Click the link to Sign up for the Imagga API that appears in the settings.
This will take you to the Imagga website where you can create a free account.
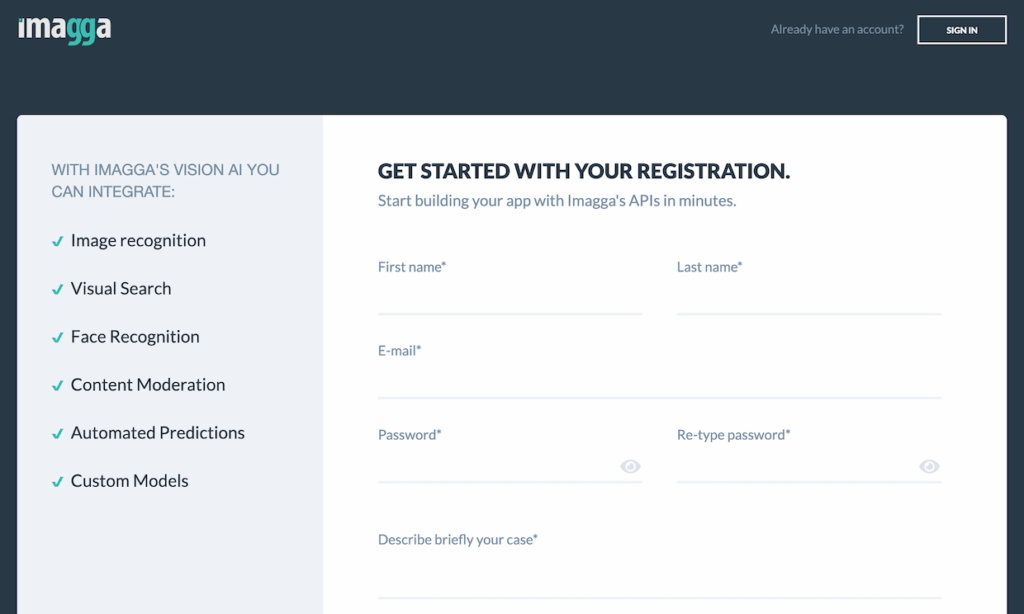
The free tier includes enough API calls to tag thousands of images, which is perfect for most photographers and website owners.
After confirming your account, you’ll see your Imagga dashboard. Look for the Authorization section and copy your authorization code.
Return to your WordPress admin panel and paste the code into the Imagga: Authorization Code field.
Set the Minimum Confidence Level
The Imagga: Minimum Confidence setting controls how selective the auto-tagging system is. This percentage represents how confident the AI must be before it applies a tag to your image.
The default value is 40%, which works well for most users. Here’s how to think about this setting:
- Lower confidence (30-40%): More tags will be applied, but some might be less accurate. Good if you want comprehensive tagging and don’t mind occasionally removing irrelevant tags.
- Higher confidence (50-60%): Fewer tags will be applied, but they’ll be more accurate. Good if you prefer quality over quantity.
For most photographers and image-heavy sites, the default 40% strikes a good balance between coverage and accuracy.
Save Your Settings
Once you’ve enabled auto-tagging, entered your authorization code, and set your confidence level, click the Save button at the bottom of the page.
That’s it! Your automatic image tagging system is now configured and ready to work.
Important Note About Existing Images
Auto-tagging only works for images uploaded AFTER you enable the feature. It won’t automatically tag images already in your existing galleries. Don’t worry though, we’ll show you how to manually tag those images in the bonus section below.
Step 4: Create Your Gallery and Upload Images
With auto-tagging configured, you’re ready to create a gallery. If you’re new to Envira Gallery, this process is incredibly simple and intuitive.
Navigate to Envira Gallery » Add New in your WordPress dashboard.
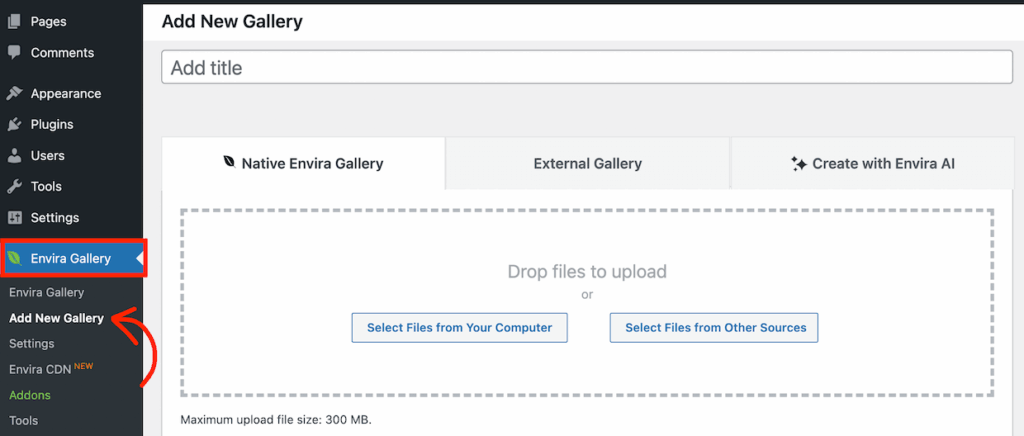
Give your gallery a title and then drag and drop your images into the upload area. You can also click to select images from your WordPress Media Library if you’ve already uploaded them.
Since we have a complete guide dedicated to creating galleries, I won’t go into extensive detail here.
Check out our comprehensive tutorial on how to add a photo gallery to WordPress for step-by-step instructions on creating and customizing your galleries.
Step 5: Watch Your Images Get Tagged Automatically
When you add images to your Envira Gallery, the system automatically analyzes each image and applies relevant tags, all without any manual work on your part.
Simply drag and drop your images into the gallery. Behind the scenes, the image recognition AI is:
- Analyzing the content of each image
- Identifying objects, scenes, colors, and subjects
- Assigning relevant tags based on what it detects
- Storing those tags with your images
For example, if you upload a landscape photo featuring mountains and a lake at sunset, the system might automatically tag it with: landscape, mountains, lake, water, sunset, nature, outdoor, and scenic.
You don’t have to do anything, the tags are applied automatically as soon as you upload the images.
Once your images are uploaded and tagged, click Publish to make your gallery live.
Pro Tip: If you want to review the auto-generated tags, click the blue pencil icon on any image in your gallery. This opens the Edit Metadata window, where you can see all the tags that were automatically applied. You can add additional tags manually or remove any that don’t fit.
Bonus: How to Manually Tag Existing Images
As mentioned earlier, automatic tagging only works for images uploaded after you enable the feature. If you have existing galleries with images you’d like to tag, you’ll need to add tags manually.
Fortunately, Envira Gallery makes manual tagging quick and easy.
Navigate to the gallery containing images you want to tag. In the Gallery tab, you’ll see thumbnails of all your images.
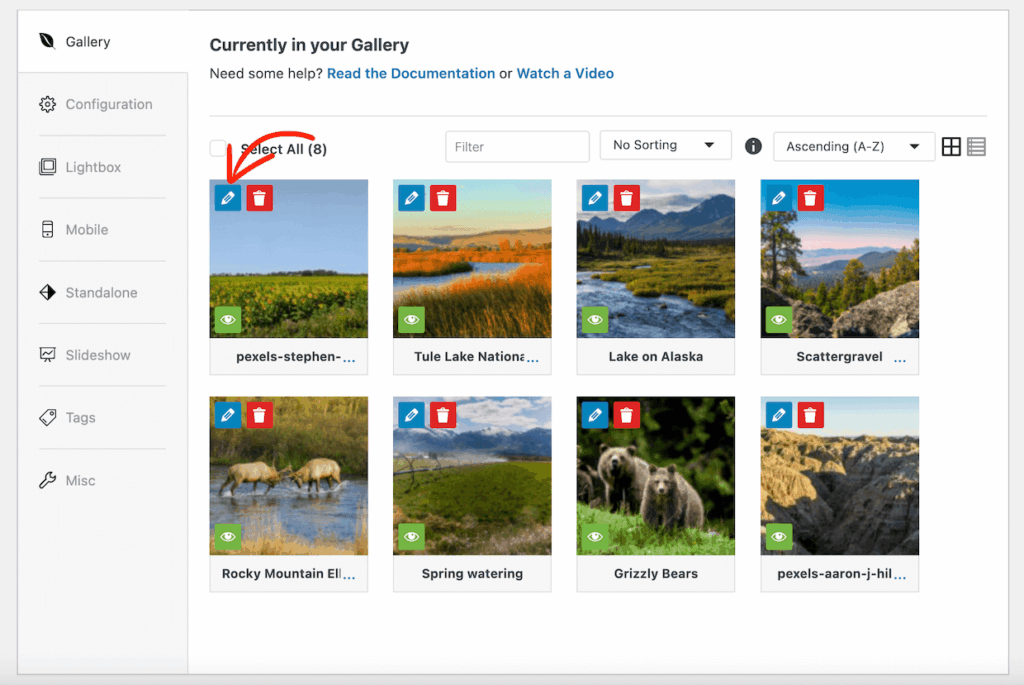
Each image has a blue pencil icon in the top-left corner. Click this icon to open the Edit Metadata window.
Scroll down to the Tags field. Here you can enter your tags as a comma-separated list. For example: landscape, sunset, mountains, nature, outdoor, etc.
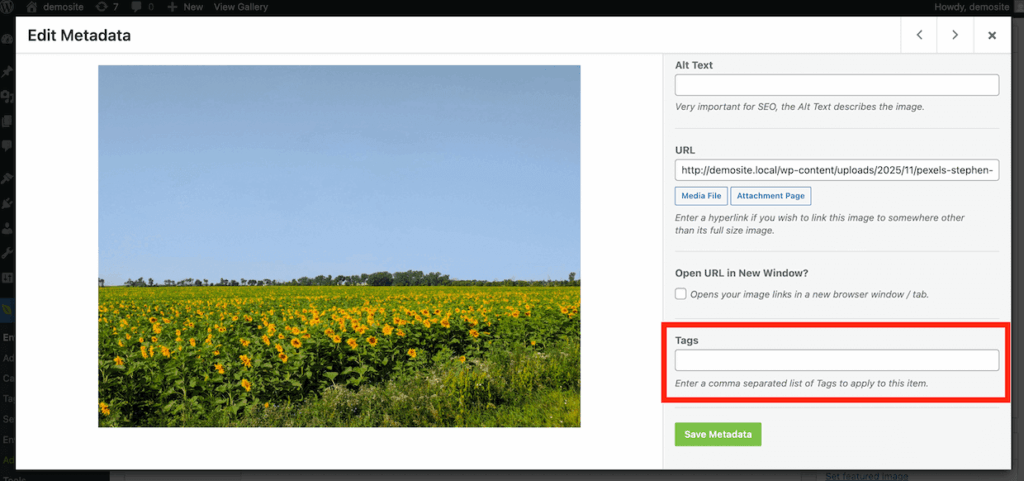
You can add as many tags as you like. Just make sure to separate each tag with a comma.
Once you’ve added all your tags, click the Save Metadata button at the bottom of the window. Repeat this process for each image you want to tag.
While this is more time-consuming than automatic tagging, it’s still much faster than many other tagging methods, and it gives you complete control over the tags applied to your existing image library.
Enabling Tag Filtering in Your Gallery
Once your images are tagged (either automatically or manually), you can enable tag filtering to create an interactive browsing experience for your visitors.
Tag filtering displays a list of clickable tags above your gallery. When visitors click a tag, the gallery instantly filters to show only images with that tag. This makes it incredibly easy for people to find exactly what they’re looking for in large galleries.
To enable tag filtering, navigate to the Tags tab within your gallery settings (not the global Settings page we visited earlier, this is specific to each individual gallery).
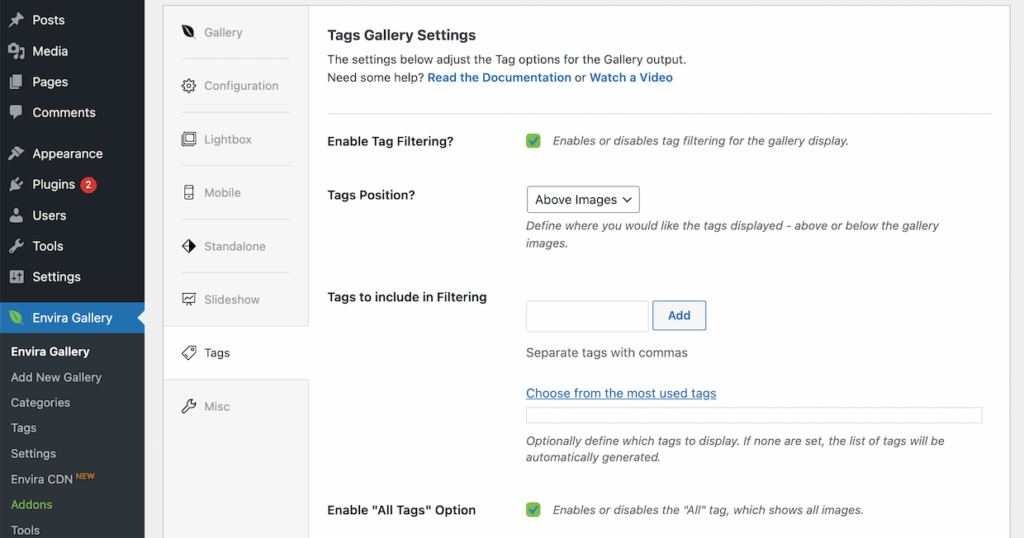
Check the box next to Enable Tag Filtering?
You’ll see several configuration options:
- Tags Position: Choose whether tags display above or below your gallery images
- Tags to Include in Filtering: Optionally specify which tags to display, or leave blank to show all tags automatically
- Enable “All Tags” Option: Shows an “All” button that displays all images when clicked
- Sort Tags: Choose how tags are ordered (alphabetically, by count, etc.)
Keep scrolling for additional settings regarding scroll settings, tag count, and more.

Configure these settings based on your preferences, then click Publish or Update to save your gallery.
Your visitors can now interactively filter your gallery by clicking on tags, making it easy to browse large image collections by subject matter.
For a deeper dive into all the tag filtering options available, check out the Tags Addon documentation.
Frequently Asked Questions About Automatic Image Tagging
What is automatic image tagging and how does it work?
Automatic image tagging uses artificial intelligence and machine learning to analyze the content of images and assign descriptive tags based on what the AI “sees.” The technology uses computer vision to identify objects, scenes, colors, and subjects within an image.
When you upload an image with auto-tagging enabled, the AI analyzes the pixel composition and compares it against objects and concepts it has been trained to recognize. It then assigns relevant tags with confidence scores indicating how certain it is about each tag.
Does automatic image tagging improve SEO?
Yes! Automatic image tagging provides significant SEO benefits. Search engines rely on tags and metadata to understand image content since they can’t “see” images the way humans do. When your images are properly tagged:
- Search engines can index them more accurately
- Your images appear in relevant image search results
- Your pages rank better because search engines understand your content context more completely
- You capture additional organic traffic from Google Image Search and other search engines
Well-tagged images are a crucial but often overlooked component of comprehensive SEO strategy.
Can I edit or remove automatically generated tags?
Absolutely! Automatic tagging is designed to save you time, not lock you into tags you don’t want. You have complete control over all tags, whether they’re auto-generated or manually added.
To edit tags on any image, simply click the blue pencil icon on the image thumbnail in your gallery. This opens the Edit Metadata window where you can add new tags, remove existing ones, or modify tags as needed. All changes are saved when you click the Save Metadata button.
Will automatic tagging work on images already in my galleries?
No, automatic tagging only applies to images uploaded after you enable the feature. The AI analyzes images as they’re uploaded to your WordPress site, so it won’t retroactively tag images that were added before you activated auto-tagging.
However, you can easily add tags manually to existing images using the process described in the bonus section above. While this requires more effort than automatic tagging, it’s still much faster than many alternative methods.
How accurate is automatic image tagging?
The accuracy of automatic tagging depends on the confidence threshold you set and the complexity of your images. Modern AI image recognition is remarkably accurate for common objects, scenes, and concepts.
The confidence threshold setting lets you control the trade-off between quantity and accuracy. At the default 40% confidence level, you’ll get comprehensive tagging with good accuracy for most images. Higher confidence levels (50-60%) will apply fewer tags, but they’ll be more accurate.
You may occasionally need to remove an irrelevant tag or add a specific tag the AI missed, but overall, the technology is quite reliable for most photography and visual content.
What’s the difference between image tags and metadata?
Image tags and metadata serve different purposes:
Metadata stores technical information about the photo, such as when it was taken, camera settings, dimensions, file size, and location data. Metadata is automatically generated by your camera and stored with the image file.
Tags describe what’s in the photo, such as objects, subjects, colors, scenes, and concepts. Tags are not automatically generated by cameras and must be added either manually or through AI-powered automatic tagging.
Both are important for organization and SEO, but they provide different types of information.
Do I need a paid Envira Gallery license to use automatic tagging?
Yes, automatic image tagging is available with the Tags Addon, which requires an Envira Plus license or higher. The Plus license includes access to all addons, including Tags, making it the perfect choice for photographers and image-heavy websites.
You can view all license options and features on the Envira Gallery pricing page.
Can visitors see the tags on my images?
Tags can be displayed to visitors if you enable tag filtering in your gallery settings. When enabled, tags appear as clickable buttons or links that visitors can use to filter the gallery view.
If you don’t enable tag filtering, tags remain in the background as organizational metadata. They still provide SEO benefits and help you manage your media library, but visitors won’t see them displayed on your site.
Ready to experience automatic image tagging for yourself? Get started with Envira Gallery today!
I hope you are now able to use automatic ai image tagging on your WordPress site. Here are a few more resources you might find helpful:
- How to Optimize Images for Web: Ultimate WordPress Guide
- How to Create a Slideshow in WordPress (The Easy Way)
- How To Create a Stunning Photo Album In WordPress (Step-by-Step)
Don’t forget to check out our blog and follow us on X (Twitter) for the best photography tips, resources, and WordPress tutorials.


