Are you a photographer looking to take professional-grade photos from the comfort of your own home? Setting up a home photography studio doesn’t have to be complicated or expensive.
With the right equipment and setup, you can create a dedicated studio space that allows you to capture high-quality images of any subject, from portraits and products to still life and fine art.
In this ultimate guide, we’ll walk you through everything you need to know about setting up a home photography studio, including:
Whether you’re a beginner or an experienced photographer looking to expand your services, this guide will provide you with the knowledge and inspiration to create a functional and efficient home photography studio that helps you take your photography to the next level.
Choosing the Perfect Space for Your Home Studio
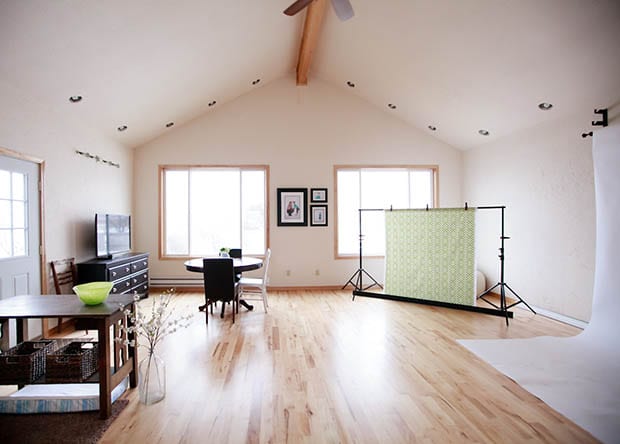
The first step in setting up your home photography studio is finding the right space. The ideal space will depend on the type of photography you plan to do and the size of your subjects. Here are some factors to consider:
Size
- For full-body portraits or large subjects, you’ll need a space with ample width and height to accommodate a wide-angle lens, hair lights, and reflectors.
- If you’re focusing on still life, headshots, or tabletop product photography, a smaller space can suffice, such as a corner of your living room or a dedicated tabletop setup.
Natural Light
- A room with large windows and plenty of natural light can be a great option, especially if you’re on a tight budget or prefer a natural look.
- North or south-facing windows are ideal, as they provide soft, diffused light that’s perfect for photography.
- If you don’t have access to natural light or need more control over your lighting, don’t worry – we’ll cover artificial lighting options in the next section.
Privacy and Accessibility
- Choose a space where you can work without interruptions or distractions from family members or roommates.
- Consider the accessibility of your studio space – you’ll need to be able to easily move equipment and subjects in and out, so a ground-floor room or a space with elevator access is ideal.
Potential Spaces for Your Home Studio
- A spare room or guest room
- A garage or basement
- A section of your living room or home office
- A dedicated corner or tabletop setup in any room of your house
Essential Equipment for a Home Photography Studio
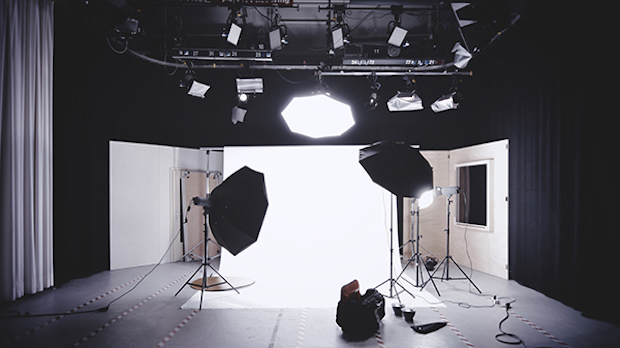
Once you’ve chosen your space, it’s time to gather the essential equipment for your studio. Here’s a breakdown of what you’ll need:
Lighting
Artificial lights are a must-have for any home photography studio, as they allow you to control the intensity, direction, and quality of light in your shots. Here are some options to consider:
- Continuous lights: These are a great option for beginners, as they allow you to see the effect of the light in real-time. Look for LED lights with adjustable brightness and color temperature.
- Speedlights: These portable flash units are a popular choice among photographers, as they offer more power and versatility than continuous lights. Look for speedlights with adjustable power output and wireless triggering options.
- Strobes: These are the most powerful option, but they’re also the most expensive and complex to use. If you’re shooting large subjects or need to overpower ambient light, strobes may be worth the investment.
In addition to your main lights, you’ll also need:
- Light stands: Sturdy light stands will allow you to position your lights at the perfect angle and height.
- Light modifiers: Softboxes, umbrellas, and reflectors can help you shape and soften the light for more flattering results.
- Wireless triggers: If you’re using speedlights or strobes, wireless triggers will allow you to fire your lights remotely, giving you more flexibility in your shooting setup.
Backdrops and Surfaces
- Seamless paper: A roll of white, black, or colored seamless paper is an affordable and versatile backdrop option that works well for most photography styles.
- Muslin or fabric: Textured fabrics can add visual interest and depth to your shots.
- Foam boards: White and black foam boards can be used as reflectors, flags, or even small backdrops for tabletop shots.
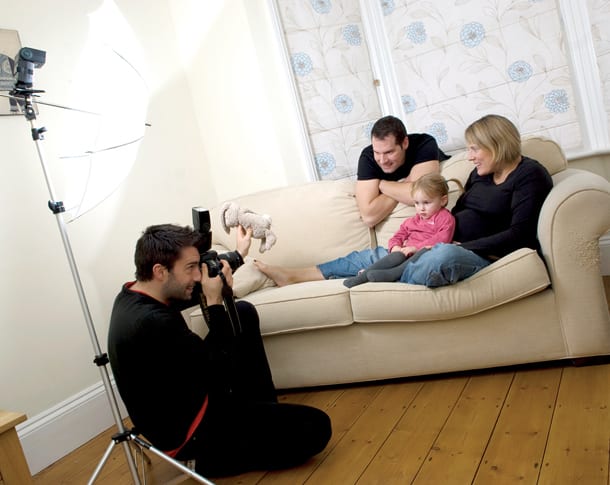
You may want to also consider adding some furniture if you shoot staged home products or family photography. A small couch that’s easy to slide out of the way and a few slipcovers in different colors can give you a lot of versatility.
Camera Gear
- Camera: A high-quality DSLR or mirrorless camera is essential for professional photography. Look for a camera with good low-light performance, fast autofocus, and the ability to shoot in RAW format.
- Lenses: A variety of lenses will give you more versatility in your shots. Consider a portrait lens for headshots, a macro lens for close-up details, and a wide-angle lens for larger subjects or group shots.
- Tripod: A sturdy tripod will keep your camera stable and ensure sharp images, especially when shooting with slower shutter speeds or in low light.
Props and Accessories
- Subject-specific props: Gather props that complement your subject and help tell a story, such as hats and scarves for portrait sessions or flowers and vases for still life shots.
- Posing stools and chairs: These can help your subjects feel more comfortable and create interesting poses and angles in your shots.
- Clamps and clips: These will come in handy for securing backdrops, holding reflectors, or positioning props in your shots.
Setting Up Your Studio for Photography
Setting Up Your Lighting
Proper lighting is key to achieving professional-looking photos. Here’s a step-by-step guide to setting up a basic 3-point lighting setup:
- Set up your backdrop: Start by setting up your seamless paper, muslin, or fabric backdrop, making sure it’s clean and wrinkle-free.
- Position your subject: Place your subject in front of the backdrop, making sure there’s enough distance between them and the backdrop to avoid shadows.
- Set up your main light: Position your main light (either a continuous light or speedlight) at a 45-degree angle to your subject, about 2-3 feet away. This will be your primary light source and will create shadows and highlights that define the shape of your subject.
- Add a fill light: Place a second light on the opposite side of your subject, also at a 45-degree angle. This light should be slightly less bright than your main light and helps fill in shadows to create a more evenly lit shot.
- Set up a back light: Position a third light behind your subject, pointed towards their hair or shoulders. This “rim light” will help separate your subject from the background and create a sense of depth and dimension.
- Adjust and experiment: Once you have your basic setup in place, take some test shots and adjust the positioning and brightness of your lights until you achieve the desired effect. Don’t be afraid to experiment with different lighting ratios and angles to create different moods and styles.
Choosing Backdrops and Props
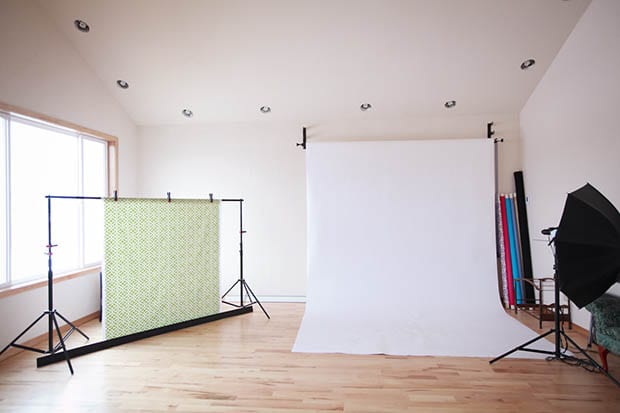
Your choice of backdrop and props can greatly impact the final look and feel of your photos. Here are some tips for choosing the right options for your shots.
Backdrops
- Keep it simple: A plain white, black, or neutral backdrop is a versatile choice that puts the focus on your subject and works well for most photography styles.
- Add texture: Textured fabrics, wood surfaces, or colored backdrops can add visual interest and depth to your shots, especially for portraits or fine art photography.
- Consider the subject: Choose a backdrop color and texture that complements your subject and helps them stand out. For example, a dark backdrop can make light-colored clothing or props pop.
Props
- Use props sparingly: Choose props that complement your subject and help tell a story, but be careful not to overwhelm the main focus of the shot. A few well-chosen props can add context and interest to your photos, but too many can be distracting.
- Consider the subject’s personality: When shooting portraits, choose props that reflect your subject’s interests, hobbies, or personality. This can help create a more authentic and engaging shot.
- Create a cohesive look: If you’re shooting a series of photos, choose props and backdrops that create a cohesive look and feel across all the shots. This can help create a strong visual narrative and make your photos more impactful.
Organizing Your Studio Space
Keeping your home photography studio organized is essential for maintaining an efficient workflow and a professional appearance. Here are some tips for organizing your space.
Designate Storage Areas
- Store your backdrops, props, and equipment in labeled bins, shelves, or cabinets for easy access and quick setup.
- Use vertical space to maximize storage in a small studio, such as hanging backdrops on a rolling rack or using wall-mounted shelves for props and accessories.
Create a Shooting Area
- Set up a dedicated shooting area with your backdrop and lighting in place, so you can quickly start shooting when inspiration strikes.
- Use tape or markers to outline your shooting area on the floor, so you can easily replicate your setup for consistency across shoots.
Tether Your Camera
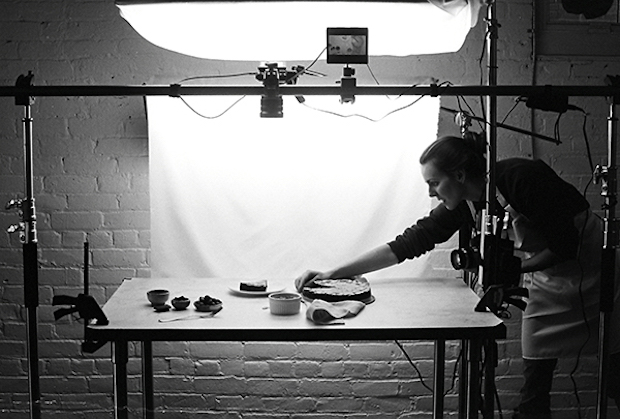
- Use tethering software to connect your camera to your computer, allowing you to see your shots in real-time and make adjustments as needed.
- Set up a tethering station with a laptop or desktop computer, so you can review and edit your shots on a larger screen.
Keep Your Space Clean
- Clean up your studio after each shoot, putting props and equipment back in their designated spots.
- Use dust covers or plastic bins to protect your gear from dust and debris when not in use.
- Regularly vacuum or sweep your studio floor to keep it clean and free of distractions in your shots.
Tips for Shooting in Your Home Studio
Now that your studio is set up and organized, here are some tips for capturing professional-looking photos.
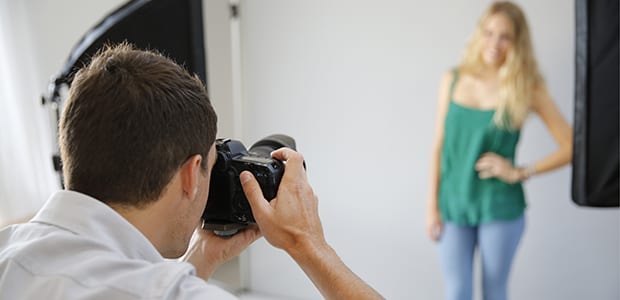
- Use manual camera settings: Shoot in manual mode to have full control over your exposure, aperture, and shutter speed. This will allow you to achieve consistent results across all your shots.
- Shoot in RAW format: RAW files contain more data than JPEGs, giving you more flexibility in post-processing to adjust exposure, white balance, and other settings.
- Use a tripod: A sturdy tripod will keep your camera stable and ensure sharp images, especially when shooting with slower shutter speeds or in low light.
- Focus on the eyes: When shooting portraits, focus on your subject’s eyes to create a strong connection with the viewer. Use a wide aperture (low f-number) to create a shallow depth of field and make the eyes really stand out.
- Experiment with angles: Try shooting your subjects from different angles and perspectives to create visual interest and variety in your shots. For example, shooting from a low angle can make your subject appear more powerful or authoritative, while shooting from a high angle can create a sense of vulnerability or intimacy.
- Use reflectors: White foam boards or reflectors can help bounce light onto your subject, filling in shadows and creating more even lighting. Experiment with different reflector positions and angles to control the intensity and direction of the reflected light.
- Direct your subject: When shooting portraits, give your subject clear direction on how to pose and interact with the camera. Use positive reinforcement and encourage them to relax and have fun with the shoot.
- Take multiple shots: Shoot multiple variations of each pose or setup, adjusting the lighting, props, and camera settings slightly each time. This will give you more options to choose from in post-processing and ensure you get the perfect shot.
- Perfect your editing: Use photo editing software like Adobe Lightroom or Capture One to fine-tune your images, adjusting exposure, white balance, and sharpness as needed. Aim for a consistent look and feel across all your photos, and don’t be afraid to experiment with different editing styles to find what works best for your brand.
Setting up a home photography studio is a cost-effective way to take your photography to the next level, whether you’re shooting portraits, products, or fine art. By choosing the right space, gathering essential equipment, and mastering your lighting and backdrop setup, you can create stunning images that showcase your unique style and creativity.
Remember to experiment with different setups and techniques to find what works best for you and your subjects. With practice and patience, you’ll be able to create a home studio setup that rivals professional studios and helps you create images that wow your clients.
To showcase your beautiful photos online, consider using Envira Gallery. This powerful WordPress plugin makes it easy to create stunning, responsive galleries that are optimized for speed and SEO. With features like albums, tags, and image protection, Envira Gallery is the perfect tool for photographers looking to showcase their portfolio online.
It may take some trial and error to find the perfect setup for your home photography studio, but don’t get discouraged! With time and practice, you’ll develop your own unique style and workflow that helps you create professional-quality photos every time.
Not using Envira Gallery? Get started today!
If you enjoyed this article, be sure to check out How to Price Photography Services: Packages, Rates, & More.
Don’t forget to follow us on Facebook and X (Twitter) for the best photography tips, resources, and WordPress tutorials.


