Adobe is one of the world’s best-known brands when it comes to photo editing. With its industry-standard photo editing software, like Lightroom and Photoshop, you can achieve pretty much any effect you can think of. However, you’re probably wondering if you could get the same editing capabilities with a free alternative.
As the better-known tool, there are a number of popular alternatives to Photoshop, but Lightroom is the solution that many professional photographers rely on to process RAW images and organize content via names, tags, and metadata. So, are there any free alternatives to Lightroom?
The short answer is yes! You may be hard-pressed to find one, singular tool that can live up to all of Lightroom’s capabilities, but digital photo editing programs have come a long way. There are many reputable, free photo editors that offer similar functionality to Lightroom.
In this article, we’ll introduce you to the best Lightroom-style editors you can get for free.
Top 5 Free Alternatives to Lightroom
1. Darktable
Darktable is a powerful open-source Lightroom alternative that offers professional-grade RAW development tools. It features a non-destructive editing workflow, tethered shooting support, and a comprehensive set of modules for adjusting exposure, color, noise reduction, and more.
One of Darktable’s standout features is its advanced color management system, which allows for precise control over color rendering and profiling. It also includes a wide range of tools for correcting lens distortions, chromatic aberrations, and perspective issues. The software’s user interface is highly customizable, allowing users to tailor the layout and workflow to their specific needs.
Darktable also includes a powerful scripting language called Lua, which enables users to automate repetitive tasks and extend the program’s functionality. In addition to its RAW editing capabilities, Darktable includes a range of tools for organizing and managing your photo library. It supports geotagging, keyword tagging, and filtering based on various metadata criteria.
While Darktable’s learning curve may be steeper than some other Lightroom alternatives, its extensive documentation and active user community make it easier to get up to speed. The software is also actively maintained and regularly updated with new features and improvements.
Pros:
- Advanced RAW processing and editing tools
- Precise color management tools
- Robust organization features
- Customizable user interface
- Scripting support for automation and extension
- Active user community and regular updates
Cons:
- Steeper learning curve due to its advanced features
- Fewer presets and plugins available compared to Lightroom
- Some users report performance issues with larger libraries
- Lacks some of Lightroom’s more premium features, such as facial recognition and cloud syncing
2. RawTherapee
RawTherapee is one of the best-known free alternatives to Lightroom on the market today. It’s respected for its lightning-fast performance as well as its excellent batch processing and workflow support features. This advanced open-source alternative to Lightroom is great for dealing with RAW files and compressed images.
RawTherapee boasts advanced RAW editing capabilities including precise color management tools, excellent noise reduction algorithms, and the ability to work with proprietary RAW formats from all major camera brands. Like Lightroom, it also supports non-destructive editing which means that you can revert back to your original files whenever you need.
If you’re familiar with editing in Lightroom, you’ll be happy to know that RawTherapee’s user interface mirrors LR’s, so you’ll be able to jump right into editing. RawTherapee also has its own extensive documentation called RawPedia, an online encyclopedia of all things related to the software.
Pros:
- Excels at RAW processing
- Advanced editing capabilities
- Customizable workspace
- Excellent documentation
Cons:
- May require significant processing power
- Limited export options
- No tools for organizing or managing your photos
- History resets as soon as you close the app (functionality to save your snapshot history is in the works, but we don’t know when it’ll be available)
3. IrfanView
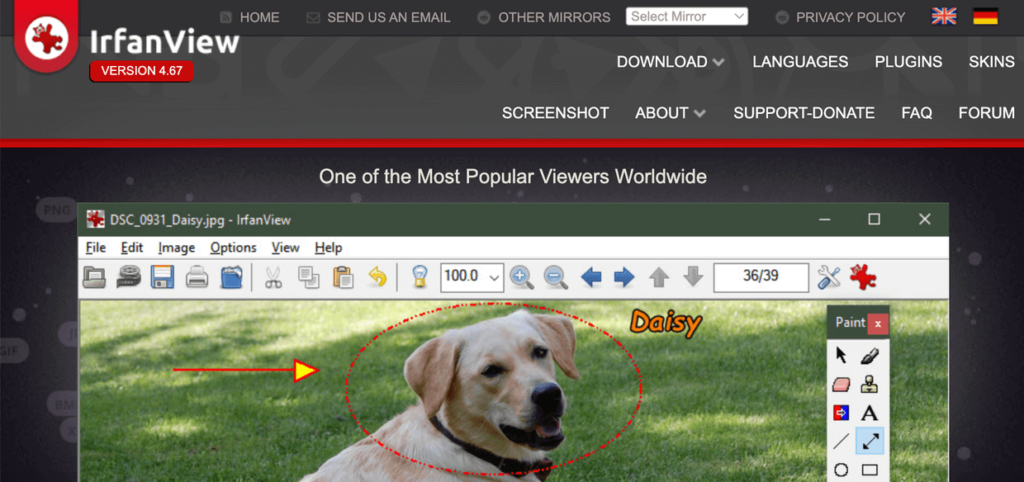
IrfanView is another great addition to this list of image editors. While this program isn’t the most advanced choice on the market, it’s packed full of great tools for professionals with a range of abilities.
IrvanView combines an advanced image editing system with fantastic organization and photo management features. It’s one of the best options for cataloging your images and editing metadata. However, you should note that it’s only supported on PC.
Perhaps one of the biggest draws of this Lightroom alternative is its customization options. IrfanView shines with its extensive plugin ecosystem that extends its functionality for tasks like reading different file types, HDR merging, batch renaming, and more. Some plugins even add additional features, like allowing you to paint with the software.
Pros:
- Extensive format support
- Batch processing tools
- Lightweight, fast, and easy to use
- Multi-language support
Cons:
- Some users repot bugs when viewing GIFs
- Limited advanced features
- The UI isn’t the best, and it can be difficult to find and adjust your preferences at first.
- Only available to PC users
4. LightZone

Another popular choice is LightZone, a non-destructive editing tool with excellent raw processing solutions. LightZone allows you to stack and organize filters according to your needs as well as edit them using a variety of professional tools.
Its standout features include vector-based, selective editing tools, the ability to create custom styles and presets, and a zone-based editing approach inspired by the Zone System for precise control over tones and colors.
The biggest drawback of LightZone is its reliability. The software was originally created by a now defunct company. It’s been revived as an open-source community project, but it doesn’t have support or even a website. You have to download the software from the GitHub repository, which can be a hassle for non-tech-savvy users.
Pros:
- Vector-based selection tools
- Excellent support for RAW files
- The ZoneFinder tool helps you quickly identify and adjust specific areas and the ZoneMapper tool give you precise control over tonal adjustments.
Cons:
- No website or support
- Lacks advanced photo editing and asset management features
- May be on the slower side when processing large files
5. Chasys Draw IES
Chasys Draw is an excellent multi-functional photo editing tool and a good option for those in search of free alternatives to Lightroom. Alongside a selection of great image editing tools, the suite is designed to work with multi-core processors, touch-screens, and pen-input devices.
If you’re familiar with Photoshop, you’ll love that Chasys Draw IES is also a layer-based editor which makes creating local edits, like local hue adjustments, easy. And like Photoshop, Chasys Draw even allows you to create animations and GIFs. The tool is primarily built for Microsoft, but it’s still possible to run it on a Mac or Linux machine.
While the RAW processing of Chasys Draw isn’t as intuitive as some of the other options, it does support RAW files from many of the world’s largest camera manufacturers and gives you a lot of control over your image editing.
Another bonus is that the tool supports a ton of native file formats from other popular editing software like Photoshop, Affinity Photo, Paint.NET, Corel PaintShop Pro, GIMP, and Krita, which is extremely convenient if you’re someone who regularly uses a variety of programs.
Pros:
- Lightweight and fast
- Flexible and powerful program
- High compatibility with RAW and native file formats from other programs and includes a multi-threaded image file converter
- Designed to work with touch screen and pen tools
Cons:
- Primarily designed for Windows
- Steeper learning curve
- Less user-friendly interface
- Lacks comprehensive documentation
Honorable Mention: GIMP

GIMP (GNU Image Manipulation Program) is a popular open-source image editing software that offers a comprehensive set of tools, including masks, layers, curves, levels, and even an animation package. It’s primarily considered a free replacement for Photoshop, but as you know, Lightroom and Photoshop share a good amount of overlap.
GIMP is probably the most robust editing application that you can get for free. The software boasts advanced retouching, cloning and healing tools, customizable brushes, smart selection tools, a built-in file manager, a vast ecosystem of plugins and enhancements, a completely customizable workspace, and over 40 export formats.
However, it’s important to note that all that functionality does not translate to “beginner-friendly.” If you’re already a pro at Photoshop, you’ll be fine, but it’s a pretty steep learning curve for most people. Also, like Photoshop, GIMP is a destructive editing application, which isn’t ideal for most photographers.
Darktable and GIMP often go hand in hand, considered the open-source equivalent to the Lightroom and Photoshop duo. If you’re comfortable with complex editing software, grabbing both of these free tools is the most complete way to replace an Adobe Creative Cloud subscription.
Additional Lightroom Alternatives for Free
While the above tools are open-source and aim to be comprehensive Lightroom replacements, there are also some specialized and freemium image editors worth considering:
- Ashampoo Photo Optimizer: A simple and efficient photo editing tool for Windows users that focuses on automatic image optimization, allowing you to quickly enhance and resize multiple images with just a few clicks.
- Pixlr: A versatile, web-based photo editor that’s free with ads. It’s beginner-friendly while offering a wide range of editing tools from basic filters to layers and smart selections, perfect for those looking for a free, cloud-based photo editor.
- Photopea: A free online alternative that’s capable of handling various image editing tasks, making it a convenient option for users who need advanced functionality without installing software and prefer web-based image processing tool.
- Google Photos: A cloud-based service that offers automatic photo backup, intelligent organization, and basic editing tools. It’s an online photo management tool for on-the-go photo editors who value digital cloud storage for images. It’s a particularly convenient management platform for Android users since it already functions as the built-in photos app.
- Fotor: A web-based image processing tool with a clean interface, offering features such as one-click enhancements, filters, creative effects, batch processing, collages, and basic retouching tools,
- PhotoDirector Essential: As the free version of CyberLink’s PhotoDirector 365 for Windows users, it provides 30 days of premium features. After which, you’ll have access to limited features including a basic editor and other creative effects.
- Paint.net: A lightweight yet powerful image editing program, also for Windows users. It offers a user-friendly interface, layer support, a wide range of filters and effects, and extensive plugin support for added functionality.
If you’re interested in premium Lightroom alternatives, check out Capture One Pro, Corel PaintShop Pro, ON1 Photo RAW, or DxO PhotoLab.
Best Free Alternatives to Lightroom Mobile
In today’s mobile-centric world, the ability to edit photos on the go is becoming increasingly important. Lightroom Mobile is arguably still the best, but there are plenty of alternatives that offer a range of mobile-friendly editing features:
- Adobe Photoshop Express: Offers a range of core editing tools, effects, and templates, allowing users to quickly enhance their photos on-the-go with a mobile photo editing app.
- Snapseed: A feature-rich mobile photo editing app developed by Google, offering robust editing tools, creative effects, selective adjustments, and precise control over image enhancements, making it a versatile and free Lightroom Mobile alternative.
- VSCO: A popular photography app known for its extensive collection of film-like filters and photo-sharing platform, providing users with creative editing options and a community of photography enthusiasts.
- Polarr: A powerful online and app-based photo editor with advanced editing tools, selective adjustments, and AI-powered features, delivering professional-grade editing capabilities on your smartphone. However, some users are disappointed that increasingly more features have been put behind a paywall.
- LightX: A versatile photo editor that offers a wide range of editing tools, including curves, levels, filters, overlays, blending modes, color splash, and advanced retouching options, perfect for creating Lightroom-quality portraits on your mobile device. and convenient digital cloud storage for images.
Showcase Your Edited Photos Online
After investing time and effort into editing your photos with Lightroom of a free alternative, it’s important to have a platform to showcase your work online. Envira Gallery is a powerful WordPress plugin that allows you to create beautiful, responsive photo galleries with ease.

With Envira Gallery, you can display your edited photos in a professional manner, attract potential clients, and grow your online presence. Check out some of our most popular features:
- Integration with Adobe Lightroom to create, edit, and manage your website galleries right inside Lightroom
- Social media integration
- Built-in lightbox display and multiple layouts, including slideshow, fullscreen, masonry, and more
- Video galleries
- Filterable galleries and albums using tags
- Built-in image compression and deeplinking for SEO
- Image licensing
- Watermarking, image protection, and password-protected galleries
- Client image proofing
- And lots more…
There’s no doubt about it, Lightroom and Lightroom Mobile are powerful photo editors. It’s hard to compete with their non-destructive RAW editing capabilities and range of features including custom presets, batch processing, organization, and more.
As you can see though, finding a free Lightroom alternative is possible! Try the photo editors on this list for yourself to see how they compare to Adobe’s Lightroom.
Well there you have it!
That’s our top free alternatives to Lightroom on the market today. What are your favorite tools to use instead of Lightroom? Let us know in the comments!
Not using Envira Gallery? Get started today!
If you enjoyed this article, be sure to check out How to Set Up a Home Photography Studio: All You Need to Know.
Don’t forget to follow us on Facebook and X (Twitter) for the best photography tips, resources, and WordPress tutorials.








I currently utilize Lightroom 6 and it feels like I’m being restricted by Adobe for their cloud and monthly subscription based Lightroom Classic if I want to update my current Lightroom 6. It seems to me that when I purchased Lightroom 6 I would be able to update that platform. Adobe evidently decided differently and
as a result willl continue to look for a non Lightroom replacement photo editing program as Lightroom 6 would probably be unable to support any new cameras, lens that I purchase in the future. I would gladly pay a reasonable upgrade fee to my lifetime and stand alone version 6 if available.