Are you looking to showcase your photography or image collection in a visually stunning, perfectly organized gallery on your WordPress website? A masonry image gallery automatically arranges your photos into a sleek, responsive layout that maximizes space and looks great on all devices.
With a masonry WordPress gallery, your images are displayed in a clean format with consistent spacing which creates an aesthetically pleasing browsing experience for visitors as they scroll through your photos.
In this step-by-step tutorial, we’ll guide you through creating a functional, beautiful masonry image gallery for your WordPress site.
What Is a Masonry Image Gallery?
A masonry image gallery is a Pinterest-like layout that displays your posts in vertical columns. In a traditional grid gallery, the images are cropped to fit into the columns and rows, but a masonry grid layout lets you display full-view thumbnails without cropping the height or width.
It’s perfect for photographers, photo bloggers, and anyone needing to showcase images of various dimensions or portrait-oriented photos. You can even showcase featured content like blog posts or products in a masonry-style post grid.
How to Make a Masonry Gallery on WordPress
Ready to learn how to set up a masonry layout, customize its appearance, and implement it on your website. Let’s get started!
Step 1: Install Envira Gallery

Envira Gallery is the best WordPress gallery plugin, allowing you to create a beautiful video or photo gallery using a drag-and-drop builder with multiple layouts including masonry, slideshow, fullscreen, lightbox display, and more. The plugin offers tons of customization options as well as the ability to further personalize your design with CSS.
Check out some of our most popular features:
- Albums to organize and manage galleries.
- Filterable galleries and albums using tags.
- Built-in image compression.
- eCommerce integration.
- Dynamic galleries to display content from other sources like blog posts, testimonials, Instagram posts, and more.
- Client image proofing and Adobe Lightroom integration.
- Social sharing buttons on images, galleries, and albums.
- And lots more…
To start using the masonry gallery plugin, you’ll first need to install and activate Envira Gallery on your WordPress site. Head to the pricing page and grab the license level that works best for you. You’ll need the Basic license or above to access the masonry layout, but we recommend Pro for access to advanced features like albums, gallery deeplinking for SEO, video support, and more.
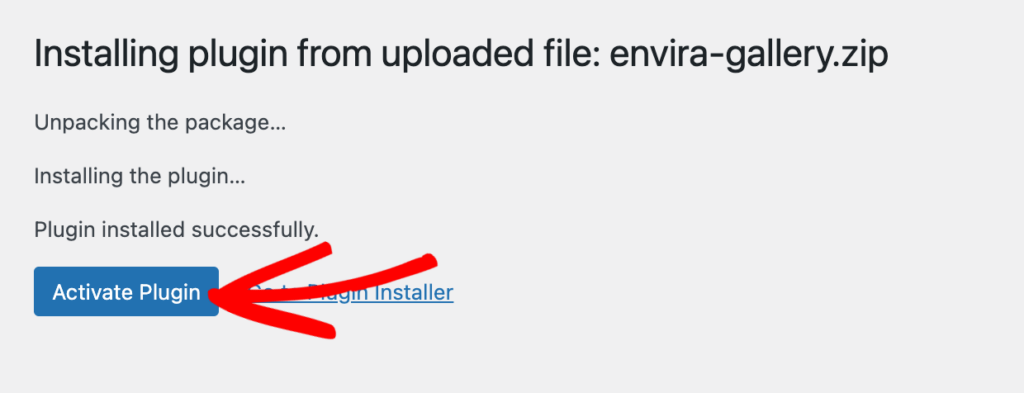
Next, download the plugin’s ZIP file and install and activate it on your WordPress website. If you need help with this step, check out this tutorial.
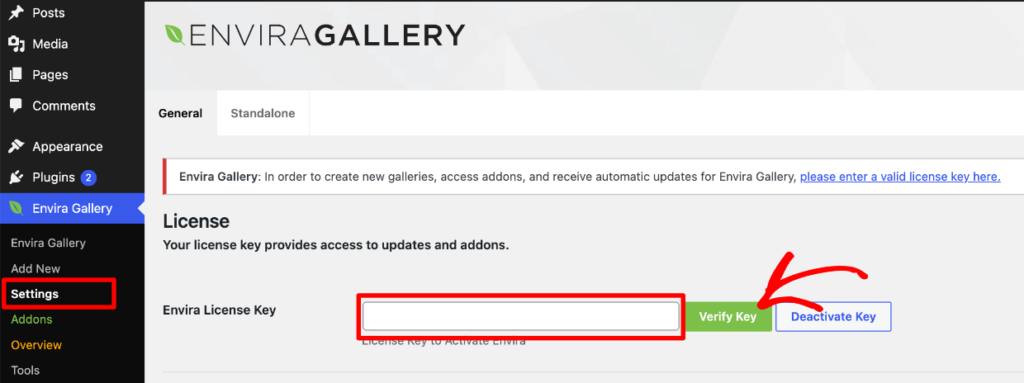
After the plugin is installed and activated, you need to verify your license key. Go to Envira Gallery » Settings from your WordPress dashboard. Paste your license key and click Verify Key.
After that, it’s time to create your masonry image gallery!
Step 2: Create a New Masonry WordPress Gallery
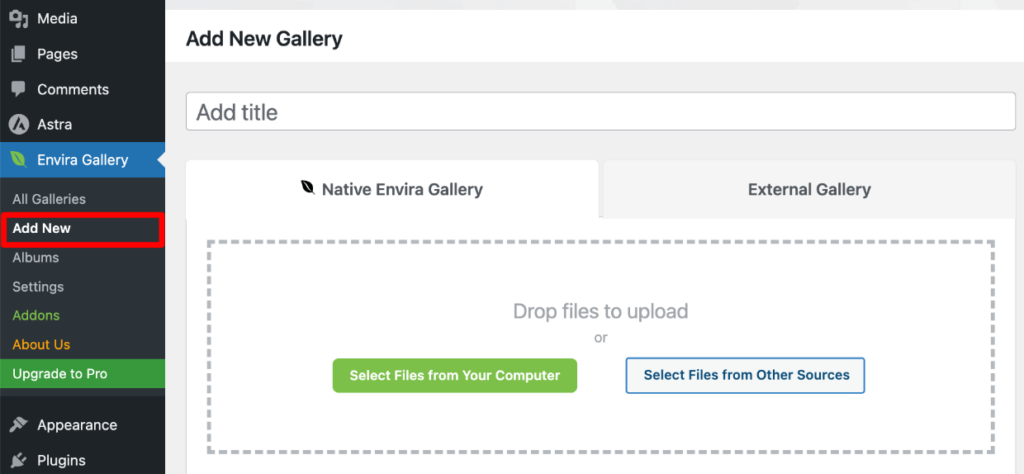
After installing and activating the plugin, go to Envira Gallery » Add New from you WordPress admin menu. Here, you’ll see a Title box at the top. Go ahead and name your gallery.
Now, let’s start by adding your photos.
You can just drag and drop your images into the upload box or use the button to Select Files from Your Computer. If you want to use images that are in your WordPress media library, just click Select Files from Other Sources.
After uploading your photos, scroll down the Gallery section to see your images. You can drag the photos to rearrange the order or click the blue pencil icon to edit metadata like the title, alt tag, and caption, or to link the image to a URL.

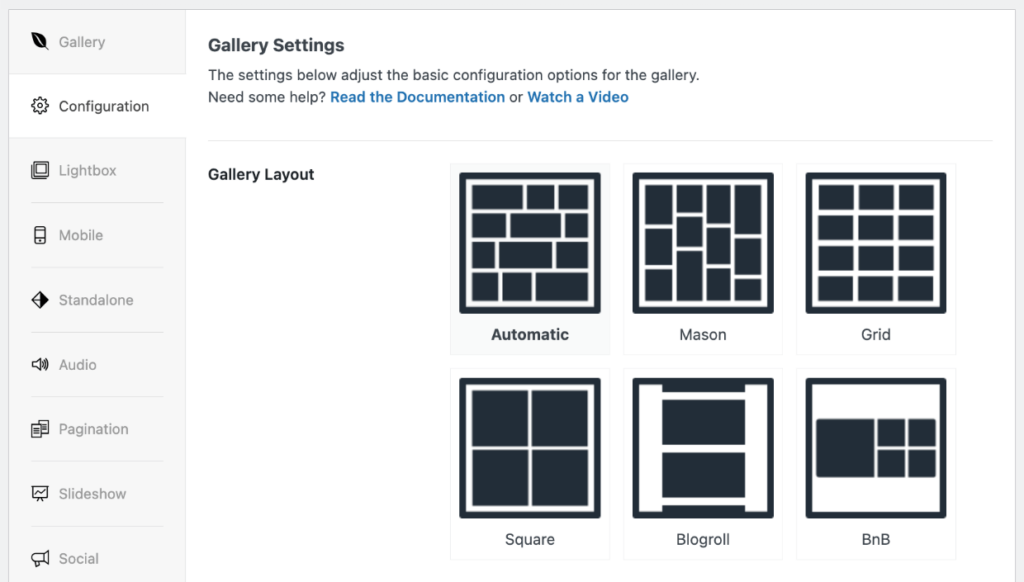
After adding the photos, click the Configuration tab in the left menu. Here, you’ll see a list of layout options. Select Mason.
Next, let’s adjust your masonry gallery layout and customize your settings.
Step 3: Customize Your Masonry Layout
Right below the gallery layout options, you’ll see Number of Gallery Columns. You can set that to however many vertical columns you’d like your masonry gallery to have.
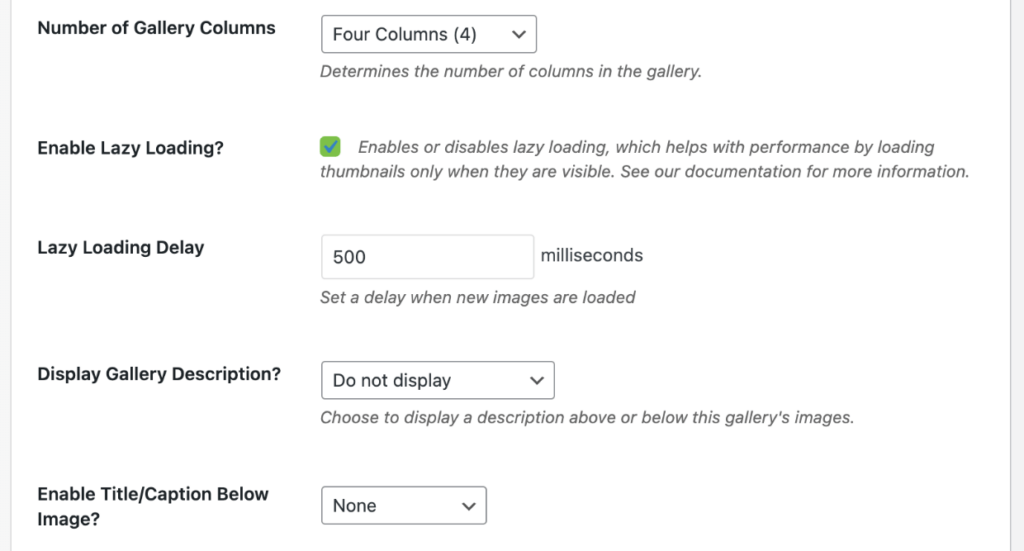
You’ll see a number of other settings on this tab such as options for lazy loading, custom image dimensions, descriptions and captions, and more. Go ahead customize the settings to your liking.
If you scroll to the bottom of this tab, you’ll see Column Gutter Width and Margin Below Each Image settings. This is the space between each column (gutter) and below each image (margin). They’re set to 10px by default, but you can adjust them to have more or less space in your masonry layout.

Regardless of how much space you want, we recommend making the gutter and margin the same size for a more uniform look.
Pro Tip: If you have the Gallery Themes Addon installed you can also choose one of our WordPress masonry themes such as polaroid, sleek, or subtle to give your gallery a cohesive look.
If you want to enable lightbox display where visitors can click an image in your masonry gallery to expand and view it in a lightbox, click the Lightbox tab on the left. Here, you can customize things like transitions, looping, thumbnail navigation, and more.
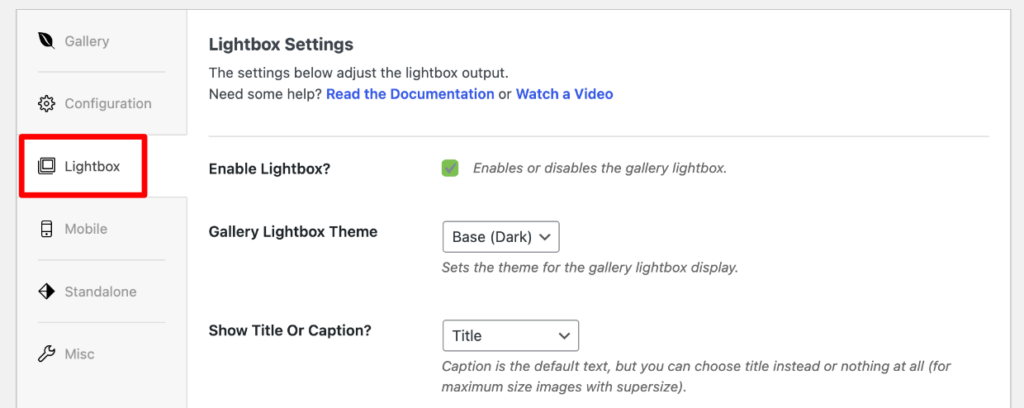
To learn more about adding a Lightbox, check out: How to Add Lightbox to WordPress Images and Galleries.
Depending on your license level and installed addons, there are a number of other customizations you can take advantage of using the tabs on the left such as slideshows, pagination to improve page load time, social sharing, image protection and watermarking, tags, mobile-specific settings, and more.
For the sake of this tutorial though, let’s move on and see how to add your new masonry gallery to your site.
Step 4: Add Your New Masonry Gallery to Your Site
Envira let’s you create a standalone gallery page, or you can embed it on your site. Once your happy with your masonry grid design and settings, click the Publish button in the top right.

You can embed the gallery in a page, post, or widget-ready area like the sidebar using Envira Gallery’s native Gutenberg block or a shortcode.
To add your masonry gallery using the block editor, go to the post or page where you want to embed it. Click the + sign to add a new block and search for/select Envira Gallery.
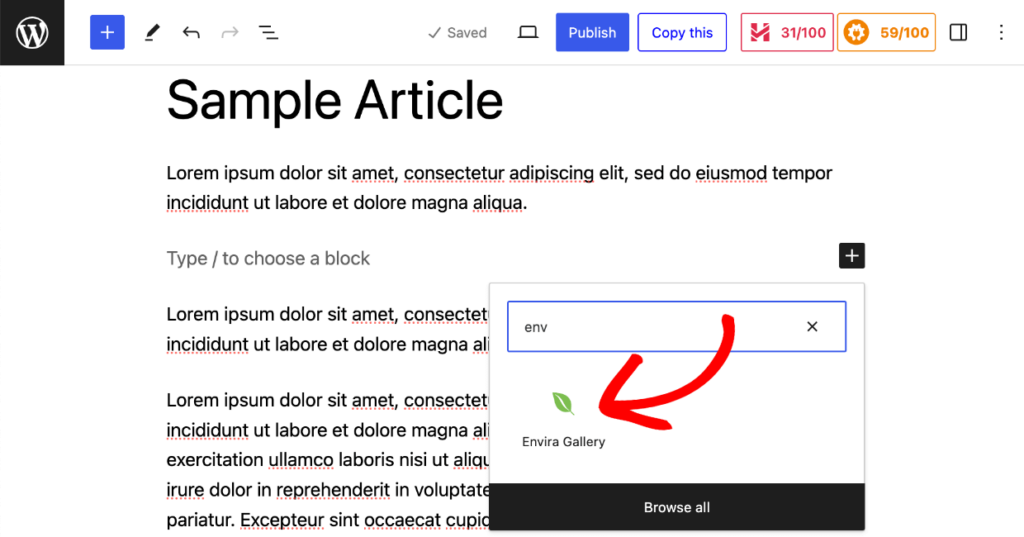
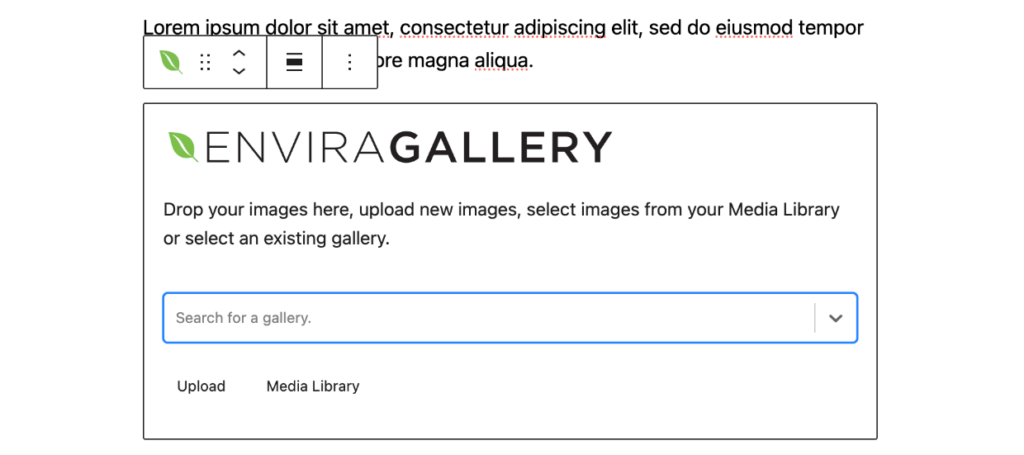
After adding the block, use the dropdown menu that appears to select your gallery. This will insert the photo gallery in your page or post.
Be sure to click the Publish or Update button at the top of the editor to save your changes!
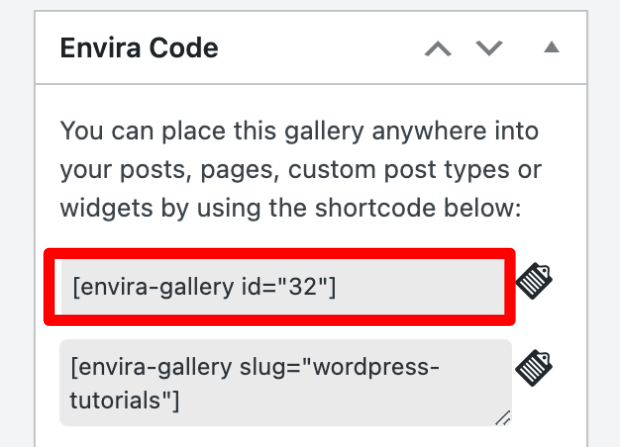
If you’d like to use a shortcode to embed your gallery instead of the block editor, just copy the first shortcode from the Envira Code section below where you clicked Publish. Then, you can insert the gallery anywhere on your site.
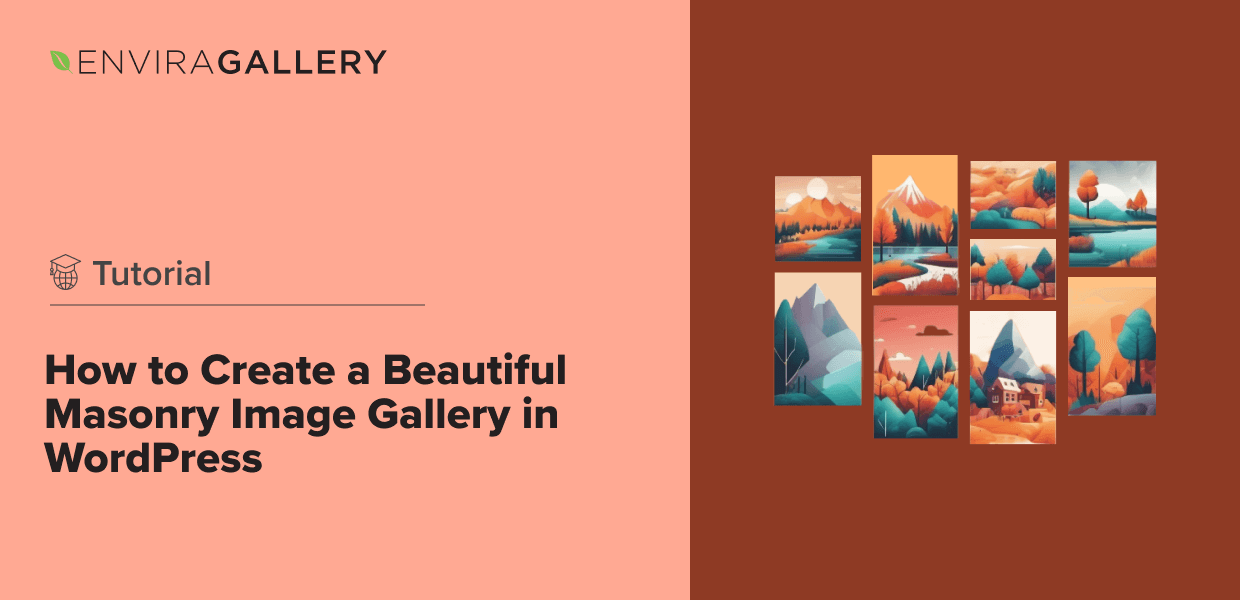
That’s all! Your masonry gallery will appear on your website like our example photo below.

Congrats, you learned how to make a masonry gallery on WordPress!
Frequently Asked Questions
What does masonry mean in web design?
In web design, masonry refers to a grid layout method where elements are arranged in an optimal position based on available vertical space. Masonry layouts are particularly useful for displaying content with varying dimensions, such as images and blog posts, in a way that maintains visual interest and aesthetic appeal without sacrificing the layout’s structure. Although it’s possible to create a rudimentary masonry gallery with only HTML and CSS flexbox, developers typically use JavaScript.
What is the difference between masonry and fixed grid?
Masonry layouts dynamically adjust the height of rows based on the content, allowing for a more efficient use of space and eliminating unnecessary gaps between images. This flexibility enables images to align edge to edge, even if they are not of the same size. Masonry layouts are particularly effective for creating visually appealing and balanced grids that can accommodate items of varying heights.
In contrast, a fixed grid layout adheres to a strict grid structure, where both columns and rows have fixed dimensions. This type of layout is more uniform and structured, but it doesn’t offer the same flexibility that a masonry grid does.
What size are masonry images?
Masonry images in a blog or portfolio grid can vary in size. A masonry layout places photos in vertical columns, which allow the images to maintain their original height. You can specify the number of columns as well as the margin and gutter spacing.
Envira Gallery will automatically resize images to fit within your masonry columns, or you can set standard dimensions and the crop position if you’d like all your images to be a specific size. The plugin is fully responsive, ensuring your photos look great on both desktop and mobile devices.
We hope this tutorial has helped you to learn how to create a masonry image gallery in WordPress. You may also want to check out our guide on How to Add a Polaroid Gallery in WordPress.
Not using Envira Gallery? What are you waiting for? Get Envira Gallery today and start building gorgeous masonry WordPress galleries that will “wow” your visitors!
Don’t forget to follow us on Facebook and X (Twitter) for the best photography tips, resources, and WordPress tutorials.








I did this but my site is just a normal 3 across grid 🙁
If you selected 3 columns, that’s what will show. However, image size can play a role here. Please contact Envira Support (http://enviragallery.com/contact/) for further assistance.
I don’t see an option for enabling masonry layout on the free version. Is this something that is only available with an upgrade and if so which one?
Hi Jenna!
Thanks so much for your question. For Envira Lite there are 2 layouts. A masonry layout (which uses any column setting) or the Automatic layout. It can be easy to get confused over the difference between a justified layout and a masonry layout. The difference is (just so you know) is that with columns you can obviously control the number of columns that appear in the gallery. With automatic, you can’t. So quite literally – the only way to create a true masonry column is to use any column count for Envira Lite.
I hope that answers your question. If not, feel free to reach out again. Thanks!
Hi, do you have any tips to create a more elaborate masonry layout that used diff size images to create a true masonry feeling? I bought your premium option but the layout ends up looking more like a staggered 3-column than a true masonry layout with a few feature images blown up for effect. Can’t seem to get even the basic masonry layout that is provided with the free WordPress gallery. I got your theme for the added functionality and just assumed it would be on par with layout options & not just the ‘theme’ of what the border around the image looks like. If there are no further options do you offer a satisfaction guarantee? Thanks.
Hi Bryan 🙂 You could also try using the Automatic layout and playing around with the Row Height to get a more random image size layout. If you need any assistance we’d be happy to help if you’d like to open a ticket up with support!
Is there any way to copy the settings from album or gallery, or make an overall setting that will be used on all galleries or albums?
Hi Claus, yes you can use the Defaults Addon for this. Here’s some more information on how to set it up.