Envira Gallery Blog
Digital Photography Tips, Tutorials and Resources
Digital Photography Tips, Tutorials and Resources
Last updated on Aug 28, 2024 by Southie Williamson
Are your WordPress images too large? If you don’t resize your photos before uploading them, you can end up with a very slow website. Large, high-resolution images, while visually appealing, can significantly increase your site’s loading speed, especially if your website contains lots of photos.
Slow-loading sites annoy users and can negatively impact your search engine rankings since site speed is a crucial SEO factor. However, resizing images manually can be time-consuming. Thankfully, there’s a way to automate the process.
In this guide, we’ll show you how to resize WordPress images automatically to save time, enhance site speed, and ensure your pictures are always displayed perfectly.
Yes, there are several methods to resize images for WordPress, each with its own benefits and use cases:
So, without further ado, let’s look at how to auto-resize WordPress images.
Several plugins can help automate image resizing on your WordPress site. Today, we’ll look at 2 different options.
In the first method, we’ll use Envira Gallery, a powerful tool for creating galleries and managing your WordPress images.
The plugin can automatically resize or crop photos that are added to a gallery. This allows you to serve scaled images to visitors in various layouts like fullscreen, masonry, mosaic, slideshow, polaroid, and more, making it ideal for anyone needing to resize and display multiple images.

By default, Envira Gallery is fully responsive and mobile-friendly. This means it automatically scales images to fit in their galleries and ensures they look great on all devices. Moreover, the plugin lets you further optimize images by setting your own custom dimensions for desktop galleries, mobile galleries, lightbox views, and thumbnails.
Plus, Envira Gallery offers tons of other features to help you manage and display your website visuals, including:
See All of Envira Gallery’s Features →
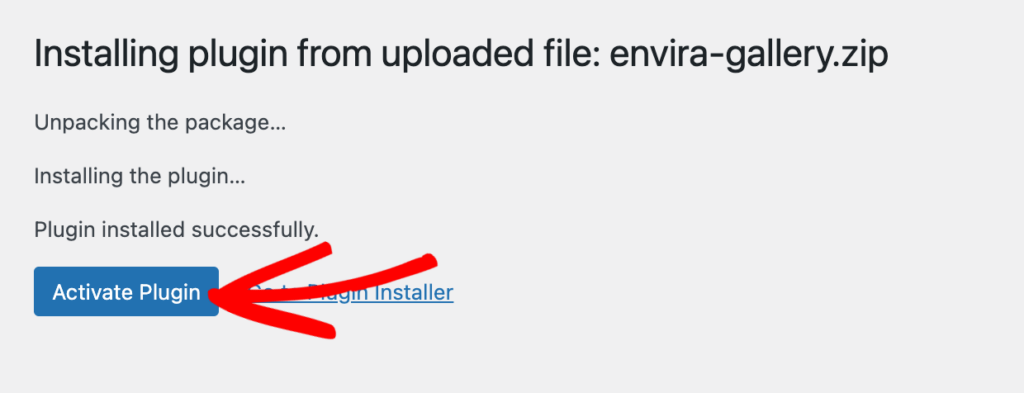
First, you’ll need to Install and Activate Envira Gallery on your WordPress site. The free version of the plugin will let you resize the gallery or lightbox view. However, you’ll want to grab a Pro license to access all our features, such as fullscreen images, custom thumbnail sizes in the lightbox, WooCommerce integration, and more.
You can see our step-by-step documentation if you’re unfamiliar with installing a WordPress plugin. Once Envira Gallery is activated on your site, you’re ready to create your first gallery.
If you’re using a premium license, you’ll also want to go to Envira Gallery » Settings from your WP admin menu and enter your license key to unlock all available features and addons.
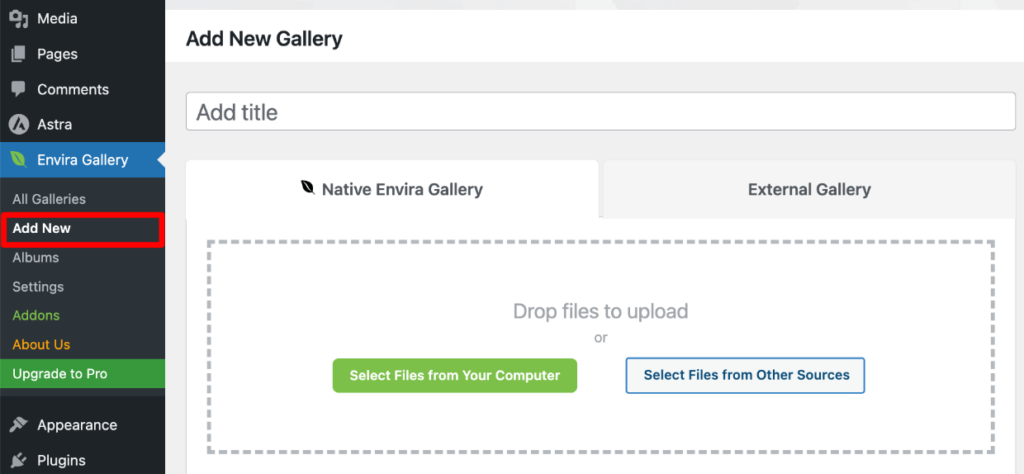
After activating Envira Gallery, you can create a new image gallery by navigating to Envira Gallery » Add New. Enter a title for your gallery and upload or select photos from your Media Library.
For more detailed instructions, check out our beginner’s guide to creating an image gallery. Next, we’ll show you how to adjust your settings to resize images.
To resize or crop images automatically within your gallery, scroll down to the Gallery Settings panel and click Configuration from the menu on the left.
Here, you’ll see an option for Image Size. You can use the dropdown menu to automatically resize photos to one of the preset WordPress sizes. Or, select Default and enter the maximum size you want to use next to Image Dimensions.
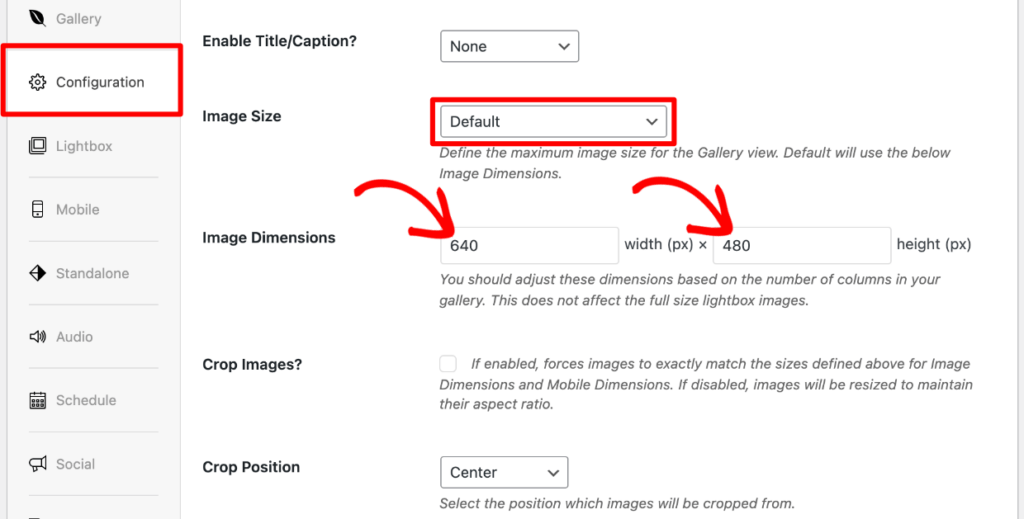
By default, images will be resized to maintain their aspect ratio. However, to enable cropping, check the box next to Crop Images. This will auto-crop your photos to exactly match the size you defined. Once enabled, you can use the Crop Position dropdown to specify where images are cropped from.
Pro Tip: Want to resize images for mobile? Click the Mobile tab, enable it, and customize the image size you want to generate for mobile galleries.
Regardless of the size you set for your gallery, Envira will display images in their original size when opened in a lightbox. To change this, click the Lightbox tab on the left. Then, select one of your preset WordPress sizes using the dropdown menu next to Image Size.
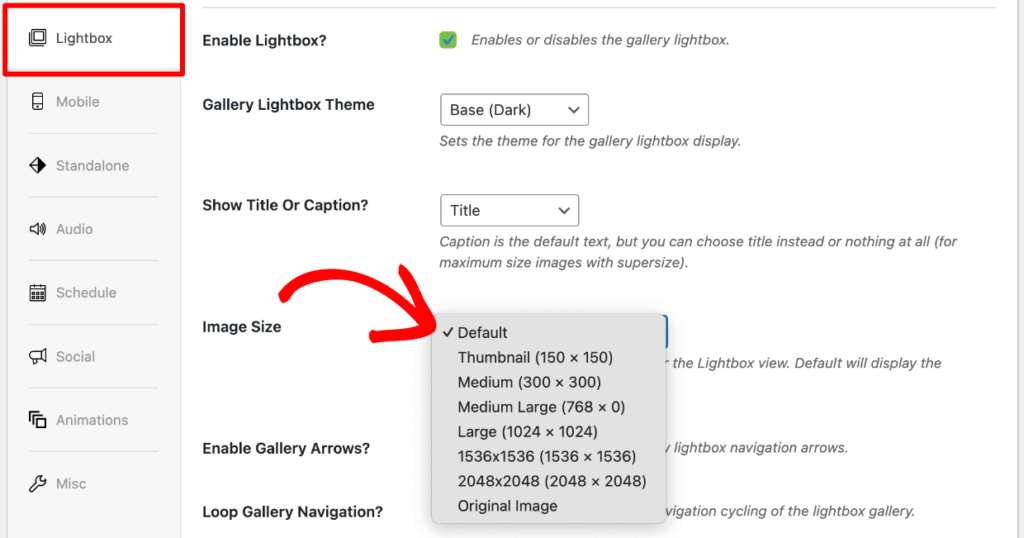
These sizes are predetermined by your site settings and theme. You can learn more about this in How to Disable or Add Custom Image Sizes in WordPress.
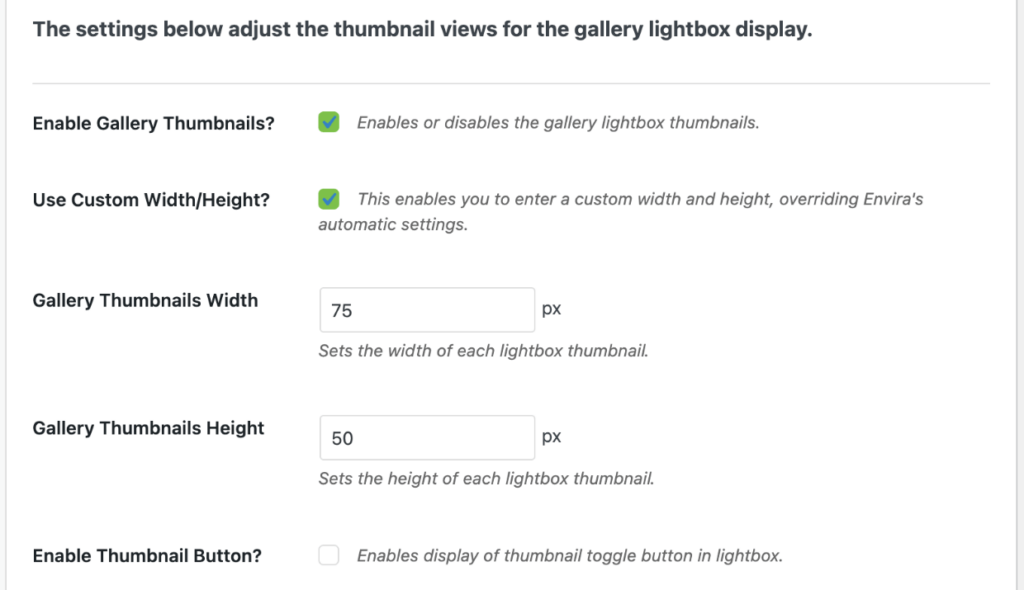
Premium users can also Enable Gallery Thumbnails to provide a better navigation experience for visitors viewing photos in a lightbox or slideshow. If enabled, you can select Use Custom Width/Height to customize the thumbnail sizes within the lightbox.
Once you’ve finished creating your gallery, be sure to click Publish.
You can easily embed the gallery anywhere on your site using a shortcode or Envira’s native Gutenberg block. You’ll also be able to quickly add images to your gallery and adjust basic things like your layout style, columns, and margins using the block settings sidebar within the WordPress editor.
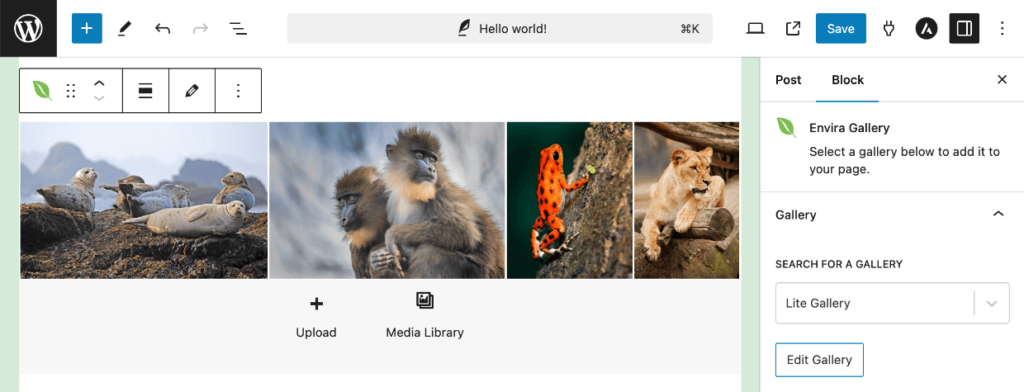
Once embedded, you can rest easy knowing all the images will be resized and displayed according to your preferences. Only want to display a few photos from a larger gallery? Check out this documentation.
Ta-da, you learned how to auto-resize images in a gallery!
Pro Tip: Use Envira Gallery’s Defaults Addon to bulk-apply resizing and other settings to multiple galleries.
In the second method, we’ll show you how to resize WordPress images using Imsanity, a free image resize plugin.
This simple, free plugin uses WordPress’s default resizing functionality to automatically scale and replace WordPress images in your Media Library. It can resize your photos to specified dimensions upon upload or resize previously uploaded photos.
To start, you’ll need to install and activate the Imsanity plugin. Go to Plugins » Add New Plugin in your WordPress menu and search for Imsanity. When you see it, click the Install Now button.
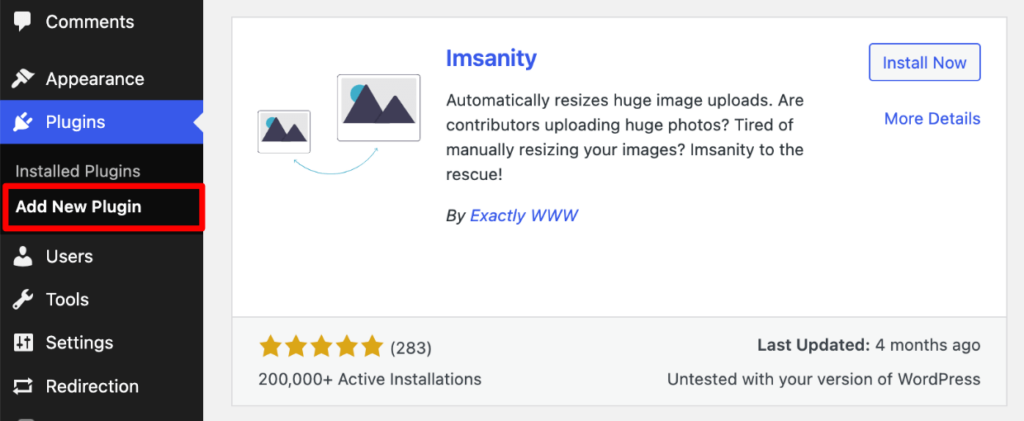
When the button changes to Activate, click it.
Next, go to Settings » Imsanity and adjust the settings for resizing your WordPress images:
You can also select the JPG image quality for compression and decide whether or not to automatically convert BMP and PNG images to JPG. Note that the plugin uses standard WordPress compression, so you shouldn’t rely on this alone when optimizing images.
Lastly, decide whether or not to Delete Images. If enabled, the plugin will fully replace the initially uploaded image with the scaled-down photo in the new file format (if converted). WordPress will use this new version to generate thumbnails.
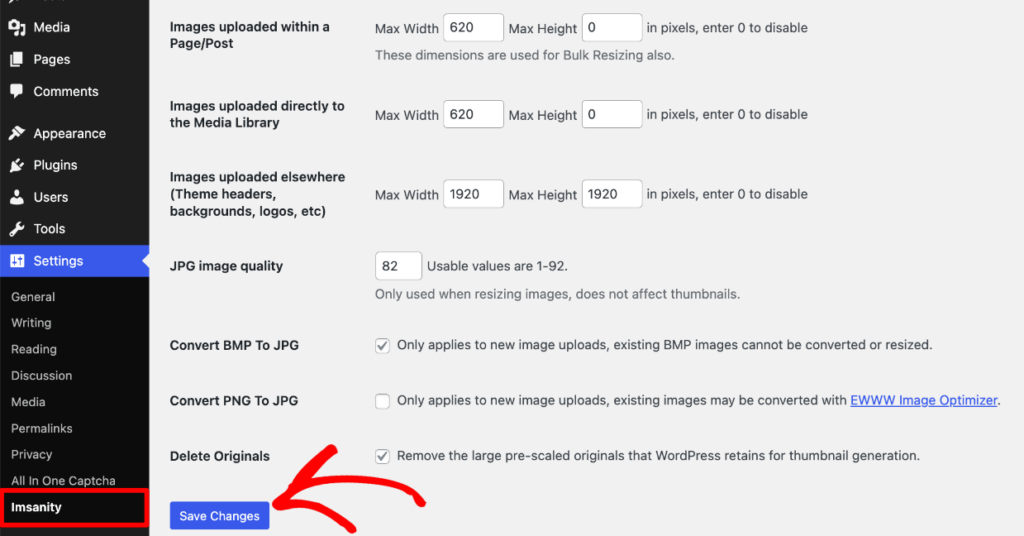
Once you’re satisfied with your settings, click the Save Changes button. Now, Imsanity will automatically resize all your large images to the sizes you set, and you don’t need to do a thing.
If you have large photos uploaded before installing Imsanity, you can also use the plugin to resize them individually or all in one go. Both options will use the dimensions you set for Images uploaded within a Page/Post in the previous step, so first, ensure that’s set to the size you want to use. Then…
To resize an image individually:

Do note that there’s no way to apply a bulk action to select and resize multiple images.
To resize ALL of your images at once…

Remember to backup your images BEFORE you click “Start Resizing All Images.” Once resized, you won’t be able to revert back to the original images.
That’s it!
We hope this article helped you to learn how to resize WordPress images automatically. That way, you can maintain an optimized, fast-loading website that keeps visitors happy and improves your SEO rankings.
Not using Envira Gallery? Get started today!
If you enjoyed this article, you may want to check out our Ultimate Guide to the Best Web Hosting for Photographers.
Don’t forget to check out our blog and follow us on X (Twitter) for the best photography tips, resources, and WordPress tutorials.
Envira Gallery helps photographers create beautiful photo and video galleries in just a few clicks so that they can showcase and sell their work.

Ah. Barbi told me about the Insanity plugin to set a maximum width and height for uploaded images. Our clients will upload unedited images that are 3000+ pixels or more because they don’t understand image dimensions. I’m going to give his plugin a try. WordPress should add this feature right out of the box.
Hey Tom, we are glad to help anytime. Do share your experience and follow us on Facebook and Twitter for more tutorials. 🙂
Is there any option to set automatically remote url image size in WordPress post or page? Thanks in advanced.
Imsanity can set size that we upload WordPress media library. is it possible to use this image size automatically
Hi Naimul, if you please tell us what exactly you need, so we can help you out? 🙂
It would be great if Envira had the ability to automatically scale gallery pics to a certain size upon upload, so that only those pics got special treatment. As it is right now, I have to scale my pics offline before I upload them, which takes longer.
I see that the method above could be useful, but I would only want that to affect my Envira Gallery images and no others. Don’t think that tool can make the distinction.
Hey Josen, thank you for reaching out. You can leave your feedback here: http://enviragallery.com/contact/ Our team will look into it. 🙂
is there a plugin which can resize images from smaller width to larger width?
We don’t know of any plugin that upsizes images. Upsizing any image can make the image appear of less quality or pixelated as it would be like “stretching” the image.
I’ve installed Imsanity and the default setting is width 2048 x height 0. This doesn’t sound right. What should the height dimension be? Or does the restive just go on width?
Hi Julie 🙂
In order to keep images responsive, height:0 can mostly mean height:auto;. This way the image height is proportional to the image width. Does that help?
I am new to designing my website. I have 3 photos I wish to place on my home page. I used Imsanity and resized all the photos that I had uploaded to my media section. I placed them on the home page, but they are still different heights. Do I need to take them back into Photoshop and make them the same height before I upload them again?
If I bulk resize pictures in WP library that are already used in Envira galleries, will the galleries automaticly use the smaller pictures? Or do I need to make the galleries all over again?
Hi Britt, shoot our Support Team a ticket, they will be able to better assist you.