Envira Gallery Blog
Digital Photography Tips, Tutorials and Resources
Digital Photography Tips, Tutorials and Resources

Last updated on Feb 5, 2024 by Southie Williamson
Are you looking for the best photo editing software to take your images to the next level?
Whether you’re a beginner or a pro, editing your photos before uploading them to your photography website, posting them on social media, or submitting them to a client is essential.
In this guide, we’ll share the best photo editing software for professional photographers and beginners. We’ll also share the best free photo editing software and the best mobile editing apps.
Ready to get started?
Photo editing is part of the job if you’re a photographer. Through editing, you can make your already stunning photos even more perfect by adjusting metrics like exposure, white balance, color, and more. Intuitive, easy-to-use photo editing software can help you save time while taking your images to the next level.
Plus, editing your photos helps to reduce the size of your image files, which is especially important if you plan on posting your images online to your photography website or a social media account. Smaller images will improve your WordPress site’s loading speed, which will, in turn, improve your search engine rankings. So, photo editing is a win all around!
There are now tons of different image editor applications out there to choose from, each with its specialties and functionalities. So, how do you know which is right for you? To get started, ask yourself these questions:
What Type of Editing Are You Trying to Do?
Are you looking for an editing app to touch up your images for social media? Or do you need something with layers, brushes, and the tools to create composite images? Maybe you want to create infographics or banners?
Does the Image Editor Have the Tools You Need?
After you’ve decided what kinds of edits you’d like to make in your photographs, you can start looking for software that offers the right tools to complete those edits. For example, if you know you want to use lots of filters and presets, check that the editing software you’re considering has those editing tools.
Do you need to do color correction, cropping, white balance adjustments, or sharpening? Will you need to use layers and blending modes? Do you want to add type or graphics to your images?
What File Formats Do You Need to Work With?
Some programs are more selective in the file types they accept. Pay special attention to whether the program you’re interested in accepts RAW images from your camera. Different cameras use different RAW file extensions, like how Canon DSLRs use CR2 files.
While this may not be a deal-breaker for beginners who don’t currently shoot in RAW, compatibility is still something to consider.
Does the Editing Software Match Your Budget and Skill Level?
The final thing you’ll want to consider is the price-to-value ratio and whether the software fits your skill level. Paying a higher price for a better program may be worth it in the long run, but there are plenty of powerful alternatives that are more budget-friendly or even free.
You should also consider your current skill and commitment level. A complex program could still be a good choice for beginners if you’re committed to a career in photography. However, if you’re more of a hobbyist or casual shooter, it may not be worth investing the time to learn a program like Photoshop when a more straightforward option could work just as well for your purposes.
As you can see, the best photo editing software for you depends a lot on the kinds of editing you plan to do and your personal preferences. Whether you’re a graphic designer looking to turn photos into advertisements, a professional photographer looking to up your editing game, or just looking for simple photo adjustments for social media, we can help you find your perfect photo editor.
(click a software to jump down to our in-depth review)
| Best Photo Editing Software for Photographers | ||
|---|---|---|
| Adobe Lightroom and Lightroom Classic | Overall best photo editing software for photographers | Subscription |
| Adobe Photoshop | Best photo for complex image manipulation | Subscription |
| Affinity Photo | Best professional photo editing software without subscription fees | One-time price |
| DxO PhotoLab | Best for RAW processing and noise reduction | One-time price |
| Capture One Pro | Best for studio and fashion photographers | One-time price or subscription |
| ON1 Photo RAW | Best all-in-one photo editing software for photographers | One-time price or subscription |
| Best Photo Editing Software for Beginners | ||
| Skylum Luminar Neo | Overall best photo editing software for beginners | One-time price or subscription |
| Corel PaintShop Pro | Best photo editing software for Windows users | One-time price |
| Adobe Photoshop Elements | Best for beginners who want to learn Photoshop | One-time price |
| Canva | Best software for beginner-friendly design | Subscription (limited free version available) |
| Best Free Photo Editing Software | ||
| GIMP | Overall best free photo editing software | Free open-source software |
| Darktable | Best free Lightroom alternative for photo editing | Free open-source software |
| Pixlr | Best for free browser-based editing | Freemium |
| Fotor | Best free photo editing software for web-based batch processing | Freemium |
| Ashampoo Photo Optimizer | Best free auto-optimize photo editor for Windows users | Freemium |
| Best Mobile Photo Editing Apps | ||
| Lightroom Mobile | Overall best mobile photo editing app | Freemium (included with a Lightroom Creative Cloud plan) |
| Photoshop Express | Best app for retouching | Freemium |
| VSCO | Best editing app with social networking | Freemium |
| Apple Photos | Best free mobile photo editing software for IOS users | Free |
The photo software programs we’ll cover in this section are particularly well-suited to professional photographers. These image editors are some of the best in the biz, and for good reason.

It’s impossible to ignore Adobe Lightroom when talking about the best photo editing software. In fact, Adobe products as a whole are typically considered the gold standard when it comes to editing software for photographers.
There are two versions of Lightroom: Lightroom and Lightroom Classic. Both of these editors are at the top of the game, so let’s talk about why.
Lightroom is a more consumer-friendly version of LrC (Lightroom Classic). Adobe designed Lightroom to work for photographers at every skill level. It has a navigable yet powerful interface and doesn’t sacrifice any functionality for ease of use.
For most freelance photo editors, Adobe Lightroom offers all the tools you’ll need to create stunning portraits, landscapes, real estate shots, and other photography.
Lightroom’s host of fantastic features include:
Lightroom’s clean and easy workspace allows you to focus on what’s important — your image. The left-hand panel gives you quick access to your image library, so you can toggle between photos as you edit. Lightroom keeps stock of your photo edits in a drop-down labeled History. That way, you can easily scroll back through your image edits, make changes, and review your edits before saving them in a custom preset.
You’ll find drop-down menus for making quick adjustments, adding keywords to your images, and more. All of your primary and advanced photo editing tools live in the Develop module. From there, you can manipulate your photo with lens correction, split toning, effects, and other adjustments.
Having a centralized panel for all of your photo editing tools sets Lightroom apart and makes it super intuitive to use! Lightroom also uses cloud storage, so you can sync your work across devices or edit locally and upload when you’re ready.
Pricing: Subscription-based with multiple plans.
Get started with Adobe Lightroom today!
Lightroom Classic is the go-to workflow software for professional photographers. It offers unparalleled features for importing and exporting photo collections, organization, and picture editing on RAW files.
This photo editing software also includes features that you won’t find in the non-Classic Lightroom, such as soft proofing, tethered shooting, printing, and plugin support. Third-party plugins give you the opportunity to continually expand the software’s editing capabilities.
All in all, Lightroom Classic is a top-notch pro editing software and the most popular program for working photographers. However, it does lack certain features that are valuable to amateur photographers, like tutorial content and basic video editing capability.
Pricing Model: Subscription-based. Lightroom Classic can’t be purchased by itself. It’s included in the Adobe Creative Cloud Photography plan starting at $9.99 / month or in an Adobe CC All Apps plan starting at $59.99 / month.
Get started with Adobe Lightroom Classic today!
Adobe Lightroom and Lightroom Classic also integrate with Envira Gallery, the best WordPress gallery plugin with over 3 million users.
Using an easy drag-and-drop builder, the plugin allows you to create beautiful image and video galleries on your WordPress website. It offers multiple layouts, including slideshow, fullscreen, grid, masonry, lightbox, and more.

Envira Gallery offers tons of powerful photography features such as client proofing, albums to organize and display galleries, tagging to create filterable galleries, eCommerce integration to sell your photos, social sharing buttons for images and galleries, Instagram integration, and dynamic galleries to showcase featured content, image protection features, and so much more.
With Envira Gallery’s Pro Lightroom Addon, the plugin seamlessly integrates with any version of Lightroom. You can keep your WordPress galleries and your Lightroom collections synced and create WordPress galleries straight from Lightroom.
Get Envira Gallery today & supercharge your Lightroom workflow!

Although you may feel intimidated by Adobe Photoshop if you’re a new photo editor, there’s a reason it’s considered the most powerful editing tool available.
Photoshop is a layer-based photo editing software, which can take some time to get used to, but it’s worth the effort. Layers allow you to build up your edits over time and apply them selectively to only the parts of your images that need adjusting.
Photoshop includes masking, retouching, gradients, text and shape tools, filters, and more for professional designers and photographers.
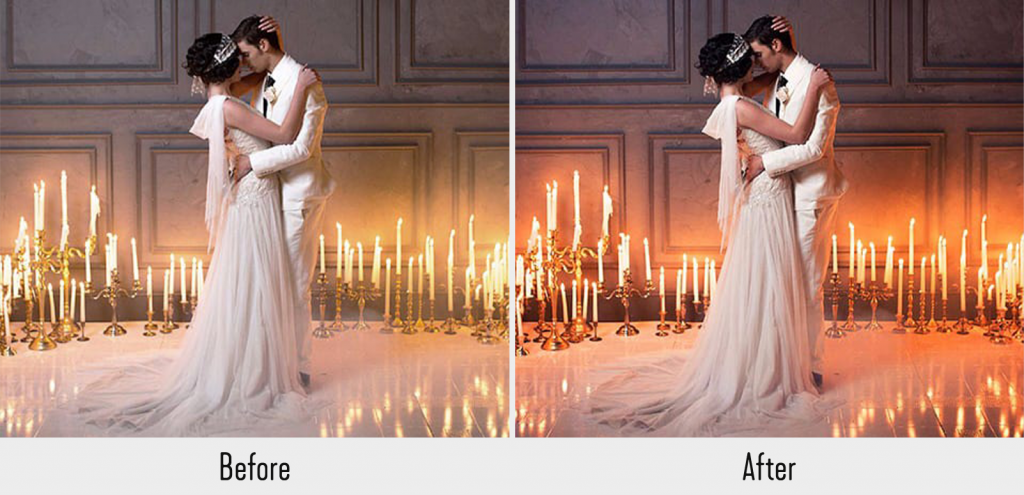
You can also use Photoshop to create short animations or GIFs using the program’s Timeline window. The program also provides generative AI tools through Abobe Firefly to add, remove, or extend content in an image.
While Photoshop does have a somewhat steep learning curve, recent versions make the program more intuitive, and there are readily available tips and tutorials to help new users.
All in all, there really isn’t any effect you can’t achieve with Photoshop, and it’s often regarded as the best photo editing software of all time.
Pricing: Subscription-based with multiple plans.
Get started with Adobe Photoshop today!
Don’t know whether you need Photoshop or Lightroom? Check out our guide: Lightroom vs Photoshop: Which is the Best Solution?

Looking for a pro photo editing software without the burden of subscriptions? Enter Serif’s Affinity Photo, a robust application combining Lightroom’s finesse with Photoshop’s graphic manipulation tools.
That said, it’s fairer to mainly compare it with Photoshop, given their nearly identical interfaces and similar capabilities. Affinity Photo mirrors Photoshop with layers, masks, smart objects, CMYK/RGB editing, and versatile RAW file conversion.
You can use Affinity Photo for RAW editing, 360-degree image editing, focus stacking, panoramic stitching, digital painting, batch processing, and more. “Personas,” instead of Workspaces, provide a customized toolset for various tasks. Although Affinity Photo doesn’t include every Photoshop feature, such as neural filters, it’s still an excellent alternative for the price.
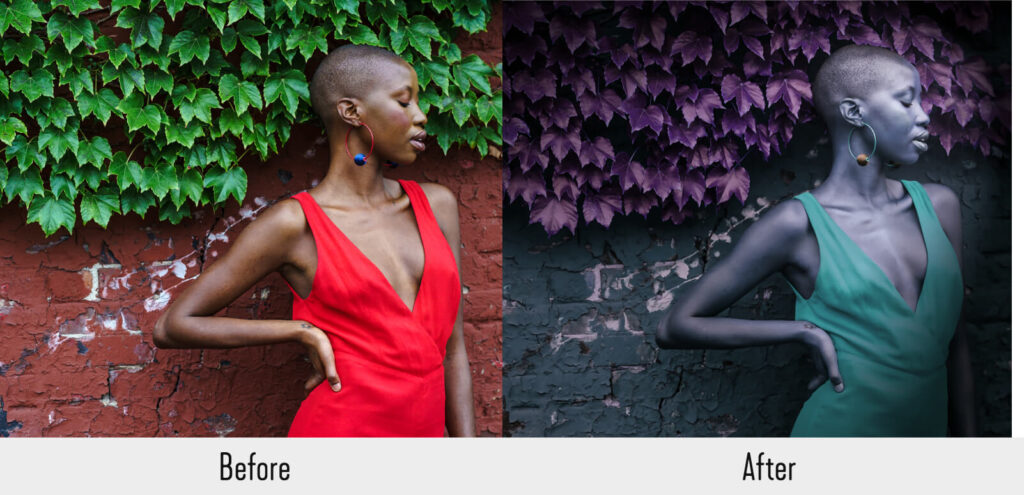
The software is available for Mac and PC, includes a full-featured iPad app, and supports PSD files. Serif also offers various add-ons to extend Affinity Photo. However, given its complexity and lack of educational material, it’s not the best choice for most beginners.
Aside from Affinity Photo, Serif also offers Affinity Designer, a vector graphics software that rivals Adobe Illustrator, and Affinity Publisher, a page-layout software and alternative to Adobe InDesign.
Pricing: One-time purchase starting at $69.99 (the iPad version can be purchased by itself starting at $18.49). A Universal License, which includes Affinity Photo, Designer, and Publisher, is also available starting at $164.99.
Get started with Affinity Photo today!
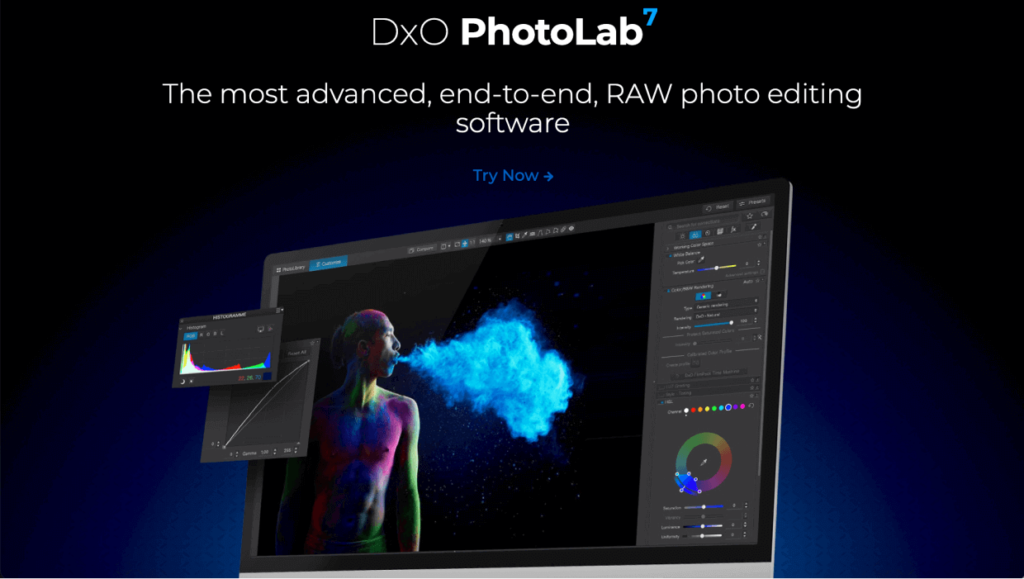
DxO PhotoLab is a solid photo editor and a popular no-subscription Lightroom alternative. It’s well-loved for its powerful RAW processing engine, which converts your RAW images to JPG smoothly. It also supports Fujifilm X-Trans files, allowing you to apply the same film looks to your RAW files as your Fuji camera does with JPEGs.
This photo editing and organizing system comes with customizable interface options, presets, color protection, and multiple export formats so that you can accomplish all your tasks in one place.
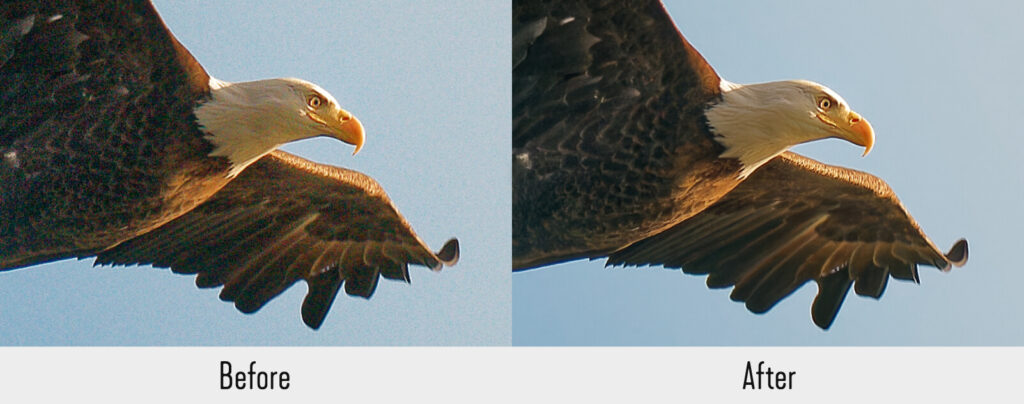
Those perks come alongside a suite of processing and correction tools to meet the needs of real photographers:
DxO PhotoLab is less robust than Lightroom when it comes to bulk photo organization and management, and you’ll need a tool like Photoshop for any non-destructive layer-based edits. However, it shines in terms of RAW processing and noise reduction features.
Pricing: One-time purchase starting at $229. There are also multiple bundles available that include other DxO products, such as the Nik Collection and DxO Film Pack.
Get started with DxO PhotoLab today!

Capture One is a RAW image editor made by the camera company Phase One. It is similar to the other software on this list but with some solid distinctions that make it particularly well-suited to studio and fashion photographers.
Capture One allows you to customize its layout to your liking and even create and modify the program’s keyboard shortcuts. It’s a premier alternative to Lightroom Classic with key features including:
Similar to Lightroom, Capture One doubles as a photo editor and an organizer. But its photo library functions a bit differently than Lightroom’s. Capture One stores your photos both in sessions and in collections. Sessions allow you to group your photos by shoots for different clients, and Collections allow you to sort your images manually.
All in all, Capture One is a professional photography editing software that’s geared towards commercial and studio photographers or teams who need tethered shooting and a collaborative workflow.
It delivers superior imaging capabilities compared to Lightroom and a high level of control over photo manipulation. However, even with Capture One tutorials and documentation, the software comes with a steep learning curve. It’s best reserved for pros who are already well-versed in image editing software.
Pricing: Available as a one-time purchase starting at $299. Or, you can purchase a subscription that includes new features/updates starting at $14.92 / month.
Get started with Capture One today!

ON1 Photo RAW provides a slew of tools for a reasonably low price. This all-in-one image editor functions as a RAW file converter and a photo editing suite — which makes it a great value! Many photo software programs are seen as an alternative to either Photoshop or Lightroom, but ON1 Photo strives to replace them both.
It has everything you need to create flawless edits, including live adjustments and previews, custom presets, textures and borders, stackable filters, and a large range of built-in presets and effects, including proprietary Weather effects to add rain or snow to an image.
Other ON1 Photo RAW features include:
ON1 Photo RAW is a serious top contender as the best photo editing software for photographers, and it even integrates with SmugMug.
It includes pretty much every tool that you’d expect in professional photography editing software, making it one of the only one-stop-shop options available. However, its slew of tools and somewhat more complicated interface make it less suitable for amateur photographers.
Pricing: Available as a one-time purchase starting at $84.99. Or, you can purchase as a subscription that includes new features/updates and 200GB cloud storage starting at $7.50 / month.
Get started with ON1 Photo RAW today!
In this section, we’ll explore the best photo editing software for beginners. The best photo editor for you will depend, of course, on the types of edits you normally make and the kinds of photos you take. However, when you’re just starting out, simpler is often better since learning how to edit your photos is ultimately more important than deciding which software to use.
Most photo editors offer free trials, and there’s even completely free editing software, So don’t be afraid to try everything. As you mimic and adapt more techniques to your own creative style, you’ll become a much more impressive image editor. Like any other skill, photo editing takes practice!

Skylum Luminar Neo has quickly grown to become one of the most popular editing tools on the market and the overall best photo editing software for beginners.
The photo editor provides RAW processing, organizational tools, basic and advanced adjustments, layers support, and AI-powered controls to automate complicated multistep tasks. Luminar Neo prides itself on being an alternative that’s convenient for people of all skill levels. So, even if you have little experience in image editing, the program is easy to navigate.
Skylum Luminar Neo bridges the gap for those accustomed to quick mobile tweaks and aspiring to elevate their photo editing game on desktops.
Check out some of the quick-edit tools that make Luminar Neo the best photo editor for beginners:
Another thing that we love about Skylum Luminar Neo is its expandability. Skylum provides a modular software platform that’s built around Luminar Neo. Aside from being a standalone app for Mac or Windows 10 and higher, it also works as a plugin for Photoshop, Lightroom, and Apple Photos (MacOs).
As your picture editing skills improve and your needs grow, you can purchase various extensions like focus stacking, panorama stitching, and more. Or, add Luminar Neo to more advanced software like Lightroom Classic.
Pricing: Available as a one-time purchase starting at $249.99. Or, you can purchase as a subscription that includes new features/updates starting at $6.21 / month.
Alternatives: CyberLink PhotoDirector 365 isn’t quite as beginner-friendly, but it provides comparable AI features and shares similarities with Photoshop. Portrait Pro is a beginner-friendly editing program that’s perfect for quickly retouching and enhancing headshots and other portraits.
Get started with Skylum Luminar Neo today!

Corel Paintshop Pro is a layer-based image editing software that’s often considered the best Photoshop alternative for Windows users. Although it’s not quite as powerful as Photoshop, it’s definitely more budget and beginner-friendly.
The photo editing software allows you to edit in both raster and vector image formats and has built-in filters and effects. You can retouch and restore your images with color correction and other features, draw and paint on them, batch process images from larger shoots, and apply HDR effects.
Check out more of Corel PaintShop Pro’s features:
Corel PaintShop Pro is an all-around solid photo editor for beginners who use Windows (the software does not support Mac). It can even be a great choice for graphic designers. However, it’s somewhat lacking in terms of in-depth photo editing, raw processing, and photo cataloging.
Pricing: One-time purchase starting at $54.99. Or, you can purchase the Ultimate bundle that includes 7 different add-ons, such as the Highlight Reel movie maker and Painter Essentials, starting at $69.99.
Alternatives: ACDSee Photo Studio Ultimate is a good alternative that works for both Mac and Windows. It offers more organizational tools and provides capable RAW processing. For alternative graphic design features, Inkscape is free vector editing software with ample tutorials for beginners.
Get started with Corel PaintShop Pro today!
For those who are just stepping into the world of image editing, Adobe Photoshop Elements emerges as one of the best photo editors for beginners. It’s a user-friendly program that offers a tailor-made Photoshop alternative for beginners and intermediate editors.
It offers Quick and Guided edit modes, which are easy to navigate for beginners. Adobe updates Photoshop Elements every year, and the latest iteration includes 62 guided edits and Sensei AI technology, which lets you select skies or backgrounds with one click, automatically sort and group photos, and more.
Photoshop Elements is a great tool for social media graphics, personalized photo gifts, and quick fixes like dehazing and colorizing. The software also lets you add animated movement effects to photos and create Photo Reels from still images.
While not geared towards professional photographers, its Expert mode does offer more advanced tools, and the software supports opening and editing RAW files. Adobe Photoshop Elements is perfect for budding photographers who may find professional-level editors overwhelming at first.
Plus, the absence of a subscription requirement makes it an appealing choice. You can also bundle Photoshop Elements with Adobe Premiere Elements video editor. Both products strike a balance between simplicity and functionality, offering a stepping stone to their professional counterparts.
Pricing: One-time purchase starting at $99.99. Or, a bundle with Premiere Elements starts at $149.99.
Alternatives: Snappa is a cloud-based, free photo editing and graphic design tool that pitches itself as the easy Photoshop alternative.
Get started with Adobe Photoshop Elements today!

Canva is a simple graphic design software with a huge following. It operates right from your web browser and comes with multiple photo editing tools and products for turning your photos into social media posts, invitations, brochures, posters, business cards, posters, book covers, and more.
The platform allows you to adjust various elements of your images with a simple drag-and-drop editor. You can use over 8,000 templates and add backgrounds, fonts, frames and borders, shapes, lines, illustrations, stickers, and more to your pictures. Its simple interface categorizes searchable elements to help you easily find what you’re looking for.
As a standalone photo editor, Canva lacks many of the photo-editing tools you’d expect, like layers and healing brushes. However, it does have options for editing using sliders. With these sliders, you can add tints and adjustments to your images before you add text and other design elements.
Canva is a great program for turning your photos into branded social media posts or graphic design projects, and the software is incredibly easy to use. You can export your finished designs in a variety of formats, including JPG, PNG, SVG, PDF, GIF, and even MP4 for the best videos.
Canva works on Windows, macOS, Linux, Android, iOS, and iPadOS, so your work is always synced between devices. Although you can use the basic software for free, most of the useful features require a paid plan.
If you want a photo editor that will help you make quick and beautiful image designs, Instagram graphics, and the best video presentations, Canva is for you.
Pricing: Free with limited features. A Pro subscription starts at $119.99 / year.
Alternatives: Adobe Express (included in an Adobe CC subscription or available by itself) is another great design tool for creating social media content, infographics, and more. It will even create a collection of templates based on your brand assets.
While paid programs do offer a ton of features for your money, they aren’t the only route. If you’re on a tight budget, you can still get a good image editor for free. Many free tools allow you to do all your basic edits, such as adjusting white balance, color correction, cropping, exposure, and more.
In this section, we’ll talk about the best image editing apps that are available as either a free online photo editor or as photo editing software that’s free to download.

GIMP, which stands for “GNU Image Manipulation Program,” has been around for decades. This open-source, free photo editor has a strong community of users dedicated to improving the software with extra plugins and enhancements. That means it’s always current, and it’s been essentially self-developed by photographers to fit their needs.
If you’re looking for a truly free Photoshop alternative, GIMP stands out as the best free photo editing software. Photographers love GIMP’s built-in file manager and customizable interface, which allows you to customize the tools available as well as your workspace’s color, widgets, and widget spacings.
GIMP’s photo retouching and editing tools are the same as those found in professional, paid photo editors. You have access to masks, layers, curves, levels, cloning and healing tools, smart selection tools, and custom brushes, along with over 40 export formats for images. The program also features an animation package, which even some paid photo editors omit.
If you want stable editing software that can run on both Mac or PC for free, GIMP is where you should look. GIMP has a lot of overlap with other editing programs, and you’ll likely have no problem getting up and running if you’re used to Photoshop-style workspaces.
However, it’s pretty technical, so we wouldn’t recommend it for beginners. The sheer amount of available options and editing tools, along with a not-so-intuitive interface, are likely to be a struggle for novice users. That said, there are a host of tutorials to help you get the lay of the land and a large community to boot, so it may be worth a shot if you’re still determined to try it out.
Pricing: Free.
Alternatives: Paint.net is easier for beginners while still providing some of the best free photo editing software for PC (Windows only). Krita is also an open-source, free editor that’s a bit more polished and better suited to illustration projects.
If you’re after the best free photo editing software that rivals Lightroom, look no further than Darktable. Created by photographers, Darktable is an open-source workflow software and RAW developer that functions as a non-destructive light table and darkroom for your photos.
Similar to Lightroom, it is both a photo editor and an image organizer. And, throughout the organizing and editing process, Darktable preserves your original images. This photo editing software supports a wide range of standard, RAW, and HDR image formats and includes RAW processing for 400+ cameras and look-up tables (LUTs).
Like GIMP, the Darktable interface is fully customizable. It offers professional color management, cross-platform integration, image organization, and a host of specialty features including:
Aside from all of that, Darktable even supports tethered shooting, which is pretty rare for a free photo editor. Although it does look quite a bit like Lightroom, it’ll still take some time to get used to.
We wouldn’t necessarily recommend it to complete beginners. However, Darktable does offer its own online user manual to help you get started learning the user interface, which makes it a bit more manageable than other open-source photo editing software like GIMP.
Pricing: Free.
Alternatives: RawTherapee is another open-source, free photo editor with advanced tools comparable to Lightroom. Polarr is a more beginner-friendly browser-based editing software that’s also similar to Lightroom.
Get started with Darktable today!

Looking for the best free photo editing software that’s browser-based? Pixlr may be the answer. It’s easy to use and provides a good range of adjustments, filters, and cutting tools. Pixlr actually offers a number of free photo editors, but the main ones we’ll focus on are Pixlr Express (X) and Pixlr Editor (E).
Pixlr X is geared towards social media editing and offers a range of cutting tools like shape, drag, and lasso that let you create compositions from several images. It also includes adjustable filters, simple animations, and sliders for contrast, brightness, saturation, vibrance, highlights, and shadows. Plus, you can use generative AI to create text-image artwork.
Meanwhile, Pixlr E gives you all the same basic photo editing tools along with some more advanced features like a clone brush and smart selection. It also features a layers panel like Photoshop, which means that you tackle more complex editing jobs and create image, text, or drawing layers.
Aside from your desktop browser, Pixlr also offers apps for iPhone, iPad, and Android. The downside of Pixlr is that the free version means you’ll see ads. However, an inexpensive upgrade to use the software ad-free is offered.
Aside from Pixlr X and Pixlr E, the company also offers Pixlr Designer for templates and animation, Remove Bg for quickly making backgrounds transparent, and Batch Editor for bulk photo editing.
Pricing: Free. The no-ads version starts at $0.99 / month, and Premium starts at $4.90 / month.
Alternatives: Photopea is another free photo editor that’s Photoshop-esque and supports PSD files, RAW image editing, and even ABR files to use custom brushes.
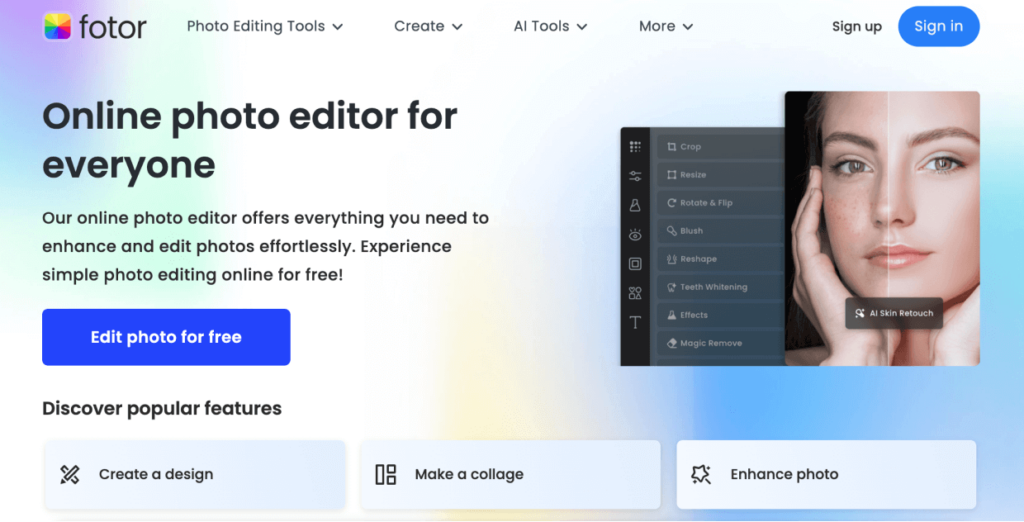
Fotor is another web-based photo editing app, but it offers a unique feature that’s often lacking in free photo editors — batch processing.
If you just need a fast and simple online photo editing tool, Fotor has a huge amount of high-quality filters that will make easy edits even easier. It’s very simple to use and gives you the option to add different special effects, frames, borders, and text to your photos.
It also lets you convert RAW files and create collages with a custom aspect ratio, and it has an improved tilt-shift filter. Like other software in this list, Fotor exports images in either JPG, PNG, or PDF files.
If you need to make complex edits and fine-tune images, Fotor probably isn’t for you since it lacks some more advanced tools. However, it does include AI software, retouching, filters, and ample effects to make your photos look great in a short amount of time.
While it’s not ad-free, the ads aren’t too intrusive, nor do they obscure your workspace. Fotor works for both desktop and mobile, and you can upgrade to Fotor Pro at any time to remove ads and gain access to more editing options.
Pricing: Free. The Pro version starts at $3.33 / month.
Alternatives: PicMonkey and BeFunky both offer free photo editing software that’s very similar.

Ashampoo Photo Optimizer is perhaps a lesser-known photo editor, but it’s still a great choice for editing a lot of photos quickly. This ad-free software features a clear and streamlined user interface, allowing for a speedy editing workflow. Do note, however, that it is only available for Windows users.
Ashampoo includes essential features like cropping, rotating, printing, and resizing images. It’s also great at letting you make manual corrections to metrics like color and exposure.
With Ashampoo, it’s easy to import photos to edit, and you can rotate or mirror a selection of photos in batches. Batch processing makes editing a lot faster if you have many images to get through because it allows you to adjust them all at once.
Plus, it’s particularly well suited to beginners due to its one-click Auto Optimize tool. The software analyzes your photo and automatically applies changes to enhance the image, such as adjusting sharpness, color, exposure, and more.
As is true for a lot of AI-based image-optimizing tools, results can vary according to the details of the photo you’re editing. But, for a free tool, it’s certainly worth a try, especially if you have a large number of photos you need to improve quickly.
Of course, if you find that you need even more capabilities than the free version offers, you can buy a premium version for access to enhanced image editing tools.
Pricing: Free. The Premium version is available as a one-time purchase starting at $40. Or, you can purchase as a subscription that includes new features/updates starting at $12 / year.
Alternatives: PhotoScape is a free photo editor that lets you create and apply custom presets to multiple photos for batch processing. InPixio Photo Studio also offers a free version, which includes basic batch editing features.
Get started with Ashampoo Photo Optimizer today!
In today’s day and age, mobile editing software is just as popular as traditional desktop programs. In this section, we’ll go over the best mobile photo editing apps for creating the perfect social media image and even professional-level digital photography editing tools you can use on the go.
If you thought Adobe only had a lock on desktop editing software, think again. Lightroom Mobile is exactly what it sounds like – a mobile app version of the traditional Lightroom software.
Even if you don’t use Lightroom on your computer, the mobile version is worth a look. It offers apps for both IOS and Android and is even the default RAW editing app on some Samsung Galaxy phones.
You can use Lightroom Mobile’s camera feature to shoot in RAW format for more control over correcting exposure, white balance, and more. Plus, it allows you to enable filters, like black and white, while you’re shooting and provides deep post-shot editing. Other features include:
You can download Lightroom Mobile for free, and you’ll still get a solid selection of editing tools. However, the paid version offers more functionality and cloud storage. And, if you use the Lightroom desktop version, all your photo editing will stay in sync.
Pricing: Free. Subscriptions start at $4.99 / month for mobile-only. It’s also included in all Creative Cloud plans that have Lightroom.
Alternatives: Picsart is an all-in-one solution that includes AI features. Snapseed, made by Google, also offers some of the best free photo editing software for iPhones.
Get started with Lightroom Mobile today!

Like Lightroom Mobile, Photoshop Express is another Adobe mobile product that mimics its desktop version. If you’re a Photoshop user, you’ll love the app version as it puts powerful editing features in the palm of your hand.
Rather than image enhancement and correction, Photoshop Express is best for collages, retouching, and text overlays. Its in-app camera mode lets you apply depth effects, face art, double exposures, and artistic filters while shooting.
It also includes social network sharing and features like:
You can also send PSD files between the app and desktop versions for seamless editing. Photoshop Express is a freemium app, but most serious users will want to upgrade to the paid photo editor software to access all the available features.
Pricing: Free. Subscriptions start at 2.99 / month.
Alternatives: Polish offers many similar tools, such as masking and AI-powered art styles.
Get started with Photoshop Express today!

VSCO is well known in the photography world for its professional photo filters, and it became popular in mainstream culture for its community photo-sharing platform. While it still provides standard editing features, the social aspect of the app remains prominent.
The VSCO app supports RAW camera files, an array of filtering options, and standard editing and correction tools. It also provides features like:
Although the app is free to download, you’ll need a paid membership to access the majority of features that make VSCO stand out.
Pricing: Free. Paid plans start at $7.99 / month or $29.99 / year.
Alternatives: Afterlight is a more budget-friendly option. It lacks the social aspect of VSCO but makes up for it with robust editing tools and filters to achieve film and VHS looks (not recommended for Android).
If you’re an IOS user, you’re probably already familiar with Apple Photos, which comes preinstalled on all iPhones, iPads, and Macs. This default app is surprisingly effective and actually one of the best free mobile apps for photo editing.
Although the desktop version has slightly more functionality, the mobile app still provides a lot of editing features and fun effects. Plus, newer iPhones let you shoot in Apple’s ProRaw. Features of Apple Photos include:
Apple’s built-in AI features also make it easy to find particular images using face detection. You can even use AI tools to identify photos with pets and detect the breed or identify the species of a plant in an image.
Pricing: Free and preinstalled on all Apple devices.
Alternatives: If you’re an Android user, Google Photos is a solid alternative. The free version is best for photo organization, but the paid version offers more photo editing features, filters, and AI tools.
Get started with Apple Photos today!
The best photo editing software for photographers depends on several factors, including the type of work you do, your technical skills, and your budget. Adobe Lightroom is a good choice for photographers as it combines professional-level organizing tools with powerful editing features. It also seamlessly integrates with Envira Gallery to streamline your workflow and keep your photos synced with your WordPress website.
Both Adobe Lightroom and Photoshop are powerful software applications that are widely used in the field of photography and are often used together by photographers. Lightroom allows you to import photos from your camera, catalog them, and organize them into collections based on criteria such as date, location, or event. Lightroom’s editing capabilities, which allow you to adjust color, brightness, contrast, and other aspects of your photos, are not as extensive as Photoshop’s, but they’re sufficient for most photographers.
On the other hand, Photoshop is a professional-grade image editing software that provides a wide range of tools for manipulating images. Photoshop includes selection tools, brushes, filters, and layers. The software is capable of handling complex tasks such as merging multiple photos, creating composite images, and performing advanced color correction. It also supports a broader range of file formats compared to Lightroom. However, it lacks the organizational features of Lightroom, which are crucial to photographers.
Many photographers use both Lightroom and Photoshop in their workflow. They use Lightroom for initial organization and basic editing and then move to Photoshop for more complex edits. This approach allows photographers to leverage the strengths of both applications.
Choosing the best photo editing software for beginners depends on several factors, including the complexity of the software, user-friendliness, and the types of features offered. Skylum Luminar Neo is highly recommended for beginners due to its clean workspace that’s easy to navigate, high levels of control with little intervention, and a wide range of AI adjustments. It also offers a simple approach to advanced edits.
If you’re looking to dive into Adobe products as a beginner, we suggest starting with Lightroom due to its simplicity and focus on photo organization and basic editing. Once you’re comfortable with the basics, you can move on to more advanced editing techniques. Or, you could try Adobe Photoshop Elements to start getting accustomed to Photoshop.
The easiest photo editing software very much depends on your image editing skill level. If you’re a beginner, you’ll want a program with a user-friendly interface, plenty of one-click presets and filters, and plenty of instructions. Adobe Photoshop Elements is tailor made for amateur and novice editors, so it’s a great stepping stone for beginners.
Other good choices for an easy photo editor include Skylum Luminar Neo, Corel PaintShop Pro, and Canva.
There are numerous free photo editing software options available, each with its strengths and weaknesses. GIMP is a powerful image editor that’s suitable for advanced image editing, while Inkscape offers standout illustration and drawing features. If you’re looking for free photo editing software that’s similar to Lightroom, you’ll want to check out Darktable and RawTherapee. All of these programs are open source, completely free, and come with a multitude of tools that can help you achieve professional-quality results.
Yes. Photoshop is considered the gold standard for advanced image editing, but there are still free alternatives to Photoshop that provide features rivaling the Adobe software. Beginners should look to Pixlr or Photopea. For those who have a bit more experience using editing tools, programs like GIMP or Inkscape will give you free access to the more advanced tools seen in Photoshop.
That’s it!
As you can see, there are many different free and paid options when it comes to photo editing software. Hopefully, we’ve given you the tools to make an informed choice about which image editor is right for you.
Ultimately, your choice will depend on the software that best fits your needs and your budget. So, take your time to decide! Since even premium software typically offers a free trial period, you can even try two or three different editing apps before committing to one.
As a word of final advice, choose one and stick with it. The more time you spend with your chosen photo editor, the better you’ll know how to make it work for you.
We hope you enjoyed learning about the best photo editing software for photographers. Be sure to check out our Ultimate List of 120+ Best FREE Lightroom Presets and 10+ Best Places to Sell Photos Online & Make Money.
Not using Envira Gallery? Get started today!
Don’t forget to follow us on Facebook and X (Twitter) for the best photography tips, resources, and WordPress tutorials.
Envira Gallery helps photographers create beautiful photo and video galleries in just a few clicks so that they can showcase and sell their work.

I have used PicMonkey for years but now that they upgraded or made changes. I find it very in user friendly. I’m wanting to try something else. Your list was very helpful. Thanks
This list is truly awesome, I personally use “Adobe Photoshop” for my work. thanks for sharing with us.
Great list of photo editors. I think the most issues people have when choosing a high-end photo editor, is getting a “complete package” as you do with Lightroom+ Photoshop in Adobe’s Photography Cloud subscription. Lightroom could be way better, and most photographers who want something else than Lightroom, get stuck because they will miss Photoshop. The best current alternative I believe to be Affinity Photo. Affinity Photo is quite cheap and is very close to matching up with Photoshop.
Photoshop is the best software to use when it comes for photo editing
Fascinating article. I’ve been using [VSCO MOD APK](https://vscocamapk.com/) for both photo and video editing, and it’s proven to be quite helpful and user-friendly.
I love the content! Thanks for sharing this insightful post. 📸 As someone passionate about photo editing, I couldn’t help but think about how Cutout Pro has transformed my editing game. The precision and ease of use in this software are unparalleled. Whether you’re a beginner or a seasoned editor, Cutout Pro’s advanced features make it a standout choice. I highly recommend it for anyone looking to elevate their photo editing skills. Give it a try and experience the difference! Photo editing software
Appreciate the thorough review, Williamson! Your blog post offers valuable guidance for photographers seeking the right editing tools. I’m especially intrigued by the product photo editor you recommended—it appears to offer specialized features for ecommerce purposes. Looking forward to giving it a try.
The article has left an indelible mark on my understanding of this topic.
Thank you for the list. I am a beginner photographer and this was very helpful.
Hey I know this is off topic but I was wondering if you knew of any widgets I could
add to my blog that automatically tweet my newest twitter updates.
I’ve been looking for a plug-in like this for quite some time
and was hoping maybe you would have some experience with something like this.
Please let me know if you run into anything.
I truly enjoy reading your blog and I look forward to your new updates.
Hi Carina, yes! You can use Smash Balloon’s Twitter Feed plugin. It lets you embed a Twitter feed anywhere on your site including in widget-ready areas.
I love how you break down complex ideas into digestible pieces. Excellent writing!